

The Great Blogger Bake Along | Finale
Alright, friends. It only took a month for my mom and I to be able to coordinate a good day for this finale, but it's here! Honestly, having...
In case you're not up to speed, this is the tenth and final bake in The Great Blogger Bake Along series. Read about it here.
Alright, friends. It only took a month for my mom and I to be able to coordinate a good day for this finale, but it's here! Honestly, having finished these final THREE bakes, I realize we could have easily done this sooner, but I assumed they would be time consuming and fussy like some of the previous bakes. Surprisingly, I was able to do all three in just a few hours!
The Challenge
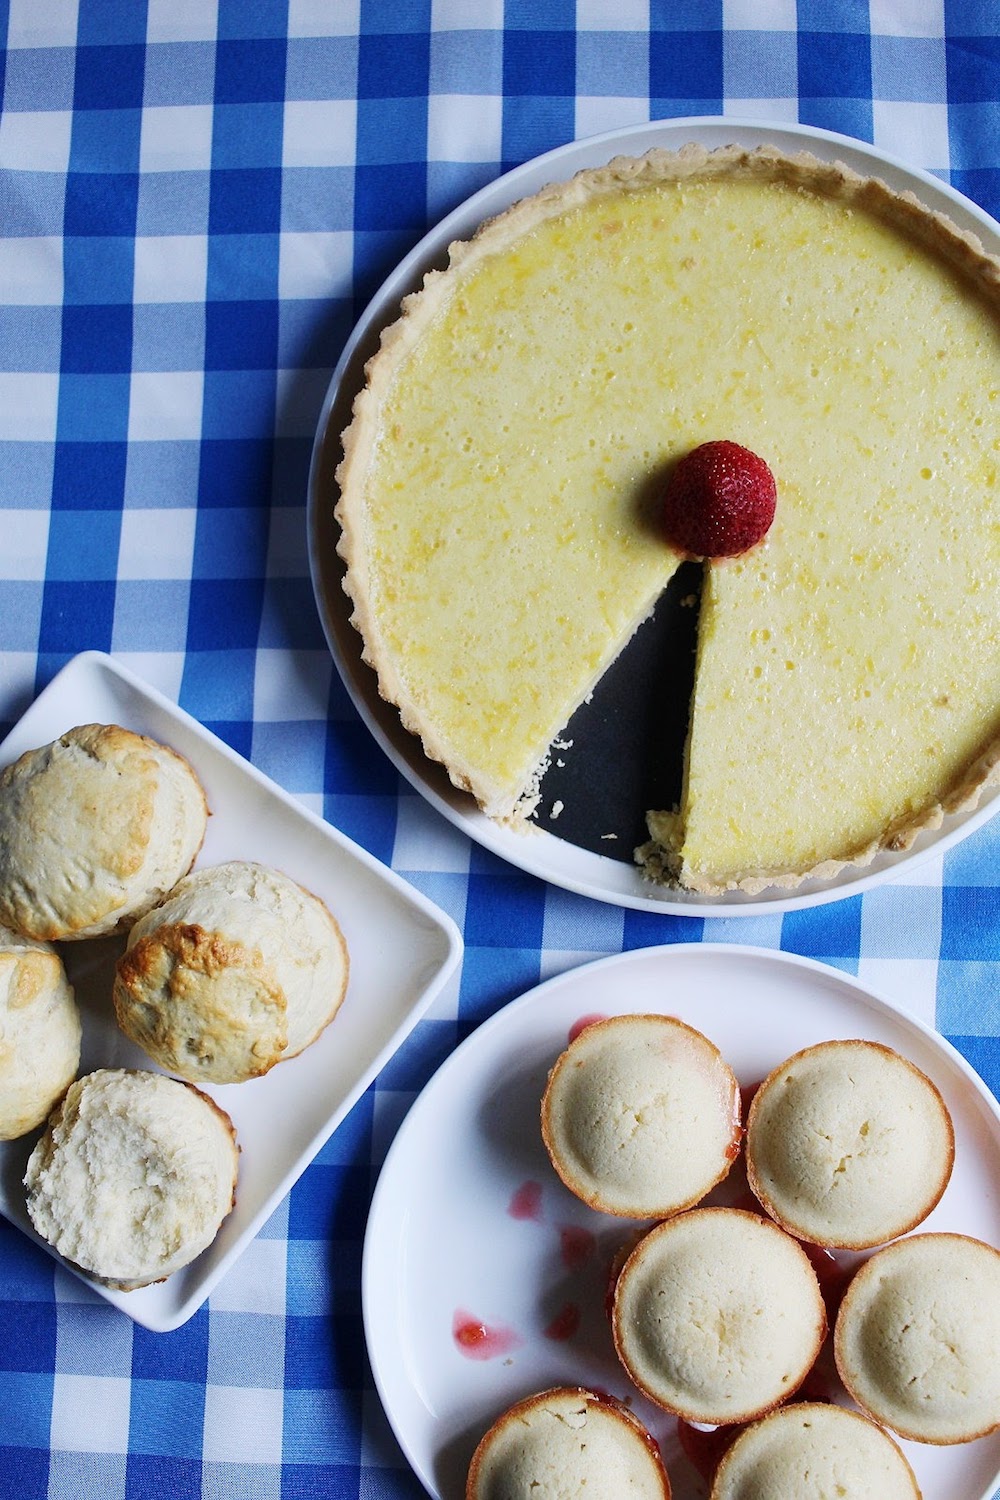
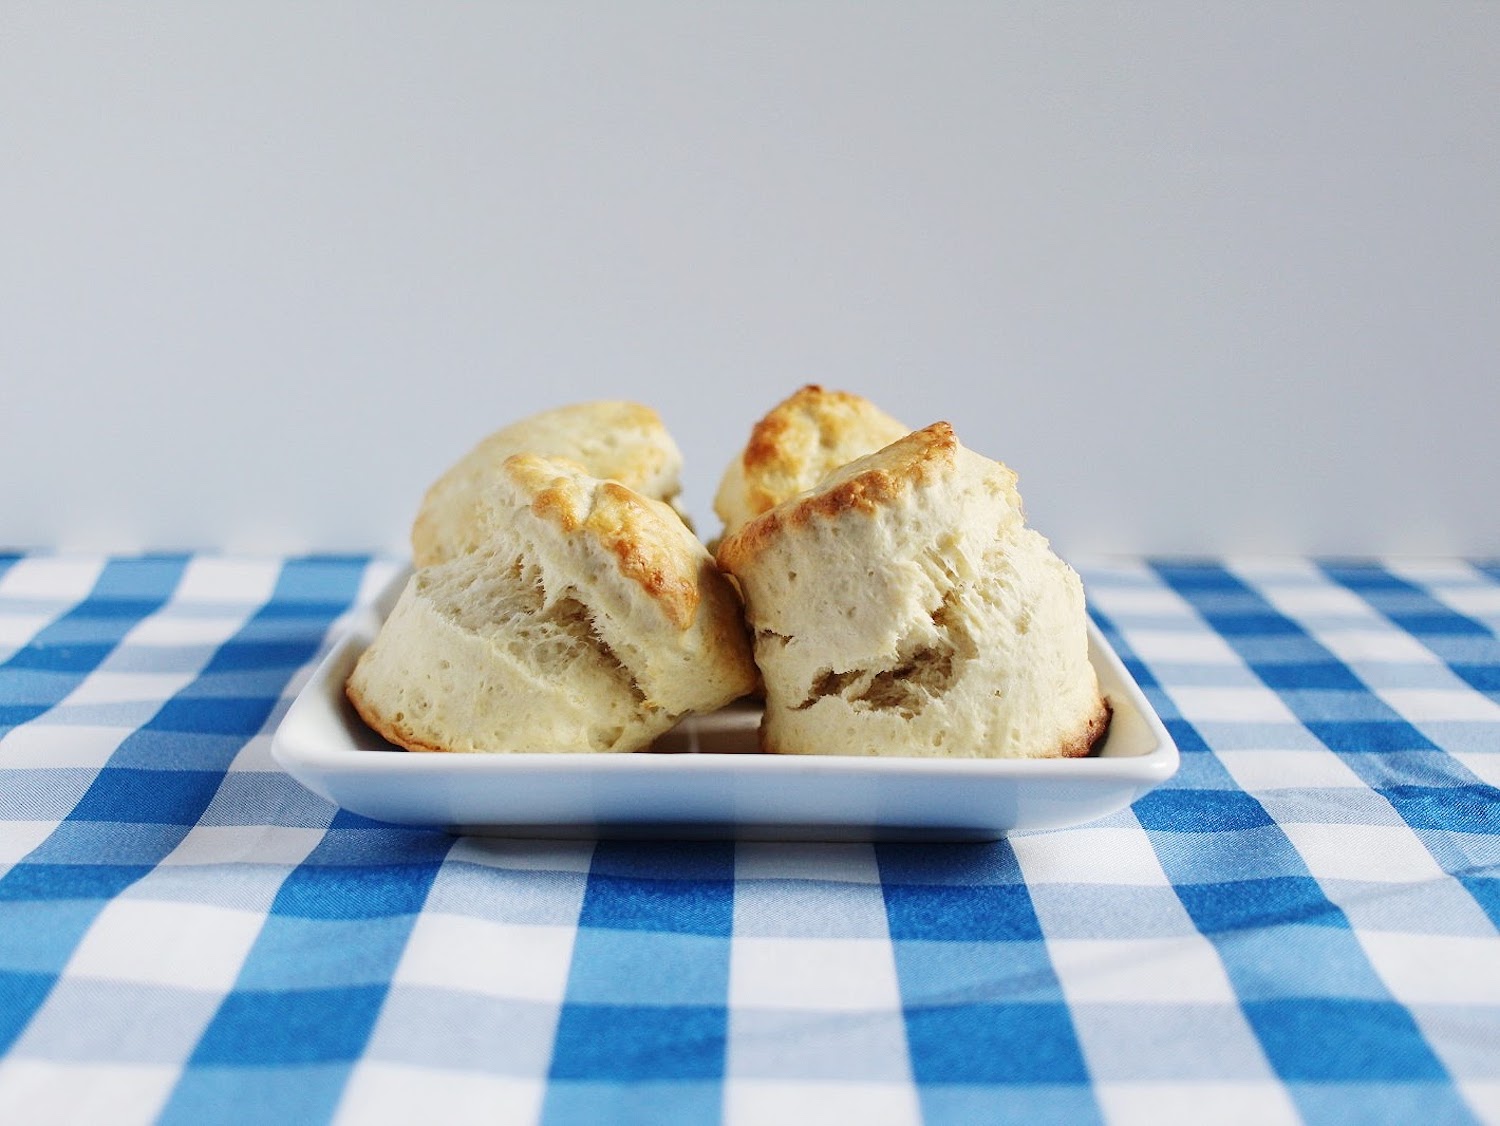
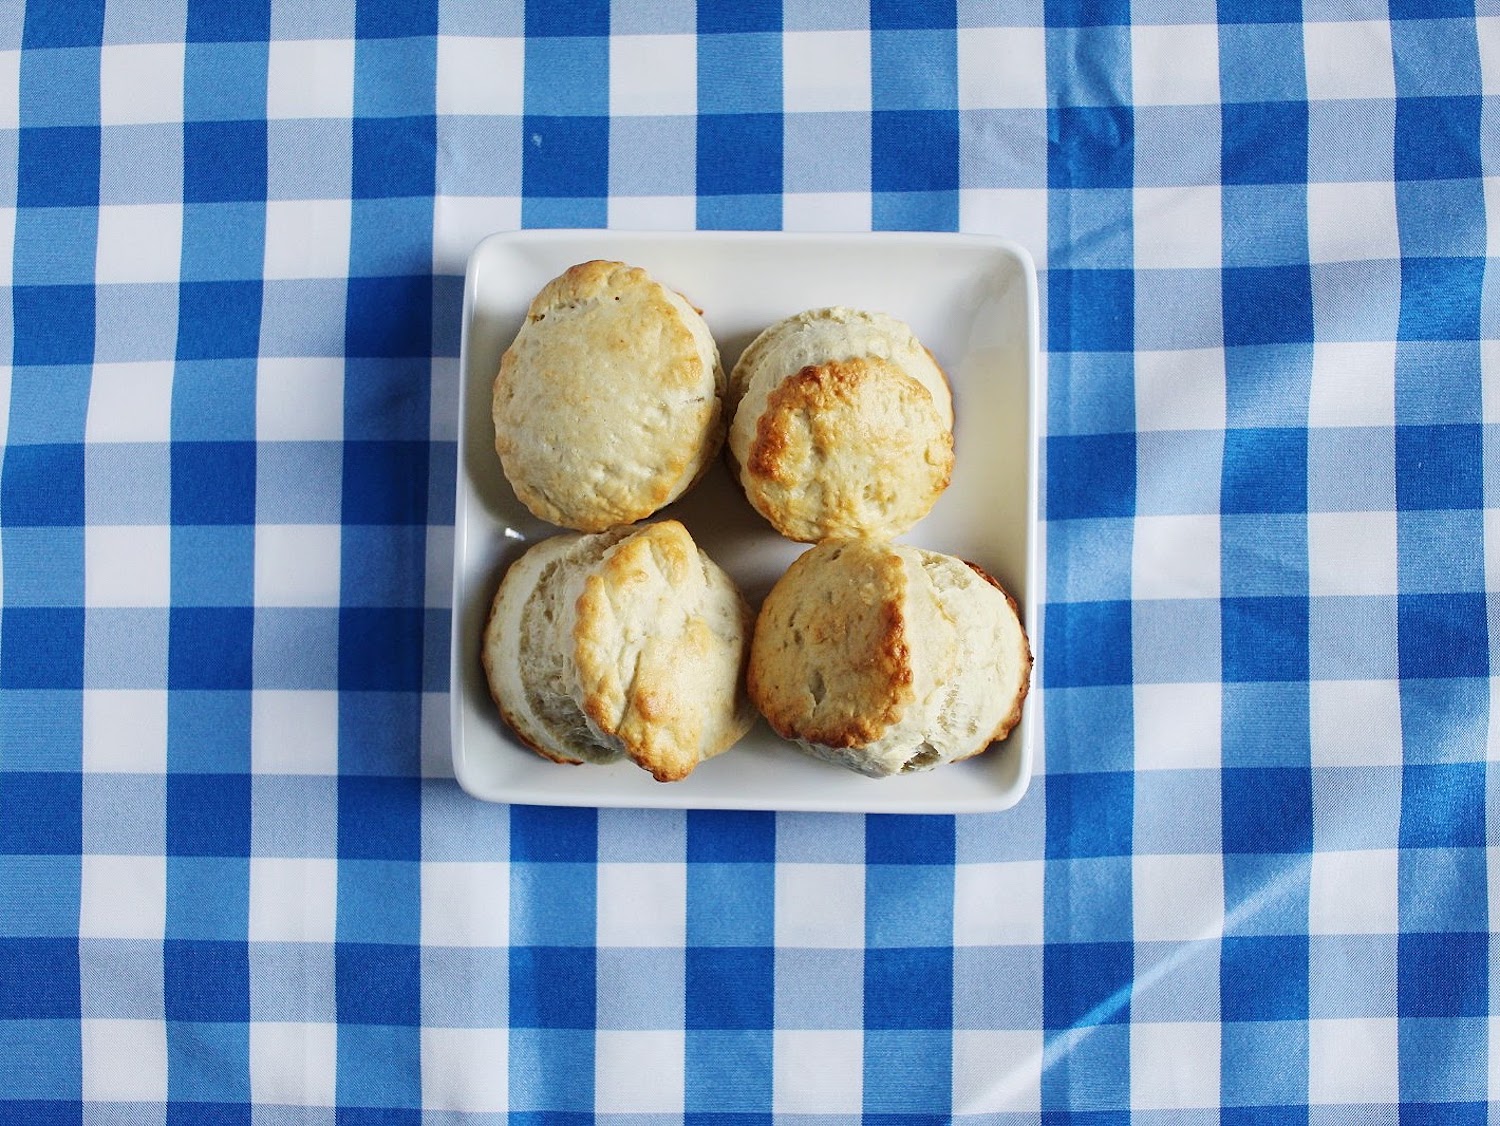
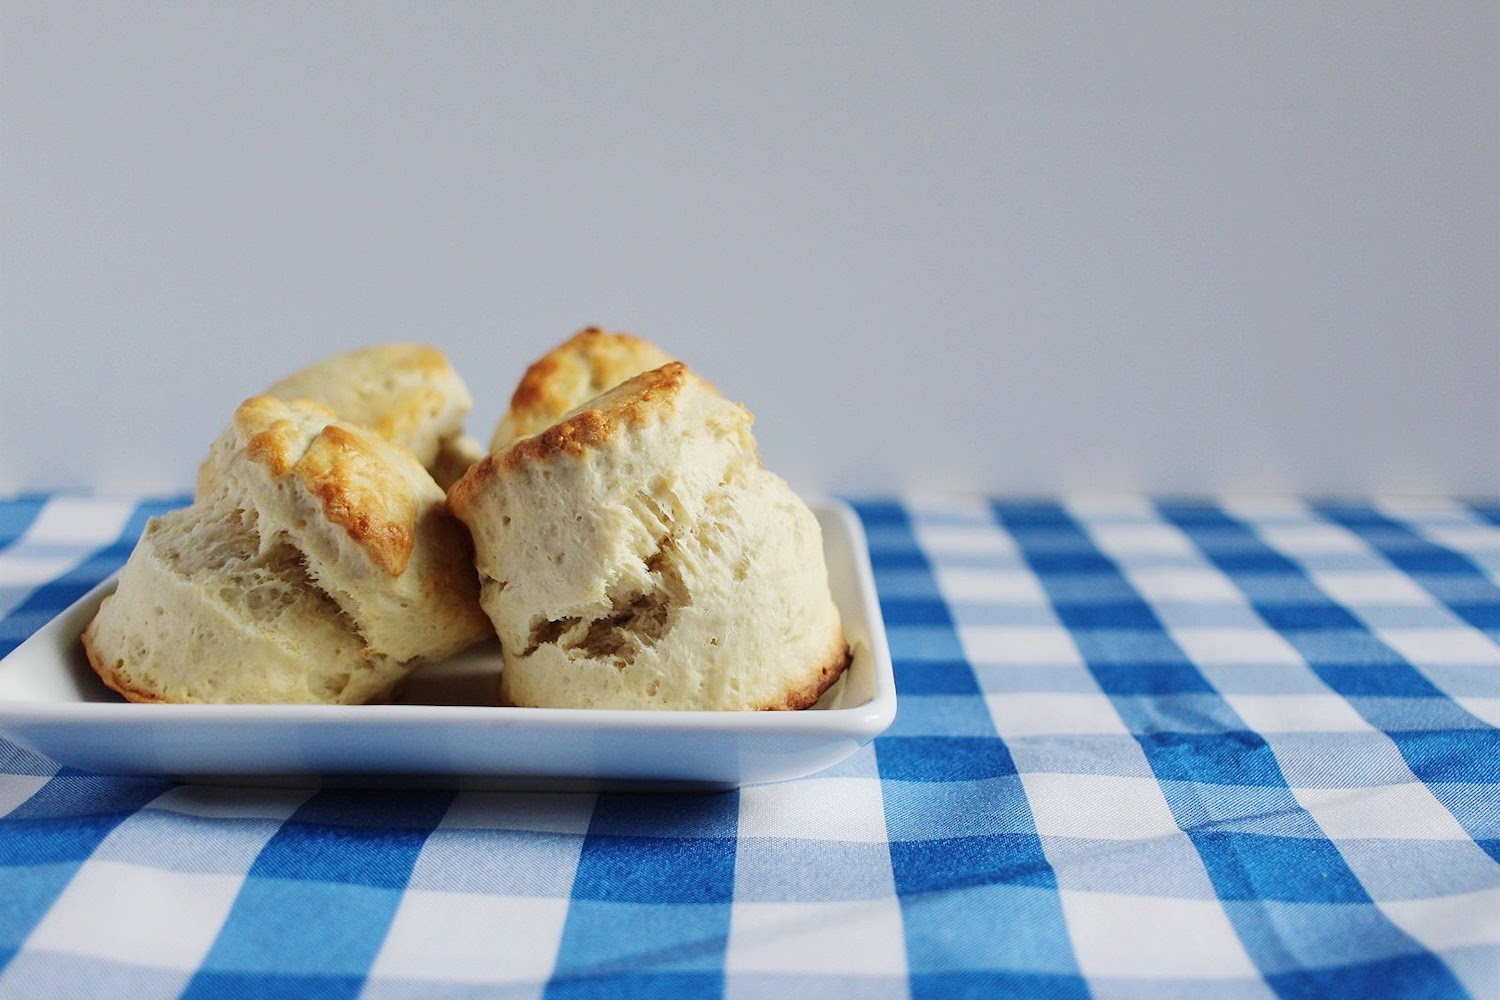
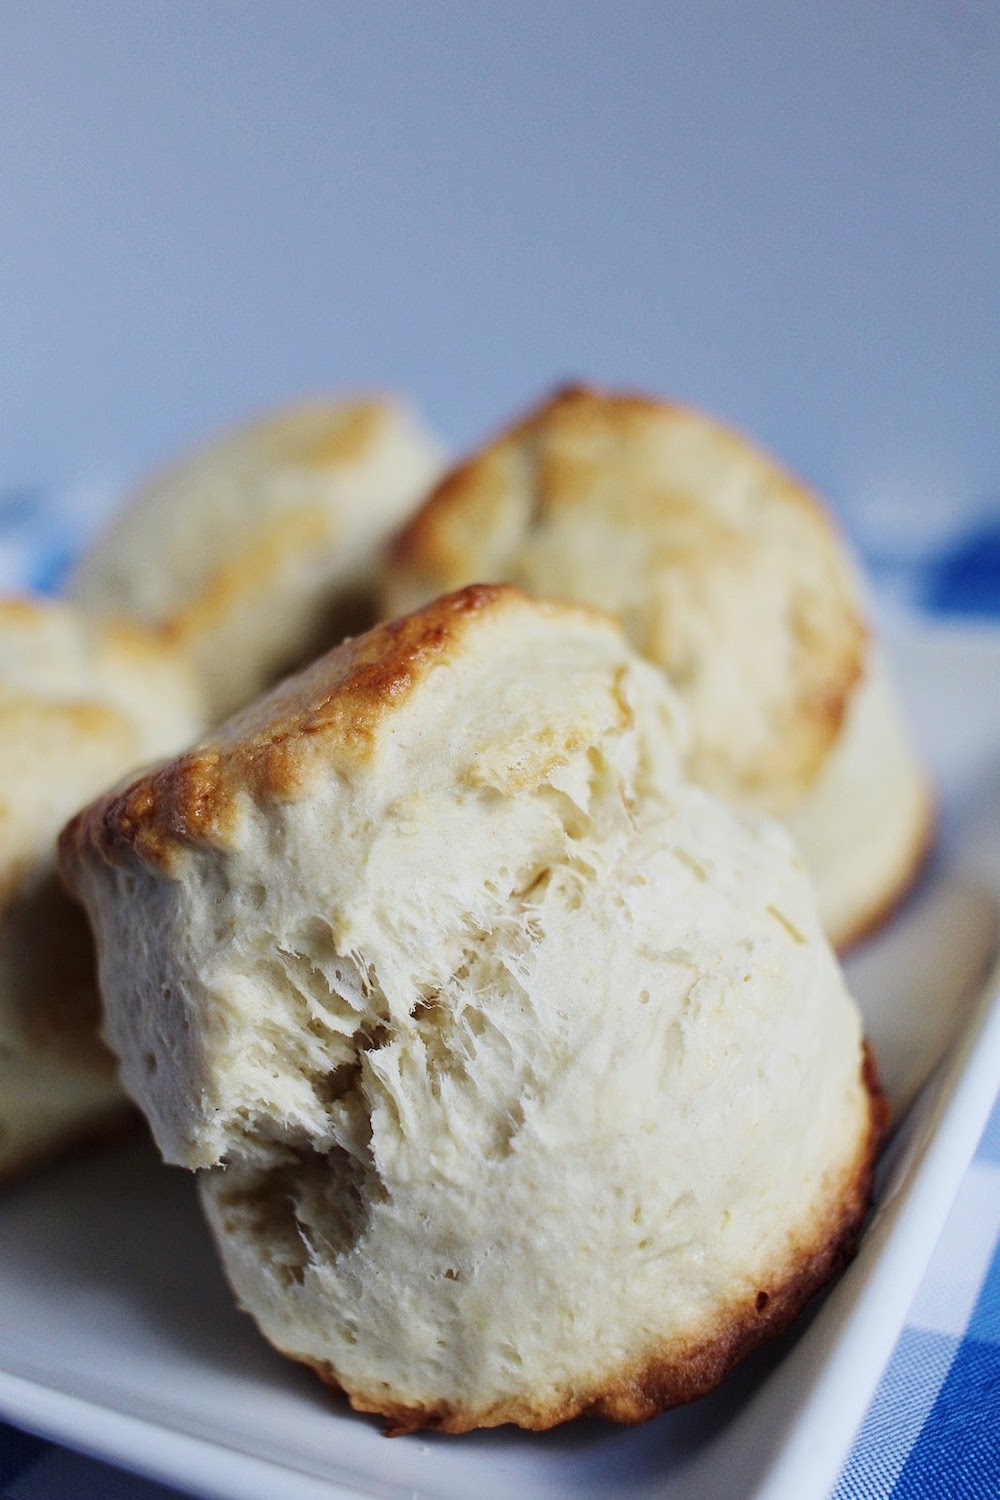
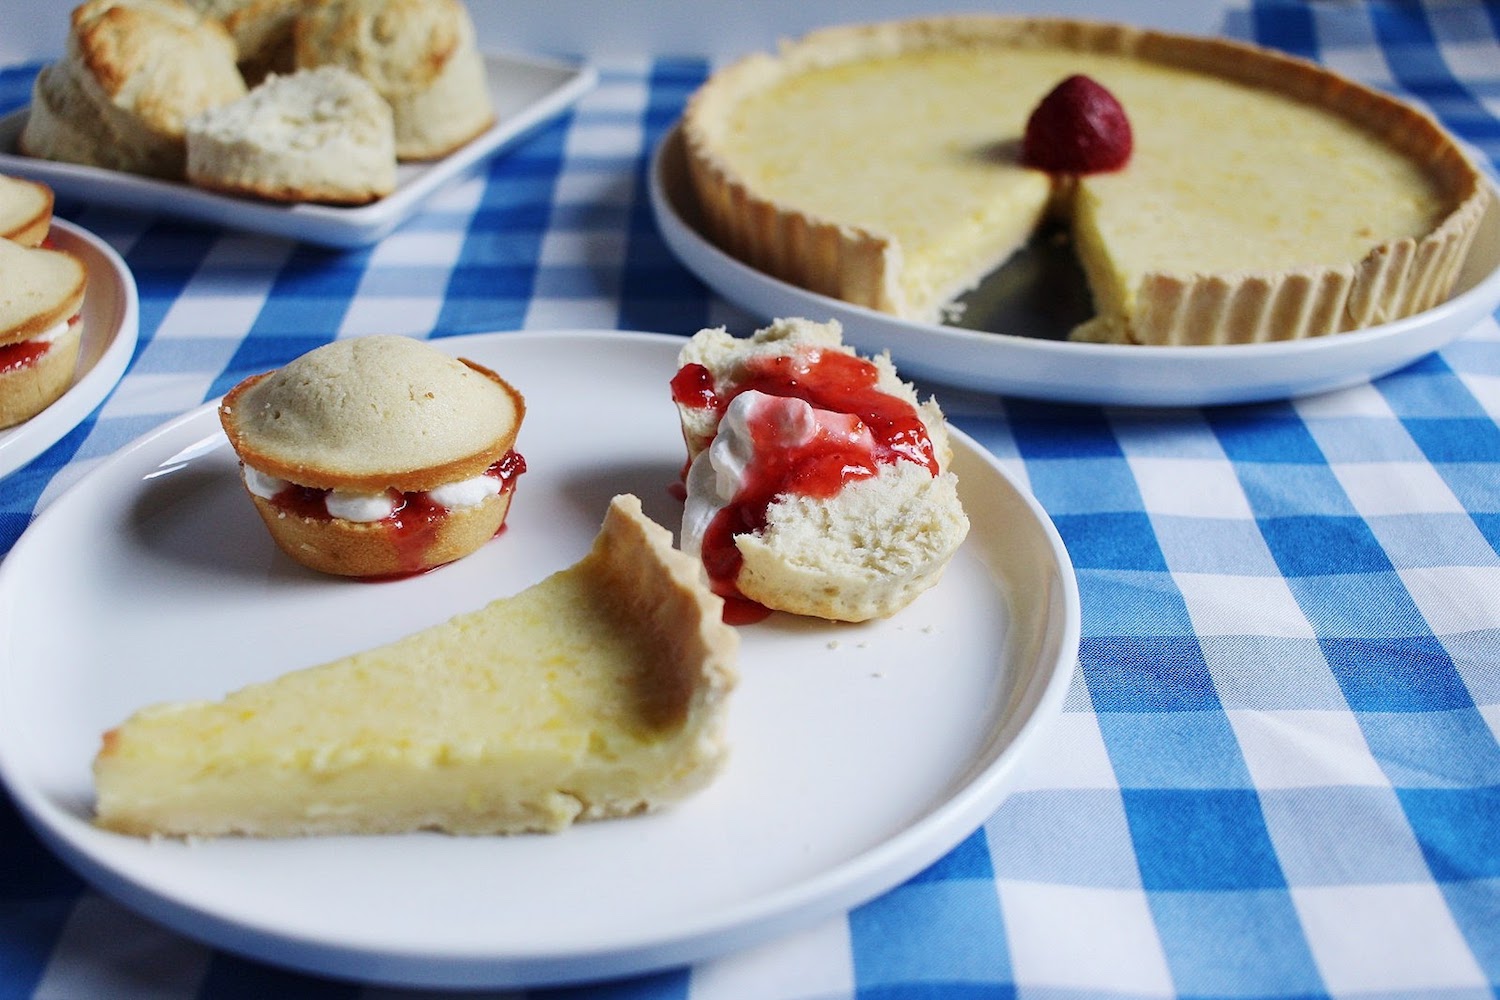
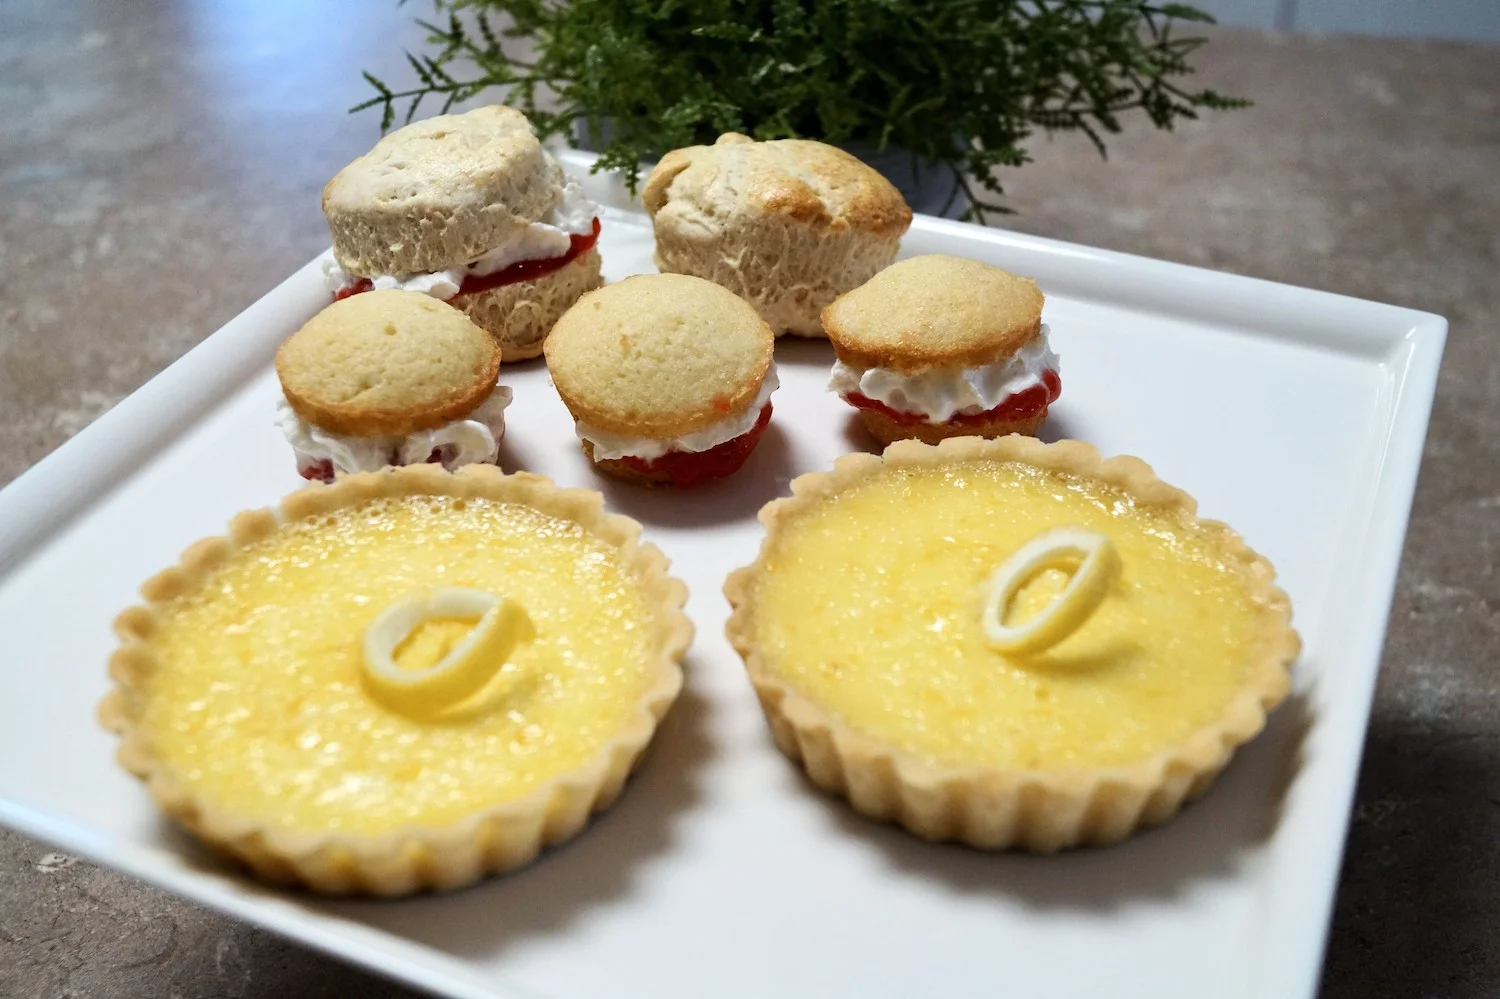
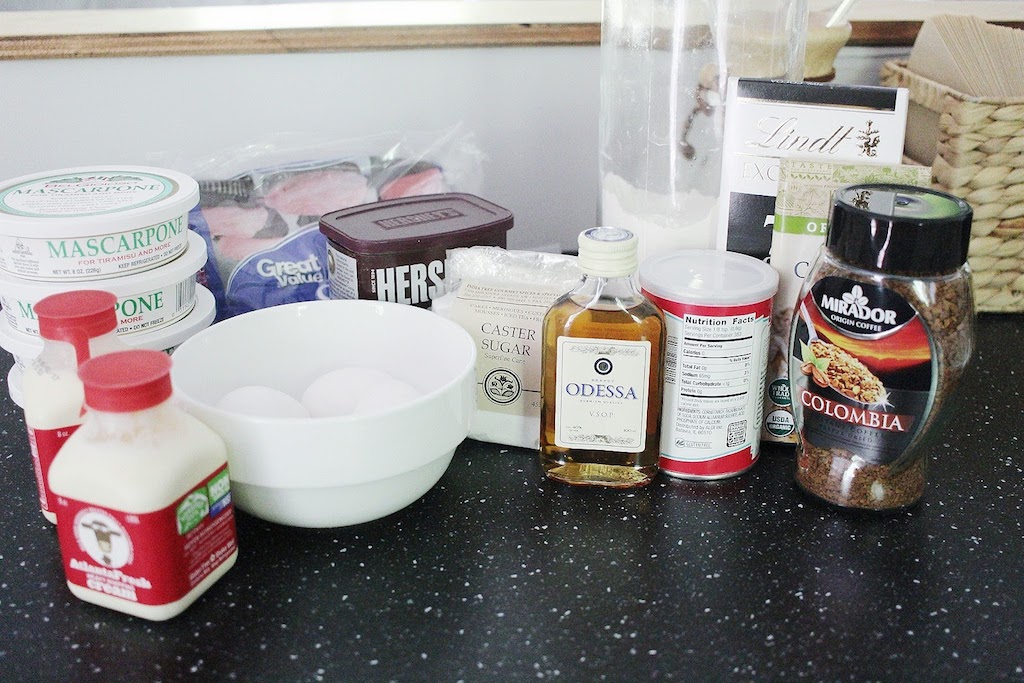
Tea Time Scones
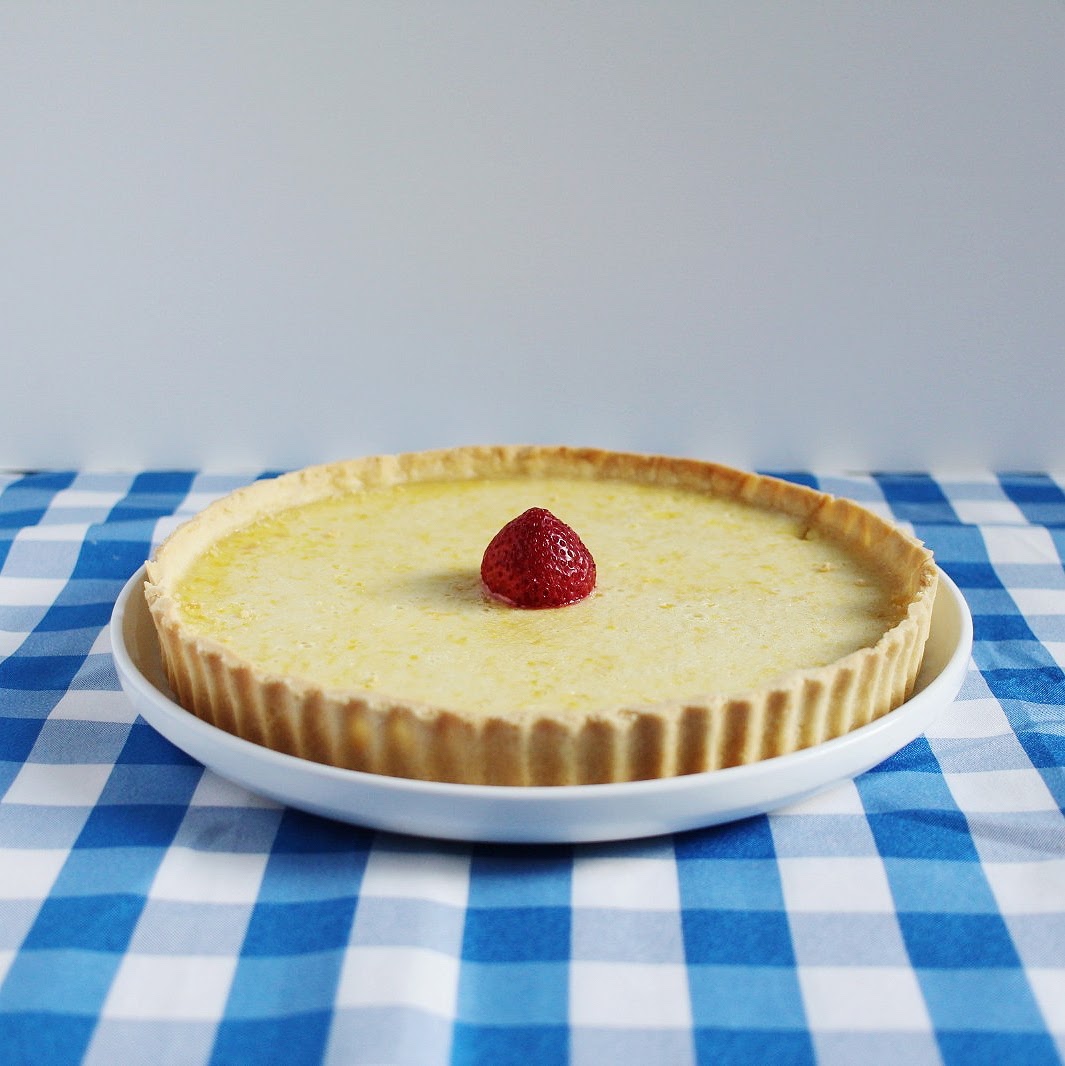
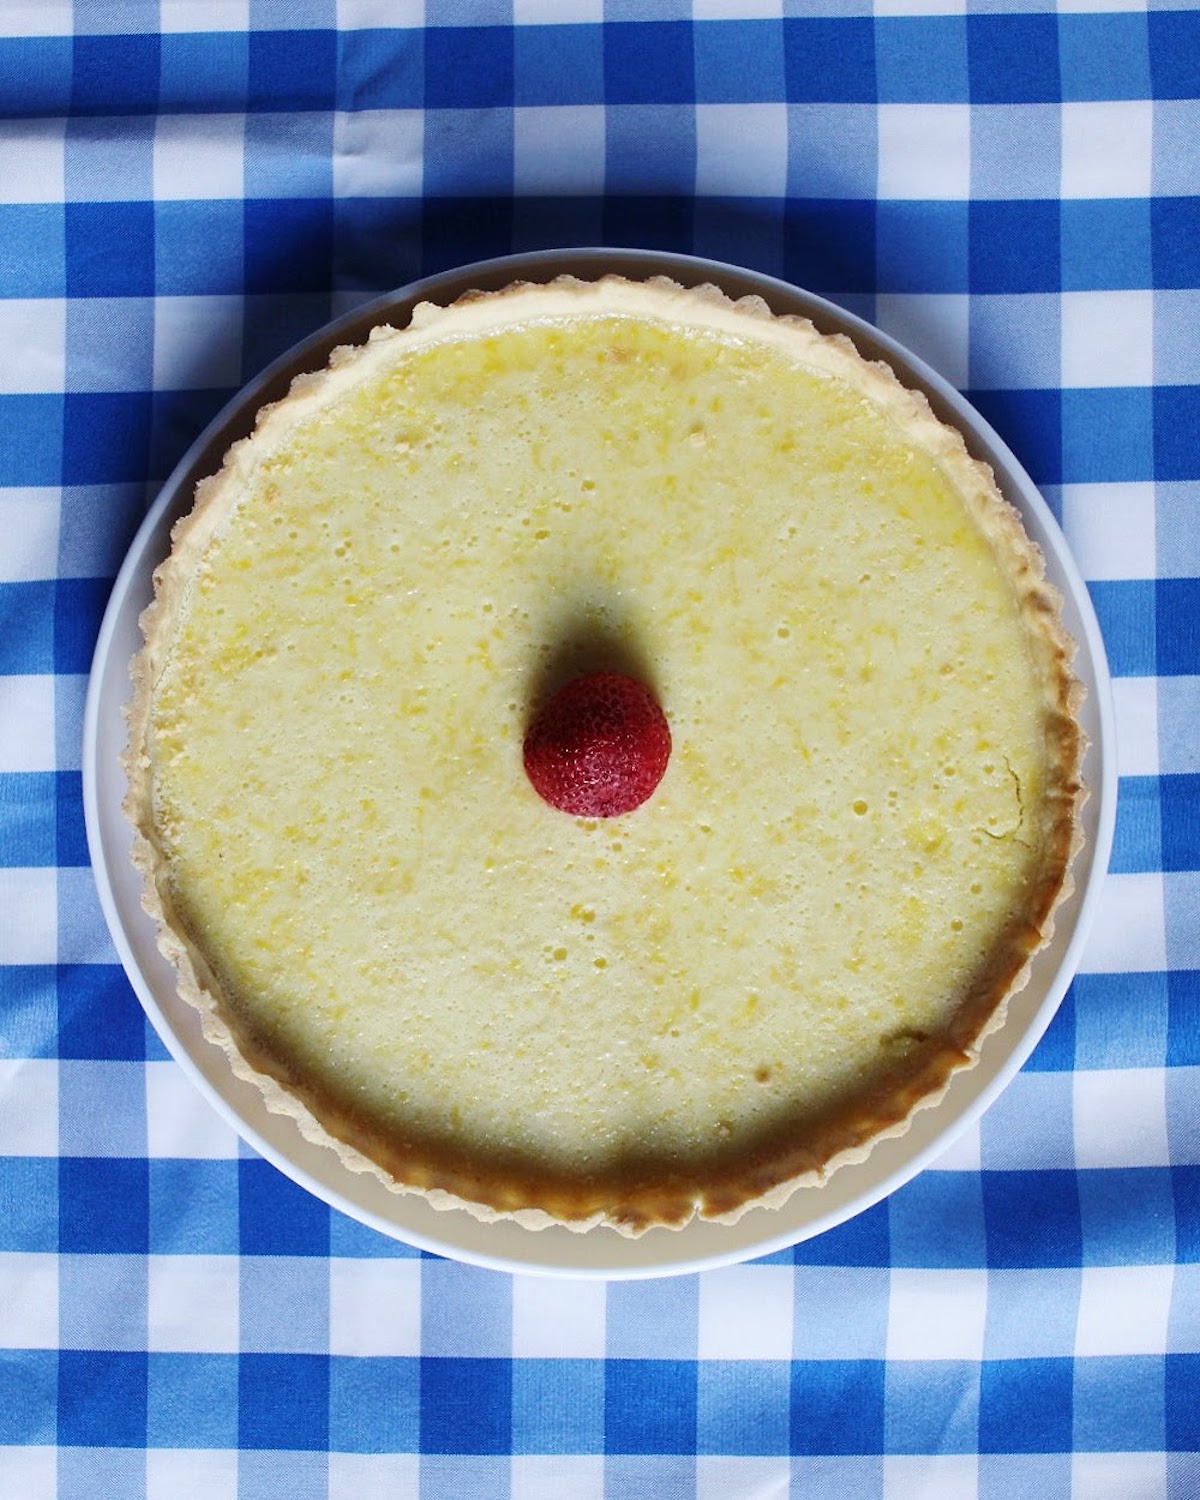
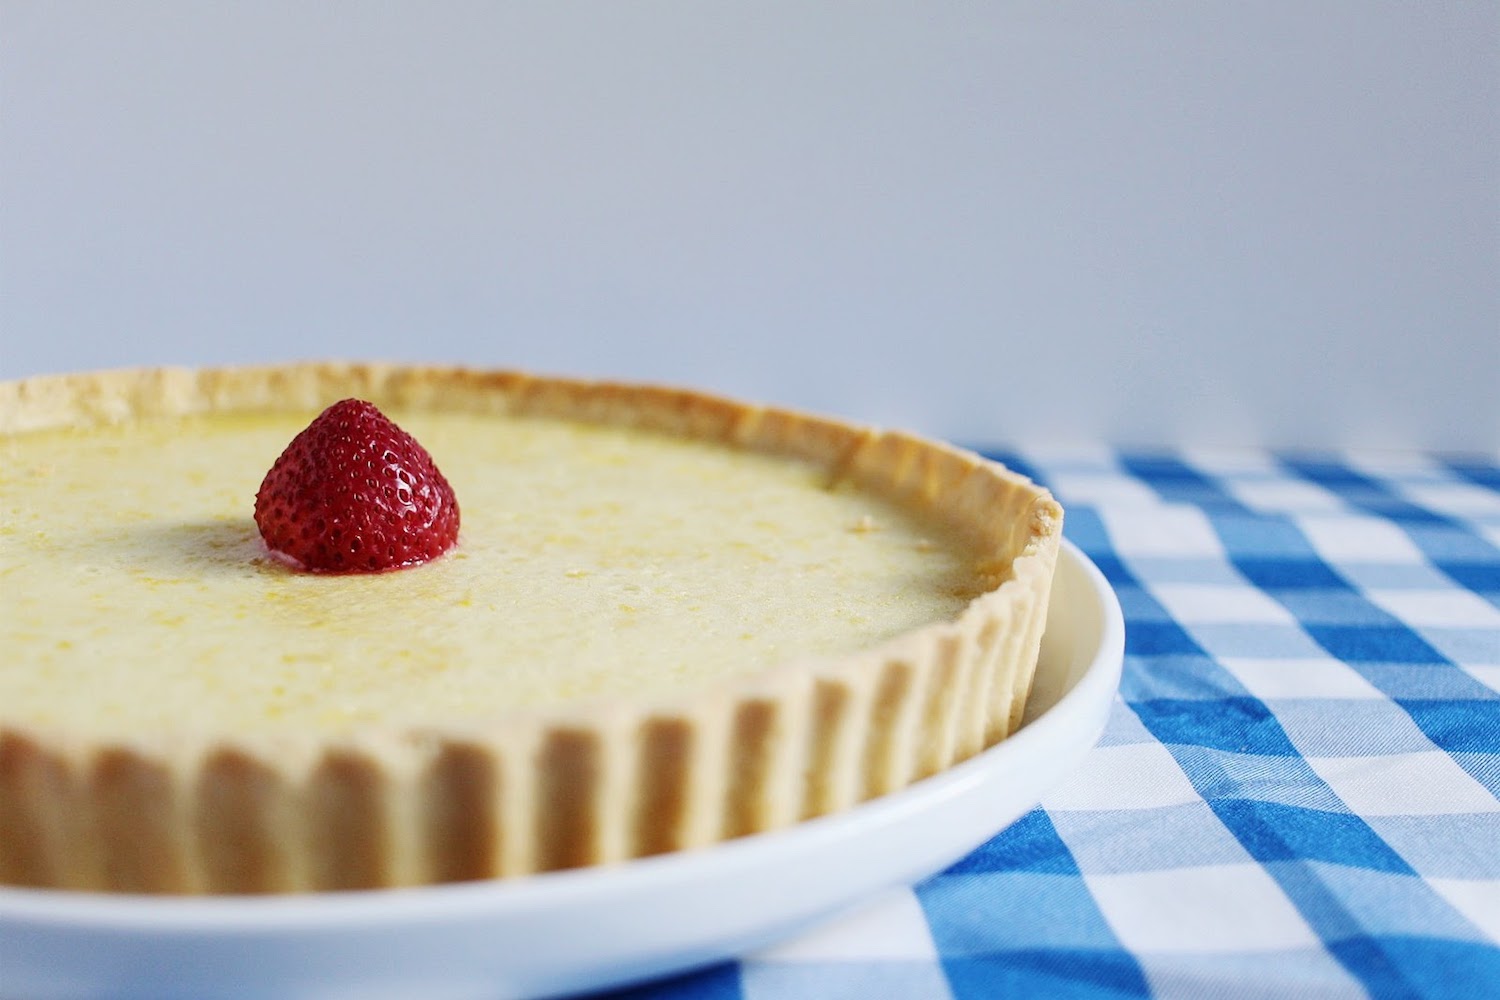
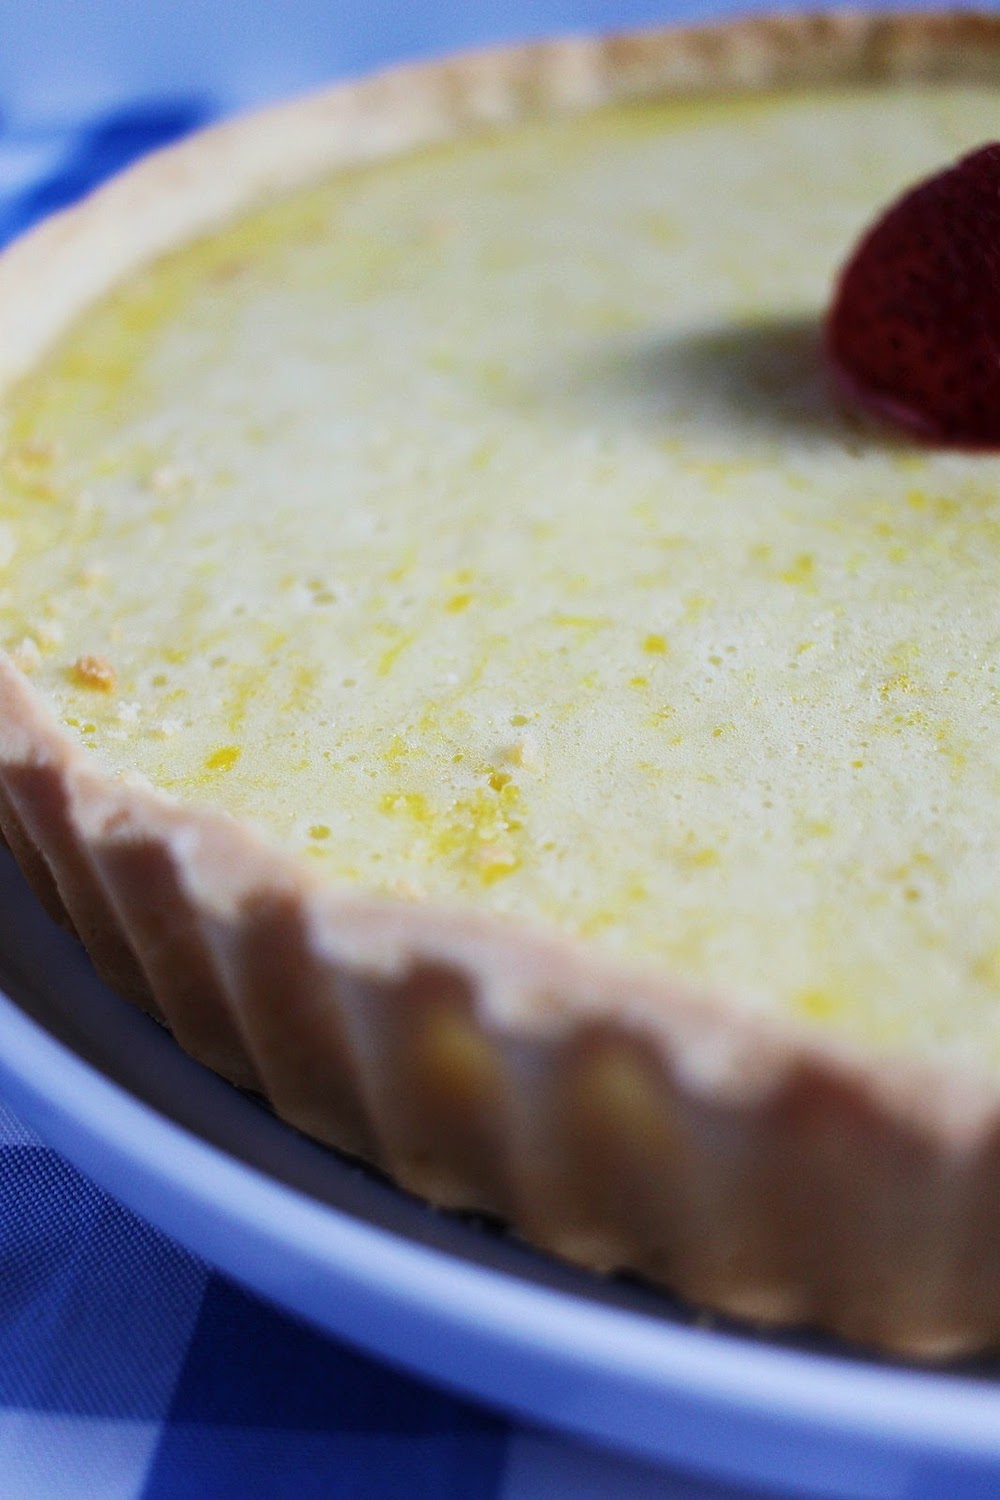
Lemon Tart(lets)
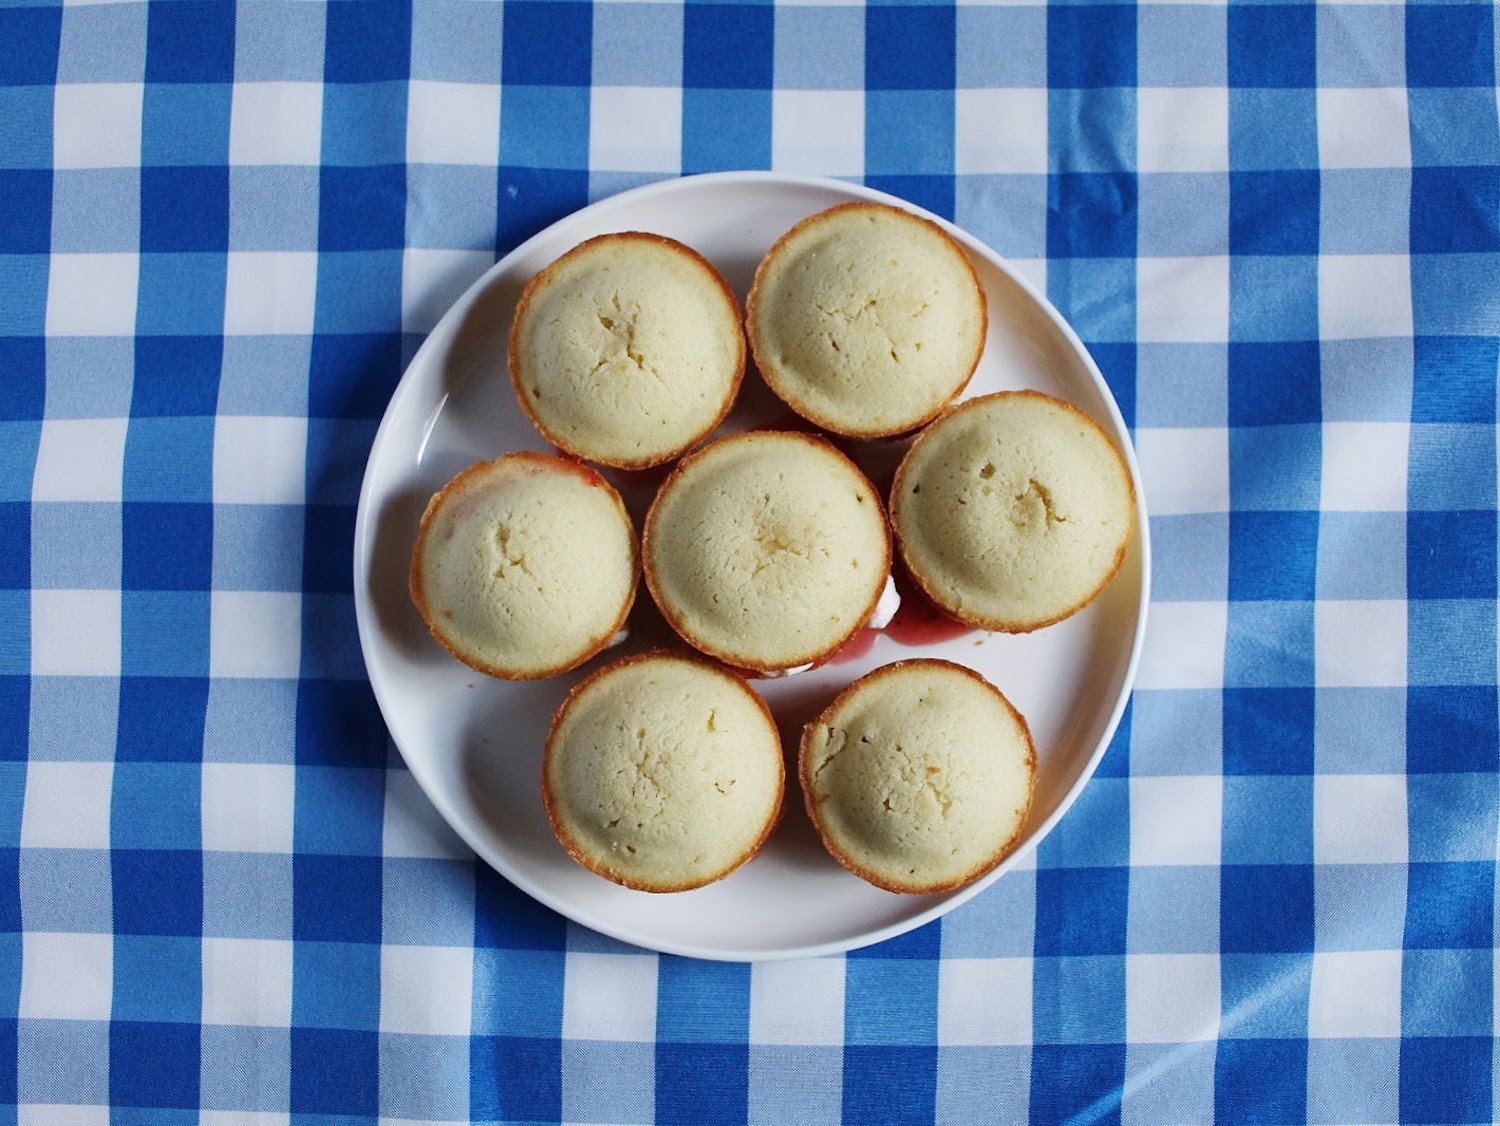
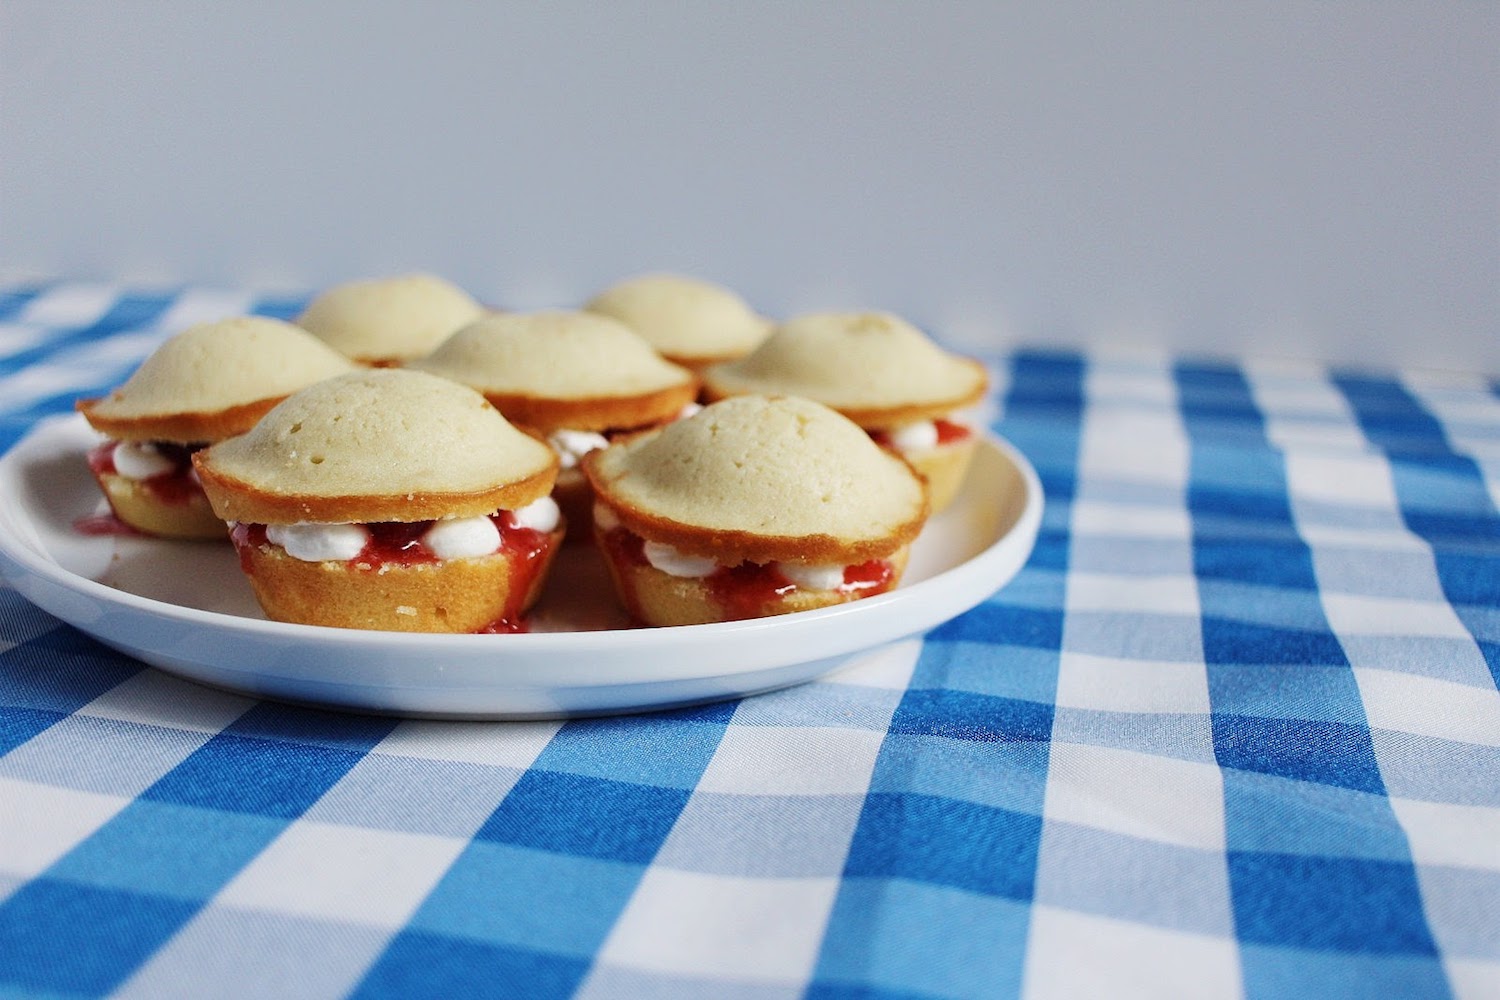
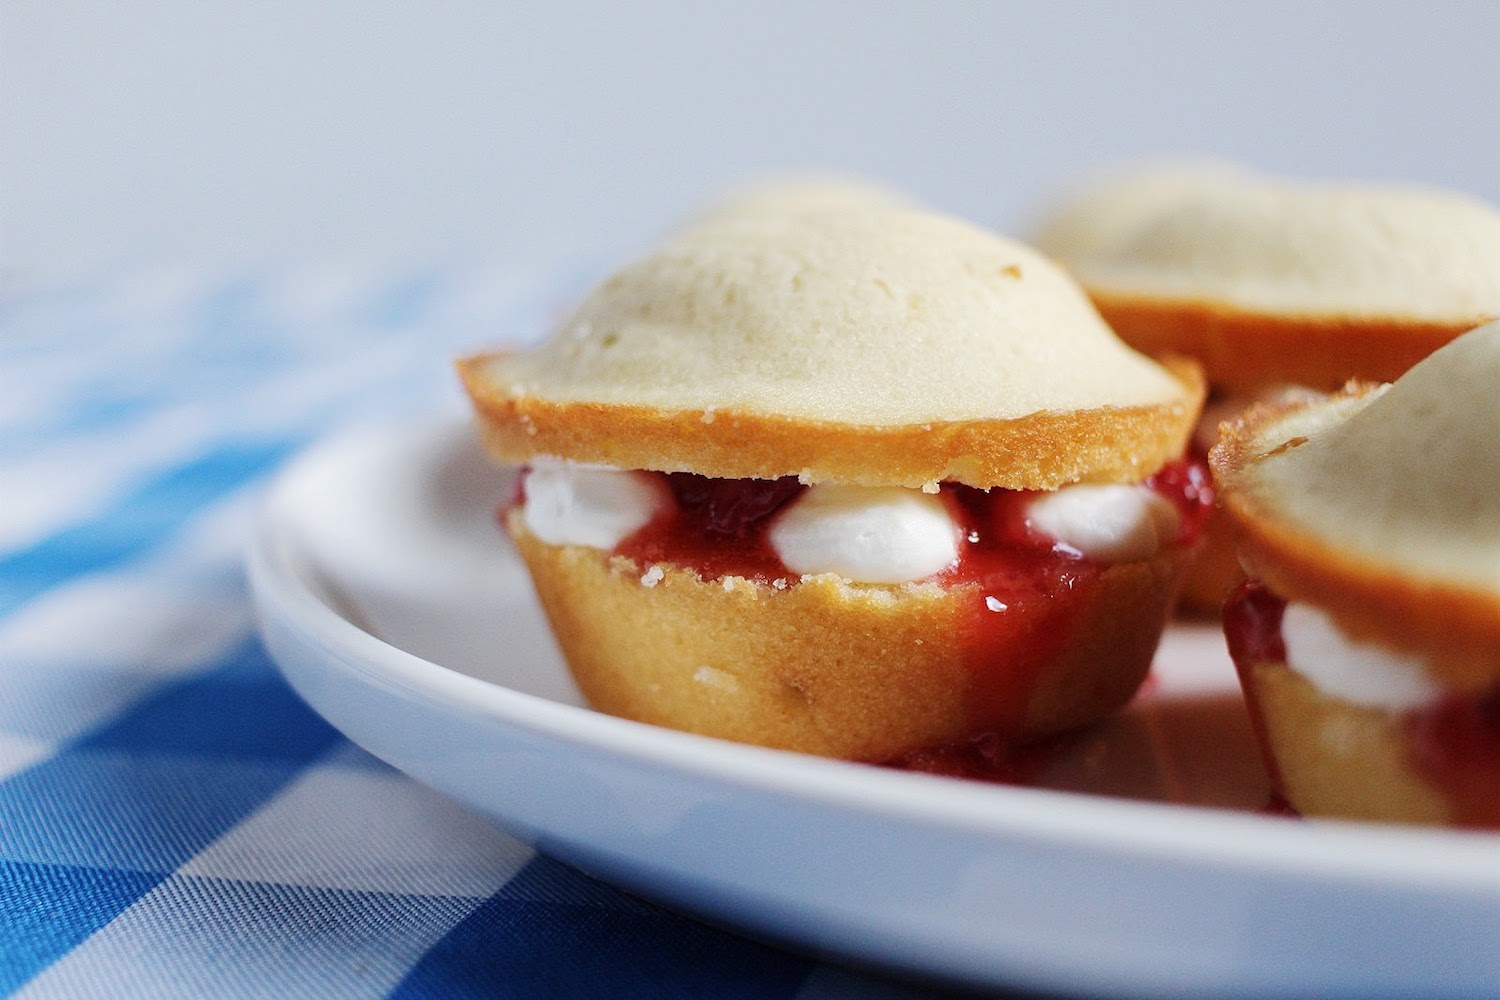
Mini Victoria Sponge Cakes
The Outcomes
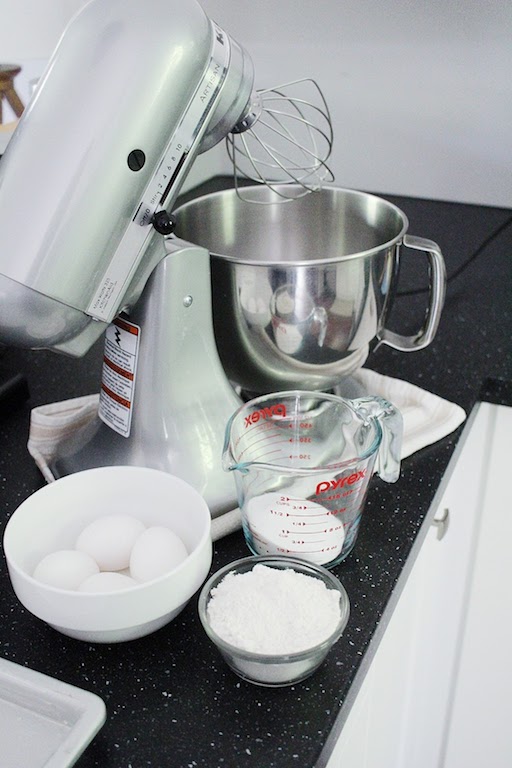
Like I said, these bakes were really pretty quick. The ingredients were few and came together without fuss. The baking times were short, the prep work was minimal, and the final presentations were easy. Truthfully, anyone could have made these little bakes and I would encourage even the most amateur bakers to give one or all of these a try. The challenge here, was doing all three in an allotted time, I'm sure. However, I had all day, but still managed to breeze through them without a problem.
Some adjustments I made:
- I used a larger tart tin instead of mini ones
- I used a muffin tin instead of perfectly round mini cake tins
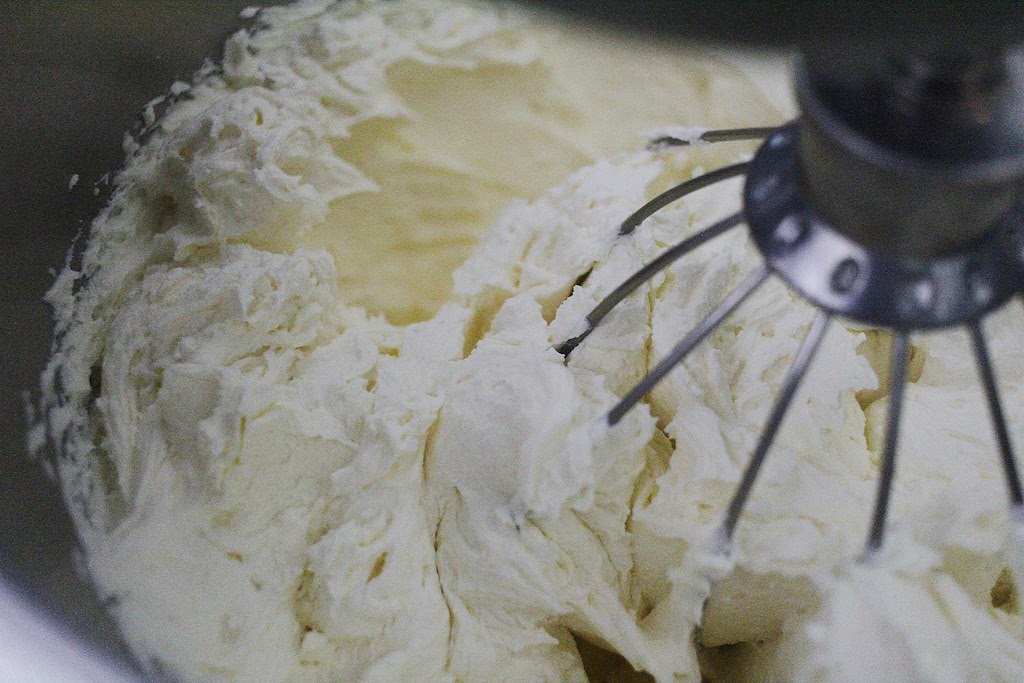
- I added sugar and vanilla to the whipped cream (because why the heck do they leave whipped cream plain?!)
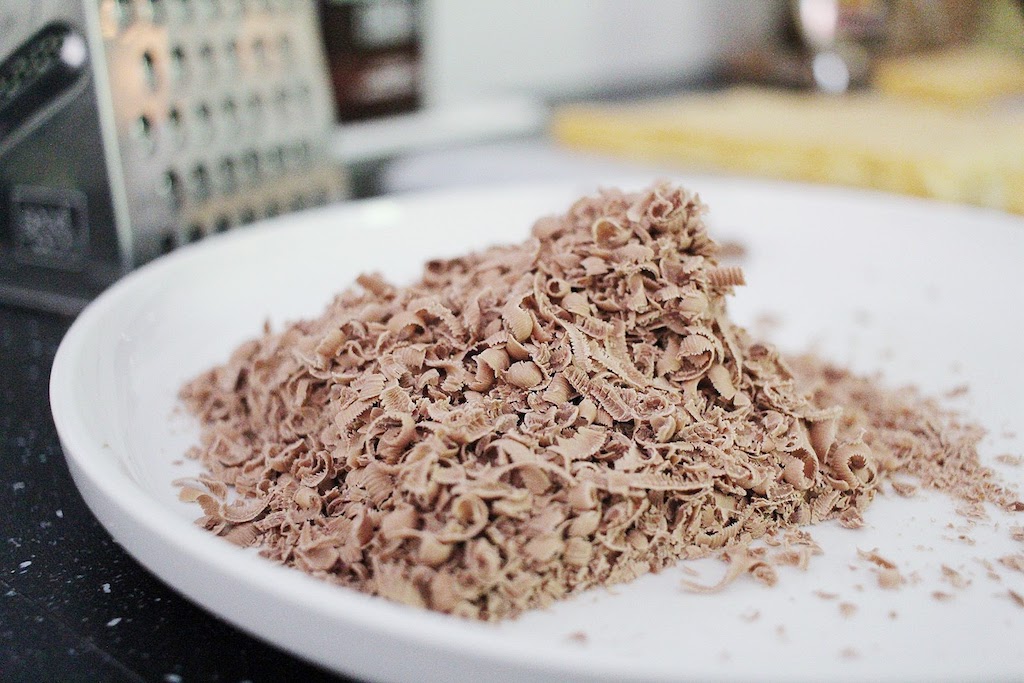
- I nixed the chocolate on the lemon tart because I don't think lemon and chocolate are a good mixture.
Would either of us bake these again?
The scones tasted more like semi-sweet biscuits and I found them sort of blah. They are supposed to be served with jam and cream, and without those additions they are nothing to write home about. I think they make a good base for making the more Americanized scones we know (if that's more of what you're looking for). I'd bake again with adjustments.
The lemon tart was delicious. A little rich, so a small piece will do, but very yummy. This was the first tart I've ever made, so I really enjoyed trying my hand at it. The crust was sweet and buttery, and the filling came together quickly, and set into tangy, creamy perfection. I would definitely bake again, and now I want to try all kinds of tart flavors!
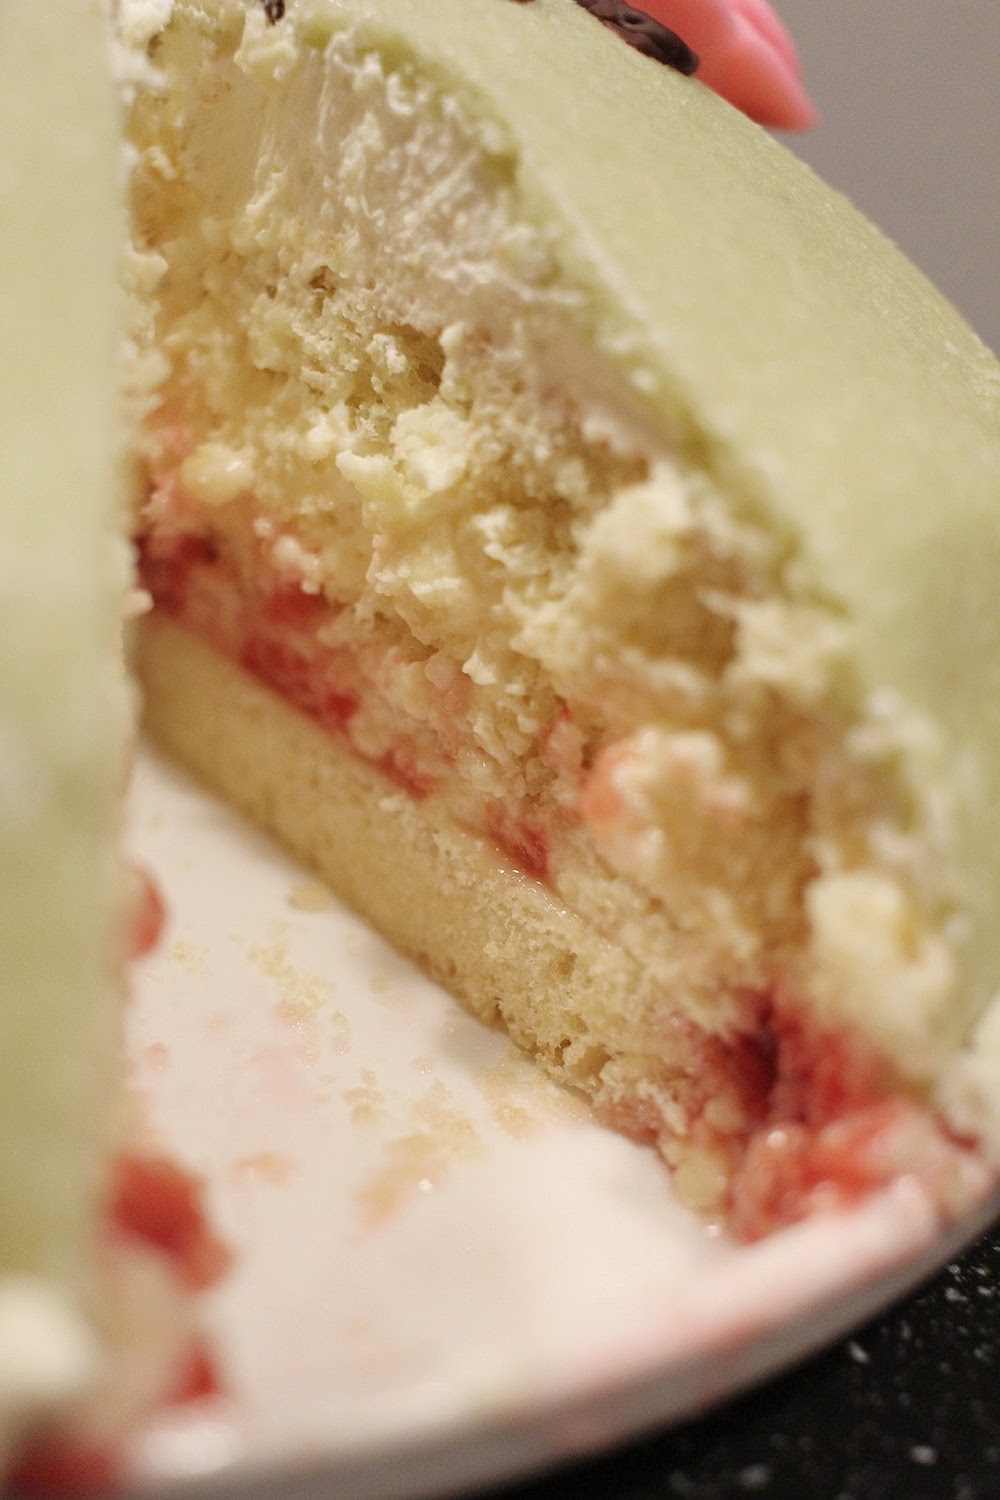
The mini Victoria sponges with strawberry jam and cream were delicious as well. This sponge mixture was far easier (and tastier, IMHO) than the sponges of some of the previous bakes. It was denser, a little dry, but the filling evened that out and made it the perfect tea-time cake. I'd bake a different batter altogether, but I love the mini versions and yummy filling.
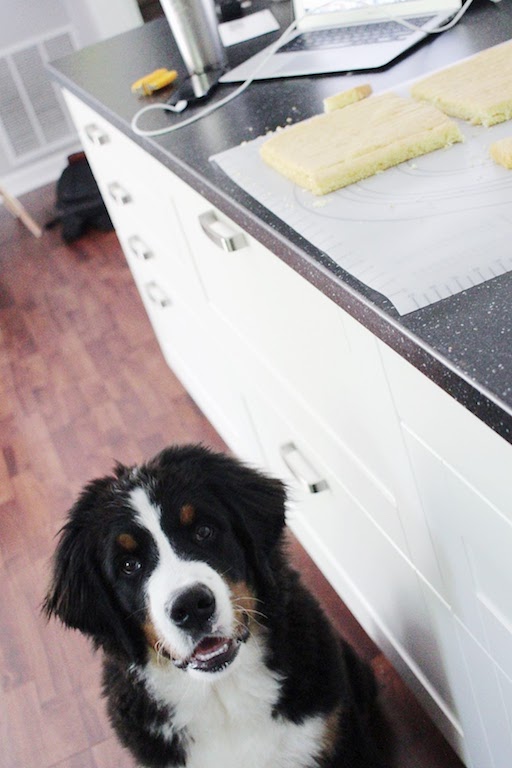
Here's the glamour shots...

Here's my mom's report
The final bake! In a way I'm happy we are finished, but at the same time sad. When your daughter lives far away it is easy to begin to feel a "distance" that not being in each other's world can bring. What fun this has been. I highly recommend doing something like this if you have someone dear to you living away. We've talked regularly and our FaceTime conversations hashing over our experiences has been wonderful. We are people who find humor in just about everything and laughing with her is frankly, "the best." Love you Joy, Joy.
Now to the bake. These final three were very easy. The instructions were simple and the ingredients not unusual.
The mini Victoria sponge. The sponge actually tasted like I think a cake should be. While they were fresh they were delicious, but I think as they cooled they became dryer. This has been typical of most of the British sponges. DRY. The moisture of the jam and cream helped. I used mini muffin tins. I had home made jam already so I got to skip that step.
Lemon Tartlets. These were surprisingly simple. I've always wanted to make these and was happy to discover how easy they really are. Joy told me she had trouble rolling out the dough. Once I began I could see what she meant. To solve the issue I rolled mine out between two pieces of Saran Wrap. Beautiful, and problem solved. I will make this again only with different filling. While the lemon was very good, it would not be the pick in this house. Neither one of us garnished with chocolate as we didn't like the pairing of those particular flavors.
Tea Time Scones. Simply put, not a fan. Too dry.
Thanks for coming along with us on our Great British Baking Show challenge.
This entire challenge has been such fun. Expensive at times, and very frustrating at others, but worth the funny FaceTimes with my mom as we laughed over every hilarious misstep. As she mentioned, this series has been a great way to remain close even though we're far apart, and I couldn't agree more. I love talking to my mama regularly, but being able to enjoy one of our favorite hobbies together from miles away is extra sweet. And geez, we needed the "extra sweet" from all the annoyingly bland bakes we did!!! Haha!! I'm sad it's come to a close, but hopefully we can continue this tradition annually. Perhaps we'll even come back with our own showstoppers with the new techniques we've learned (and failed at!). I hope you all enjoyed this series as much as we did.
BIG thanks to Cameron, our Star Baker. She did an incredible job and her writing skills are just as beautiful as her bakes. If she gets a blog going, I'll be sure and let you know!
Do you have a favorite bake from this series? I'd love to know which ones caught your eye!
Don't forget to follow me on social media to stay up to date and connected. Feel free to message or email me with any content requests, ideas, or collaborations!

Towering Torte | Showstopper Bake by Cameron
This is the second and final bake (at least until we eventually start up the challenge again with the next season) from our Star Baker, Cameron! I never know what she has baked up for us until about the day before her post goes live, and let me tell you... when I opened her email my jaw about hit the ground (and so did my husband's!). This is a showstopper to be sure! Be sure and read through Cameron's process of this bake - she is a gifted writer as well as baker, and you feel as if you're watching her as a Great British Bake Off contestant!
If you missed her last bake, find it here: Mini Lemon Cakes
And be sure to find her on Instagram for more mouth watering photos: Cameron's Instagram
Sit Down for This One… A Towering Torte to Tempt Your Sweet Tooth
I have watched and baked along with The Great British Bake Off for years. When Joy sent me the schedule of the episodes that I could select from for my bakes, I thought….now is the time for a challenge. When it came to this post I had narrowed it down between multi-tiered pies and tarts or the decadent dobos torte.
Obviously, the legendary Hungarian delicacy would be uncharted territory, so I opted for the challenge rather than the tried and true.
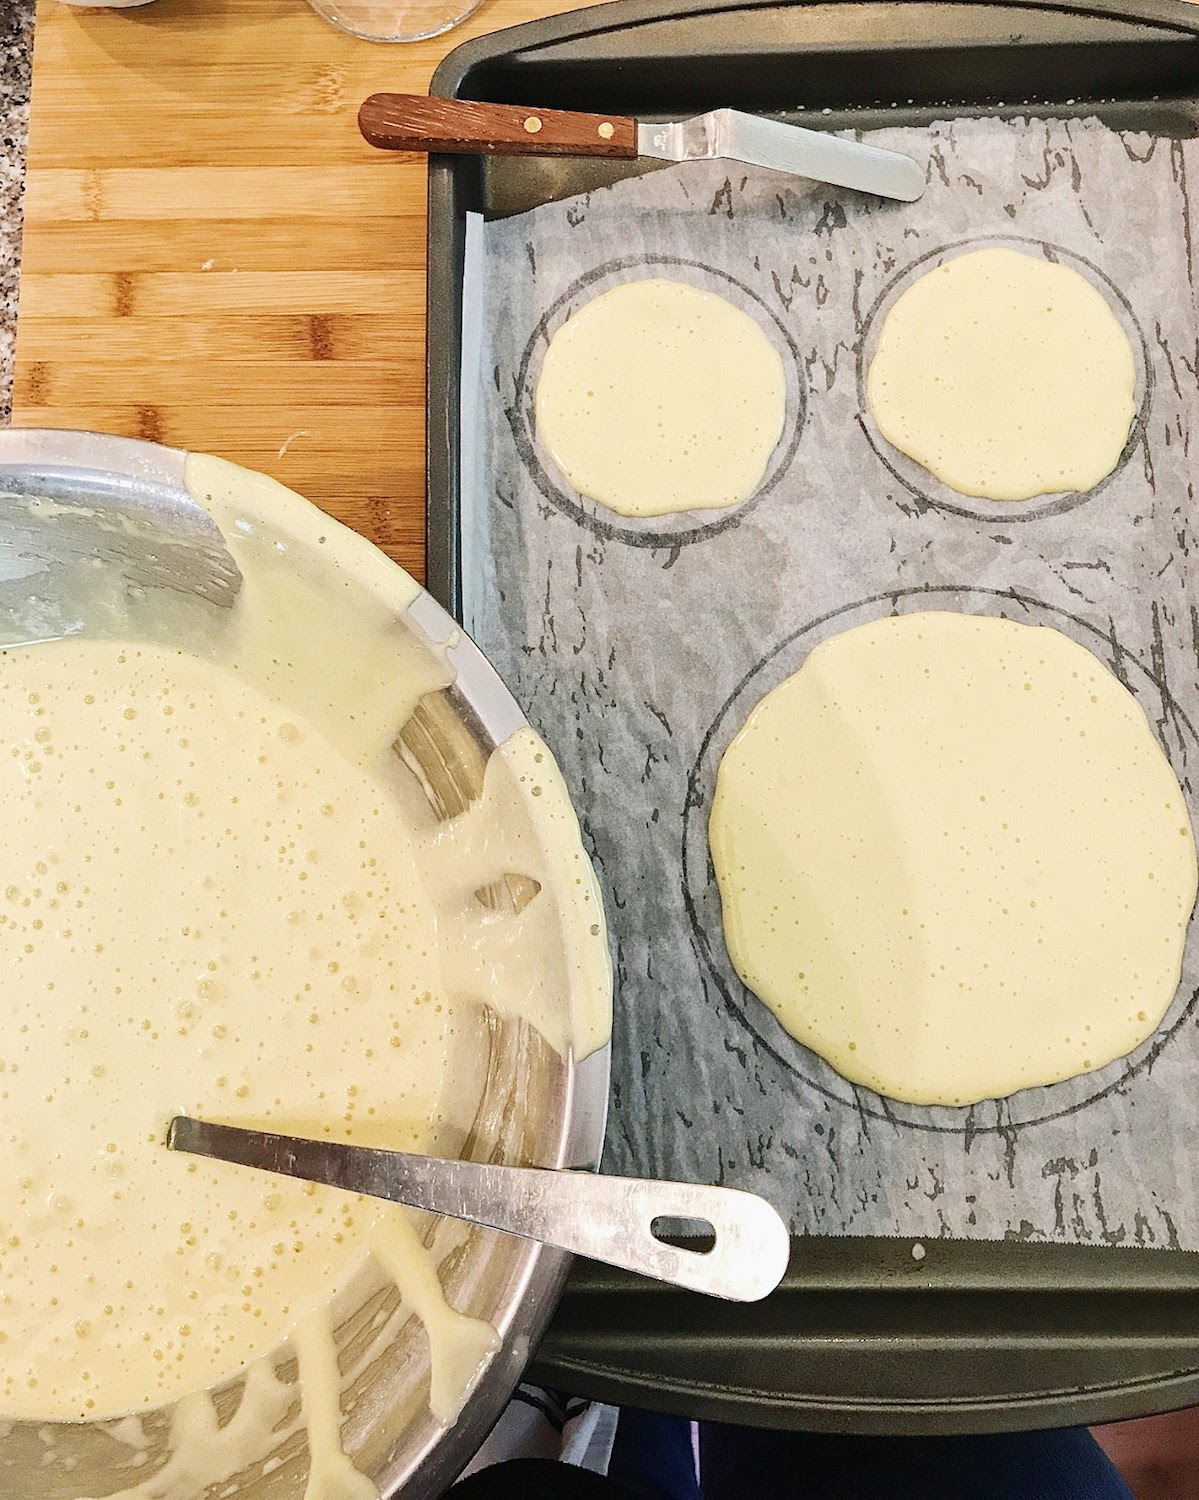
I must be honest, once I started ladling layer upon layer of fluffy batter and flattening it with a pallet knife, a little part of me wished I had gone with something more familiar. Now don’t get me wrong, this towering rich cake was delicious and seems more overwhelming than it is!
First things first, this is based on Mary Berry’s dobos torte recipe. Never having attempted this bake, I looked to the “Queen” and master for guidance. Notice that I have taken liberties with Mary Berry’s recipe and added my own personal twist to this traditionally chocolate/caramel massively layered torte….a bit “cheeky” I know….but my taste testers validated my deviation from the traditional with resounding “oohs and ahhs”. I hope you find the modifications a delight to your palate as well should you also venture into the dobos torte baking adventure.
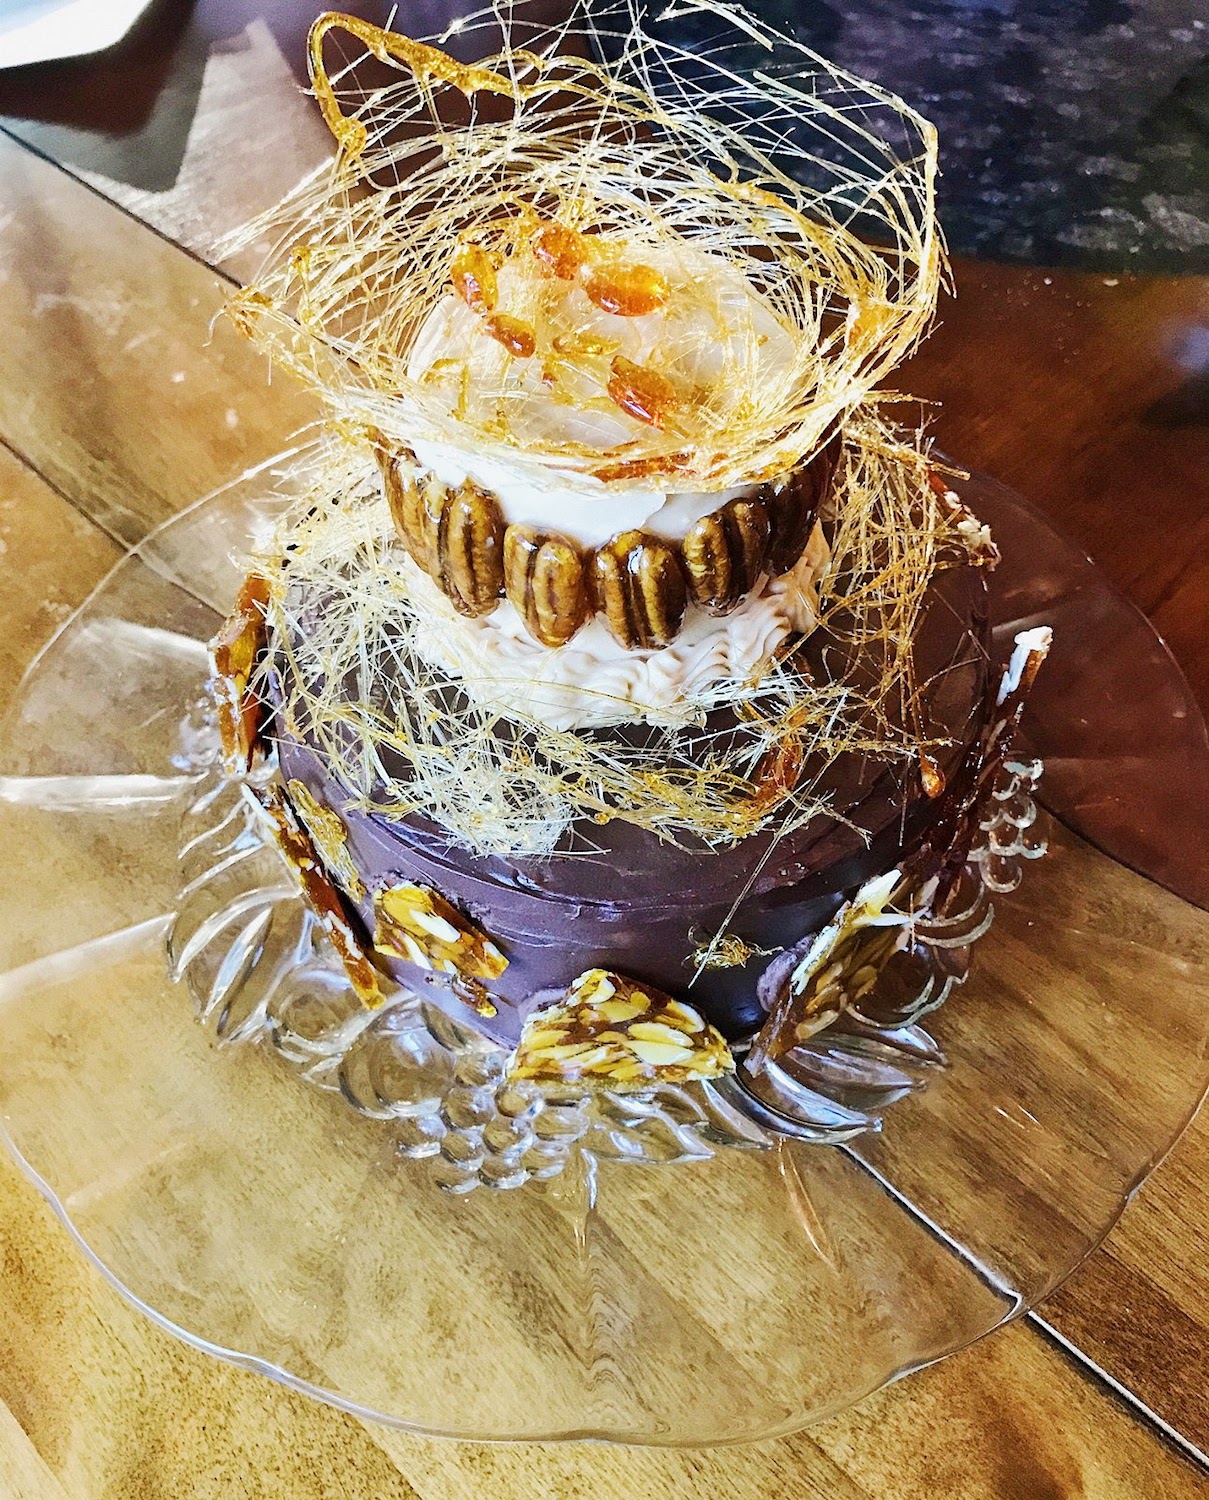
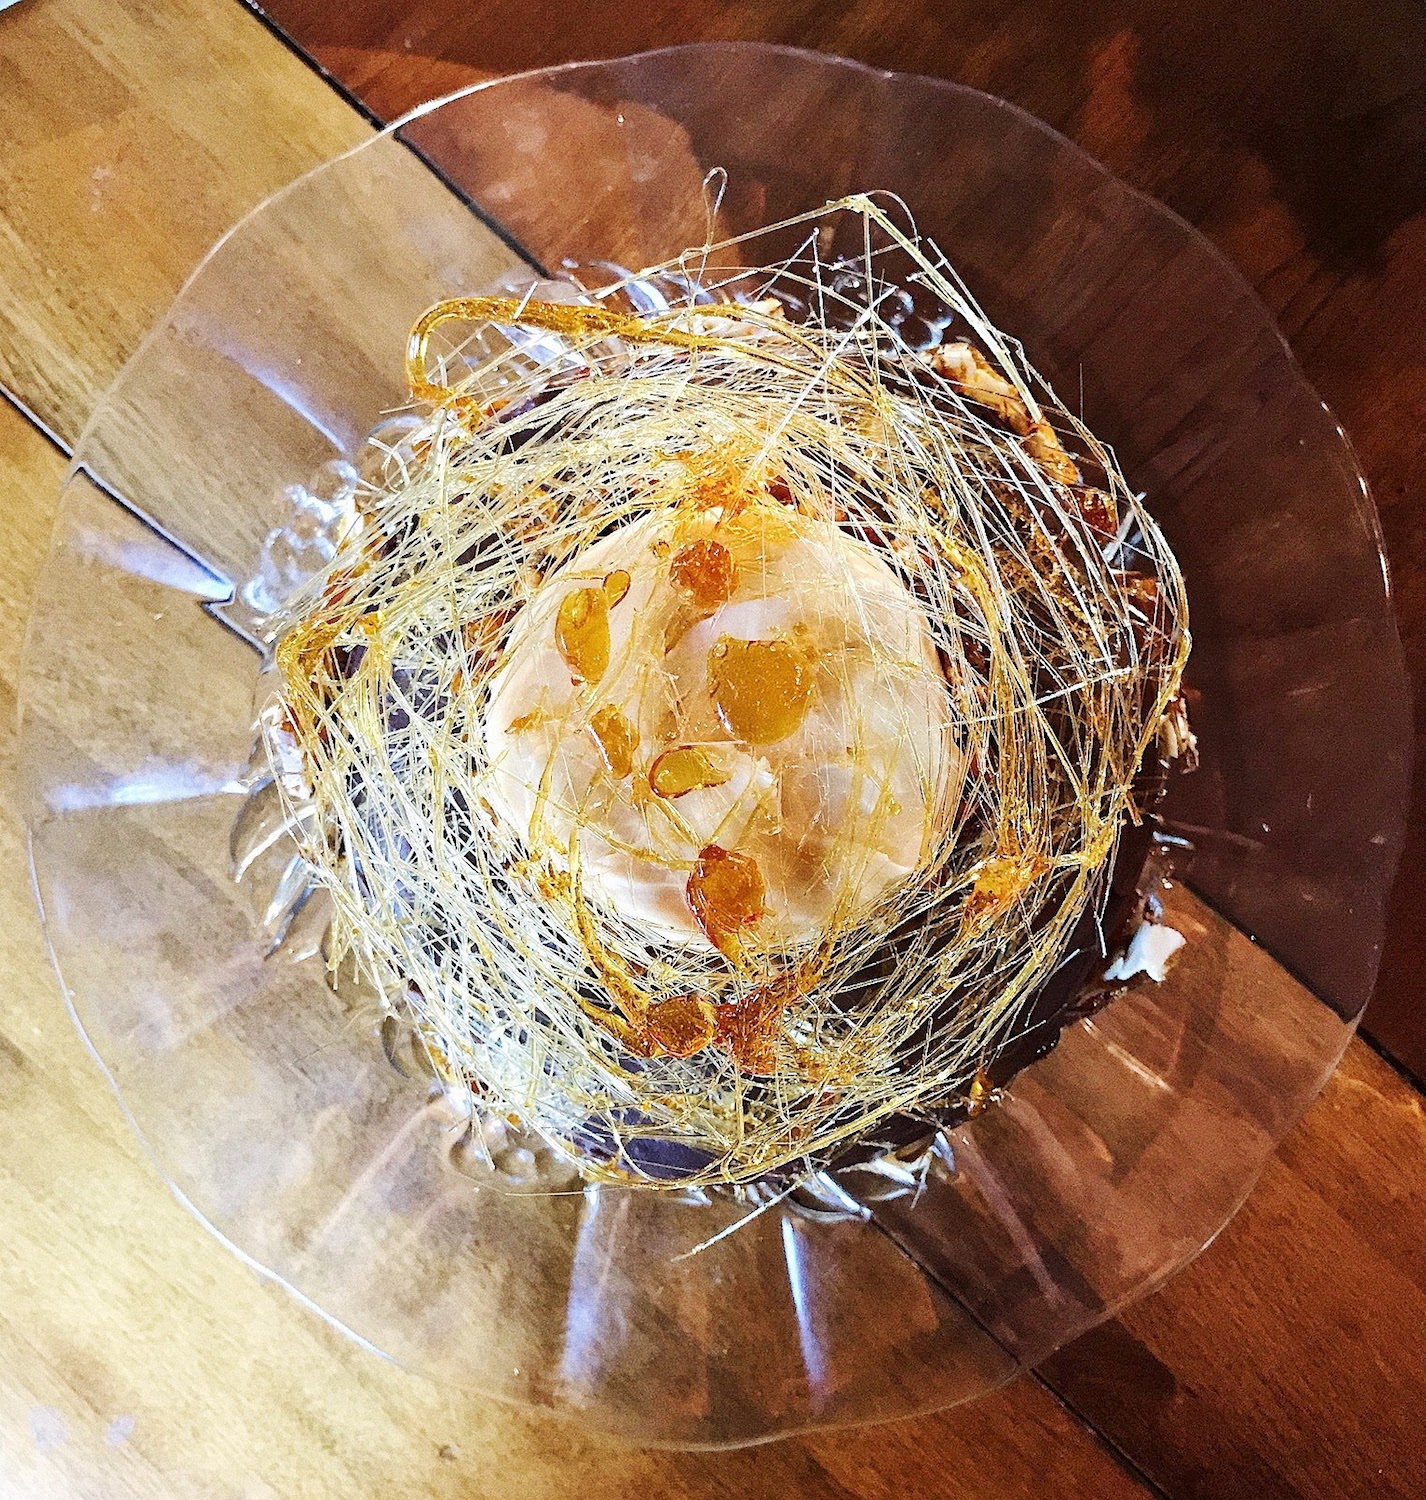
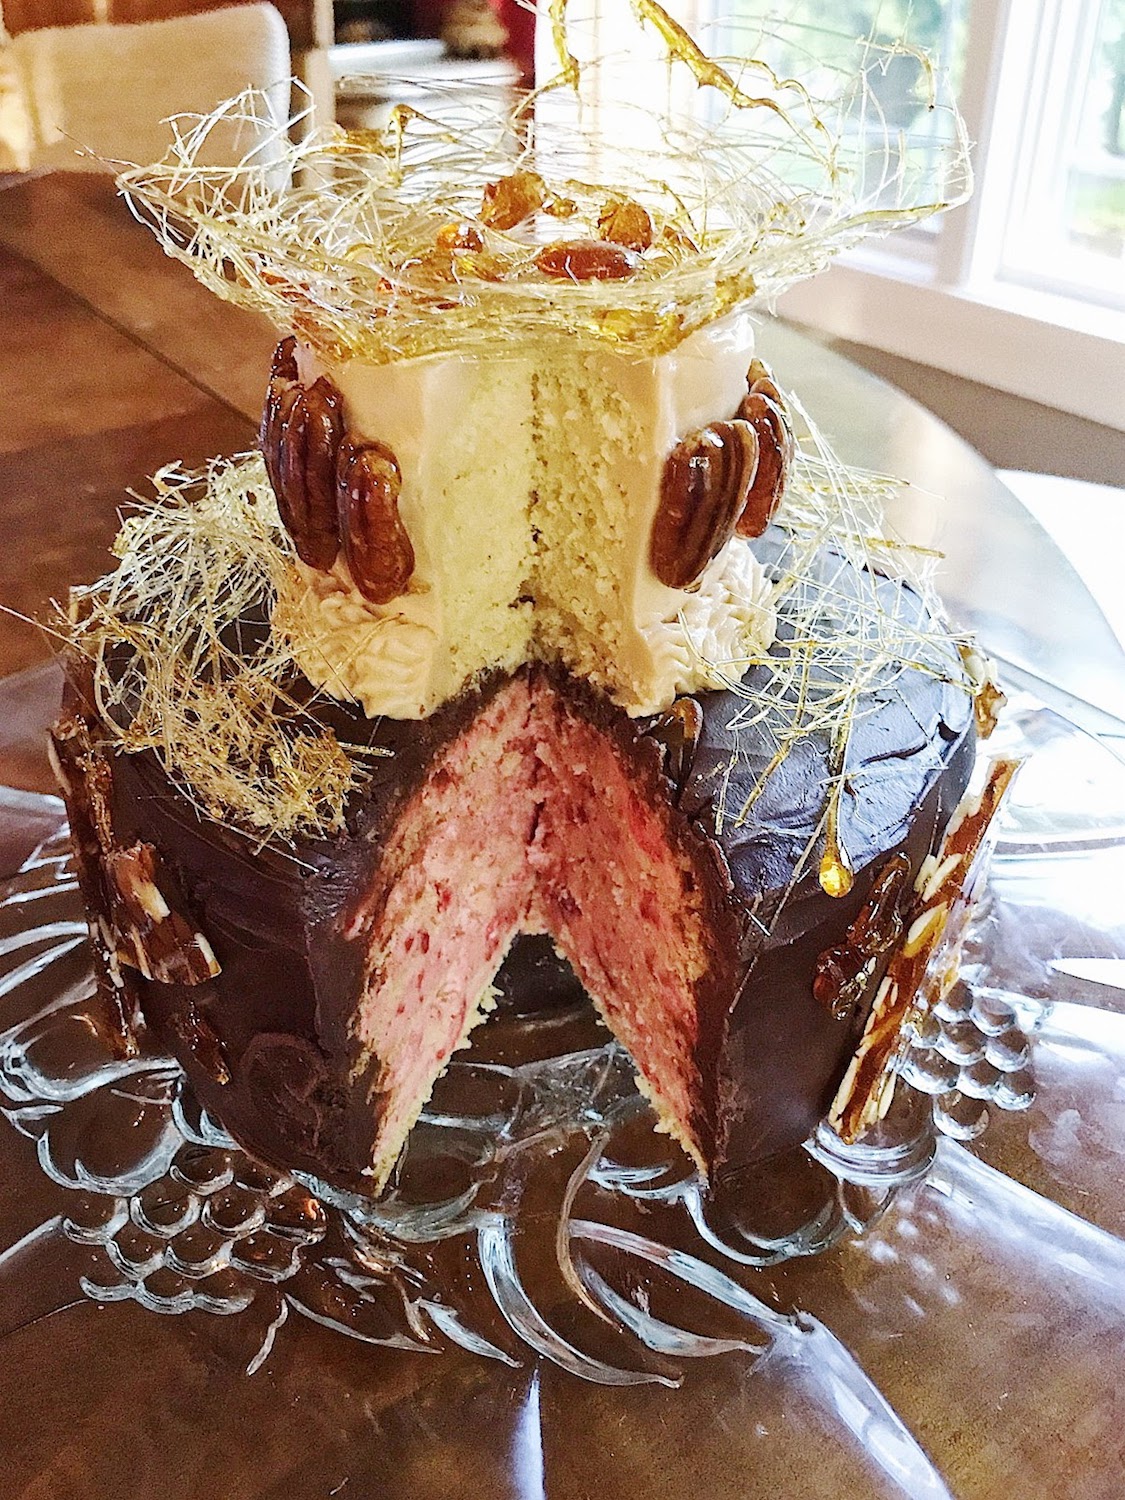
My heartbeat quickened when I saw self-rising flour as a primary ingredient. I’m not sure what it is, but I have never had much luck with self-rising flour or any recipe that calls for it. Often self-rising flour is a component gently folded into light airy egg laden sponge cakes. Nine times out of ten I either over mix the batter and it doesn’t rise or I under mix and have nasty little pockets of flour. This time the stars aligned and everything went according to the plan! I patiently took my time incorporating the flour which resulted in the intended light airy batter. The cake itself is sweet and heavenly, but the real flavor show stopper...an assortment of rich strawberry, caramel, and chocolate buttercream encased in rich silky chocolate ganache. Eye candy…. spun caramel golden threads, shards of caramel almond brittle, and caramel dipped pecans.
Initially, I wanted something a bit tarter as a juxtaposition to the sweetness of the caramel. My original flavor profile of choice was raspberry. After careful consideration, I had concerns about incorporating a juicy fruit into a buttercream. The multi-layered effect of the dobos is visually appealing but there is a structural weight issue to account for ...a tilted towering bake is not the look I hoped to achieve. This rationale leads me to freeze dried fruit. Unfortunately, I was unable to find freeze dried raspberries and opted for freeze dried strawberries…. a superior substitute! The buttercream legitimately tasted like strawberry ice cream if it were a buttercream!
The final personal hurdle of this cake was the caramel. There are few things in this world that I love more than salted caramel. One problem though…. I have the worst luck with caramel! I always burn myself and the caramel turns out crystalized or burnt.
It’s an affliction in this life to not be able to make that which one loves to eat!
This time however, like the self-rising flour, the stars aligned and everything went beautifully! I did manage to burn myself right at the very end with the caramelized pecans, but it wasn’t anything too traumatic. On this bake, I did allow myself to live on the edge and added a splash of bourbon in the caramel for a little bit of fun…. I would recommend it. It doesn’t blow you away but it does make you feel cozy.
Overall this was a bake of personal challenges, and I have to say I’m darn proud of myself and how it turned out. It was decadent and delicious. My “Ottoson Empire” dobos torte was carefully transported to share with co-workers (aka the culinary “test team). By the end of the day...it was fait accompli…. not a crumb nor a dollop of buttercream remained. I don’t think I’ve ever made something that looked so much like a showstopper. Hopefully Mary Berry would be favorably impressed. I’m very pleased with the outcome and would like to challenge everyone else to push themselves outside their comfort zone.
Happy Baking!
Towering Torte
Ingredients
Cake Sponge:
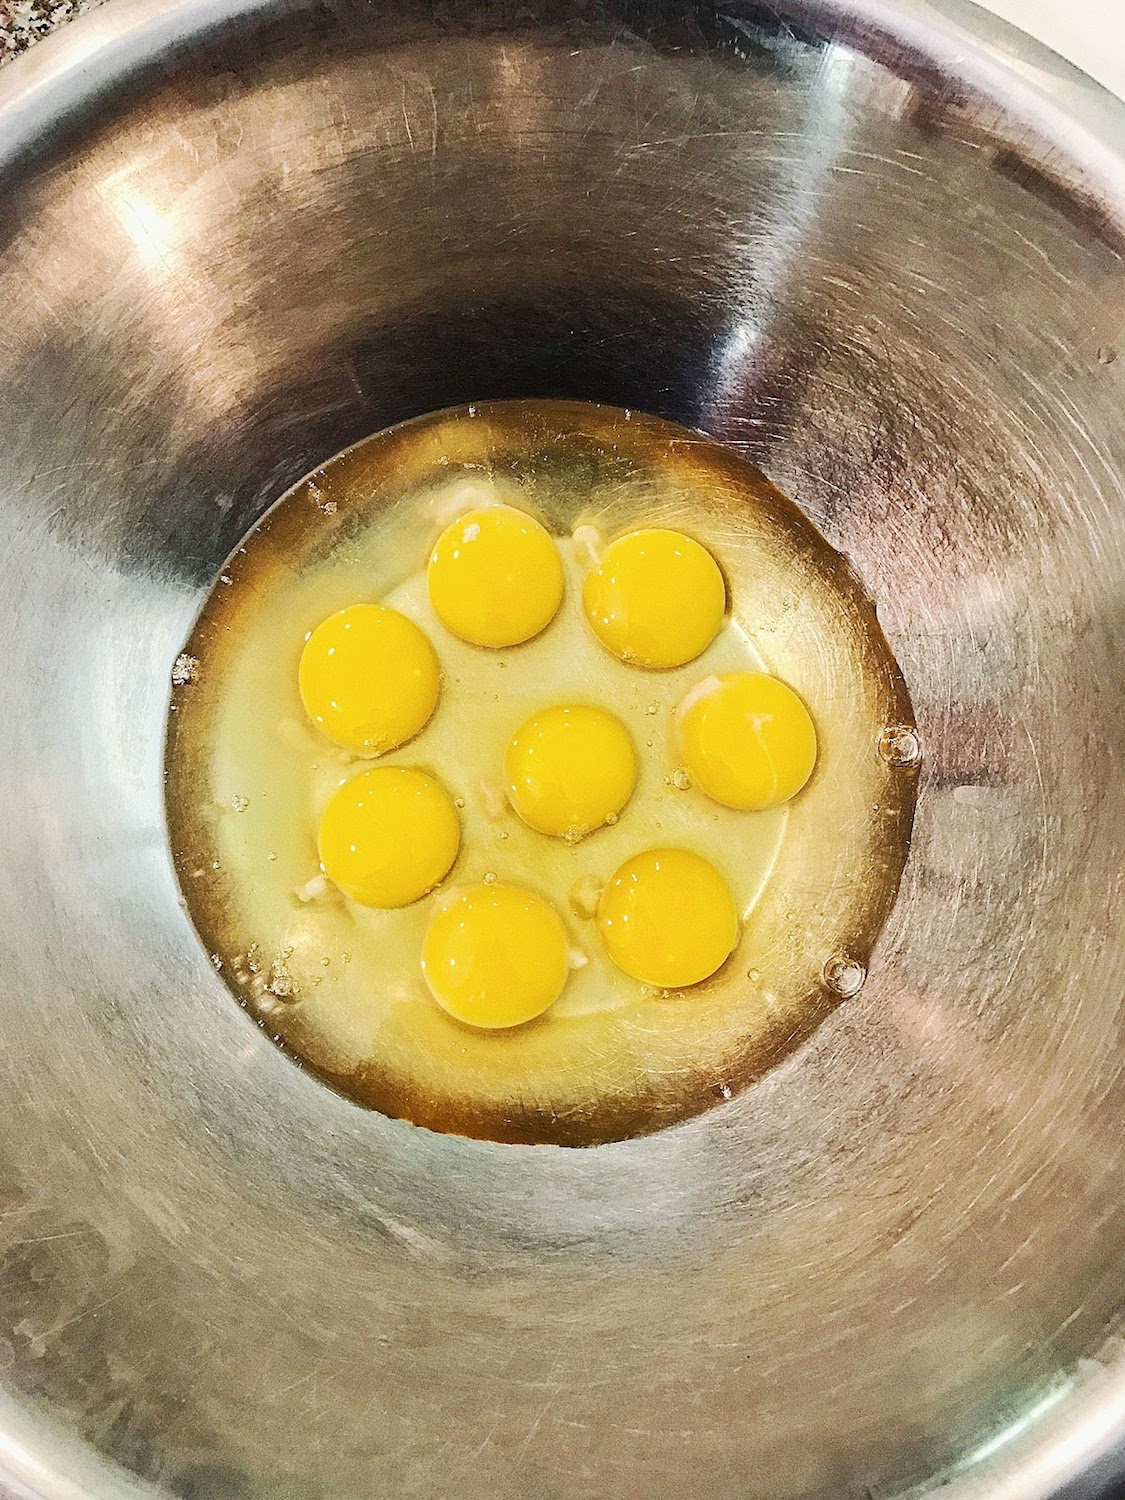
- 8 large eggs (room temperature)
- 350g sugar
- 300g self-rising flour
Caramel Buttercream:
- 800g sugar
- 400ml heavy whipping cream
- 450g softened butter
- powder sugar as needed
*A splash of bourbon optional should you feel adventuresome.
Strawberry Buttercream:
- 1- 34g/1.2 oz. bag of freeze dried strawberries
- 226g softened butter
- 448g powdered sugar
- 1tsp vanilla extract
- 1 tsp milk
- 1/8 tsp of salt
- powder sugar as needed
Chocolate Buttercream:
- 226g softened butter
- 448g powdered sugar
- 64g cocoa powder
- ½ tsp salt
- 2 tsp vanilla extract
- 4 tbsp. milk or heavy cream
Chocolate Ganache:
- 907g semi-sweet chocolate
- 350mL heavy cream
Caramel Work:
- 400g sugar
- 100g almonds
- 12 pecans
Method:
Chocolate Ganache
In a heavy bottomed pan heat heavy cream until it is at the point of boiling. Keep a close eye on it as you don’t want to scald the cream. Pour the warm cream over the chocolate. It is easier if the chocolate is in a wide shallow bowl so it will melt more easily. Once completely combined and there are no lumps, place in a bowl and allow it to cool and set a bit.
Caramel Buttercream
In a large heavy bottomed pan combine sugar and 100mL of water. On a low heat stir constantly and dissolve the sugar in the water. Once dissolved increase the heat and allow the mixture to turn a light golden-brown color (at this point you do not want to stir anymore). Once the mixture has reached the ideal color, the darker the color the stronger caramel flavor, remove from the heat and add the 400 mL of heavy cream. Be careful, as the mixture can often spit since you are adding a cool temperature liquid into something very hot. Combine entirely and leave to cool and set.
Once the caramel is cold and set you can start to beat the butter with a paddle attachment and slowly add the caramel. I found my buttercream needed a little extra help in reaching the best texture for frosting by the addition of powdered sugar ¼ cup at a time. Fill a piping bag with buttercream and set aside until ready to use.
Strawberry Buttercream
Beat your softened butter with a paddle attachment, then on a low speed add powdered sugar. Once it starts to combine, add vanilla extract, milk, and salt. Once the buttercream comes together add ¾ of the bag of freeze dried strawberries and allow them to break up a bit. Take remaining freeze-dried strawberries and crush them into a powder, then add that powder to the buttercream. This ground up version of the strawberries allows you to intensify the flavor without ruining the texture of the buttercream. Fill a piping bag with buttercream and set aside until ready to use.
Chocolate Buttercream
Beat your softened butter with a paddle attachment, then on a low speed add powdered sugar and cocoa powder. Once it starts to combine add the vanilla extract, milk, and salt. Fill a piping bag with buttercream and set aside until ready to use.
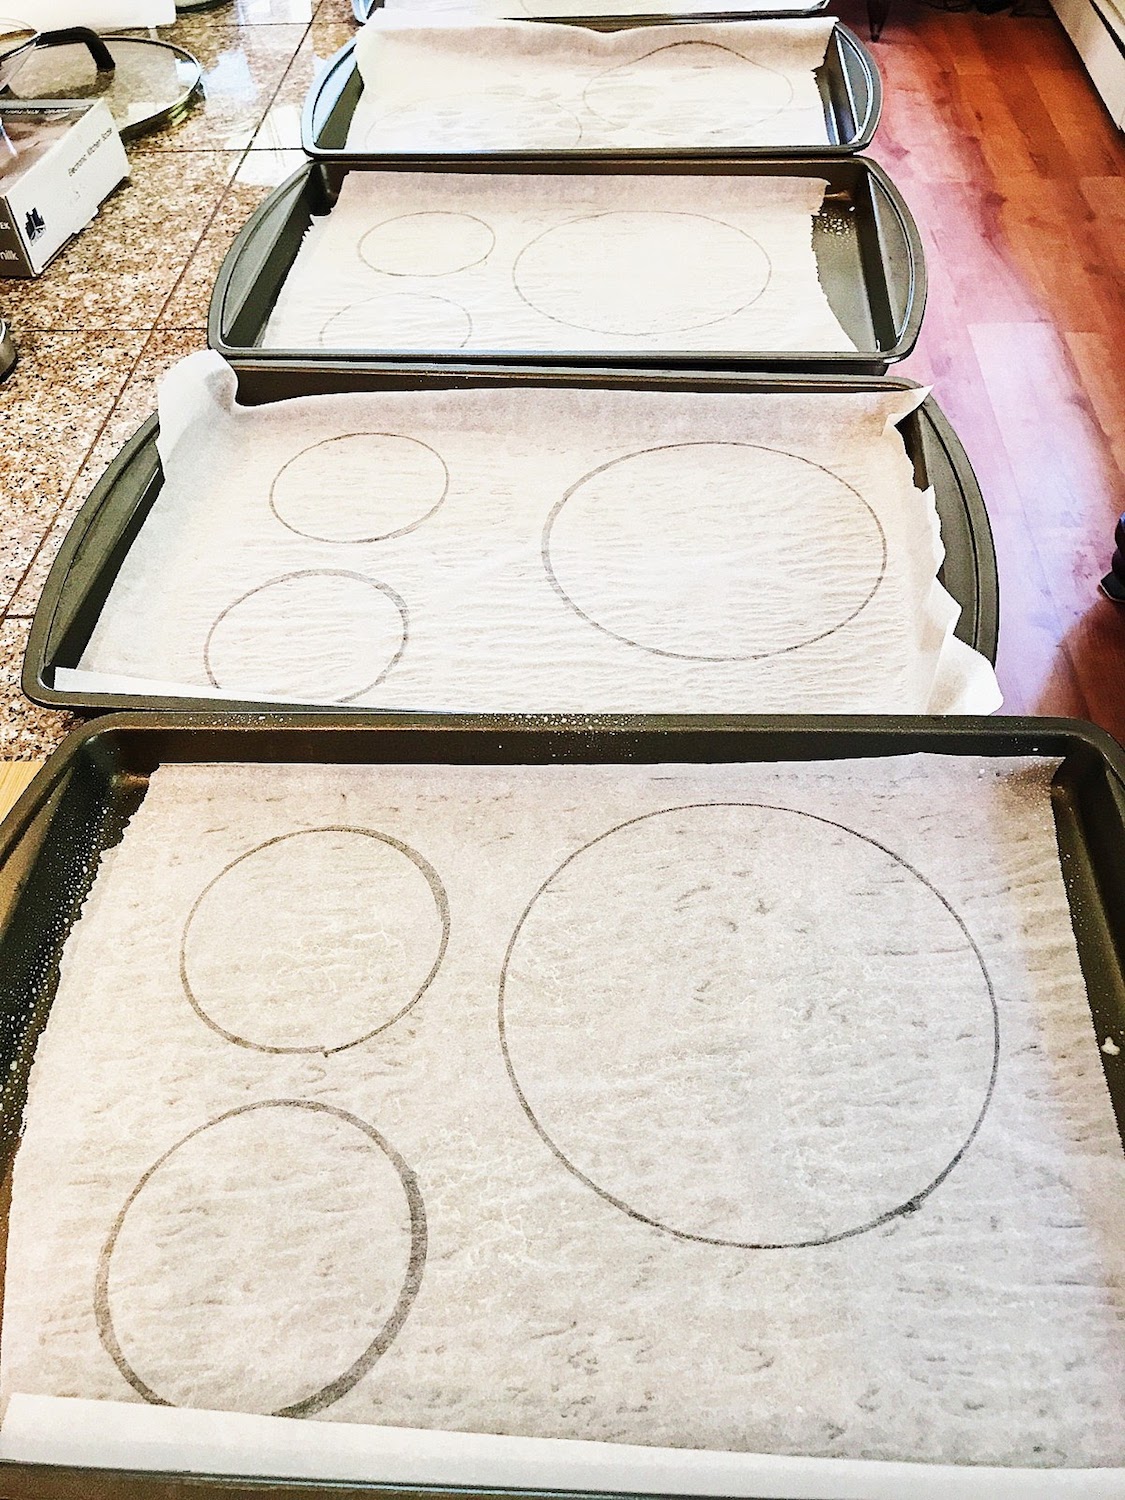
Cake Sponge
Preheat oven to 395 F and line 4 baking sheets with parchment paper. On each parchment paper trace one 8” circle and one 4” circle. You can start off with this and continue to reuse parchment paper or create more circles until you have used all the mixture or have reached your desired number of layers. Sift self-rising flour into a bowl. In a separate bowl, combine the eggs and sugar. Beat until it turns into a pale and fluffy mixture. Once eggs and sugar are combined, sift the self-rising flour in, ½ cup at a time. Be careful combining the flour into the egg mixture, this will prevent losing all the air you just created by beating the egg. Gently move a rubber spatula around the outside of the bowl and then move it thru the middle of the mixture. When the flour is fully combined the mixture will resemble a loose pancake mixture. Using a ladle, spoon mixture into your traced circles and smooth out with a pallet knife. You want the mixture to reach the edges you have traced out so the layers will be easy to trim. Place the baking sheets in the oven and watch carefully as then can overcook quickly, for my gas oven about 9 minutes was all that was needed. Repeat the process until you’ve reached the desired number of layers.
Assembly
Allow the layers to cool, this is pretty quick given the layers are so thin. Take individual 8” layers and lay them on parchment and place an 8” springform base on top and use that as a template to trim any excess off around the edges. Take one layer and place it on a cake stand, using your piping bag with strawberry buttercream (be sure not to use a tip, the strawberry bits will definitely get stuck) pipe buttercream on top of the layer and smooth with a pallet knife. Use the buttercream layers to help straighten any sloping edges. Once everything looks level, place another layer on top and repeat until you’ve reached your ideal height. You want to make sure that the final top layer does not have buttercream on top of it, otherwise it will compromise the smaller layer and be difficult to cover with the ganache.
Once the bottom tier is assembled you will want to crumb coat it. This is where the chocolate buttercream comes into play. Crumb coating prevents any loose cake bits disrupting the overall look of your frosting. Cover the entire outside of your bottom tier multi layered 8” inch tier in chocolate buttercream. You can now cover the outside with chocolate ganache and place in the fridge to set.
While the 8” base of the torte sets in the fridge, begin assembling the smaller second tier of the torte. You’ll repeat the same frosting concept as the bottom tier only now using the caramel buttercream. This tier does not have a separate frosting as a crumb coat, I just frosted the outside of the cake with buttercream. But if you wanted a more universal look you could also coat it with the ganache topping.
Decoration
On a baking sheet scatter your flaked almonds and using toothpicks, skewer pecans. In a heavy bottom pan combine 400g of sugar and 8 tbsp of water, and on a low heat dissolve the sugar. Once the sugar has dissolved stop stirring and allow it to caramelize, again the darker the color the more flavorful but it can burn very quickly. Once you’ve reached the ideal color, pour 2/3 of your mixture over the almonds and allow to set. The remaining caramel can be used to dip the pecans. Insert a toothpick into the pecan and run through the caramel. Once you have dipped them you can turn them over and insert the pick into an orange or grapefruit which will serve as a sturdy stand and allow them to cool and harden. Allow the caramel to cool completely before handling it to decorate otherwise it will melt the buttercream. To achieve the spun caramel effect, take a metal pick and dip it in the caramel, then quickly move it around an upside-down bowl. This will take some practice to get the temperature of the caramel right so it will start to stick. Keep making circular motions around the bowl until you’ve achieved the look you want.
I hope you all are as impressed and inspired as I am over Cameron's torte! For every relatively failed bake I've been having with my mom throughout this challenge, Cameron has made up for it with her incredible prowess and creativity in these showstopper bakes. Don't forget to follow Cameron on Instagram for more mouth-watering bake photos!
We're going to do the last three bakes a little differently. On the show, these bakes were done all together as part of the finale show. Because of some travel and general life circumstances, we're going to have these bakes presented together on Wednesday, July 19th... so, you'll really have to hang tight for our little Great Blogger Bake Along Finale!
Wednesday, July 19th
Victoria Sandwiches, Tartes au citron, and Scones

Bake #9 | Schichttorte
In case you're not up to speed, this is the ninth bake in The Great Blogger Bake Along series. Read about it here.
Finally! One I've actually done before! This is a German cake, and a few years ago, Tom requested it for his birthday after seeing a YouTube video of someone making one. My parents happened to be visiting, so my mom and I took this on together. I actually liked that recipe better than this one, but let me explain further in a moment.
The Challenge
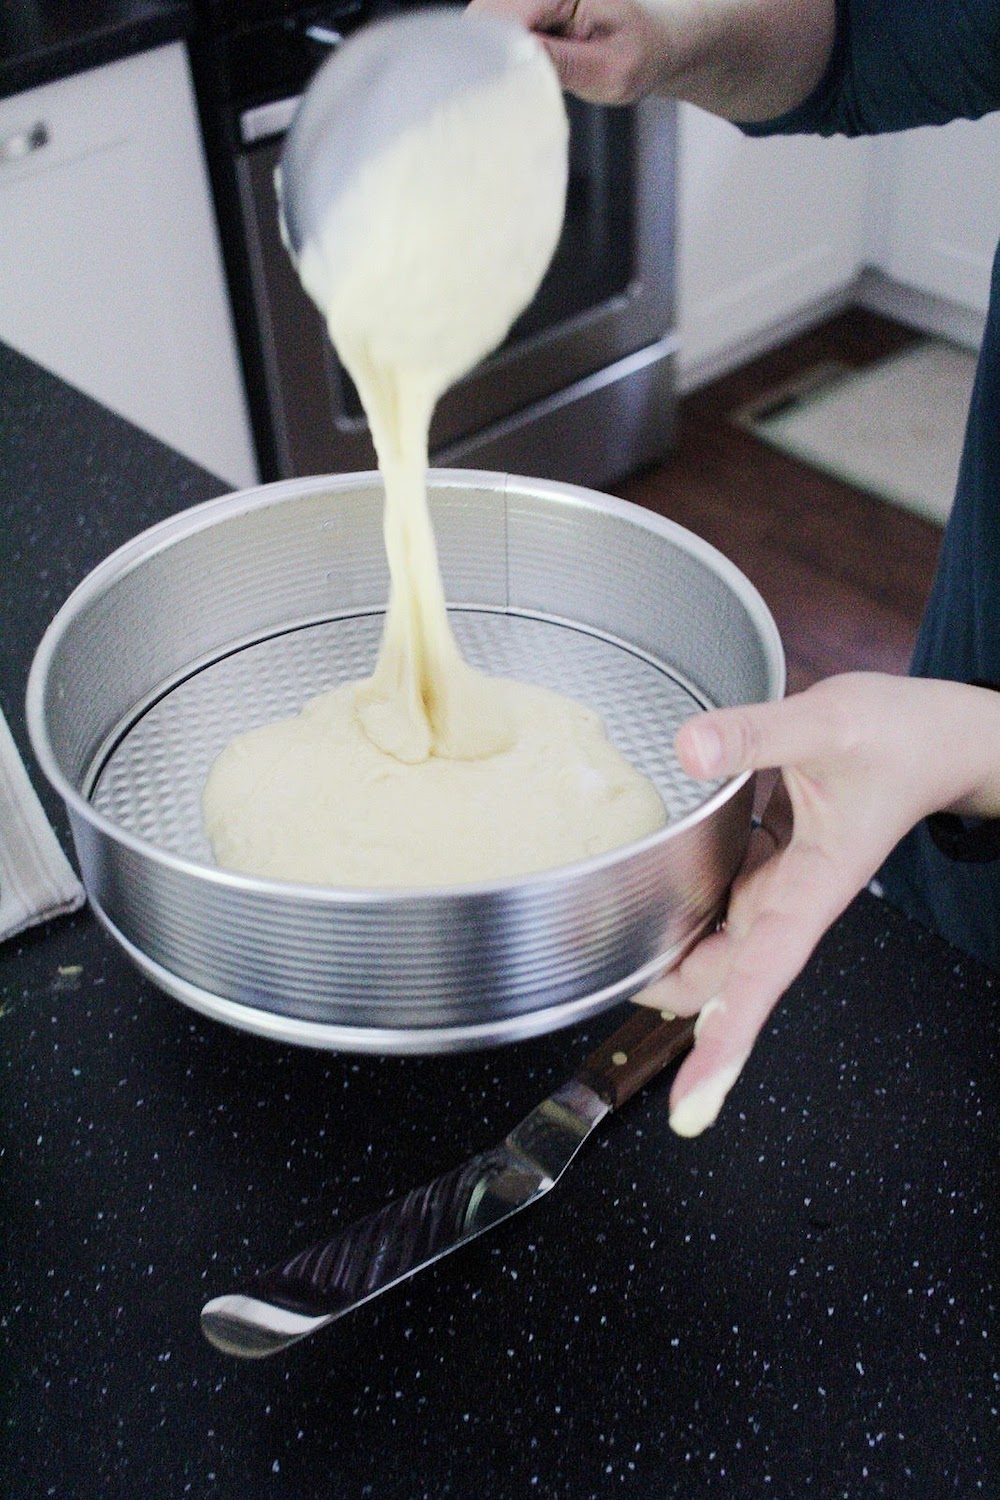
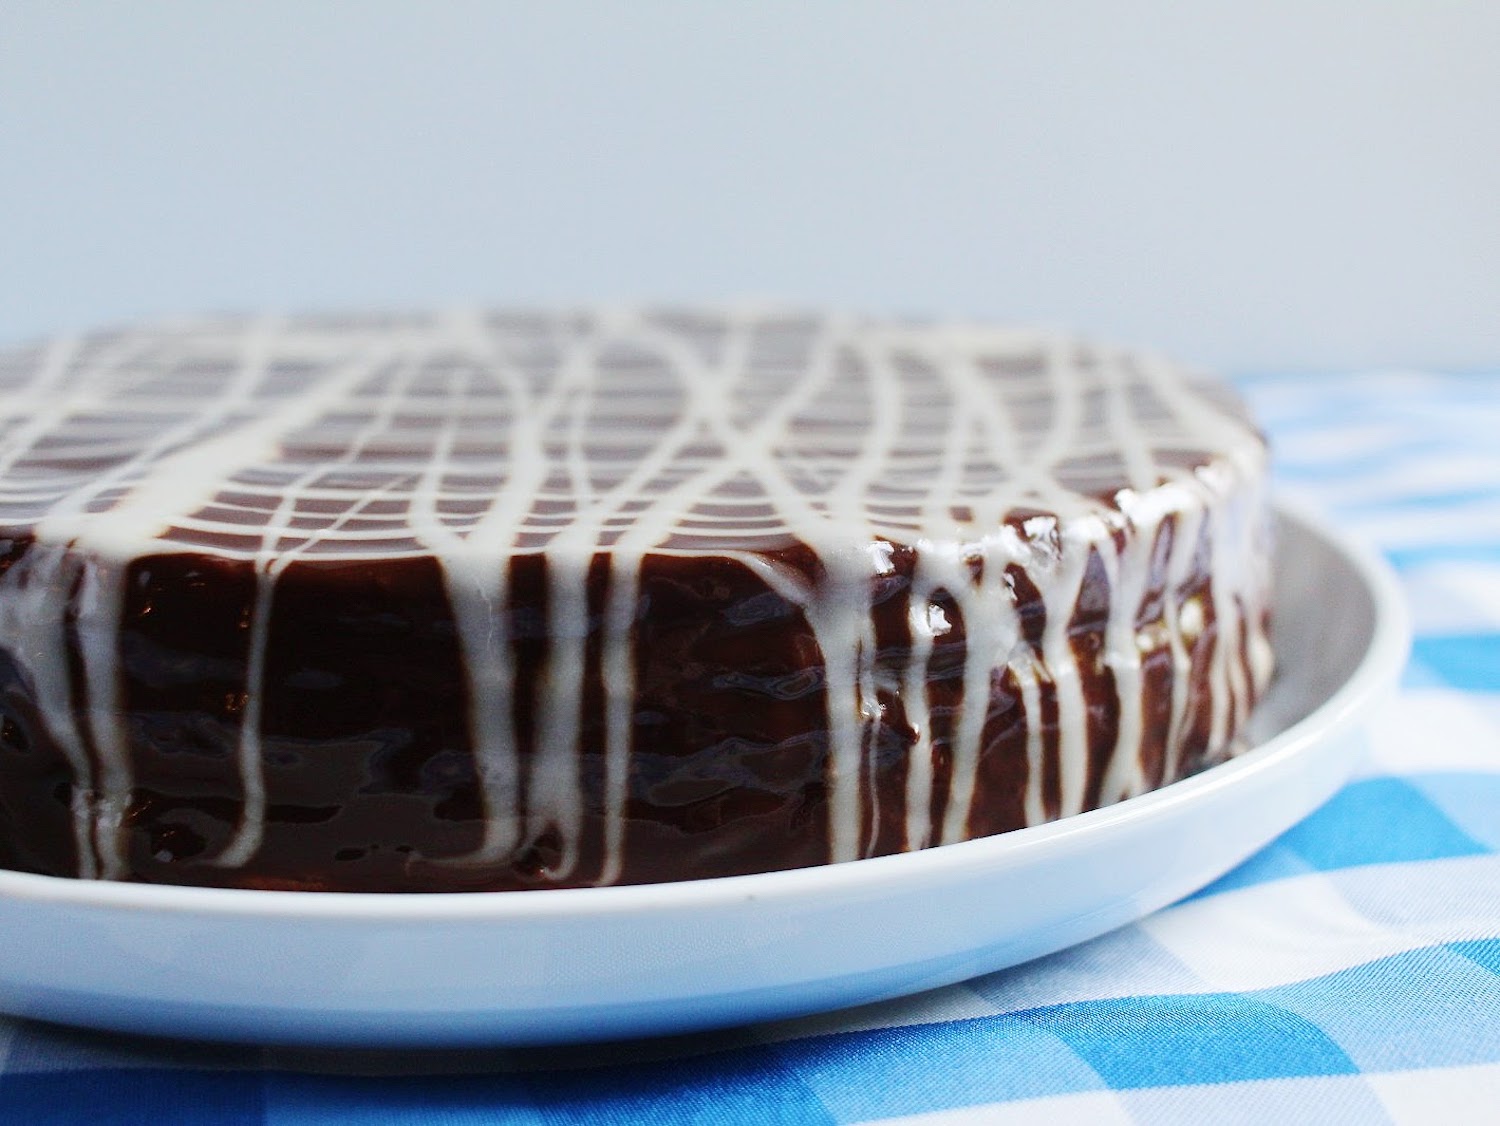
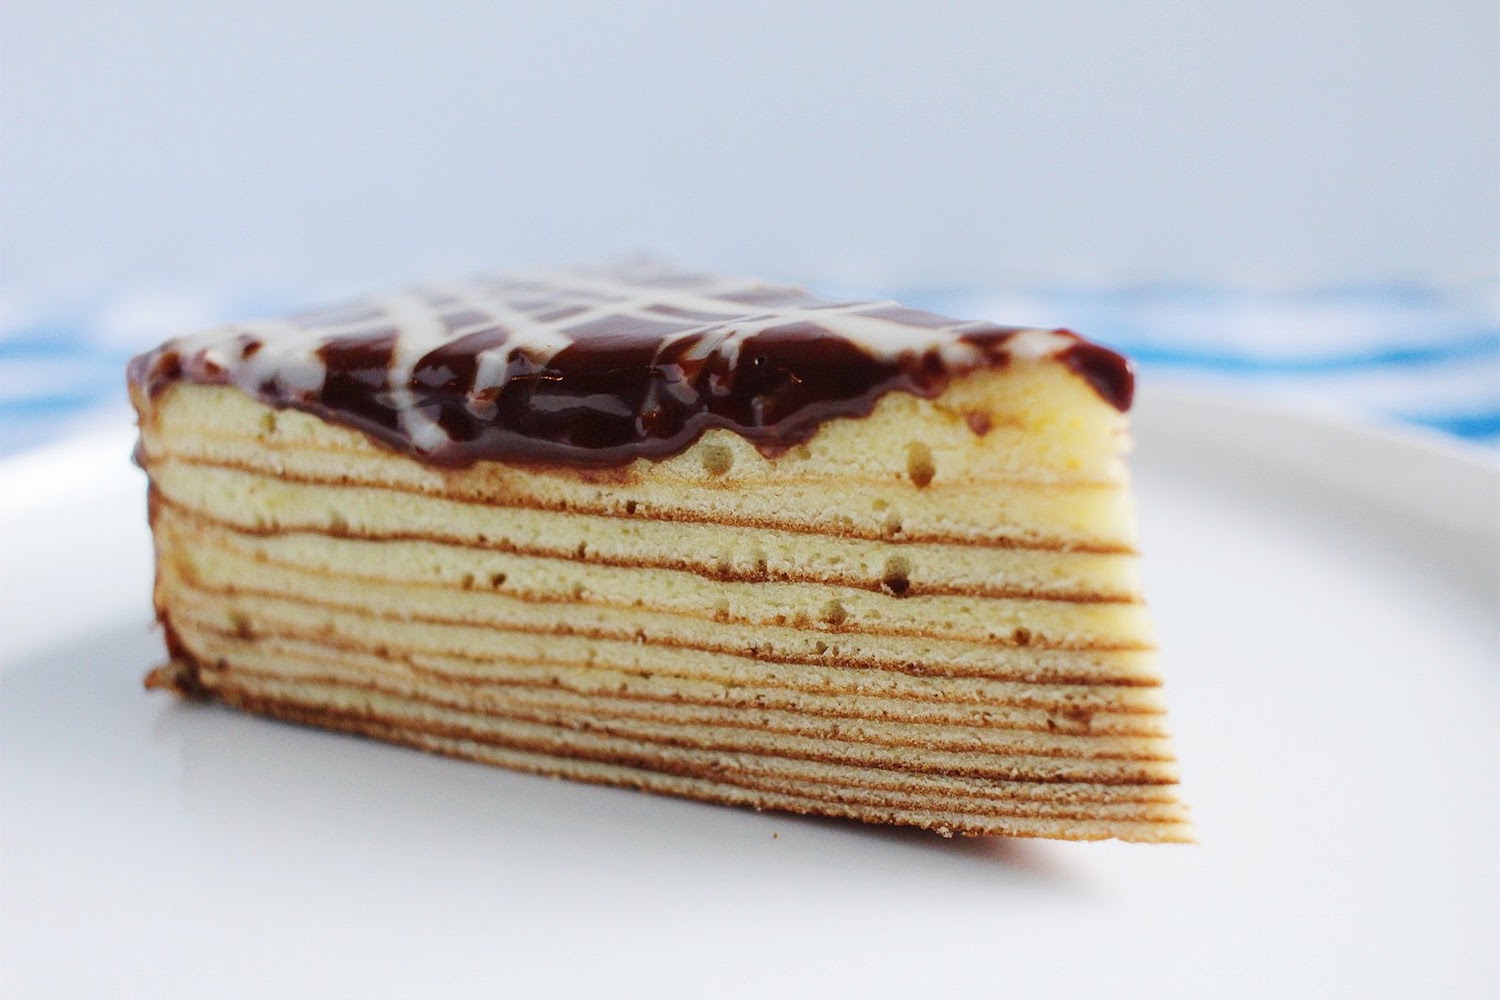
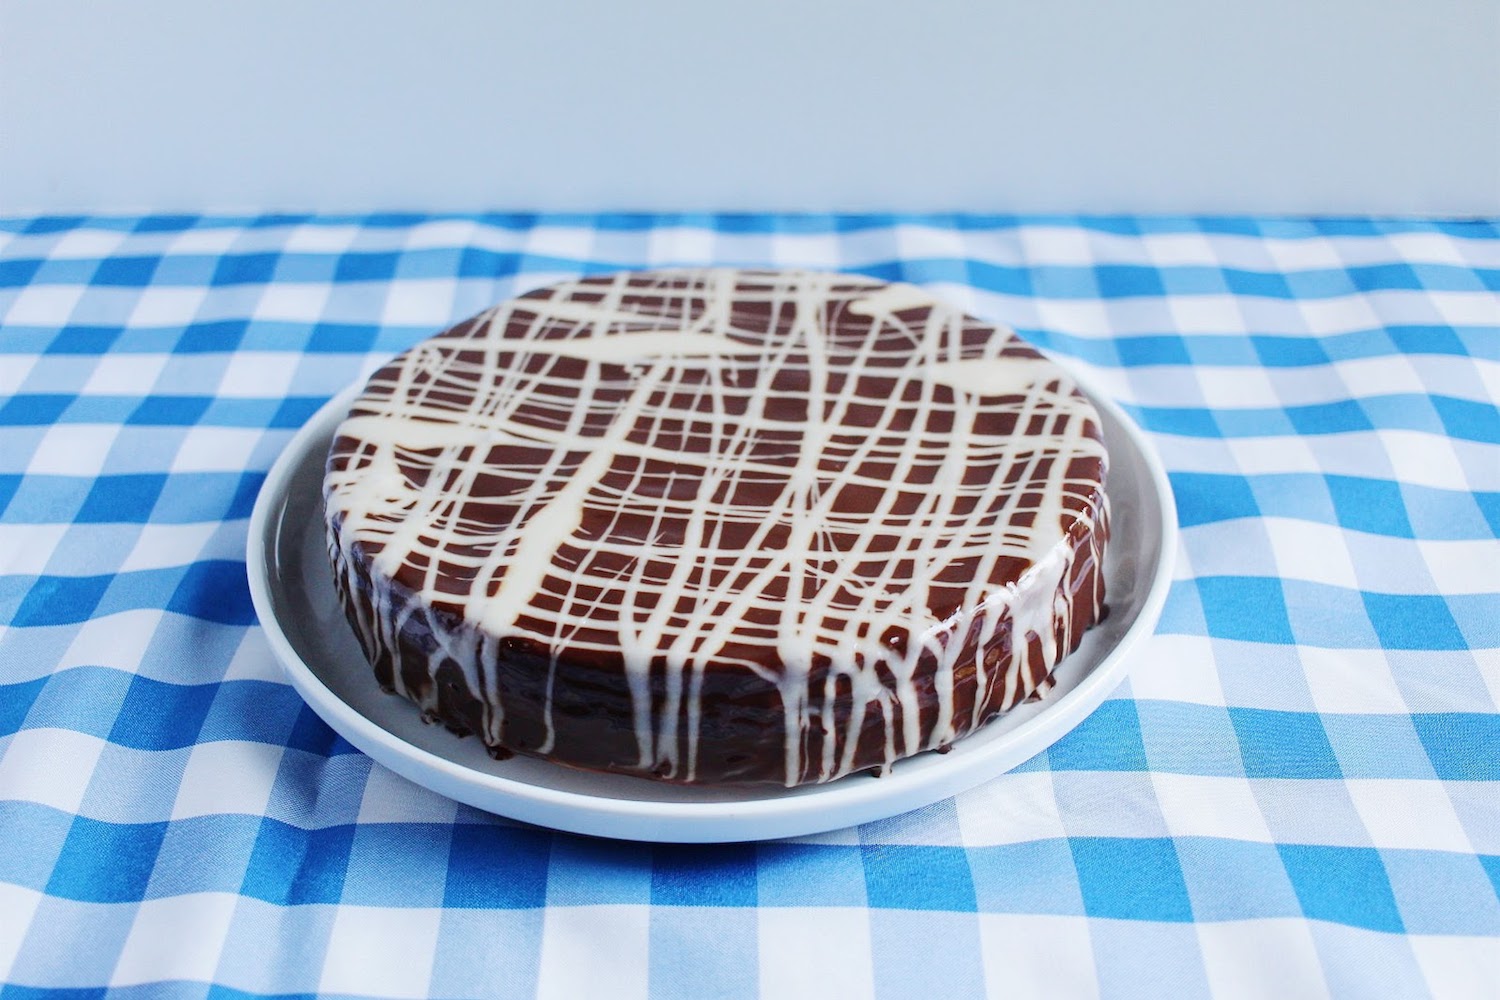
This schichttorte recipe. A twenty layer sponge cake with a chocolate/rum frosting and sugar and rum white frosting. I've also seen this called baumkuchen or "tree cake."
The Outcome
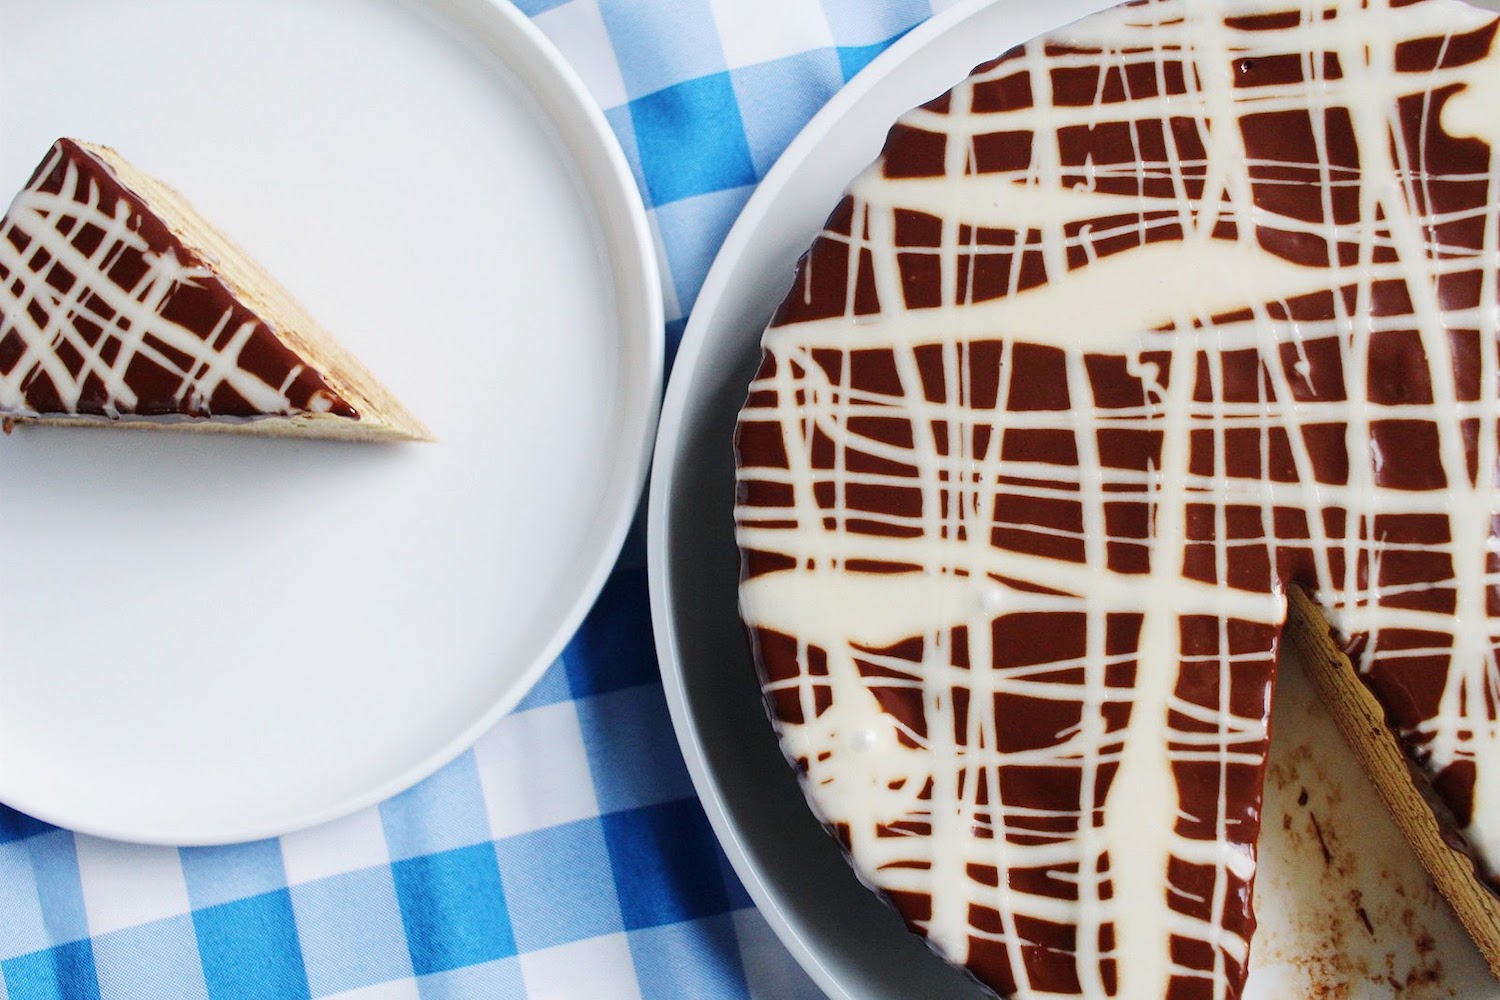
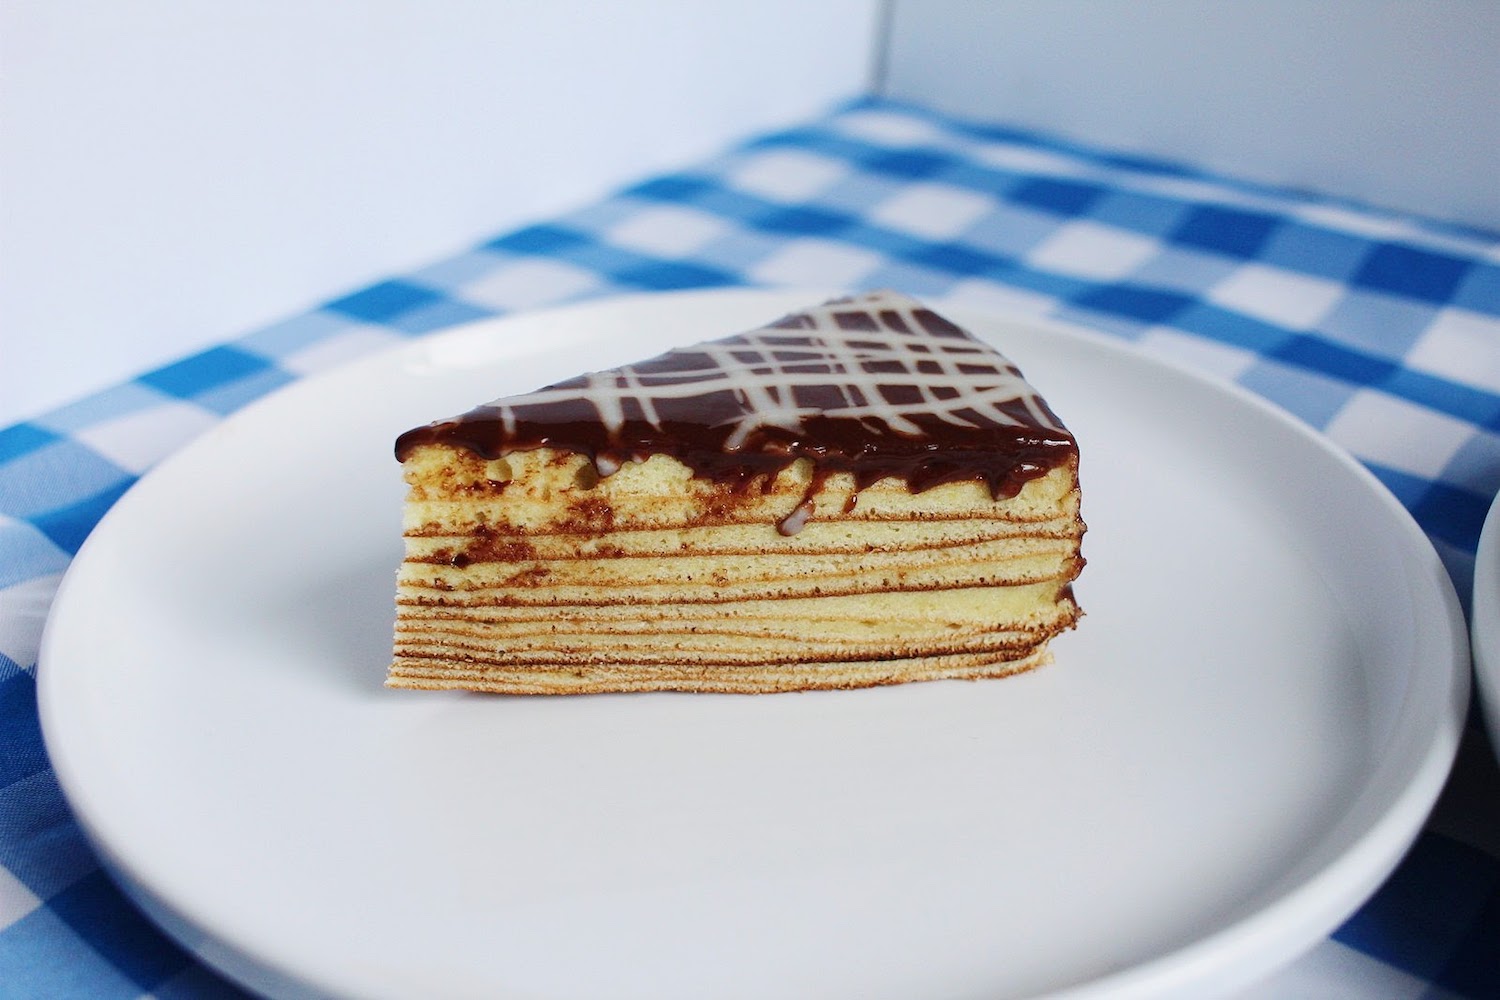
This type of cake turns out so pretty. I've now made a cake using this method three times, and it makes me want to experiment using other batters. It's a very eggy sponge, which is personally not my cup of tea, but the taste was okay. The only problem that both my mom and I came across, is that the layers get hardened, and essentially over-baked. It ended up being rather dry and both my mom and I cut off the bottom of our cakes and ate the top layers with frosting. Oh, the frostings were delicious! I'd be happy to put both of those frostings on just about ANYTHING.
Would either of us bake this again?
Overall, we were a little underwhelmed with this recipe, but the technique is actually quite fun and easy. I'll gladly make this cake again using a different batter, but the same frostings. If you're an amateur baker, looking for a 'fancy' way to make a cake, don't be afraid to give this a try!
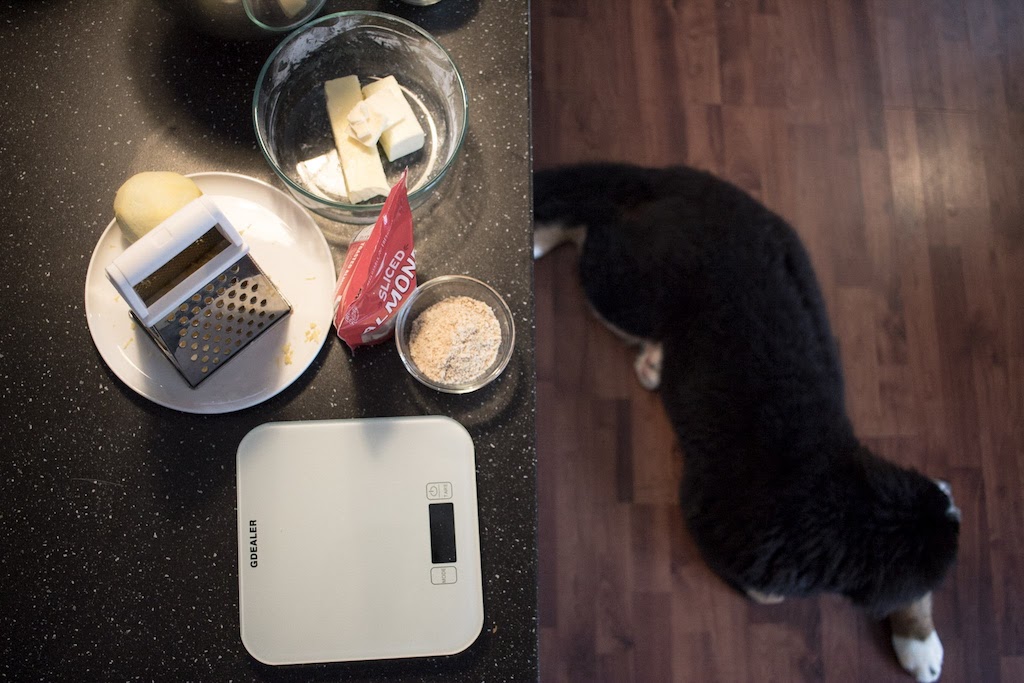
Here's the glamour shots...
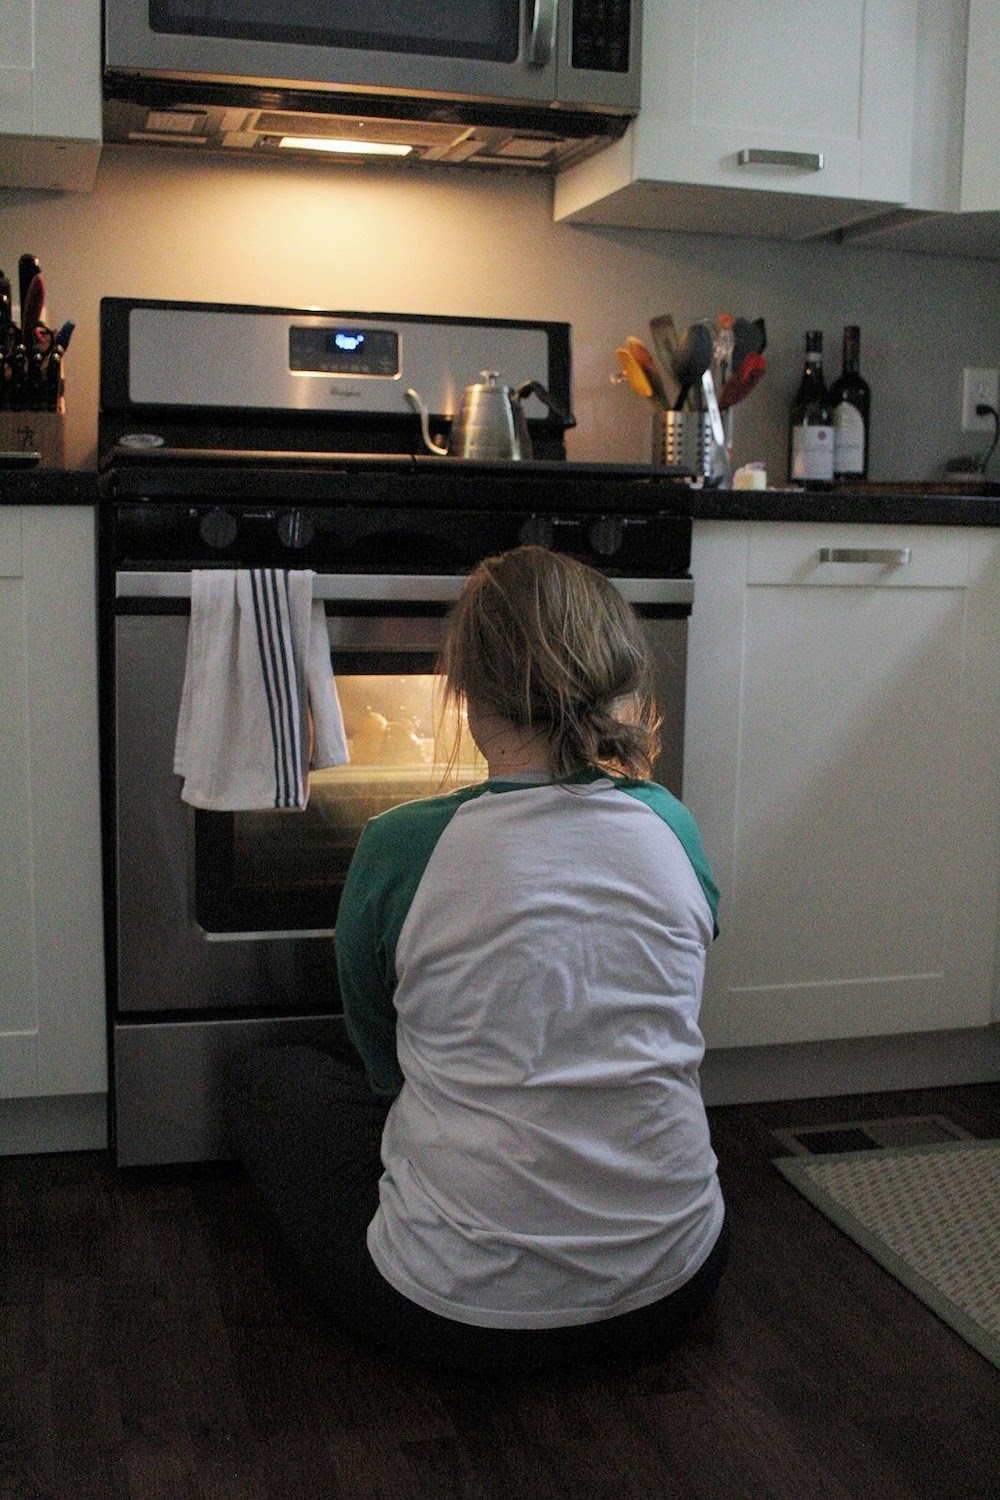
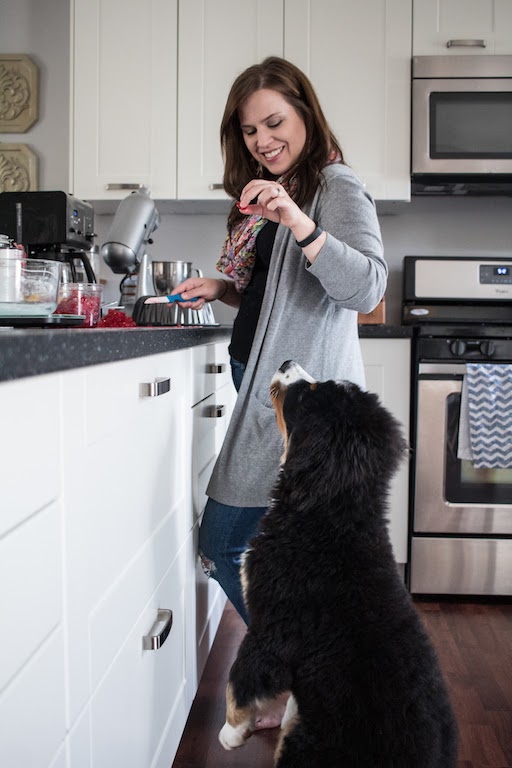
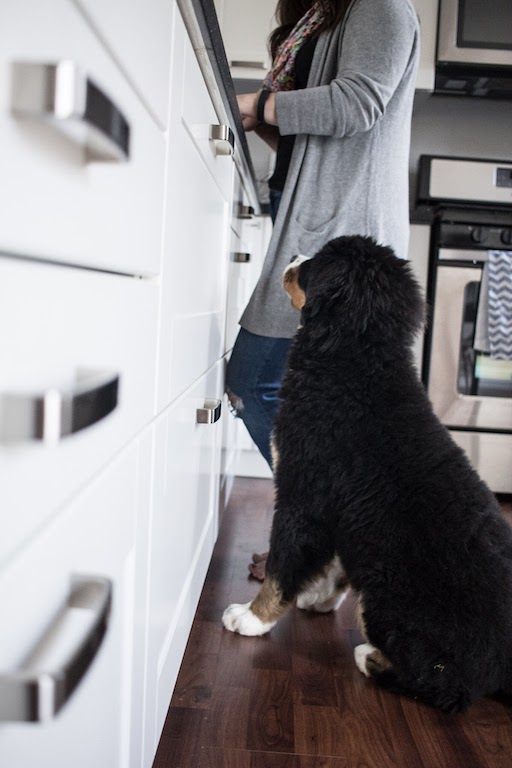
(take note of the four-legged one who can't resist getting a little too close while I take photos on the floor)


Here's my mom's report
This week's challenge was going to be pretty easy because Joy and I made this a few years ago. Actually, that one turned out nicer than this one. For some reason the "sponge" in most of these challenges turns out heavy and dry. I certainly appreciate a cake with some density and texture, but this cake was so thick and heavy it was hard to swallow. Slicing it into practically paper thin slices helped.


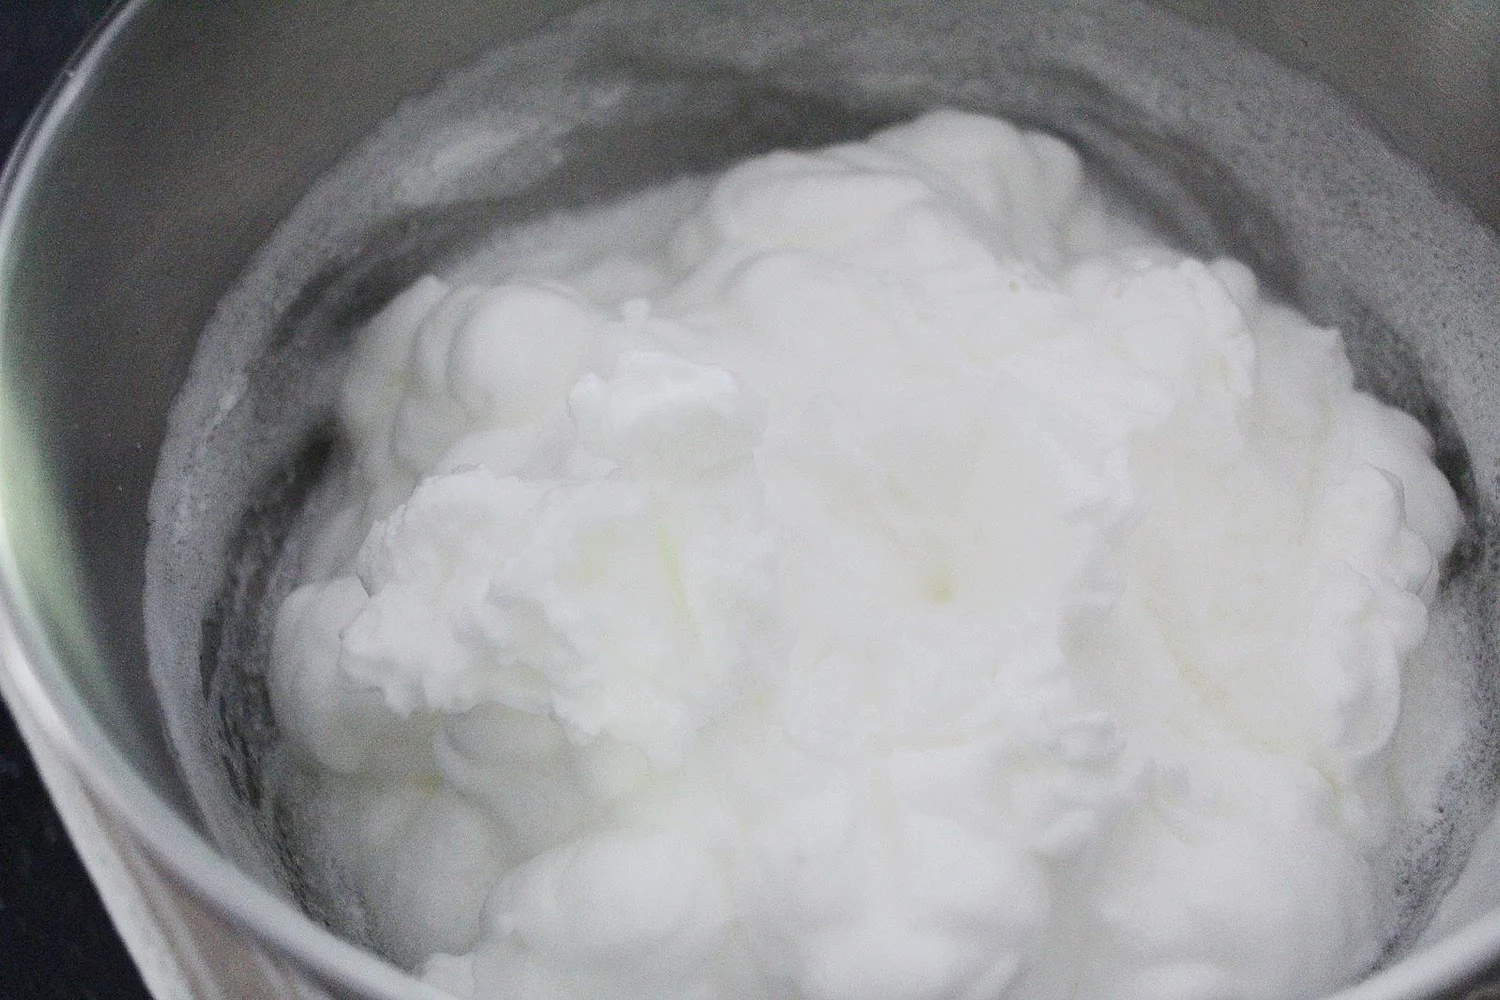
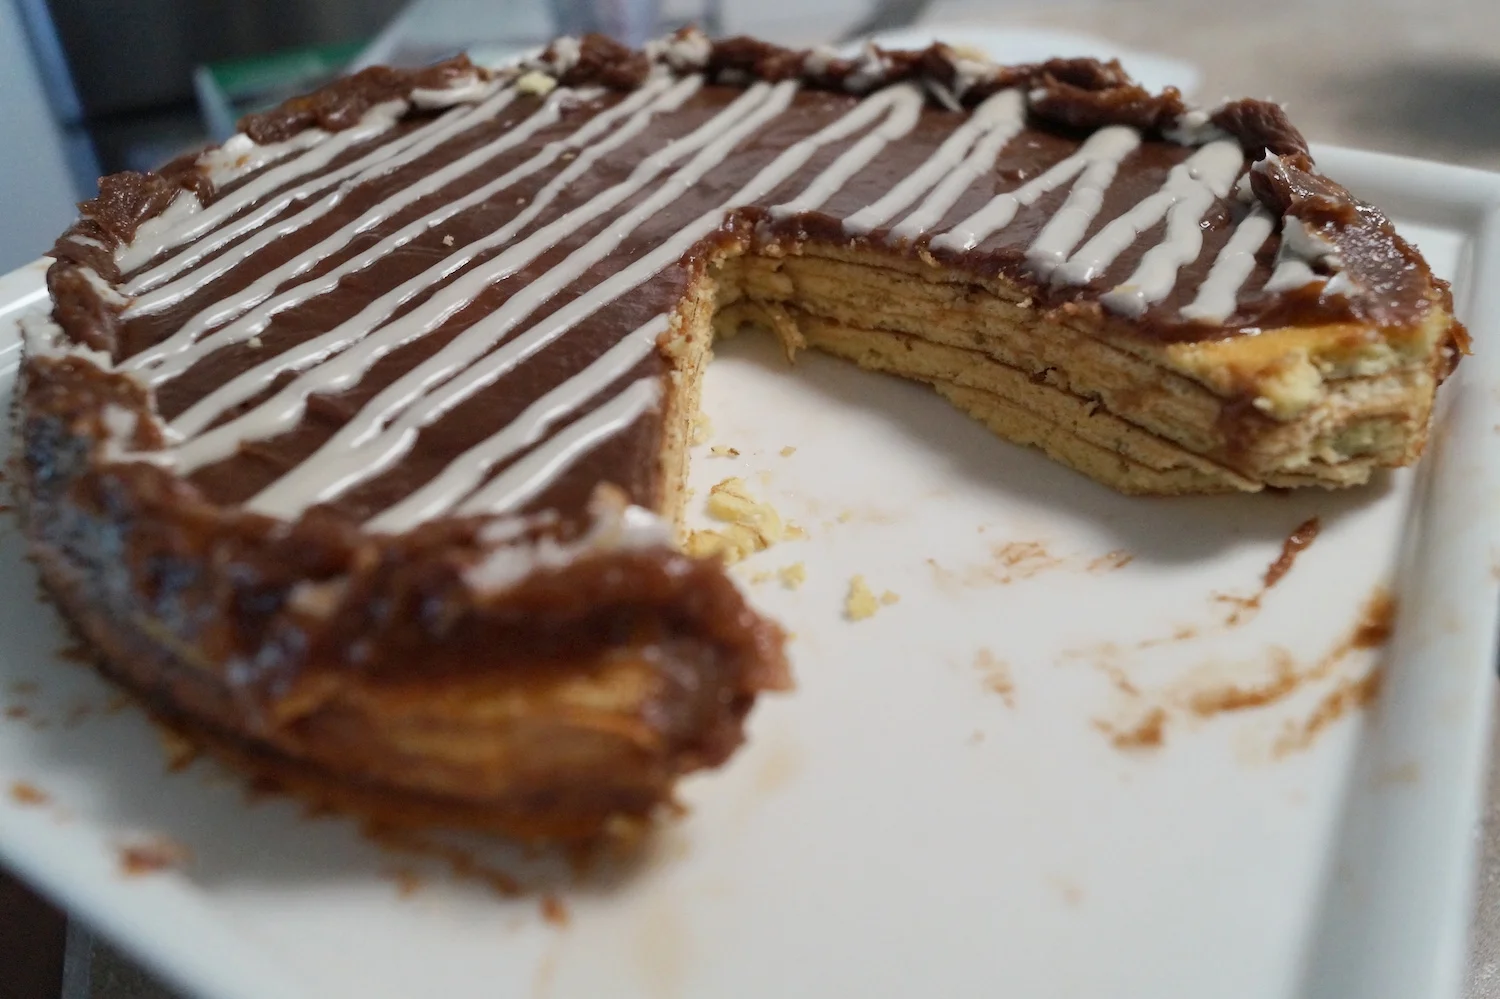
Making the rings (layers) was a whole new way of baking a cake. Under the broiler. It had to be watched carefully and I was pleased with how my layers turned out. The outcome in appearance was lovely, but taste... not so impressed.
My review:
Once I cut the bulk of the cake away and put the bottom half where it belonged we did enjoy eating the rest. The chocolate glaze was delicious. Perhaps a bowl of the chocolate with the cake cut into chunks for dipping is the answer. If I did that, I would have made another variation of this cake called "Baunkuchenspitzen." (Tree cake Pieces) I would make this again using a different recipe.

This really is a fun type of cake to make and with the right recipe, is a not-too-sweet little dessert. I'd recommend trying this one (it's the one I had made previously) or even this one where the same guy uses a box cake mix.
Wednesday, June 14th
Another special Showstopper Bake by our guest Star Baker, Cameron!
See her last showstopper here! I cannot WAIT to see what she's been baking for us! Also, you guys should know she doesn't send me her post or even tell me much about her bake until a day or two before it goes live, which makes it extra exciting for me :) So I'm always just waiting on the edge of my seat!
Also, because of summer schedule conflicts, my mom and I have decided to do our final finale bake (which is actually THREE bakes) on July 19th, so stay tuned!
That finale will include Victoria Sandwiches, Tartes au citron and Scones

Bake #7 | Kouign Amann
In case you're not up to speed, this is the seventh bake in The Great Blogger Bake Along series. Read about it here.
Stop what you are doing, go to the recipe link in the next paragraph, and make this. This has been the favorite bake in this house so far. Or maybe the florentines? Regardless, I think it's safe to say we're going to love the French and Italian cuisines on our Europe trip in the fall. Florentines and ciabatta are Italian, and these delicious pastries are French. I even got the stamp of approval on my Kouign Amann pastries by a real Frenchman earlier this evening!
The Challenge
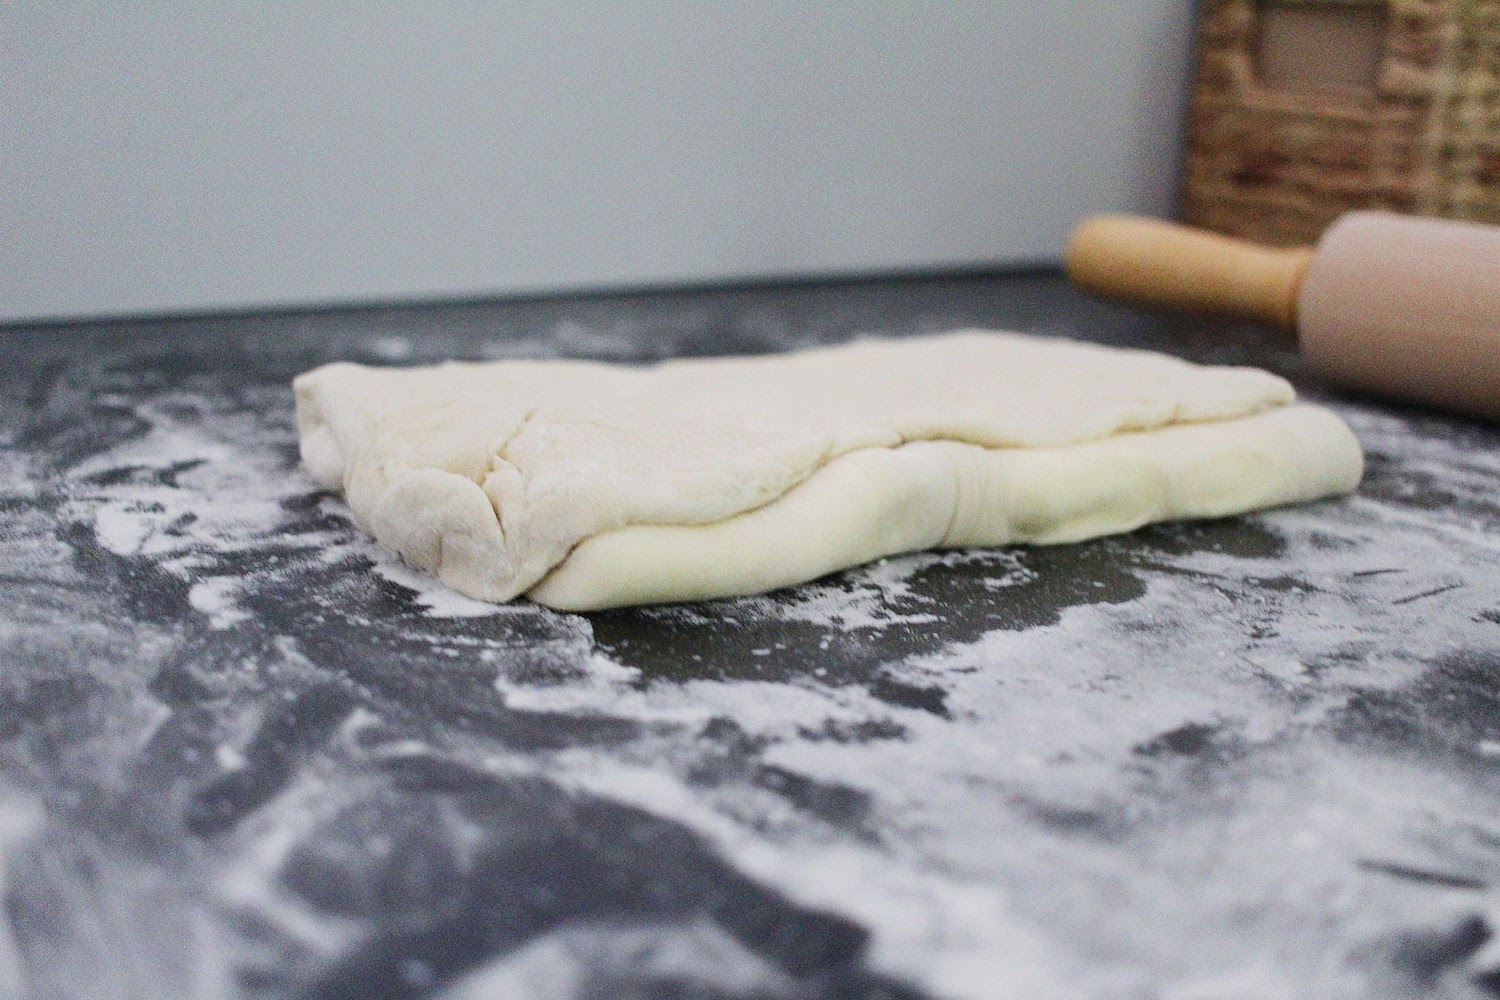
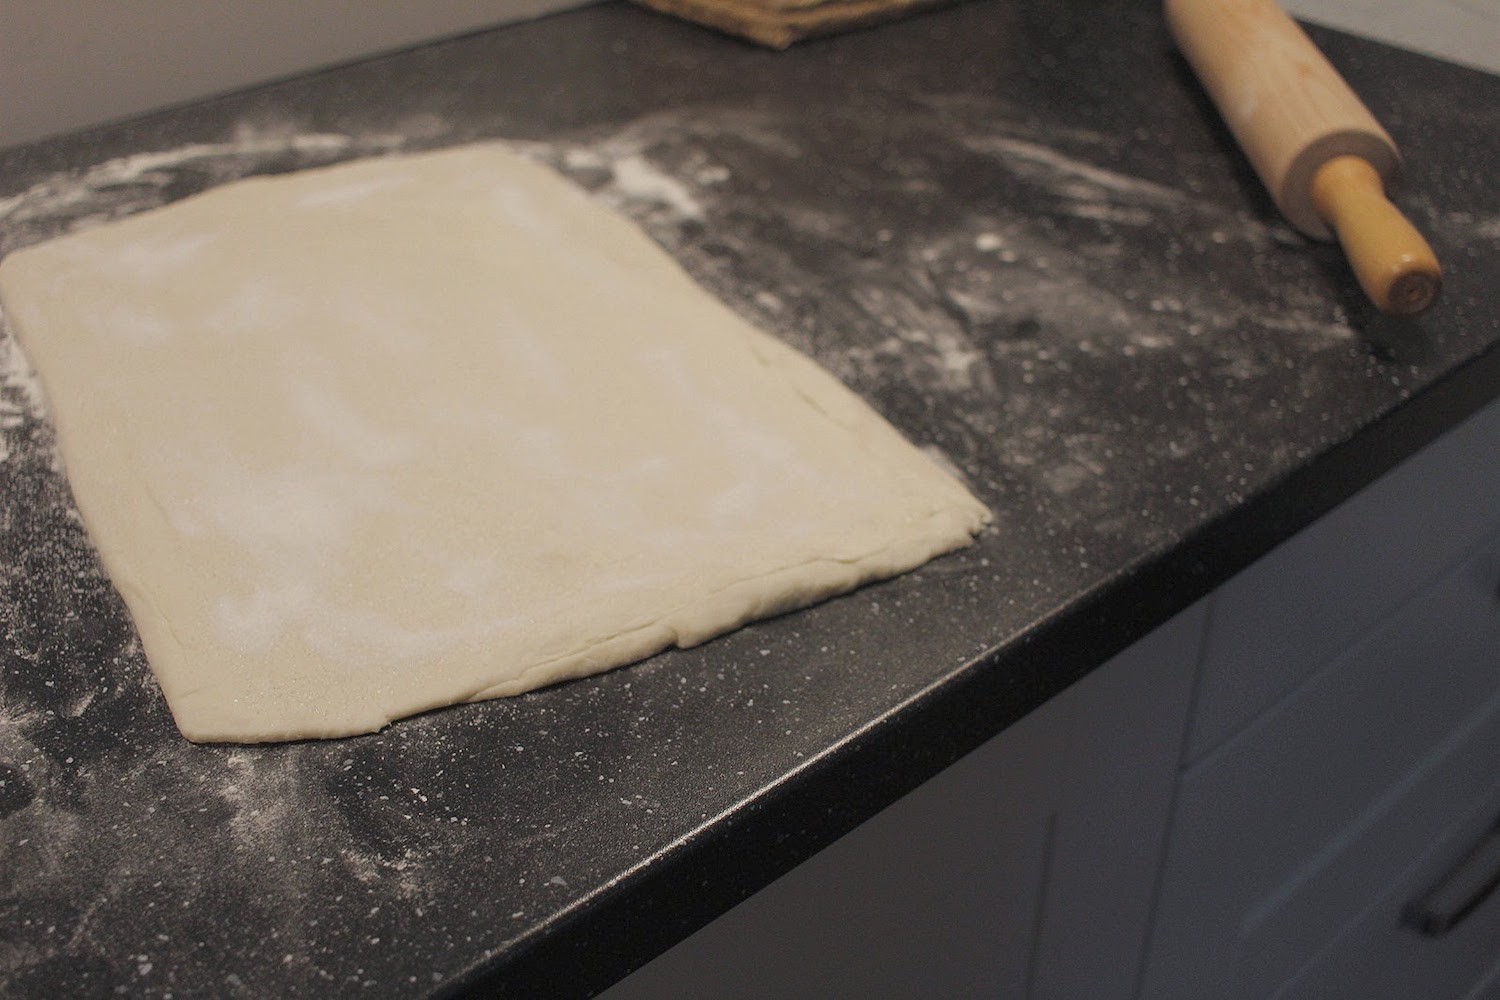
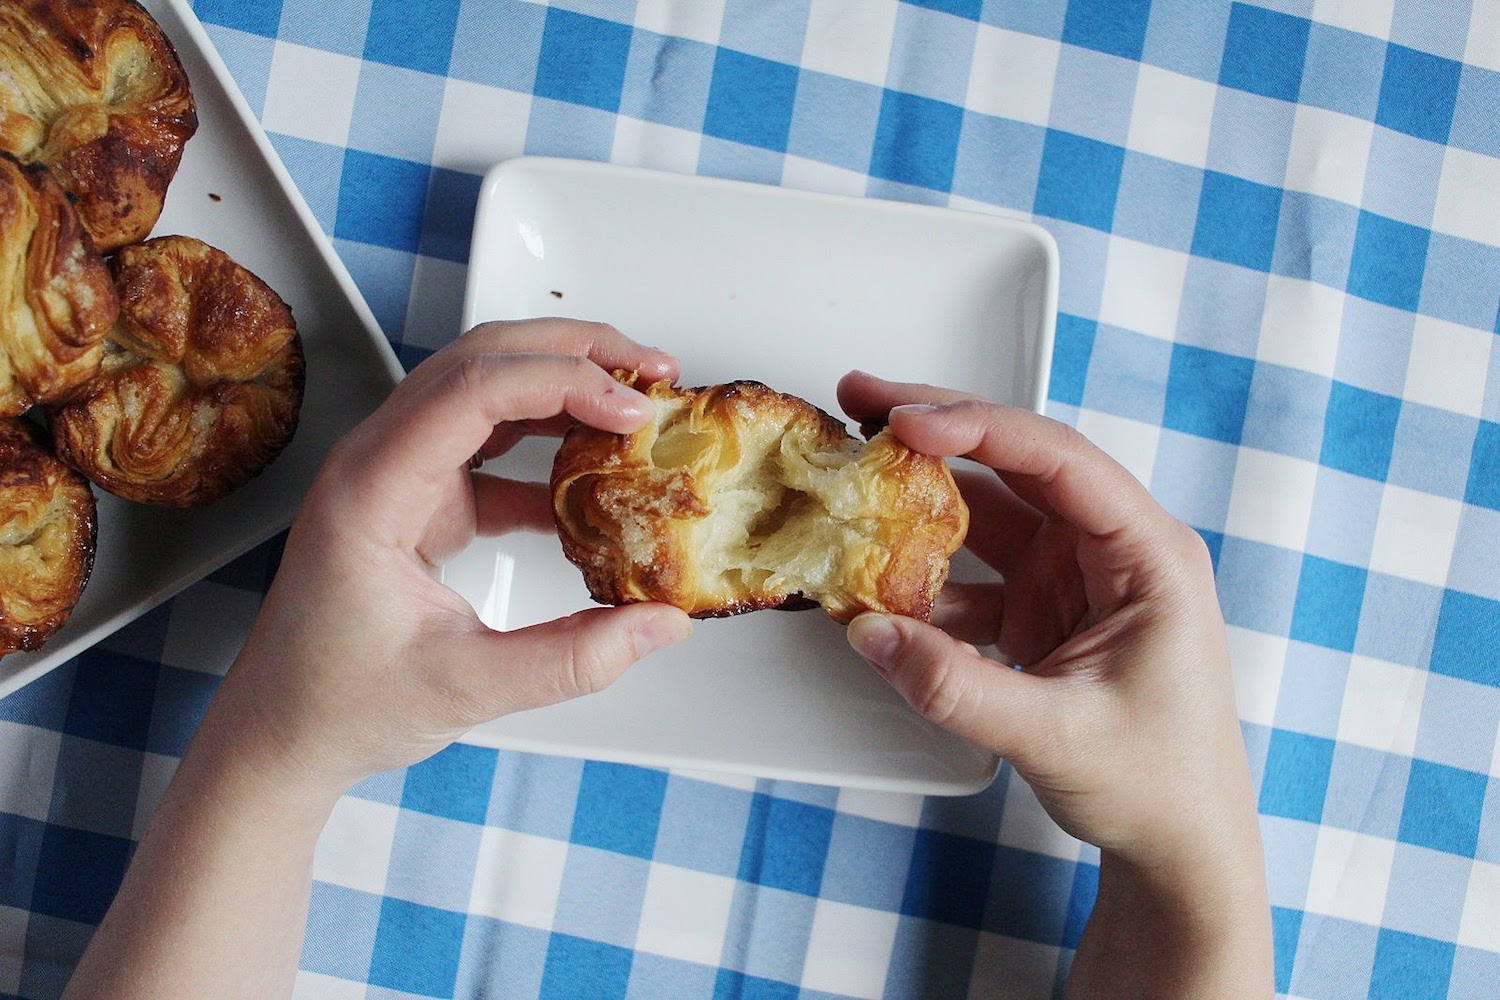
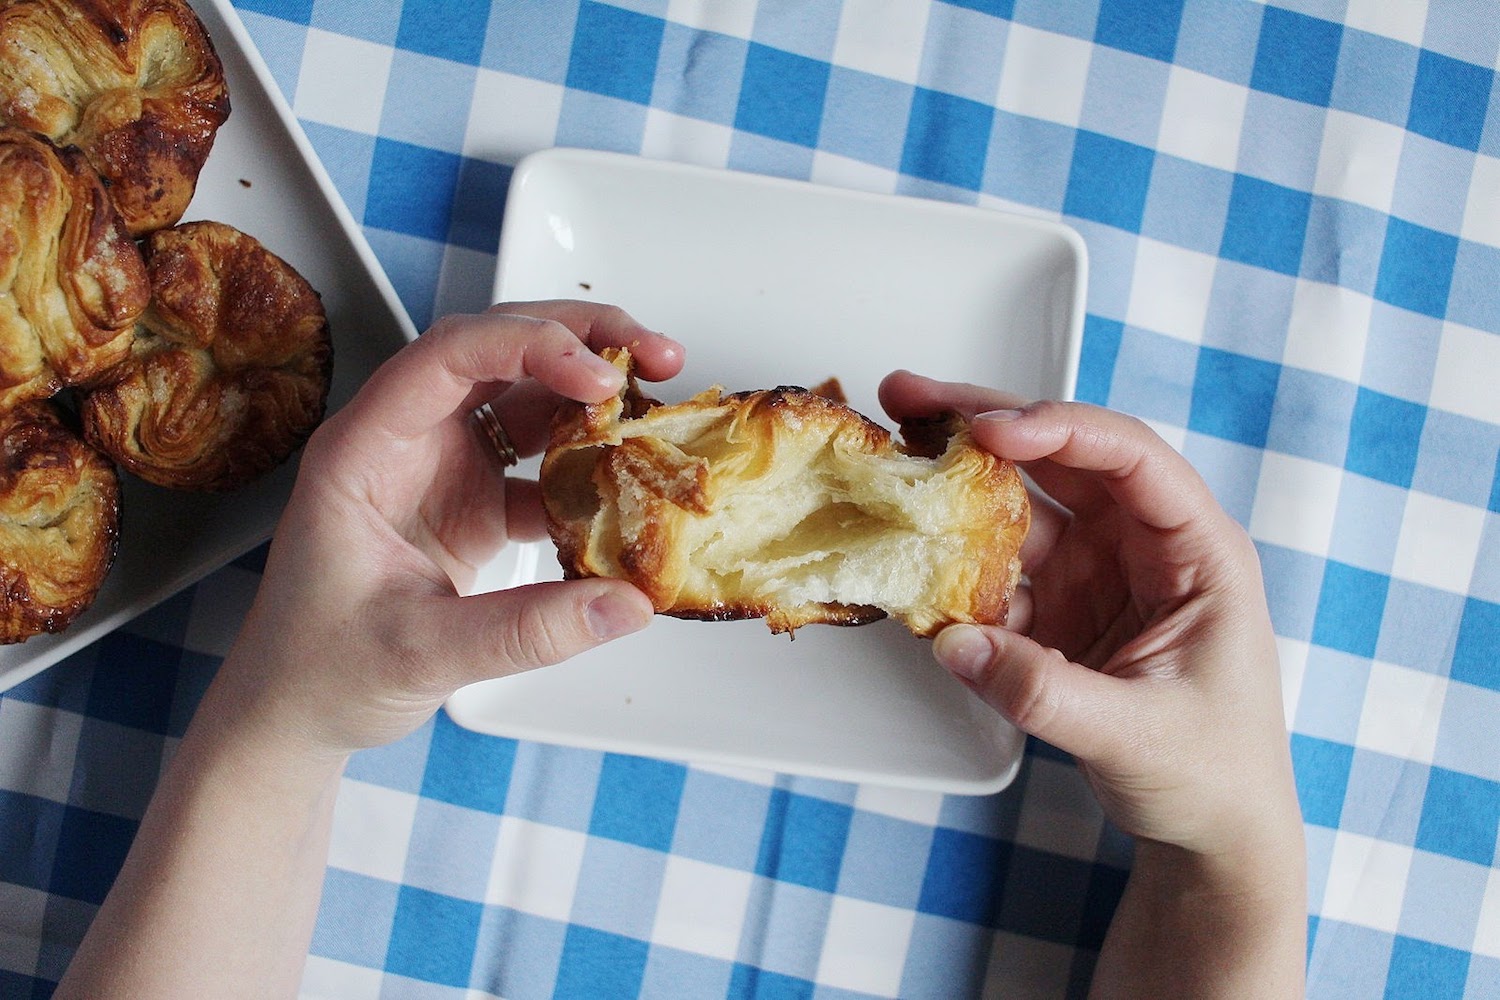
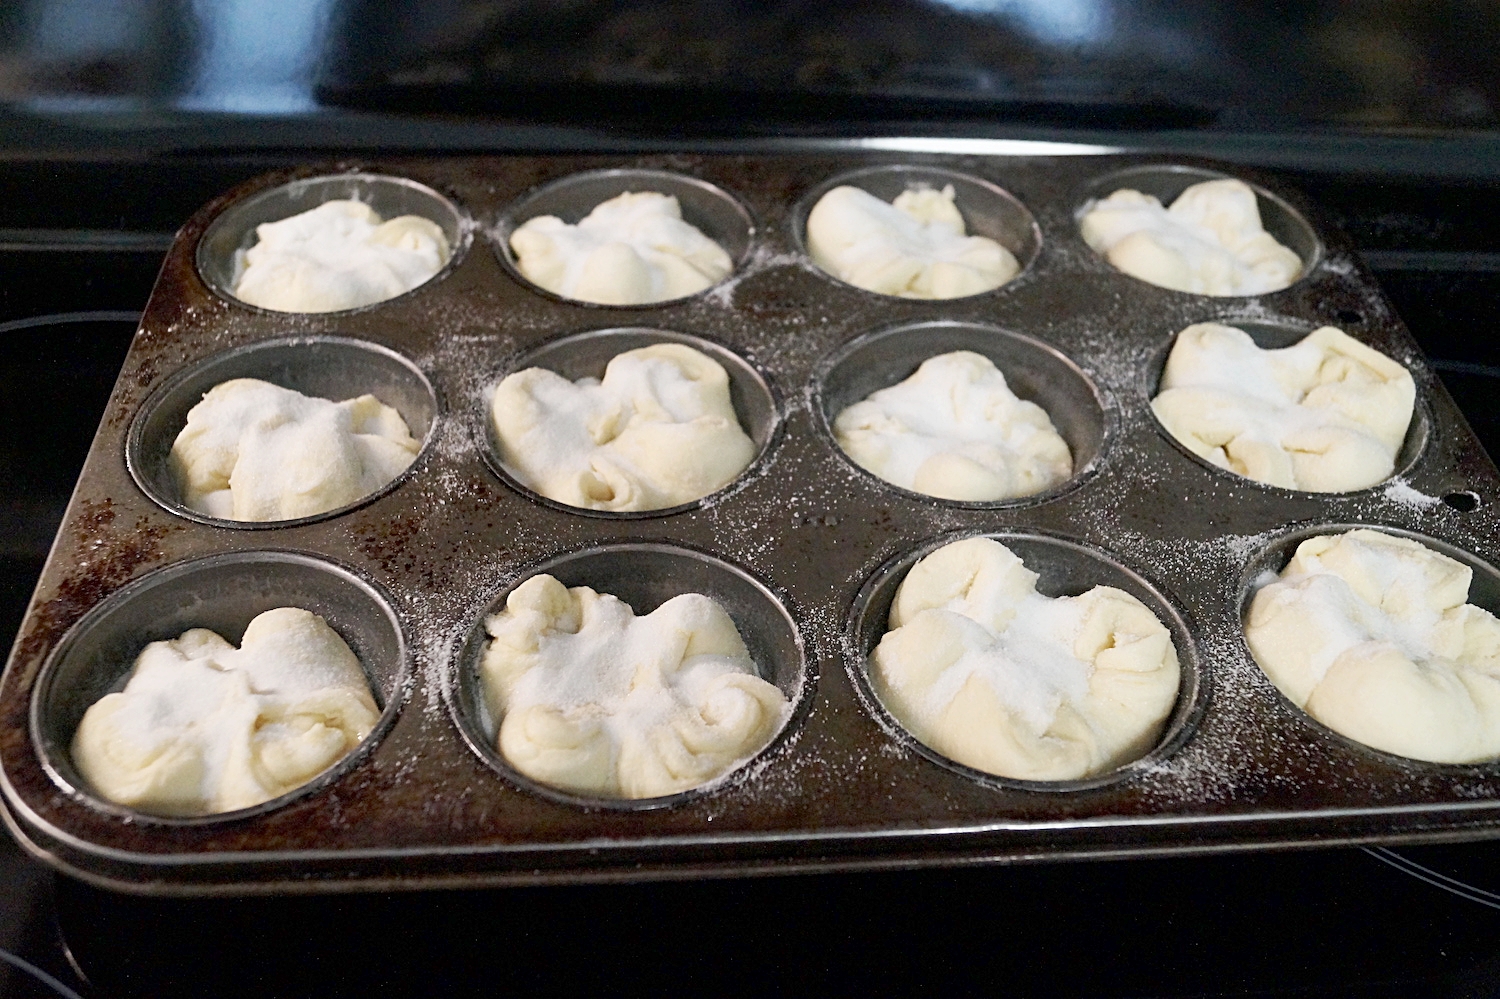
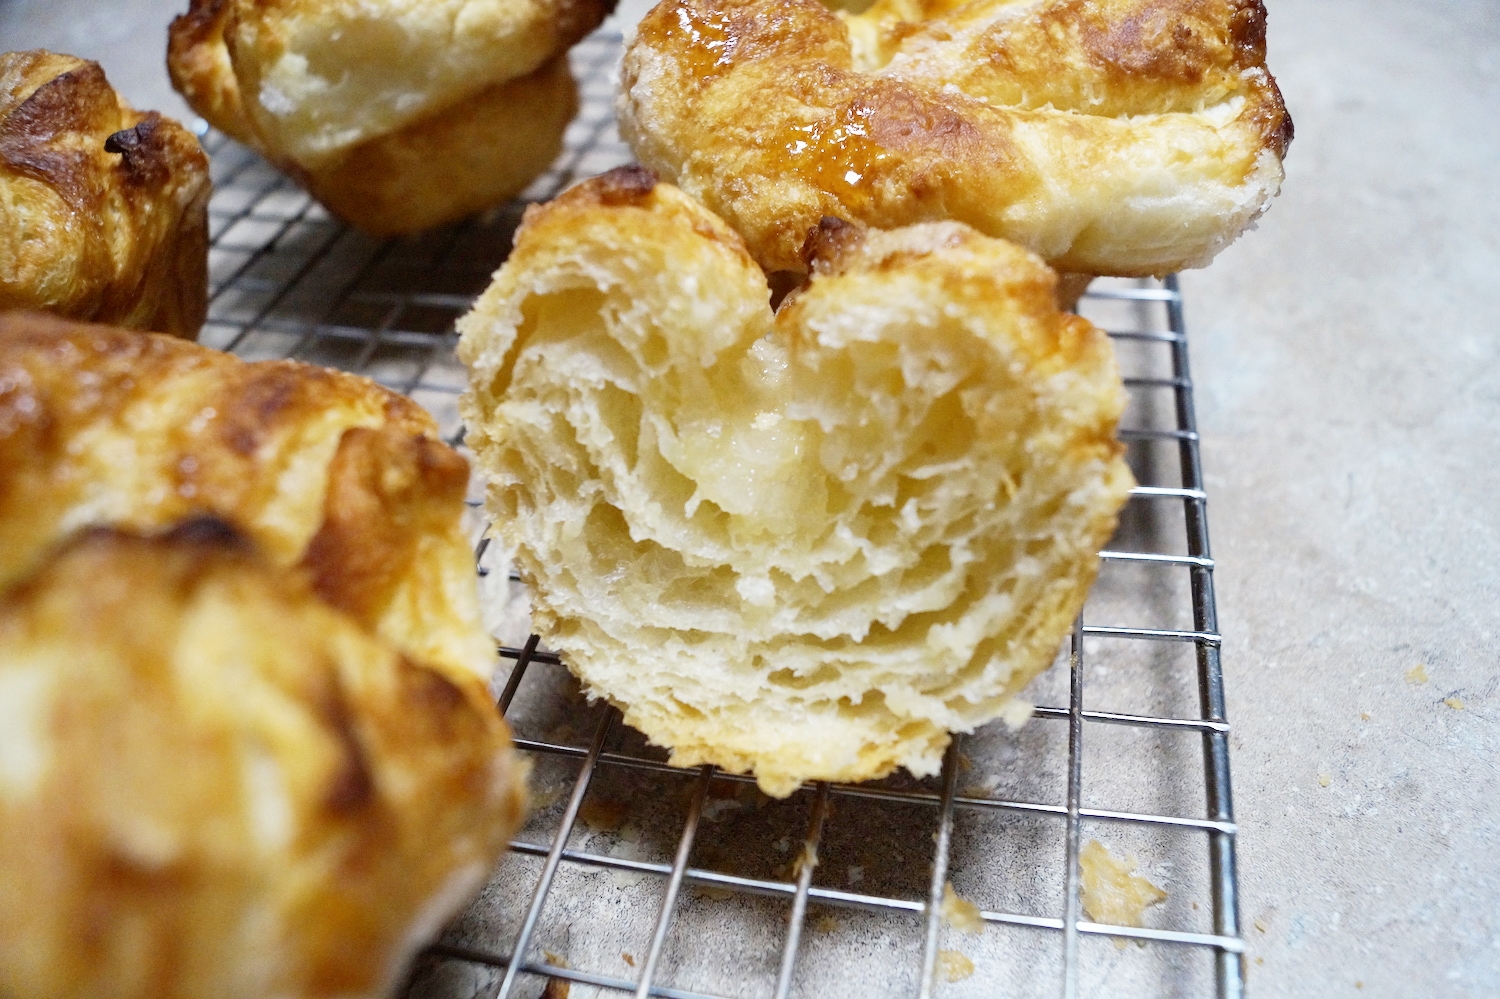
Kouign Amann pastries with a crusty outer layer and perfect, buttery, sweet layers inside.
The Outcome
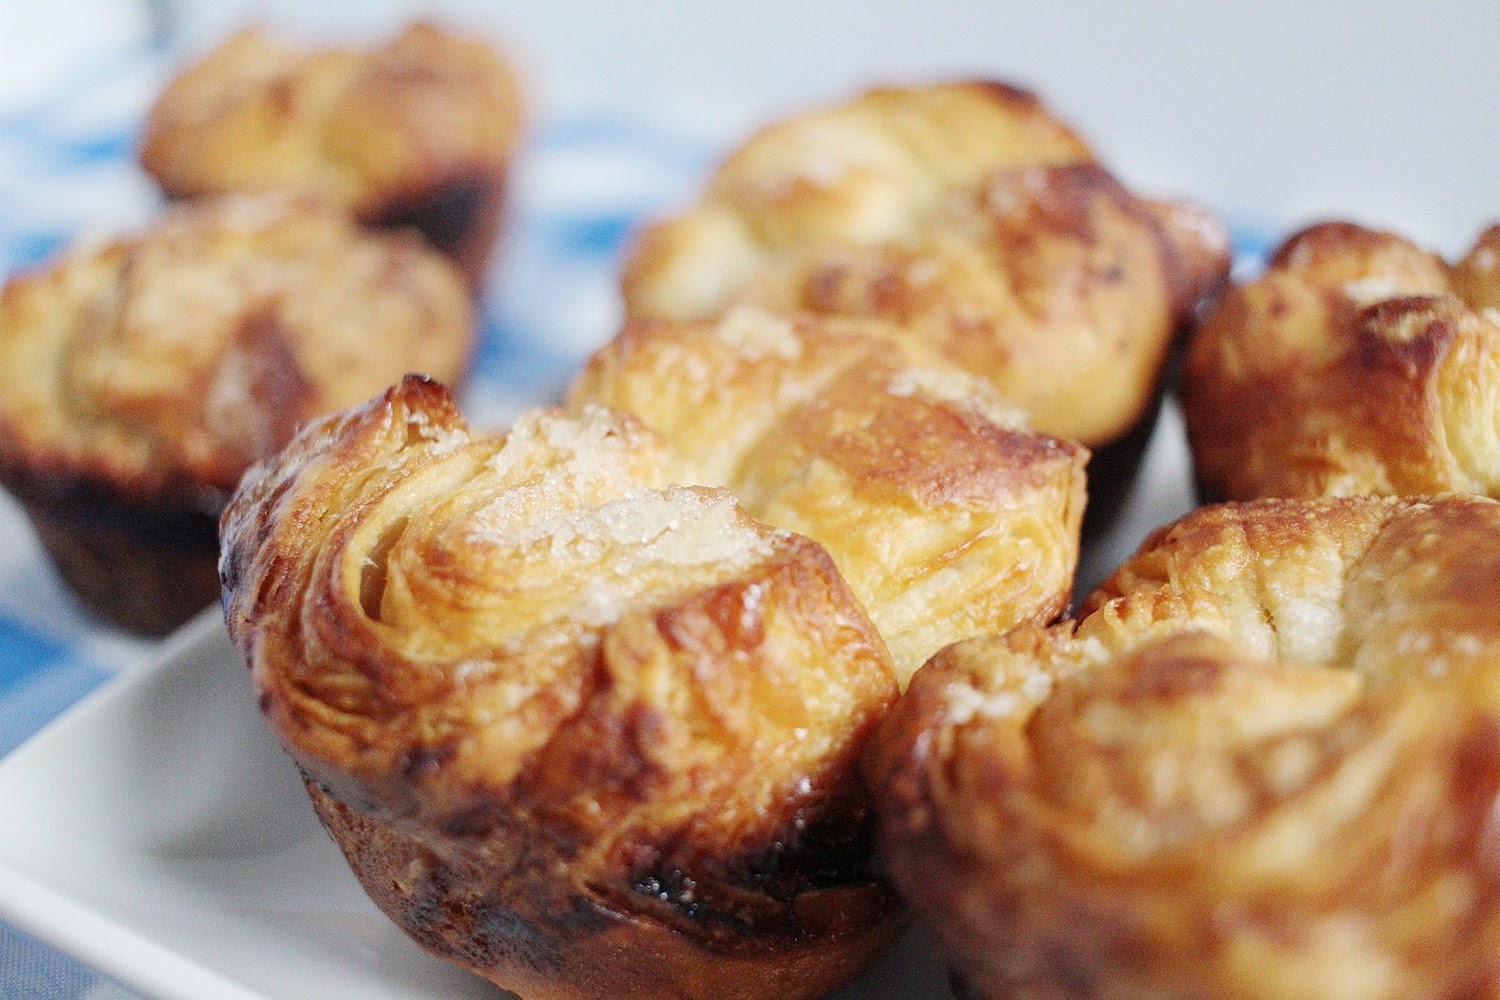
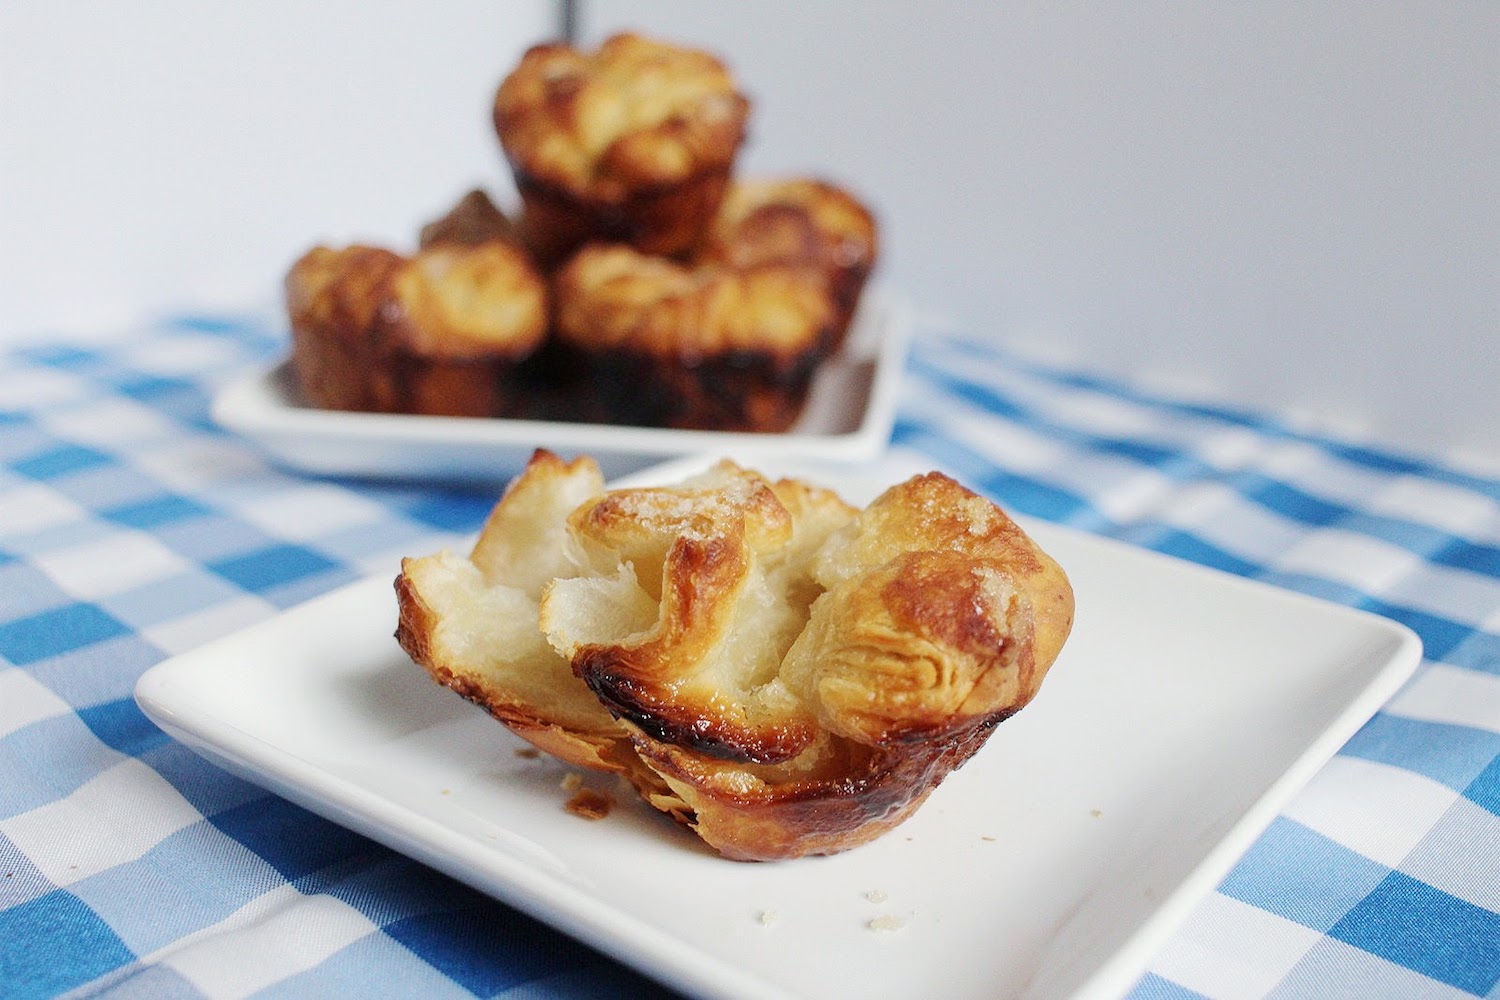
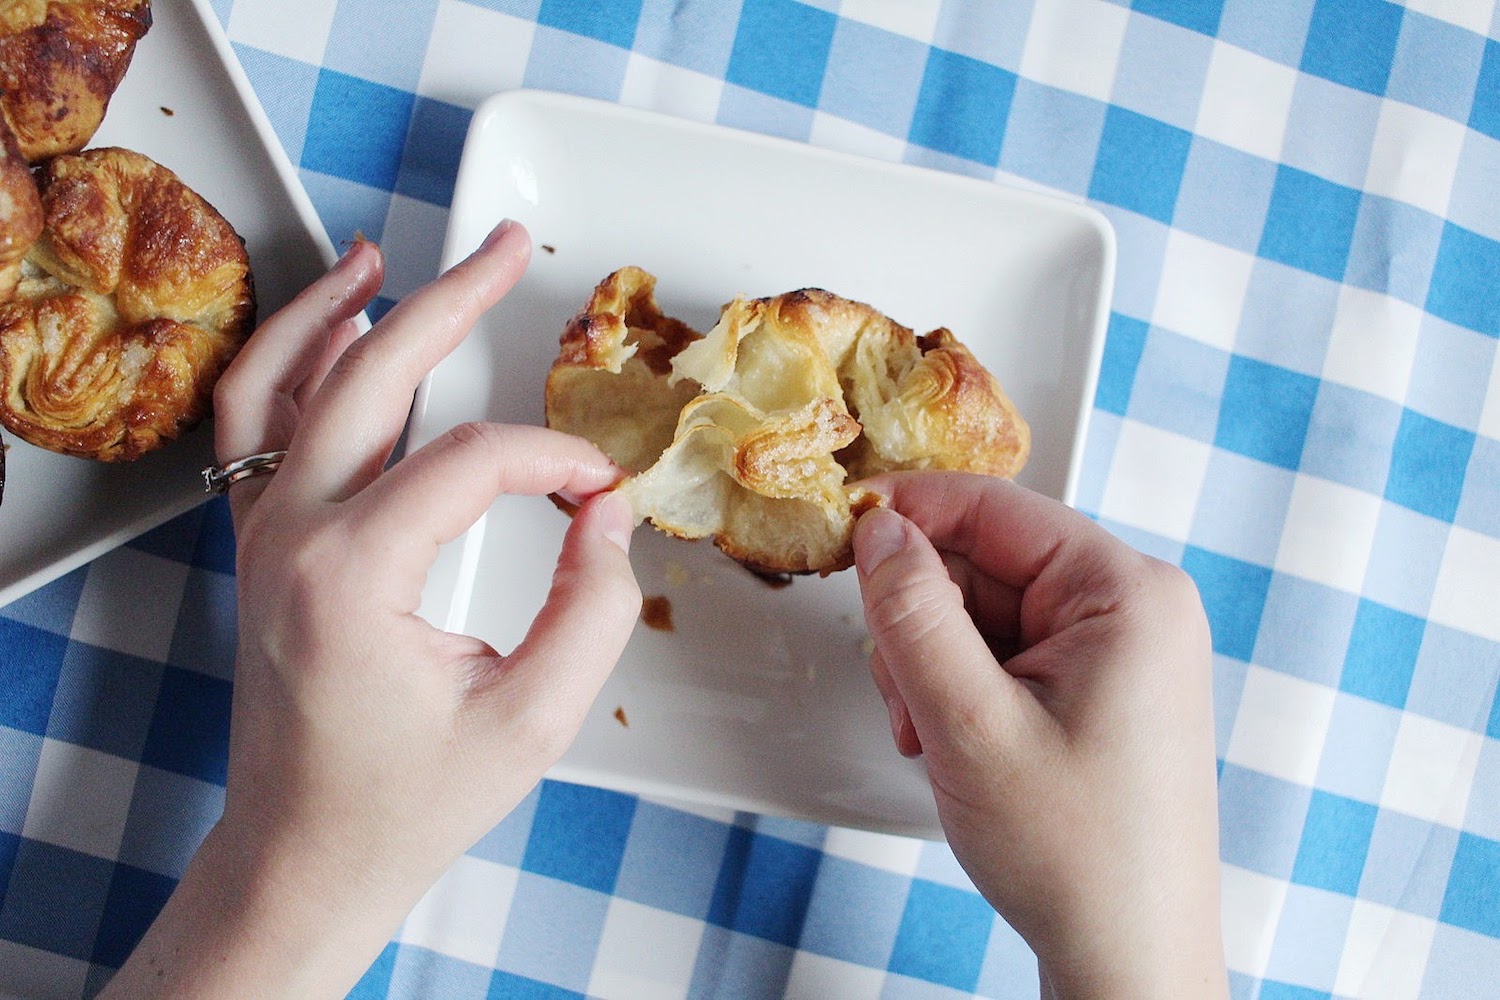
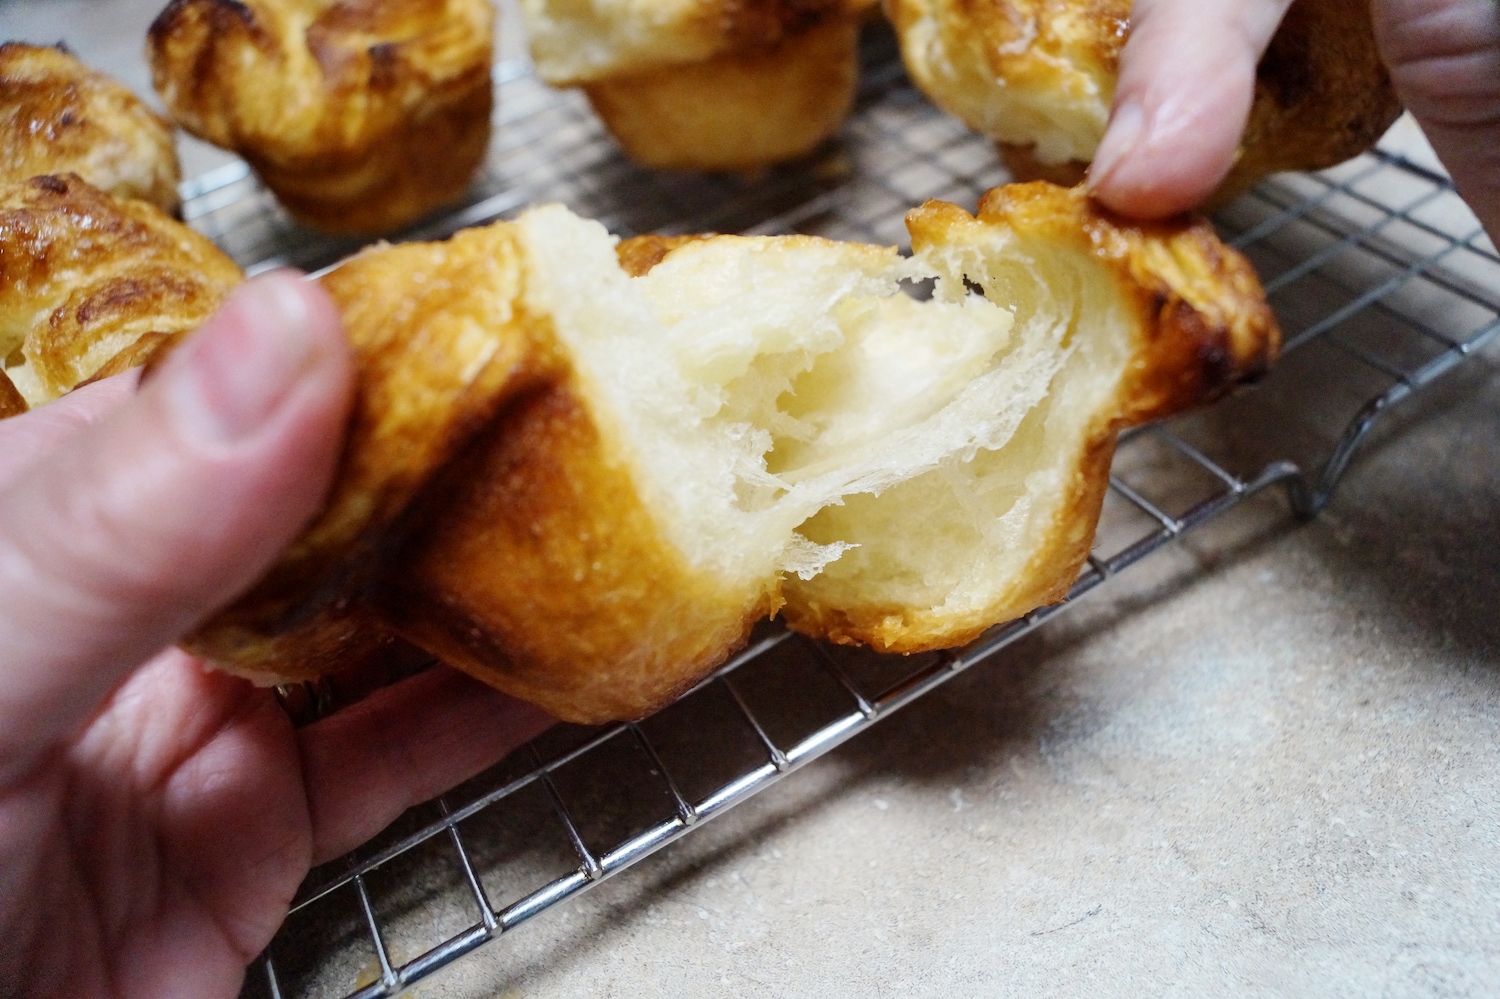
Incredible. Truly. My sugar may have slipped out into the side of my pastries, causing them to burn slightly, but TBH... I'm gonna make these ALL the time now. They come out like a sweet croissant. The layers are so mouth-watering, buttery, airy, and delectable. My husband arrived home from work shortly after they were removed from the oven, and I thought he was going to pass out from the overwhelmingly delicious flavor and texture - haha! I think he gobbled up two or three before I could even finish taking photos to share with you! This wasn't hard by any means, but took patience between chilling the layers of butter and dough. So worth it. Make these, you guys. You'll feel like a French pastry chef and want to strut your stuff to the owner of a French restaurant in Atlanta. No? Just me? haha.... ;)
Would either of us bake this again?
Well I think that's obvious... YES! Tomorrow maybe?! I'm in love.
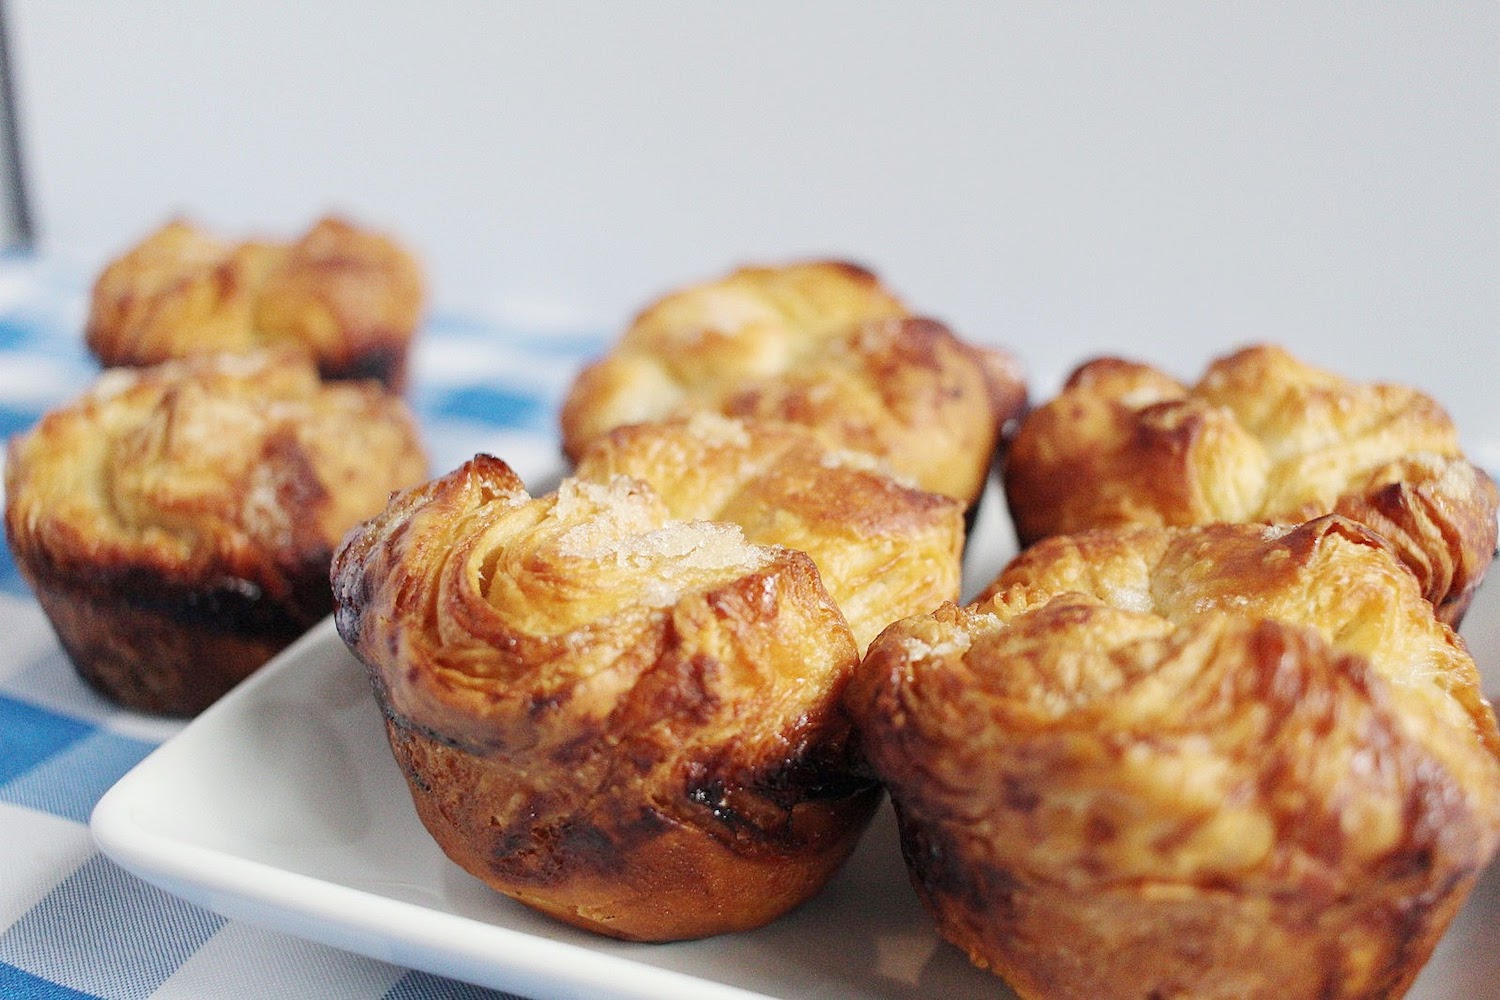
Here's the glamour shots...


Here's my mom's report
Amazing, Amazing!
After last week's debacle with the Prinsesstarta Cake, I was looking forward to this since there were simple ingredients and minimal steps. Even though it required a commitment because of the chilling of the dough it was still easy. I have three basic cakes I really like and tend to use. Many adaptations can be done with fillings and frostings. Fancy cakes that are labor intensive and expensive don't trip my trigger. Bread on the other hand does appeal to me... any bread item. I rarely buy it in the store since it has an unappealing texture and preservatives. Give me a fresh bread that I have to freeze in order to keep fresh any day! Making homemade croissants has been a goal of mine and these made me think of them. They were pretty close with exception of the shape and these are sweet. Absolutely delicious! Light and crisp on the outside beautifully layered on the inside. If you want to feel like a french pastry chef make this recipe. There were no problems making them and am happy for the experience. A fun fact: the final proofing can be done overnight in the the refrigerator and baked fresh in the morning. If you do this, make sure you set them out long enough for the dough to reach room temperature before baking. What a great B & B breakfast item. Go for it, you won't be disappointed!


I can't wait to bake these again and perhaps add some fun flavors to my layers! Nutella? Chopped pistachios and honey? Cheese and garlic chives? The possibilities are endless! Don't forget to use the hashtag #JoyLynnBakeAlong and join along on this super fun challenge. Coming up next...
Wednesday, May 31st
Bake #8: Povitica

Bake #6 | Prinsesstarta (Princess Cake)
In case you're not up to speed, this is the sixth bake in The Great Blogger Bake Along series. Read about it here.
Oh good gravy. This flipping cake.
First let me say, it's delicious. Like, REALLY good. This was the first bake that my husband legitimately LOVED. He practically licked his plate clean! It was complex, and now having done it once, I would be better prepared to do it again, but holy moly. This was HARD. I'll expand in a moment.
The Challenge
A Prinsesstarta (Princess Cake). This cake has layers of sponge, custard cream, raspberry jam, whipped cream, and marzipan. It needs to have nice layers and a dome top.
The Outcome
Okay. I'm gonna talk about the process, so hang tight while I go bananas up in here. This was a HOT MESS and it took me SIX straight hours.
First you have to make this fussy sponge. Mine was raw when the timer went off, so I had to keep it in there longer, and it didn't get a good rise either. Then you have to slice the dang thing in three even layers. Well, it was whilst slicing this cake I found chunks of flour that didn't get "folded" in properly. Whatever, I got it sliced just fine so I moved on.
Then you make a custard. Guys. I've never made lumpy custard IN MY LIFE until this day. It tasted fine, though, so I let it be. But it was sooo lumpy.
After that, you make a jam. It turned out delicious and I want to put it on everything, but mine didn't set quite right which was annoying. I let it cool completely, so I don't know what the heck I did wrong, but it was a smidge soupier than I would have liked.
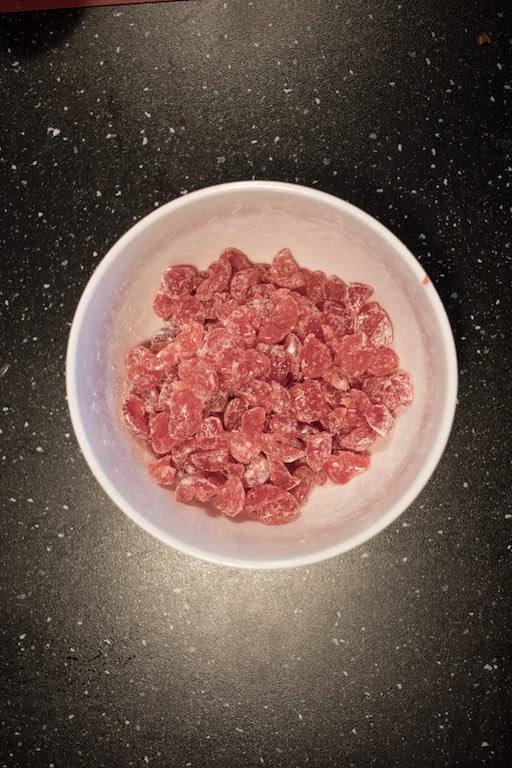
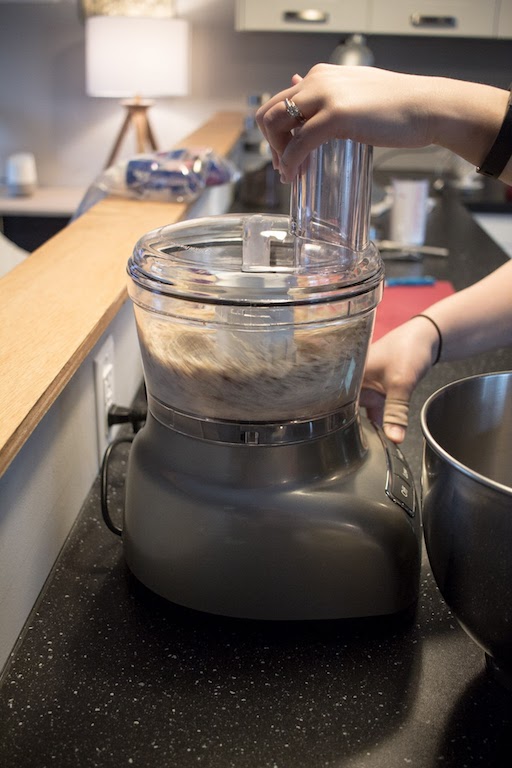
Then, you make marzipan. Oh for the love of all that is holy, who thought of making marzipan?! You grind up almonds and add raw eggs and a butt-load of sugar and some almond extract. It was sticky and kind of slimy, and it just seemed off, so I figured I must not have ground my almonds enough. So I tried to run the mixture through a food processor... which did nothing. I moved on. I rolled my marzipan and cried as it got stuck to the counter. I put parchment paper over it and under it and everywhere, but that didn't make it any easier when it came time to pick the thing up and place it atop the cake... but somehow I did it! I'm actually pretty happy with the outcome of the marzipan.
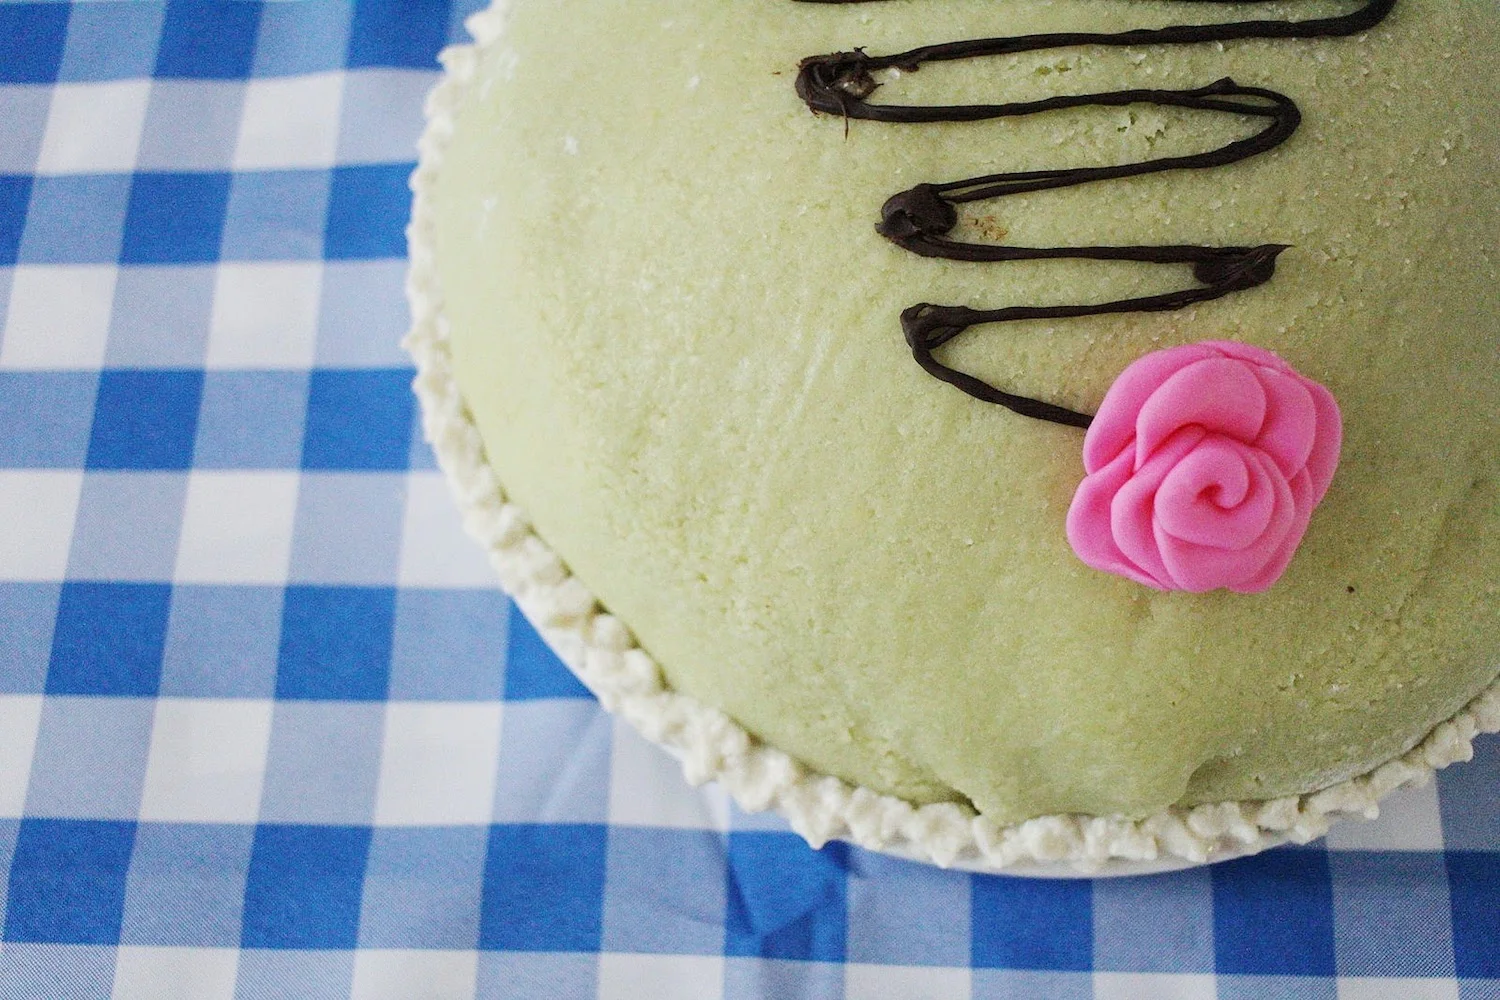
Finally, you whip up a tiny leftover amount of whipping cream and do a little piping along the bottom of the cake. However, my whipping cream DIDN'T WHIP and it was all I had left, so I made a butter-cream frosting real fast. You also have to make a little flower out of pre-made fondant, and do a small chocolate decoration. All of these little bits and pieces just added up to a ton of steps and clean-up, making it incredibly time-consuming. Again, it was very tasty, though! If you're looking for a big challenge with a tasty result, this is your bake.
Would either of us bake this again?
Oh gosh. I don't know! It was definitely a test of patience, knowledge, and experience, but not exactly something I think I'd jump at the opportunity to make again. Maybe for the right occasion, but definitely not on a whim! My mom would probably agree. We laughed wondering if we'd have even got it done much faster had we baked it together! Ha!
Here's the glamour shots...


Here's my mom's report
Are you looking for a good laugh? You'll want to read this. Here goes...
I was looking forward to another challenge, but discovered that lack of knowledge can lead to disaster. I began making this cake at 9:00 A.M. There were multiple steps and one that I added because crushed almonds were unavailable to me. It seemed so simple to run some almonds in the food processor until they became the fine sand like texture required. However, any longer in the processor and I would have had almond paste. But close enough and all would be well. Next, the pudding. First milk and a $5.00 vanilla bean. Then the egg mixture, blending them both and cooking till thick. Fine, done. Oh, and after research I discovered that UK corn flour is US corn starch, not a fine version of corn meal. Thank goodness or this would have been a complete flop! Making the jam filling was easy, I just added corn starch to the sugar and let it cook a bit longer reducing it and it thickened nicely. The cake (sponge) went together fine. The assembly for me wasn't a problem. The next time I would whip ALL the cream called for at once reserving what is needed for decorating. The directions had sooooo many steps which I would streamline.
The marzipan was next. It actually went together pretty well, but the rolling out and getting it onto the cake was a mess. I was flinging powdered sugar all over even though it said a thin layer, each time I tried to pick it up it ripped. By now I was sweating and getting panicky. My husband suggested using a pizza peel, which we did. Oh, and the green food coloring was not a pretty shade of soft green. The "Grinch" came to mind. At this point, who cared! I laid that green blob over the cake and it was done. Drizzled some chocolate on, put on that fondant rose, and sat down in a chair. It was 5:00P.M. when I finished. How this was made in 2 hours I will never know. Joy and I have had some serious laughter over this one. The final blow came when it was shared with family. My son-in-law and the rest of us did like it. The marzipan was tasty but later on too rich and we didn't eat it, just peeled it off. He did describe the texture this way. "You know, the dry skin you get on your knees or elbows? It reminds me of that." Zoom in on my pictures and you'll agree!


Phew! What a challenge! I'm proud to have done it, but glad it's behind me! Don't forget to use the hashtag #JoyLynnBakeAlong and join along on this super fun challenge. Coming up next...
Wednesday, May 24th
Bake #7: Kouign Amann

Bake #5 | Mini Pear Pies
In case you're not up to speed, this is the fifth bake in The Great Blogger Bake Along series. Read about it here.
Finally. The one I was most excited for! They looked so delectable and flavorful and fun to make, that I was just counting down the days until I got to make these. It did not disappoint in terms of 'fun to make,' but it did disappoint in other ways... hmmm read on...
The Challenge
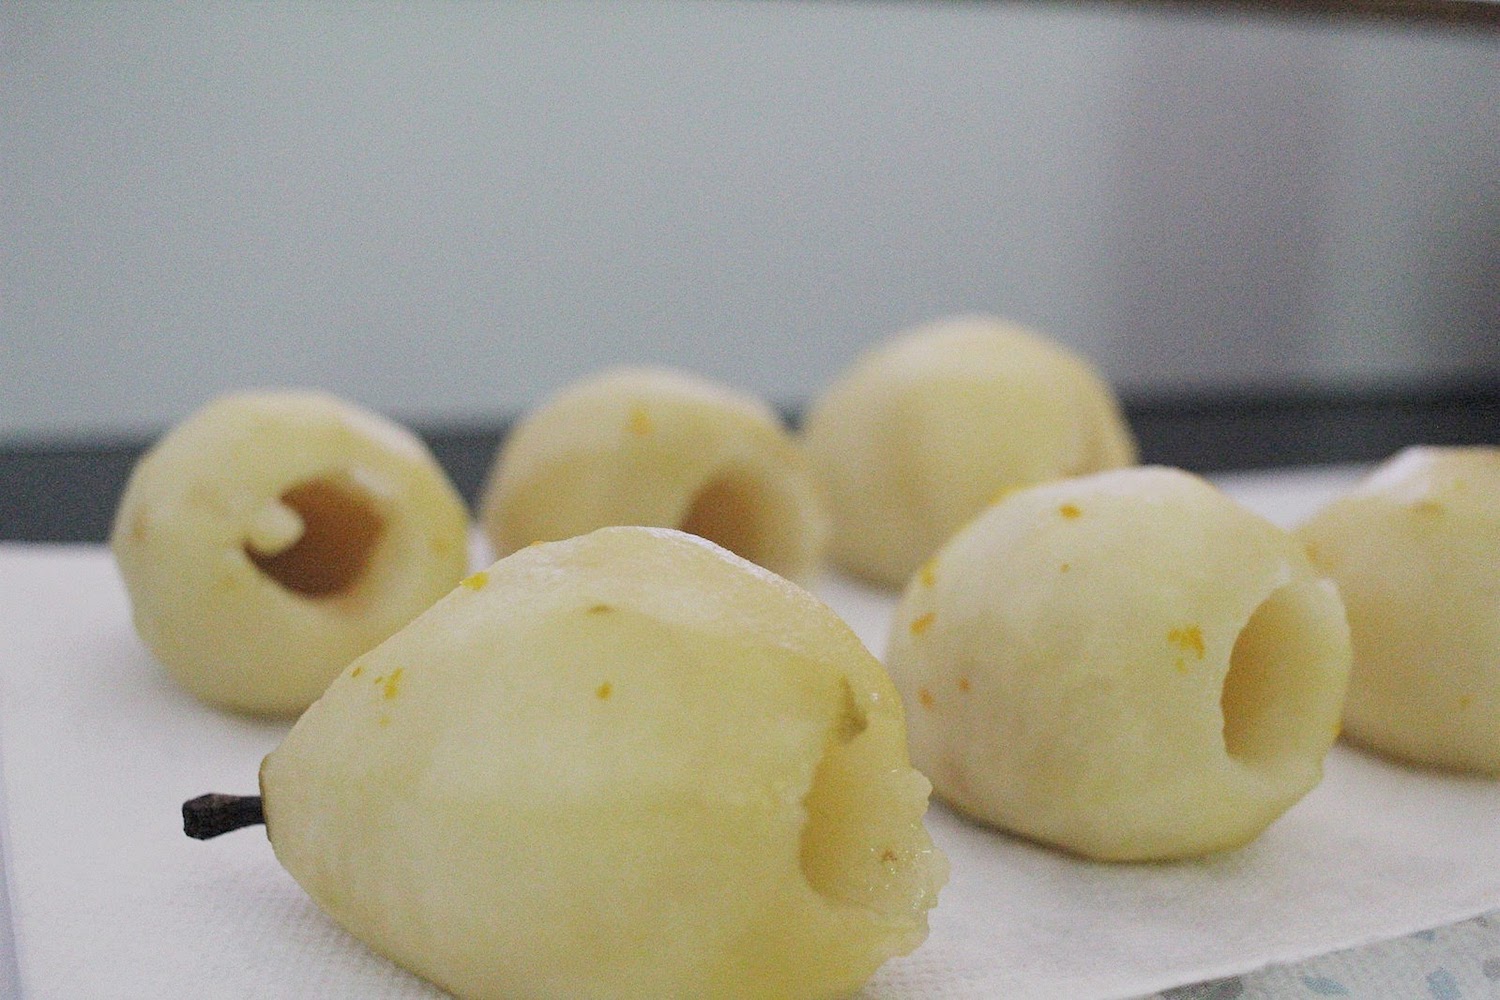
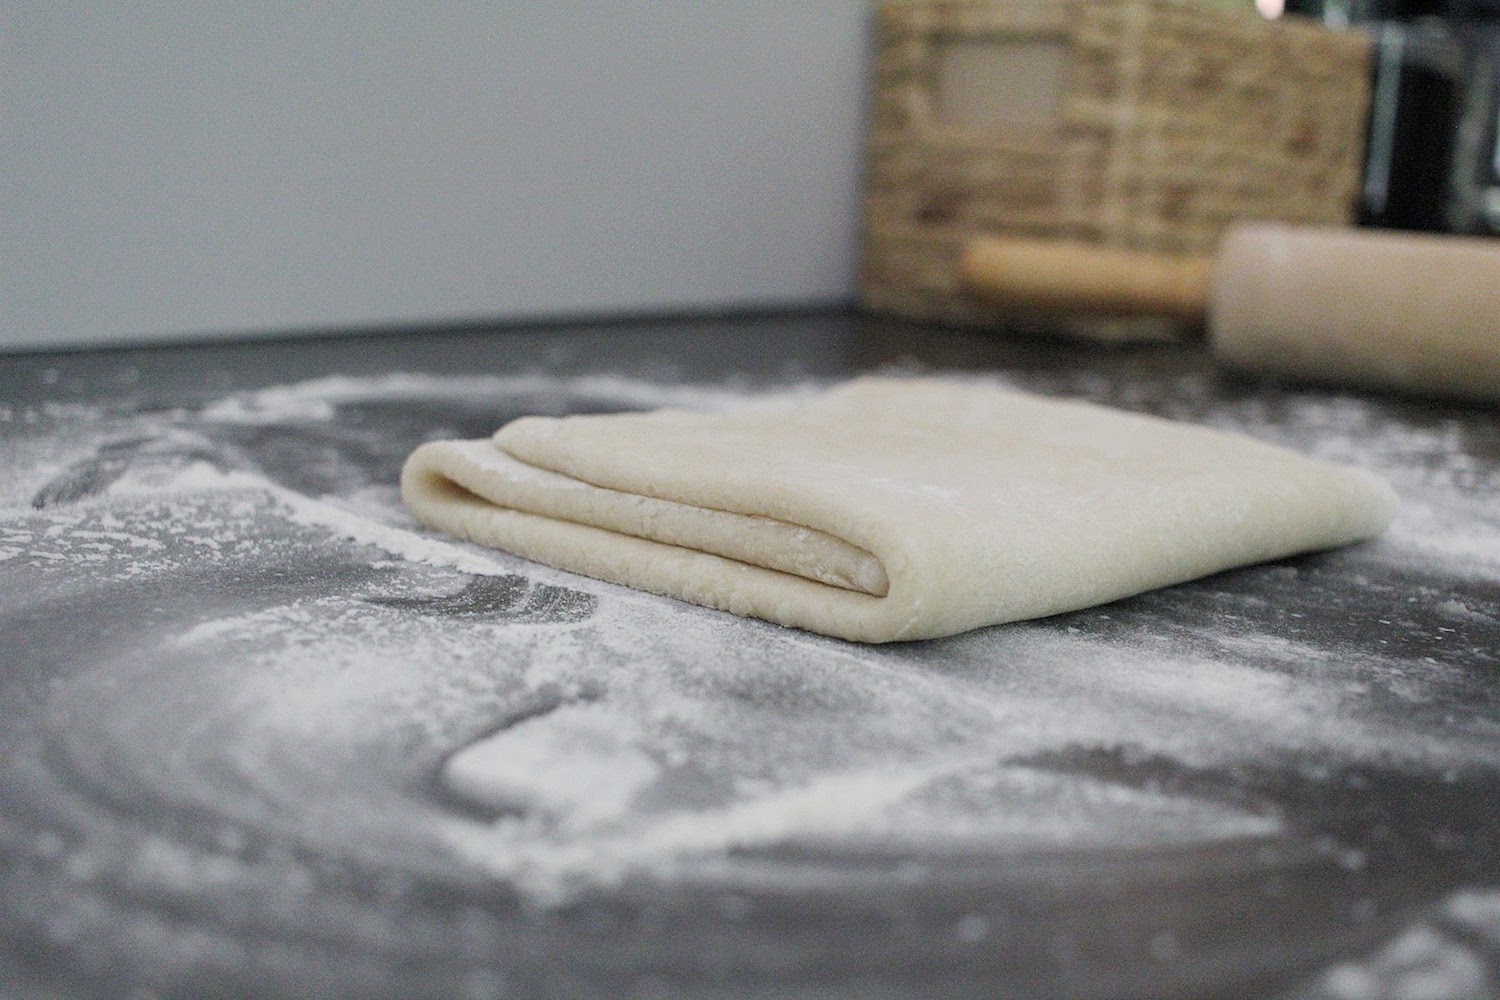
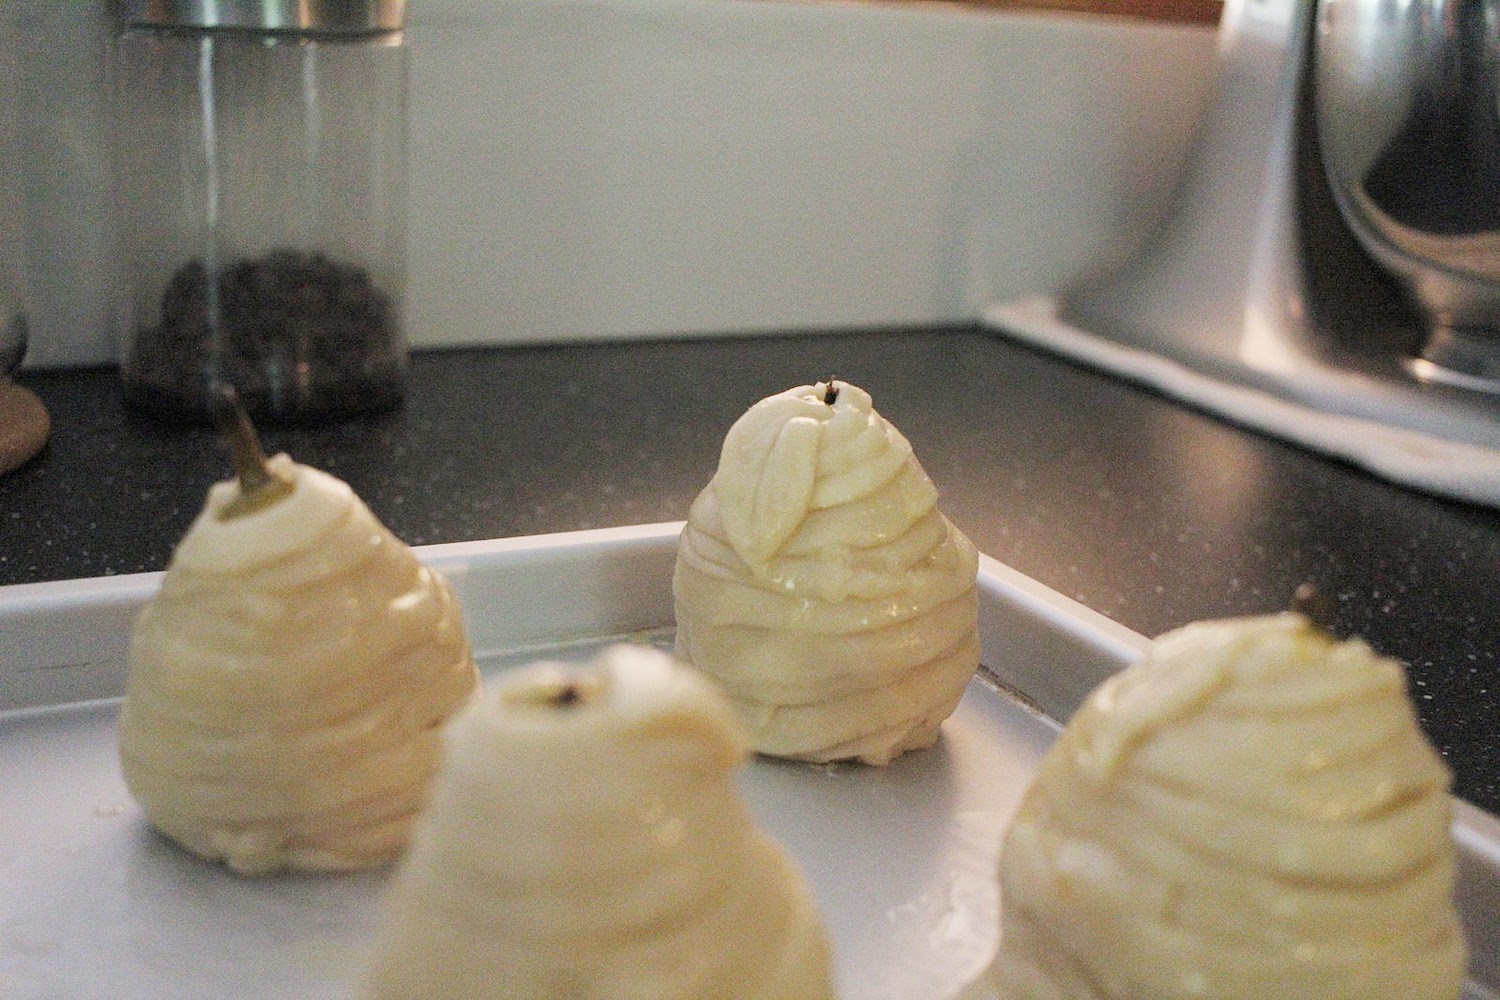
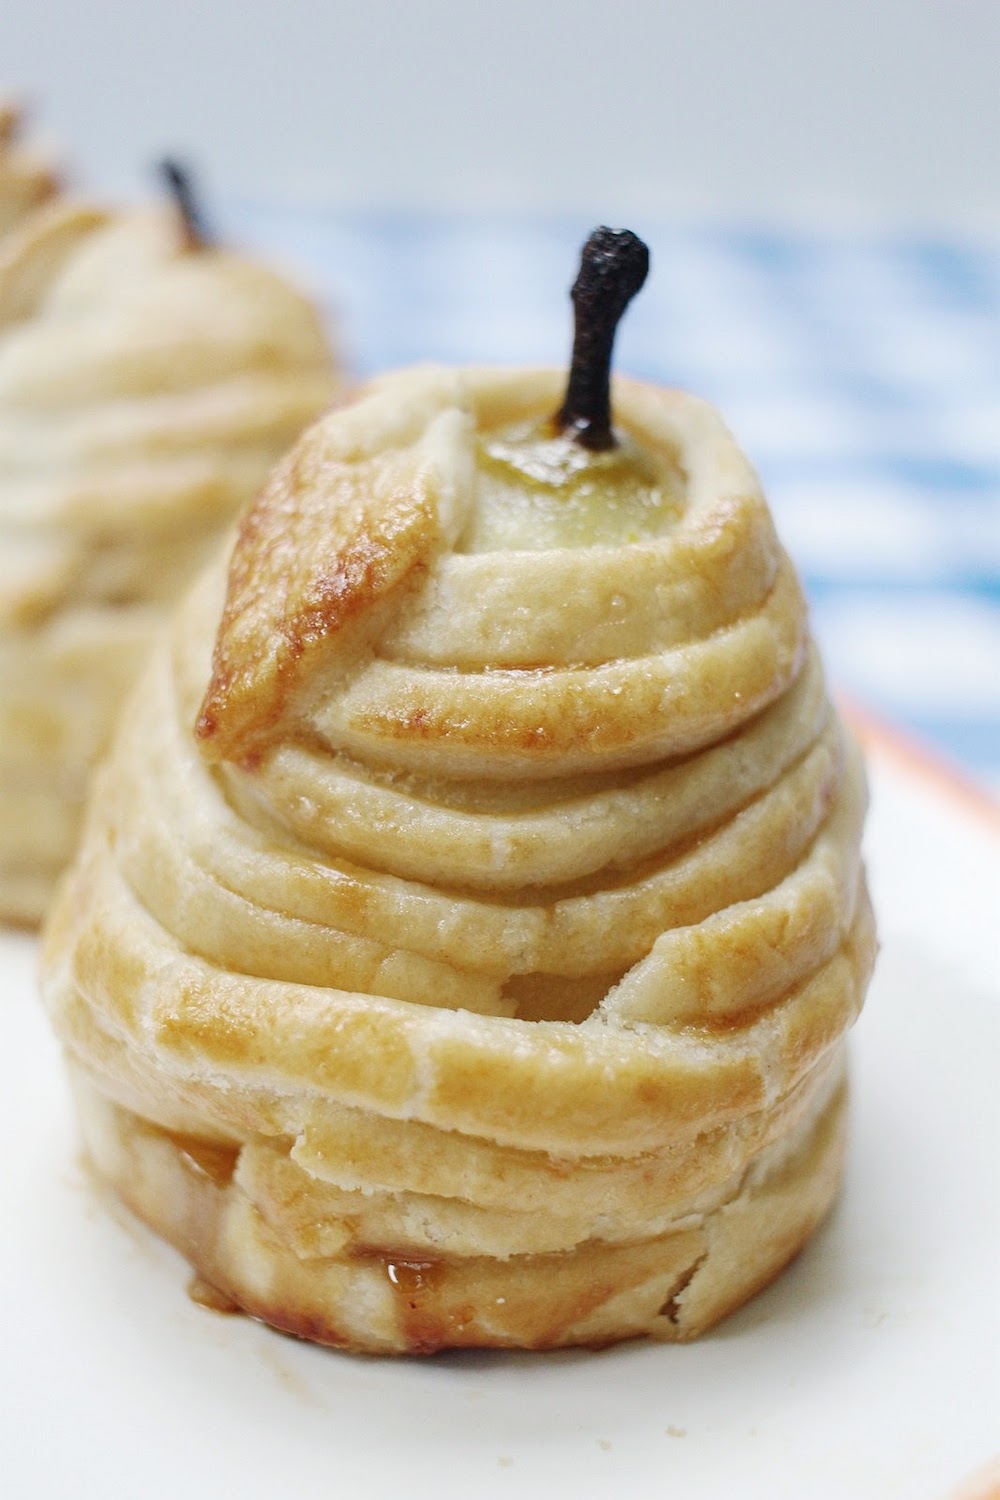
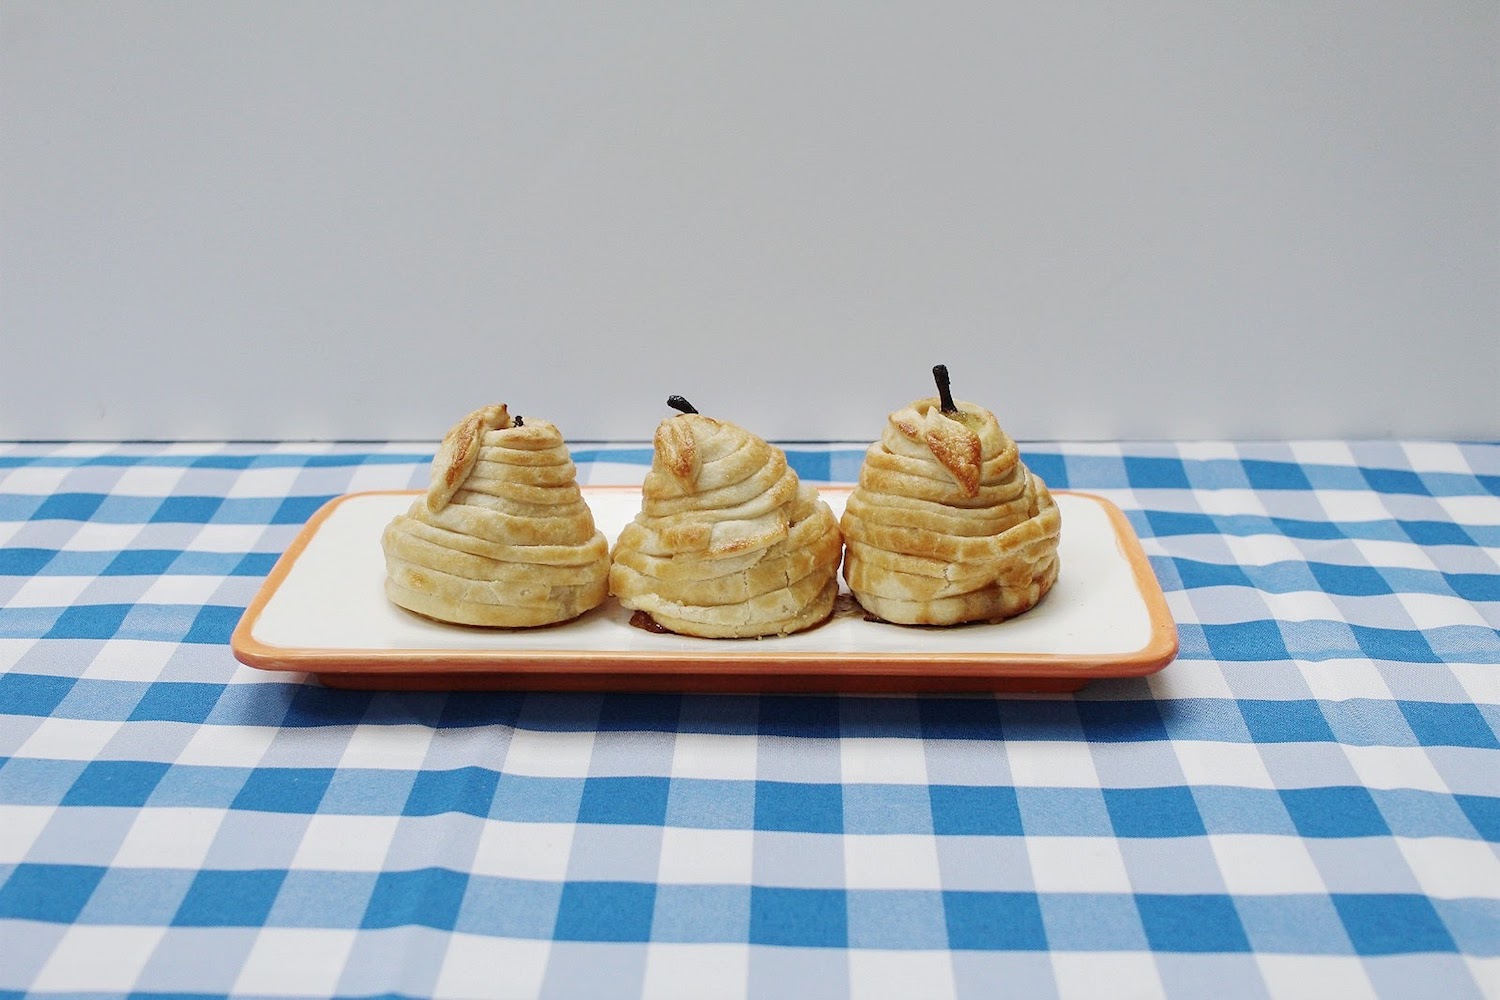
Make mini pear pies with a homemade rough puff pastry, and poached pears. Make sure the puff pastry doesn't slide down the pears and the pears aren't over-poached making them too soft to hold the pastry.
The Outcome
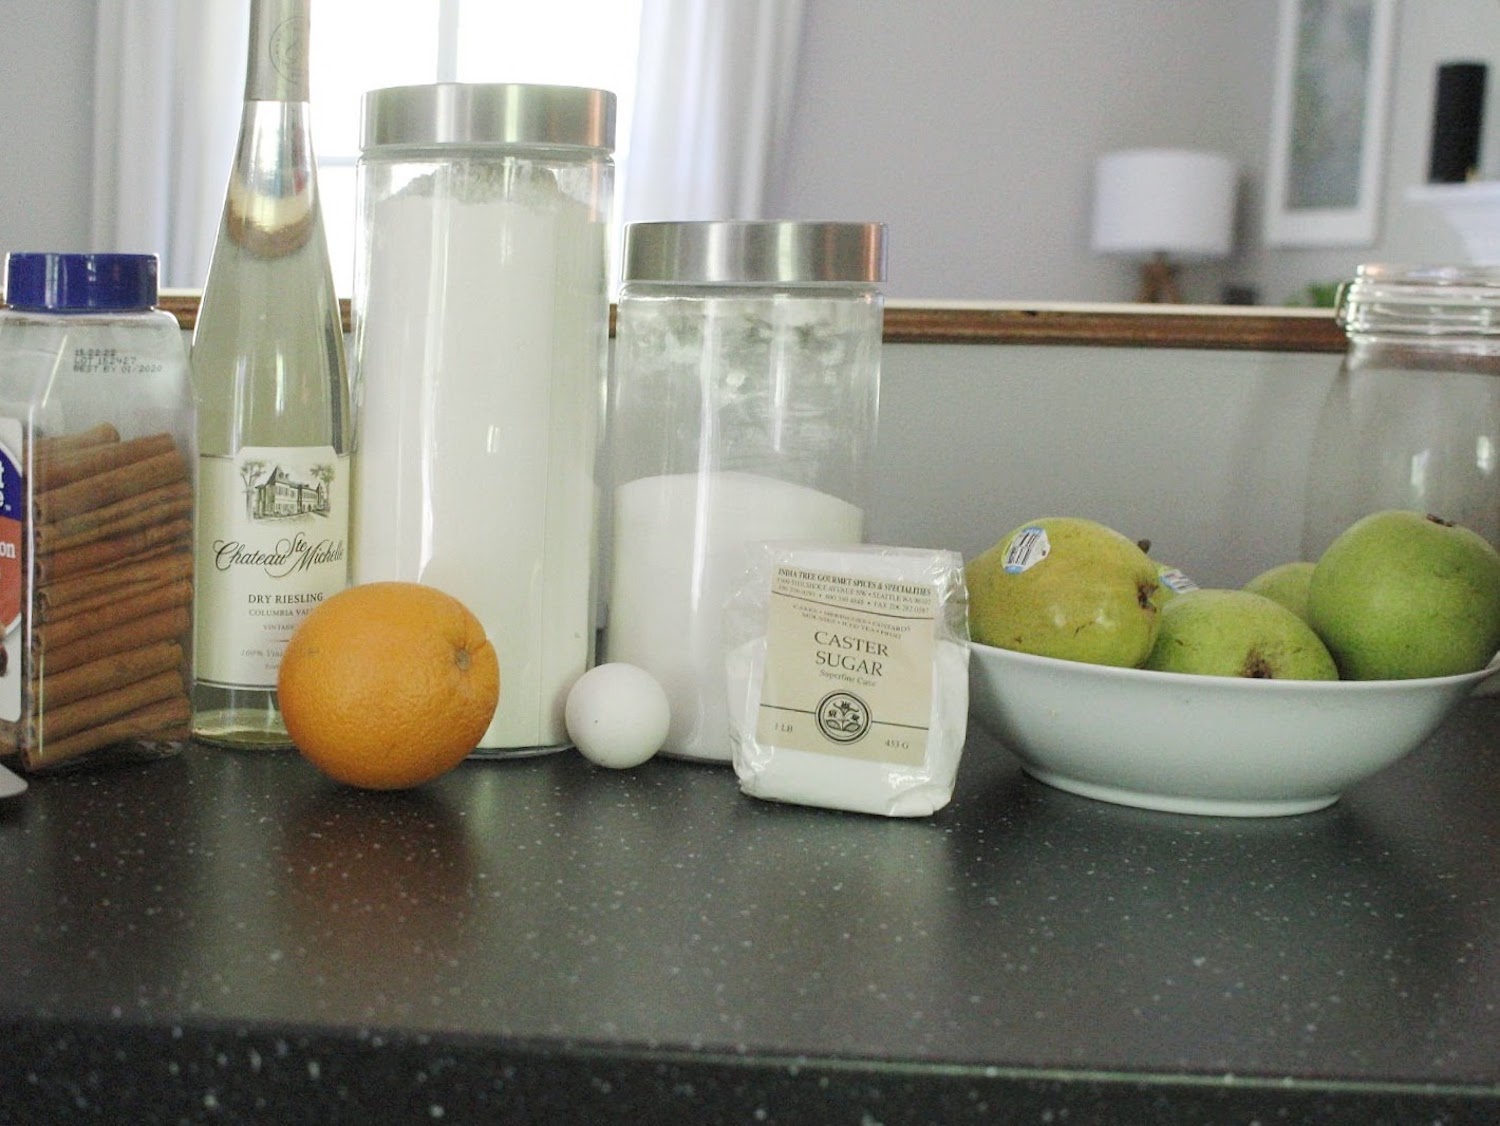
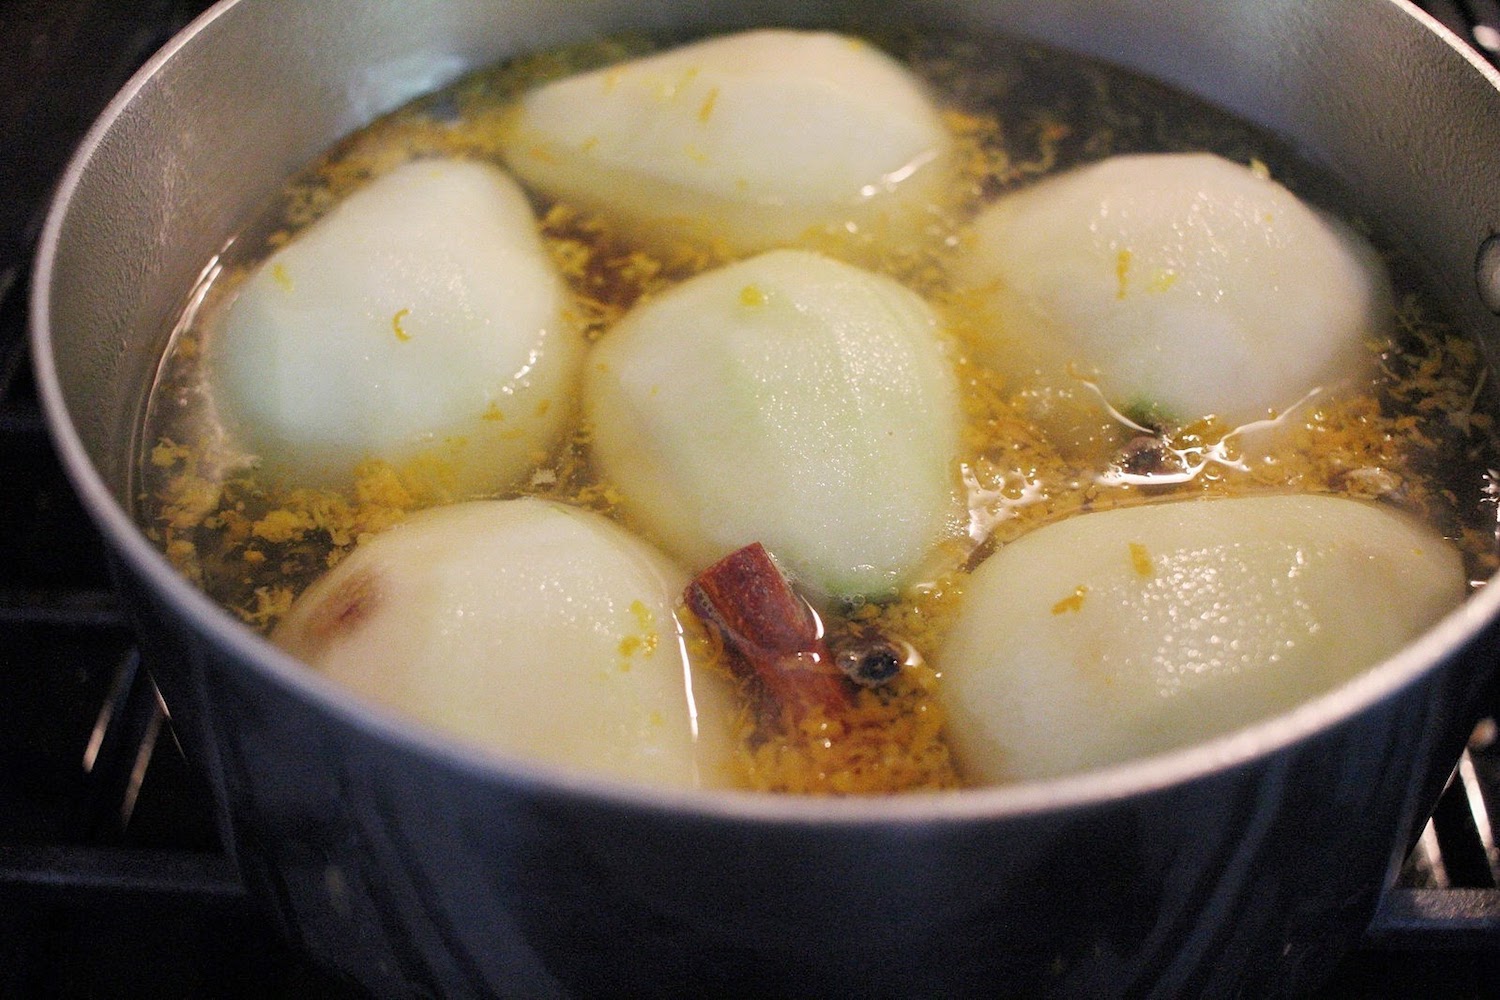
Guys... this was such a disappointment!!! So the puff pastry called for lard and butter and flour. Has to be good, right?! It was AWFUL! All I could taste was the lard and without any salt, it was just bland. The pears were poached in a water, white wine, sugar, cinnamon sticks, and orange zest mixture on the stove. After that, it's wrapped in the pastry and baked, so it has to turned out all caramelized and pie-like, right? Nope again! For such a yummy poaching mixture, they still came out almost flavorless and completely disappointing.
Would either of us make this again?
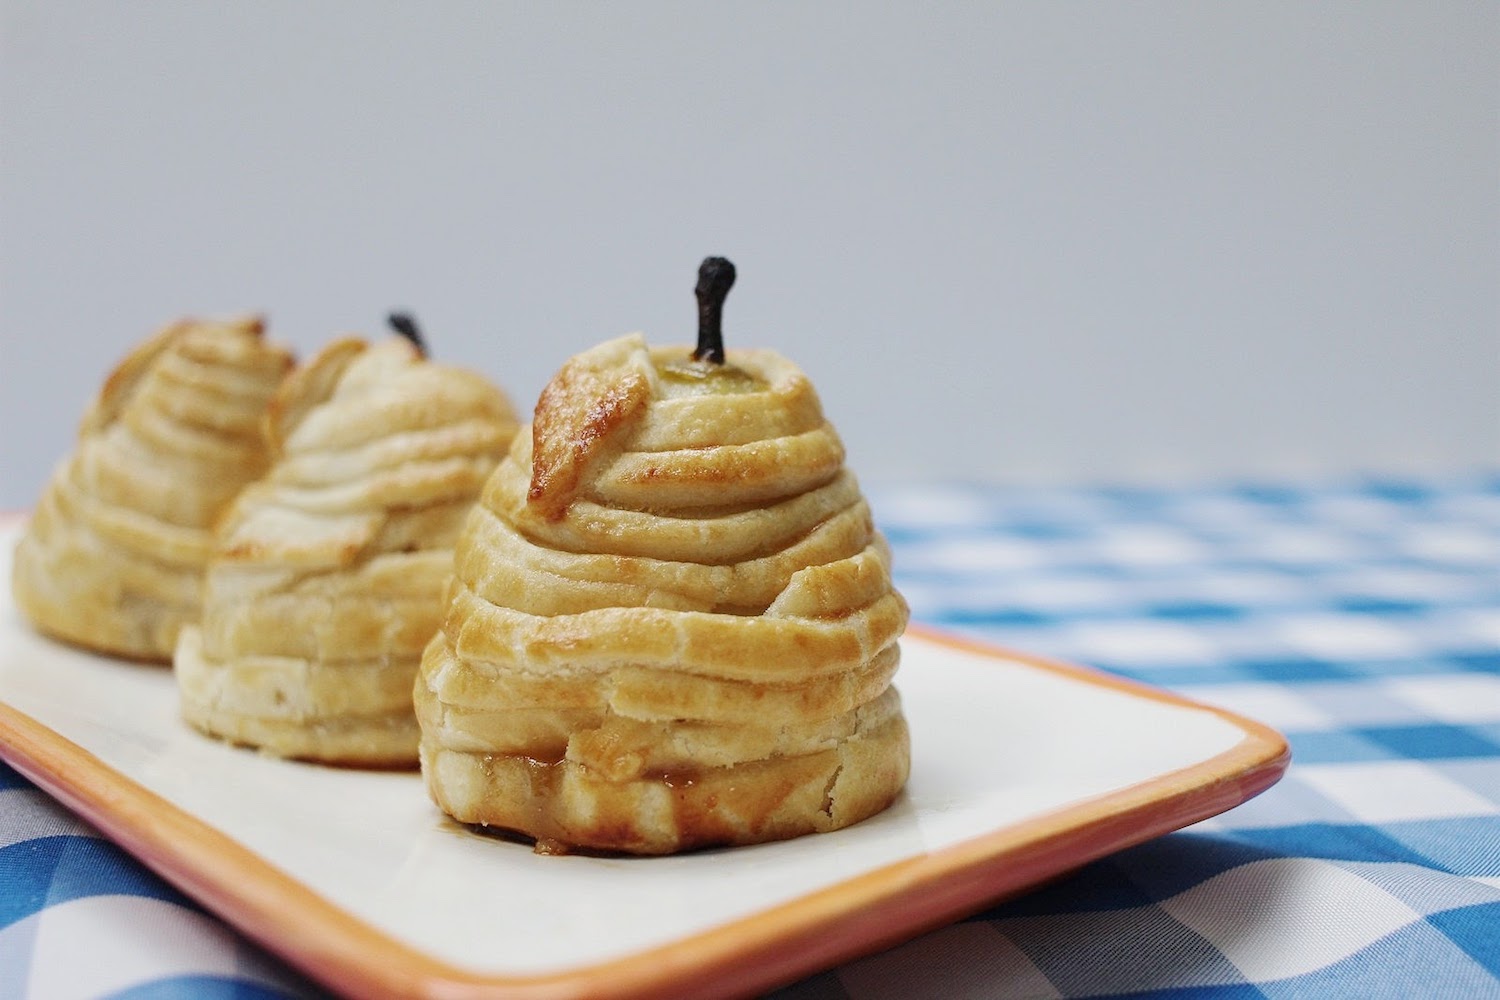
I would make it again, only with some serious adjustments. It was a genuinely beautiful dessert and I loved the process of making it, but the overall taste wasn't what I had hoped for. I let my mom do her puff pastry differently, and I think hers turned out better, so again, with those adjustments, it would be well worth it to make this again. It needs a little more sugar and salt to bring out the flavor, and I know they'd be amazing with those additions.
Here's the glamour shots...


Here's my mom's report
This challenge turned out pretty well. Mostly because Joy made hers well in advance of mine and I learned from her and was given permission to change it up a bit. Having returned on Tuesday from a trip it was a late night finishing up in time for posting.
Here is my review:
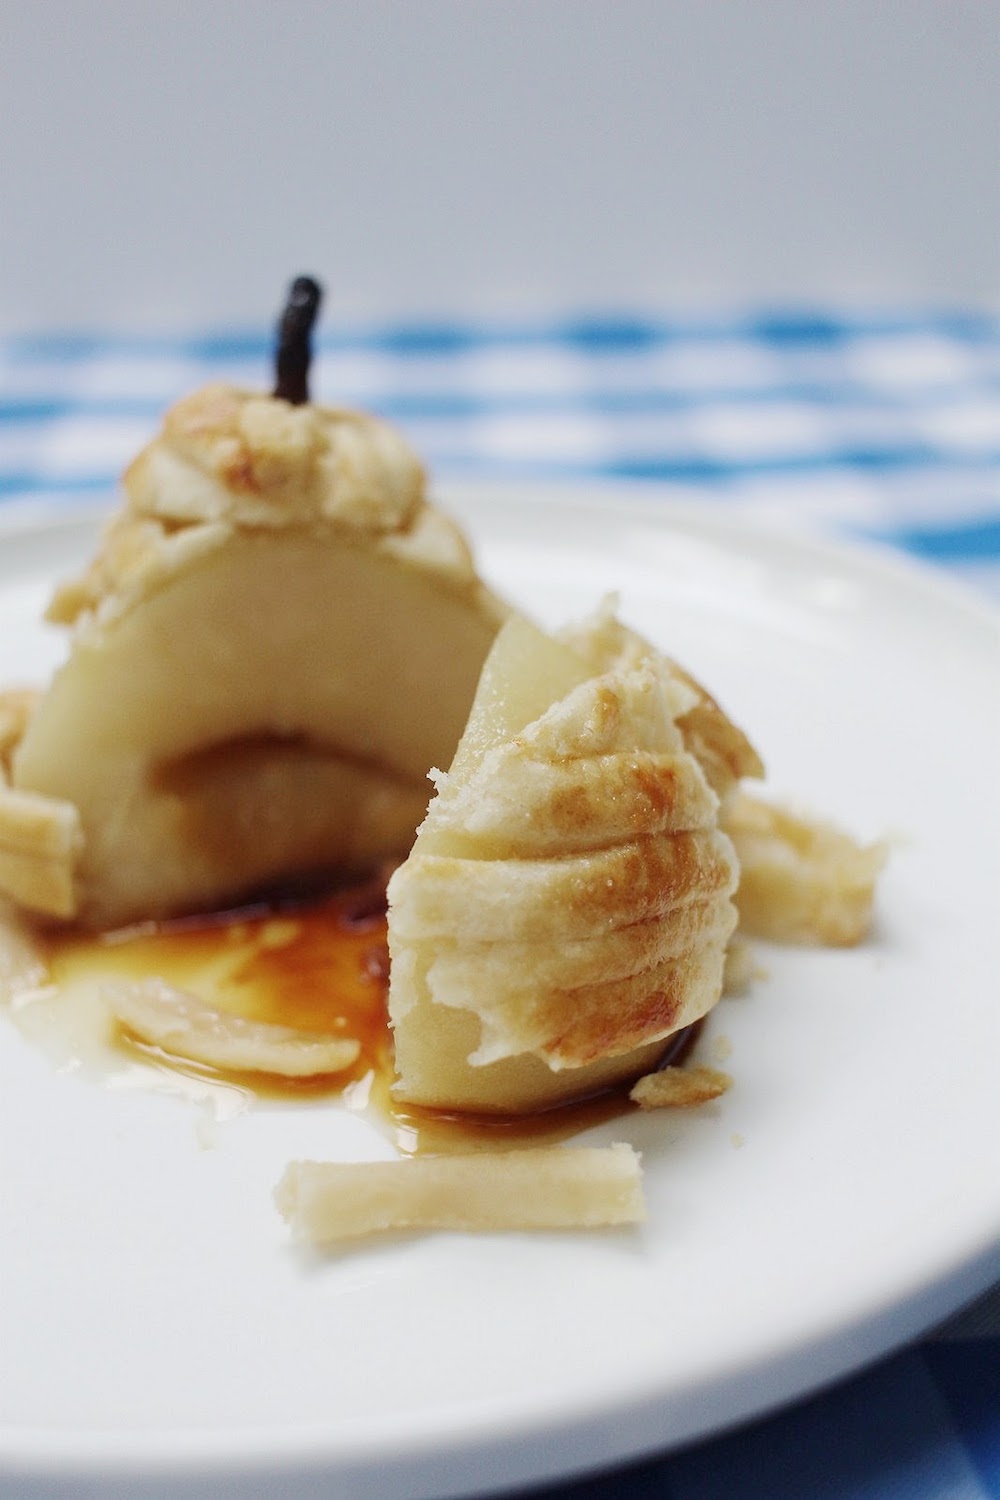
The recipe called for butter and lard. Joy made hers according to those directions and was very unhappy with the flavor of the puff pastry. We both felt a proper puff pastry would NOT include lard. Therefore when I made mine I used only butter. I think it turned out very well. It's time consuming, but worth the effort. The rest of the preparation went very well. The end result was pretty good. It called for firm pears and apparently mine were too firm because I was unable to eat them with a spoon, I needed to slice the pears. In my opinion a poached fruit should be very soft, but I suppose they need to be somewhat firm in order to wrap them easily with the puff pastry. Somewhere in the middle is where they need to be. My picture shows how I think they should be served. The thickened sugar mixture made a tasty, and pretty glaze over the pear. All of these challenges look impressive, but not all of them taste that amazing. This one was one I would serve if I could be sure the fruit would be soft.
Again, if you're looking for a genuinely fun little challenge, give the pies a try. They are so pretty, and with the adjustments are genuinely yummy, and unique way to have pie. Don't forget to use the hashtag #JoyLynnBakeAlong and join along on this super fun challenge. Coming up next...
Wednesday, May 17th
Bake #6: Prinsesstarta (Princess Cake)
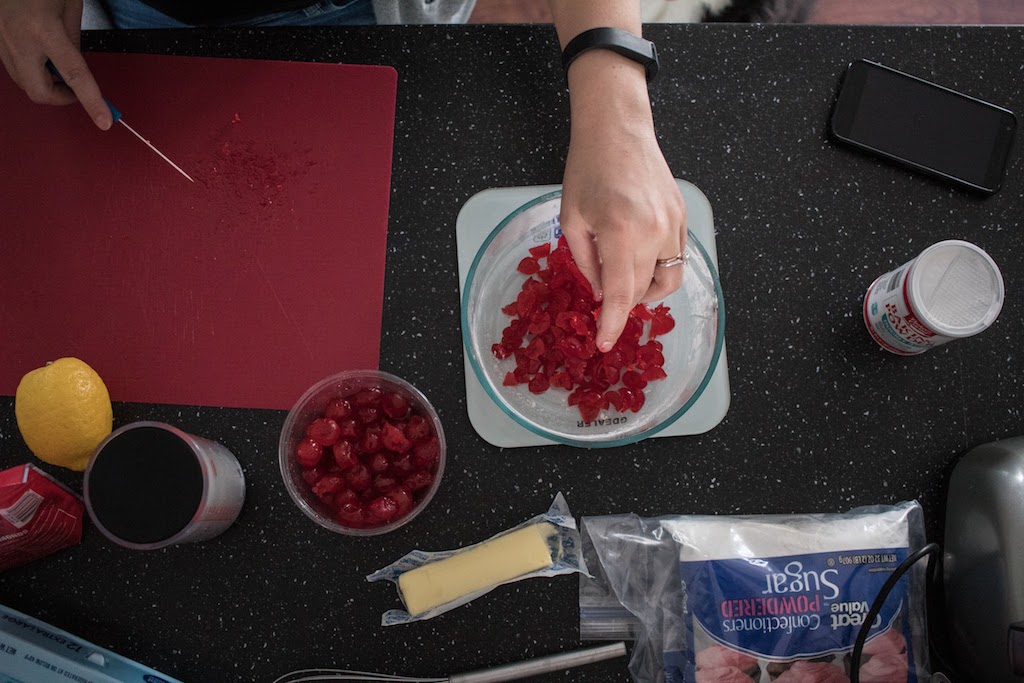
Bake #4 | Tiramisu
In case you're not up to speed, this is the fourth post in The Great Blogger Bake Along series. Read about it here.
This was the one. The one I was MOST nervous for. It didn't end up being as terrifyingly difficult as I thought it was going to be, but it certainly wasn't easy. And it was a little terrifying here and there. Of course I'm talking about the kind of terrifying that bakers go through... like when something breaks in half or a cake sinks in or part of something is baked well, and another part is burnt, or when a bake goes so bad you wonder how you call yourself a good baker at all. You know. Things like that.
The Challenge
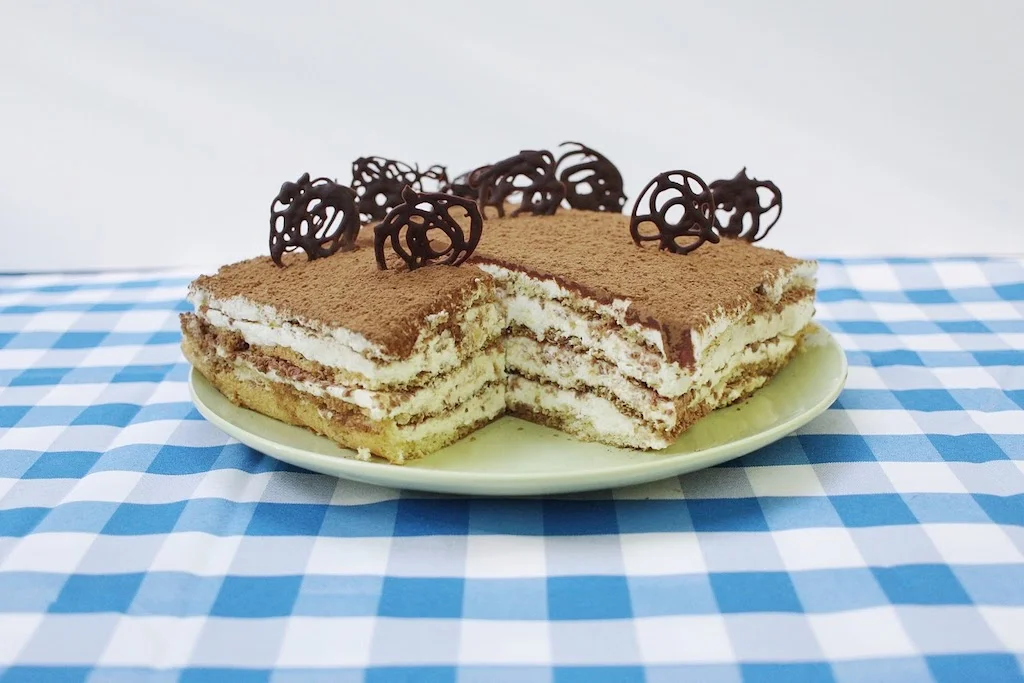
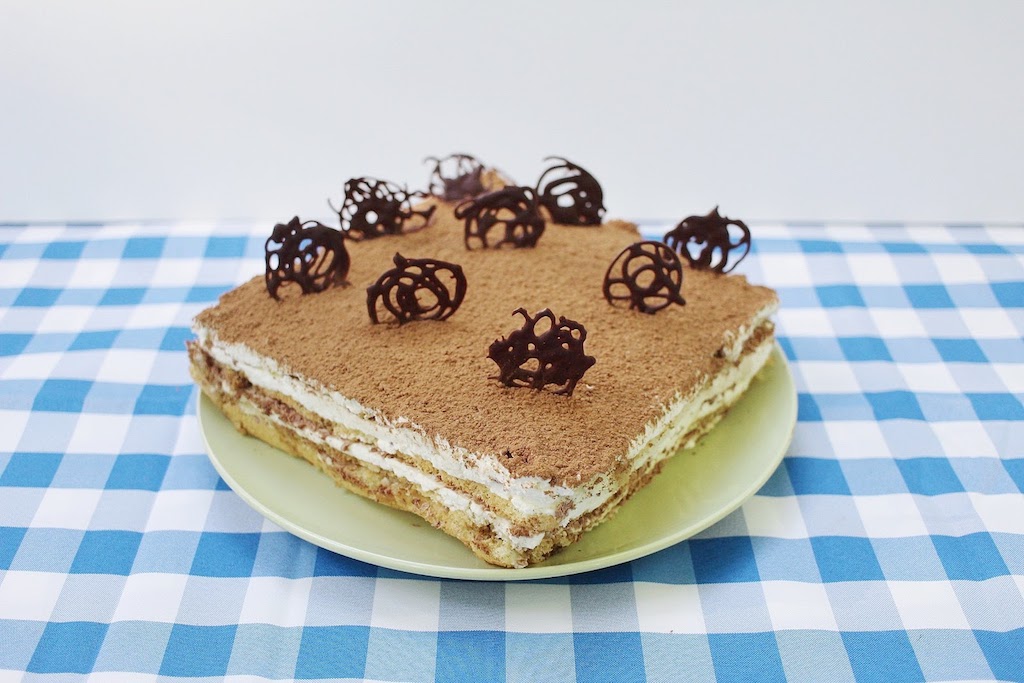
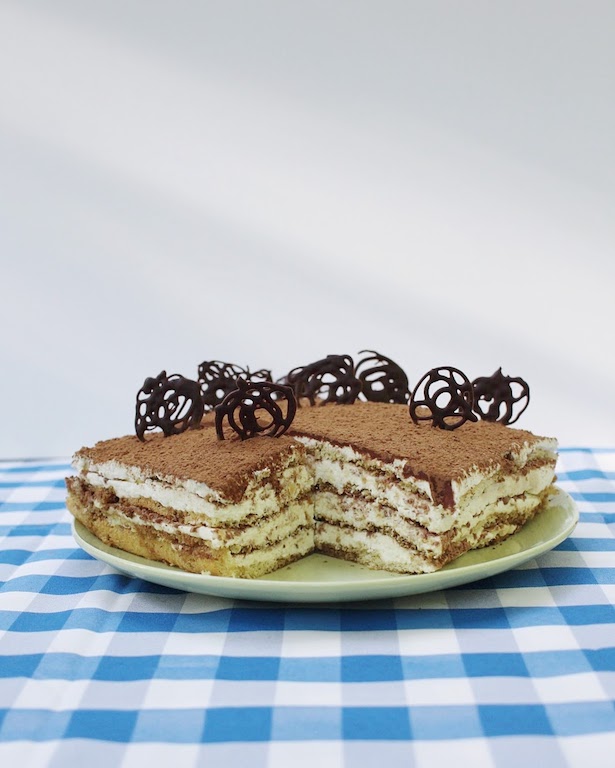
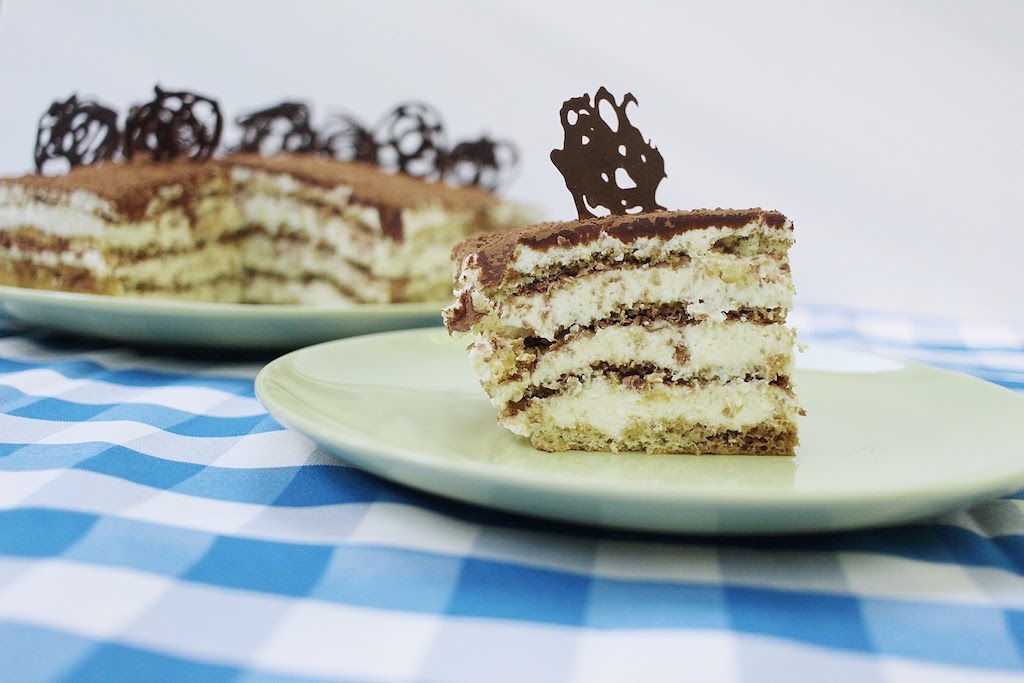
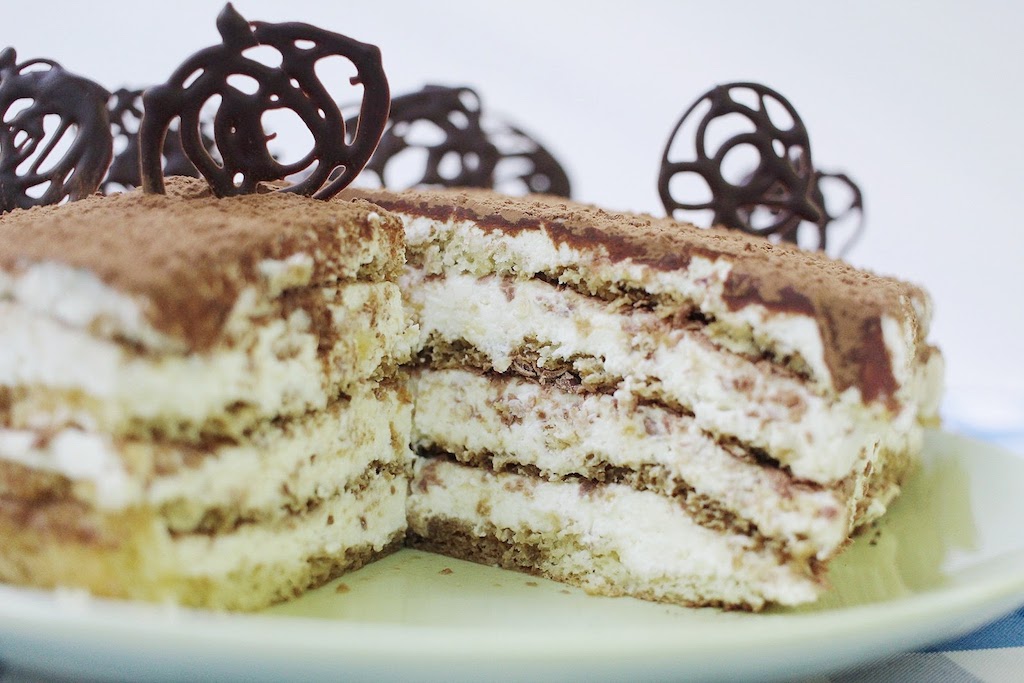
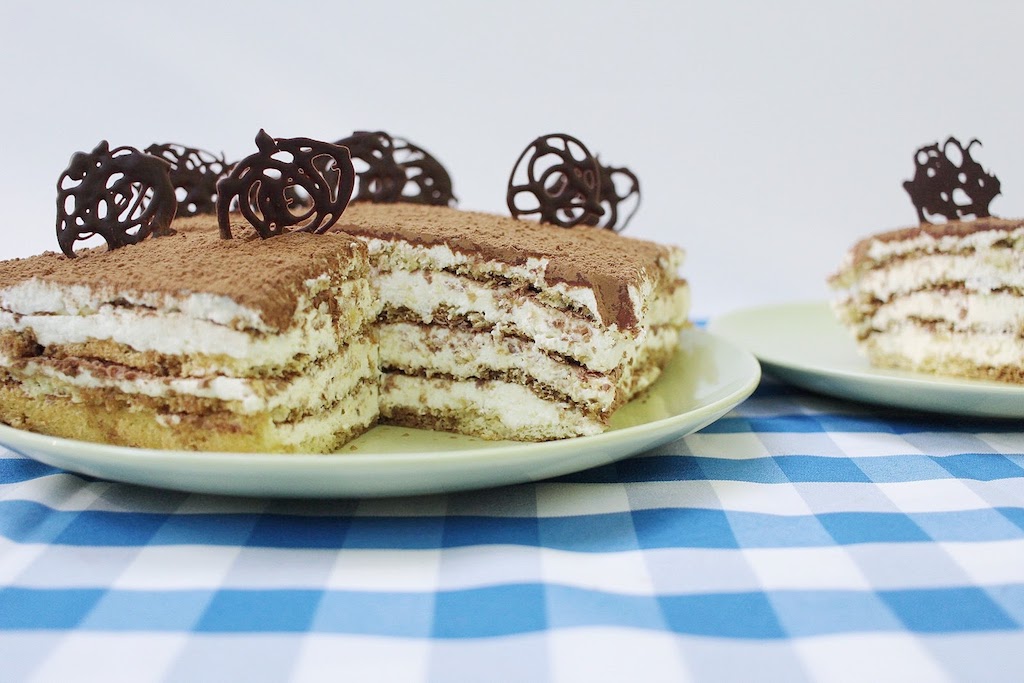
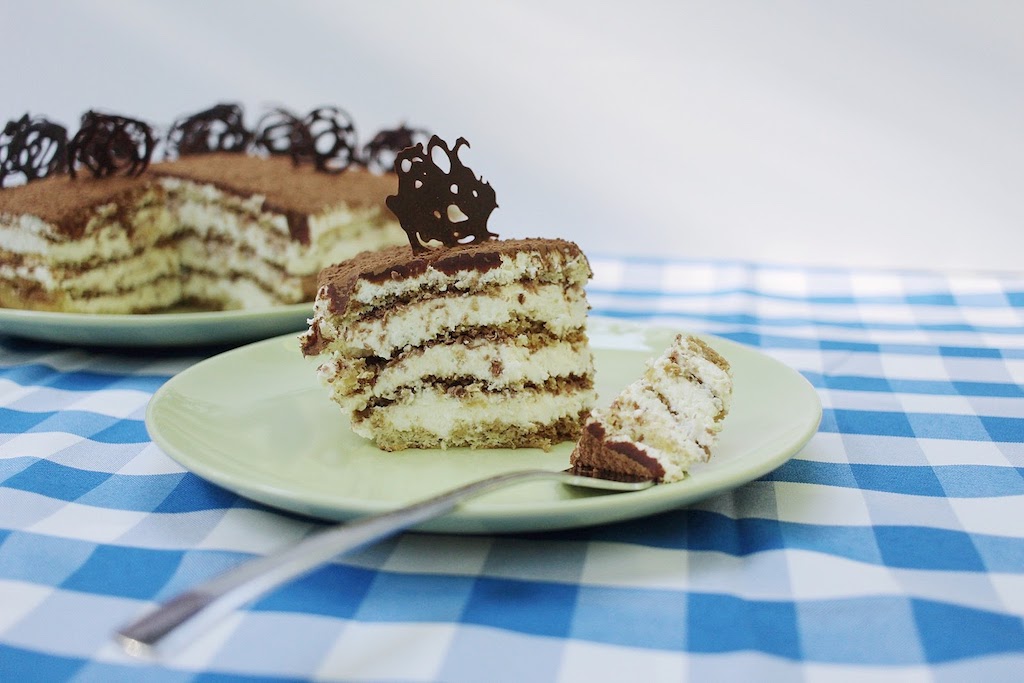
Create Mary Berry's version of an evenly layered tiramisu cake. This is a well-known Italian dessert that features cakey layers soaked in a coffee/brandy mixture, chocolate, and a creamy mascarpone cream.
The Outcome
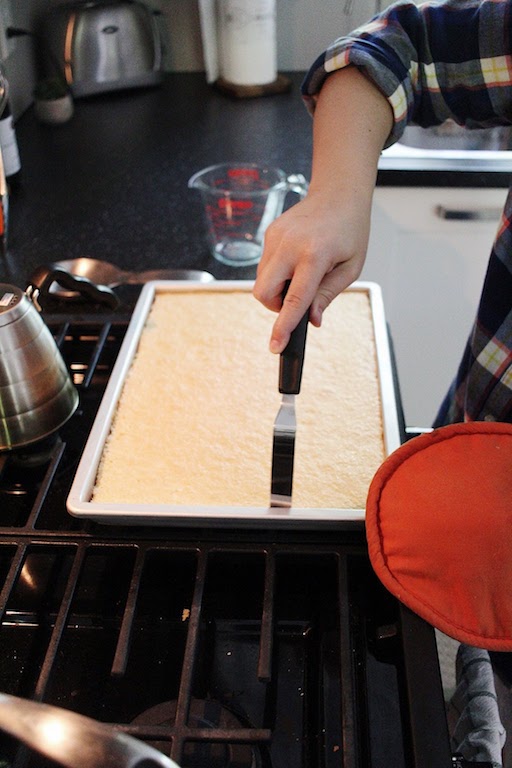
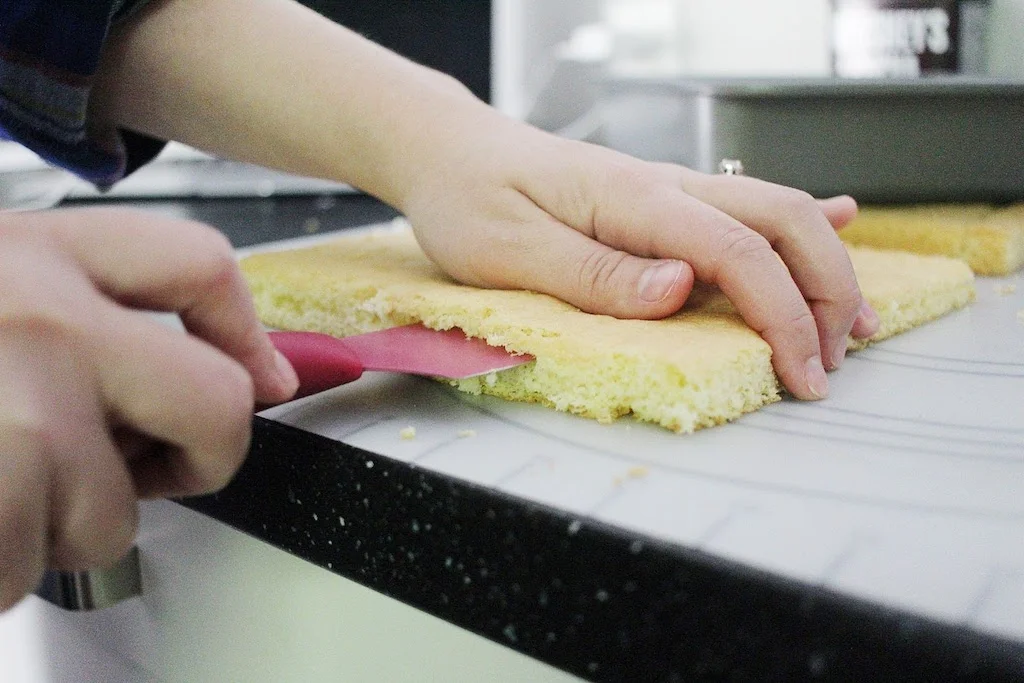
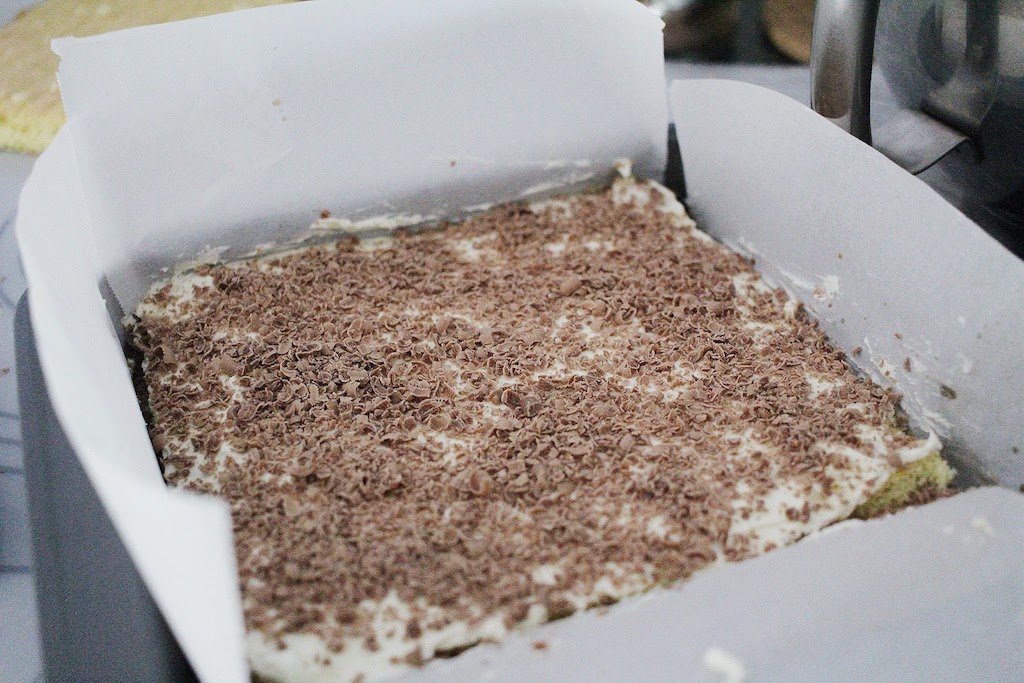
Well, it wasn't the worst bake I've done. Mistake number one, was that I forgot to put down some parchment paper for my sponge to bake on, and I nearly didn't get it out of the pan in one piece. But I saved myself from this by having greased the pan with an excessive amount of butter - haha! Once cooled, I had to slice the cake in half - like across the middle (see photos) but I measured one of my 7x7 inch squares of sponge wrong and was off by an inch! So I have a random one inch slice of cake on two layers. I also struggled with the mascarpone cream layer. I may have over whipped the mixture and turned it to butter. It called for the tiniest bit of sugar, so it wasn't very sweet, and this made it pretty bland in my opinion. Overall it turned out better than I would have expected, considering it was my first time!
Would either of us bake this one again?
My mom has made tiramisu before (using a different recipe) so I know she would make tiramisu again. For me? Yes, but I would make some adjustments. I felt the cream layer was too bland and I think mine needed more time to soak. It was a little fussy, but I don't mind fussy if it comes out beautifully. This was a great challenge, and I feel more confident to try it again!
Here's the glamour shots...
Here's my mom's report
"This isn't the first time I have made Tiramisu so it was fun to try another recipe.
It was great making the sponge. In the past I have used ready made ladyfingers, but the home made sponge cake was delicious. It was easy enough and beating the eggs and sugar for the full 5 minutes is a must.
The mascarpone cheese mixture was my challenge. Previously I have made this frosting using one method (the correct method for me, I might add). This recipe directed me another way, which I followed to a tee, knowing all the while that it would not turn out. Nonetheless following directions is often important when baking. This challenge clarified something for me. The bakers on “The Great British Baking” show must be experienced bakers, because they are NOT always given specific directions, requiring them to draw on their expertise for the proper outcome. This was one of those times for me. It asked me to beat the mascarpone chess then add 3 T. powdered sugar and the heavy cream. It was a curdled blob, never really becoming a smooth frosting. I whipped some more cream with 3 T. powdered sugar separately and folded that into the cheese mixture and was able to use it after all. My recommendation is to whip the cheese while cold. Whip cream and powdered sugar separately then fold into the cheese.
I put the coffee/brandy mixture into a bottle and squirted it over the sponge. Much less messy. I also used a bottle to make the chocolate decorations.
With the exception of the frosting I had no trouble making this cake and would recommend it. It looks impressive and is flavorful. It is a rich cake, so it’s best to make this when a group can help you eat it."
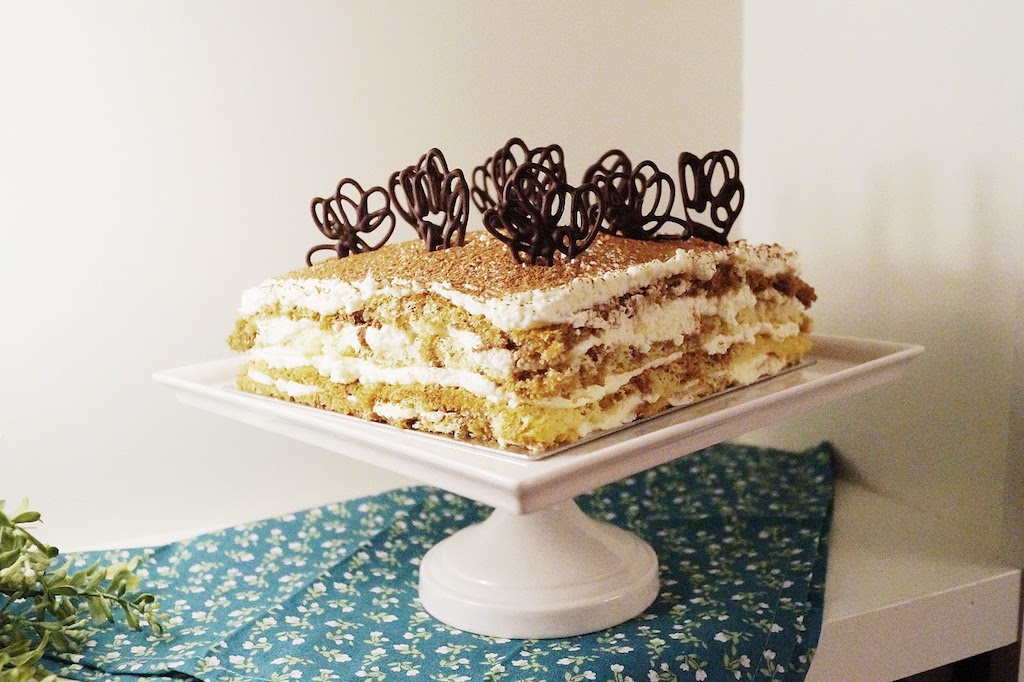
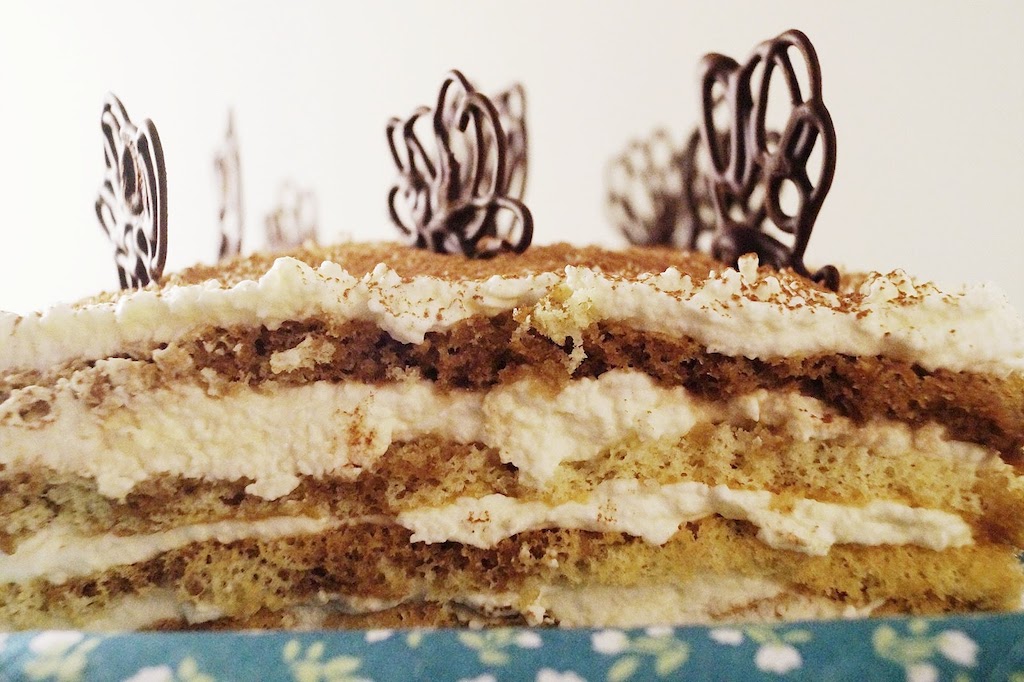
My mom's chocolate work looks so pretty, doesn't it?! Much more professional than mine.
Don't forget to use the hashtag #JoyLynnBakeAlong and join along on this super fun challenge - even just one week if you're feeling up to it! Bake #5 is the one I've been looking forward to the most. It looks really pretty and unique, but also super delicious. Coming up next...
Wednesday, May 3rd
A special Showstopper Bake by our guest Star Baker, Cameron!
(Guys, I'm so excited about this, you don't even know. I fan-girl over Cameron's bakes on the regular. I haven't even been privy to her creation yet, so I'm dying over here!)
Wednesday, May 10th
Bake #5: Mini Pear Pies

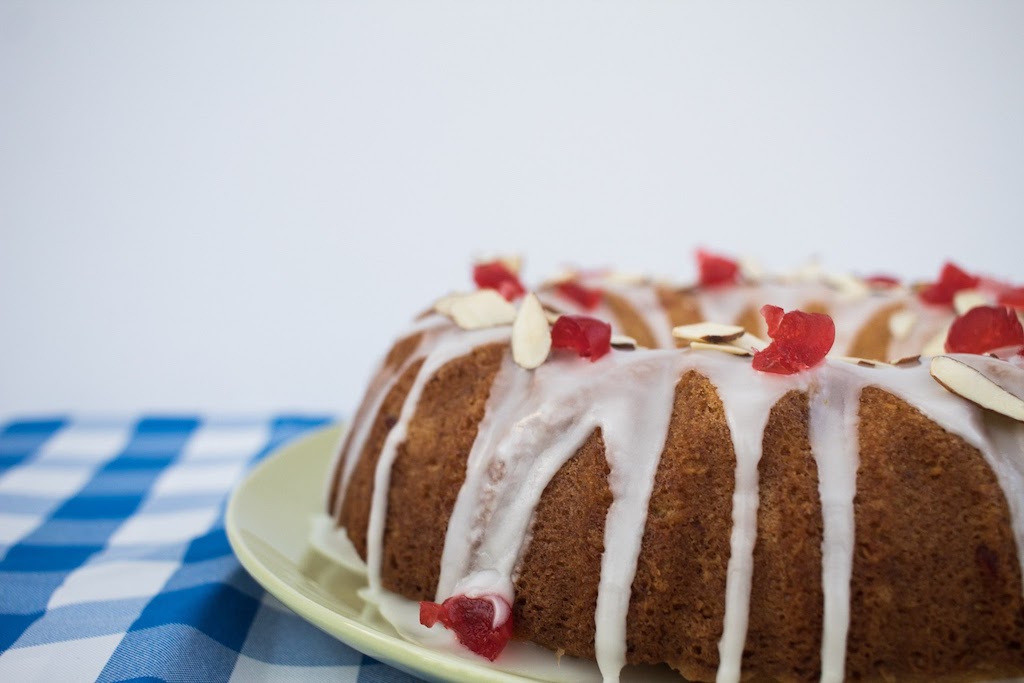
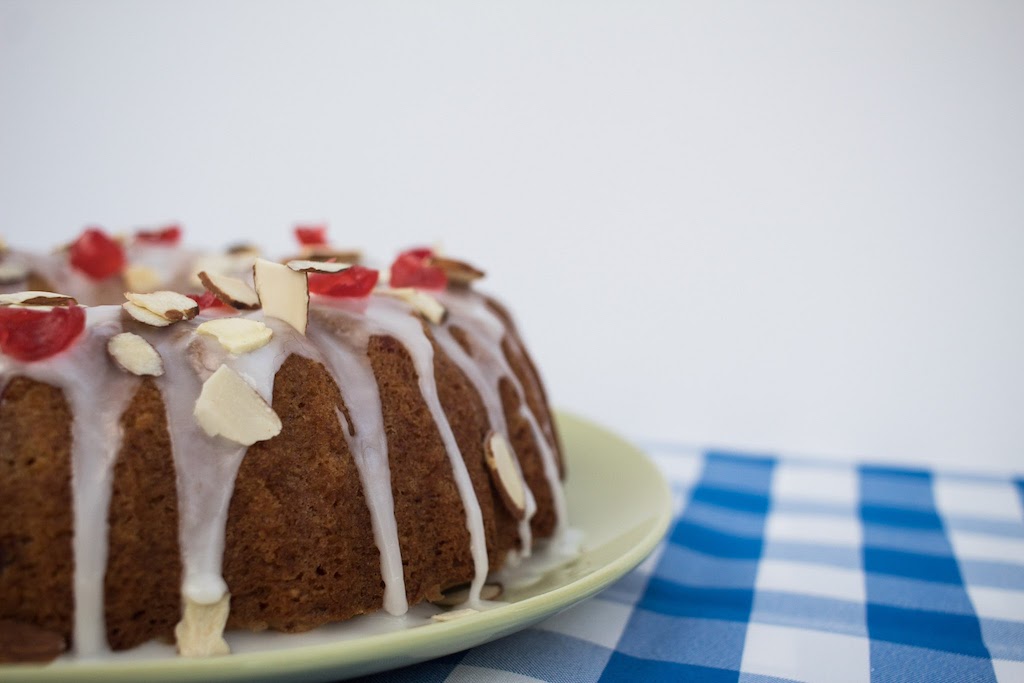
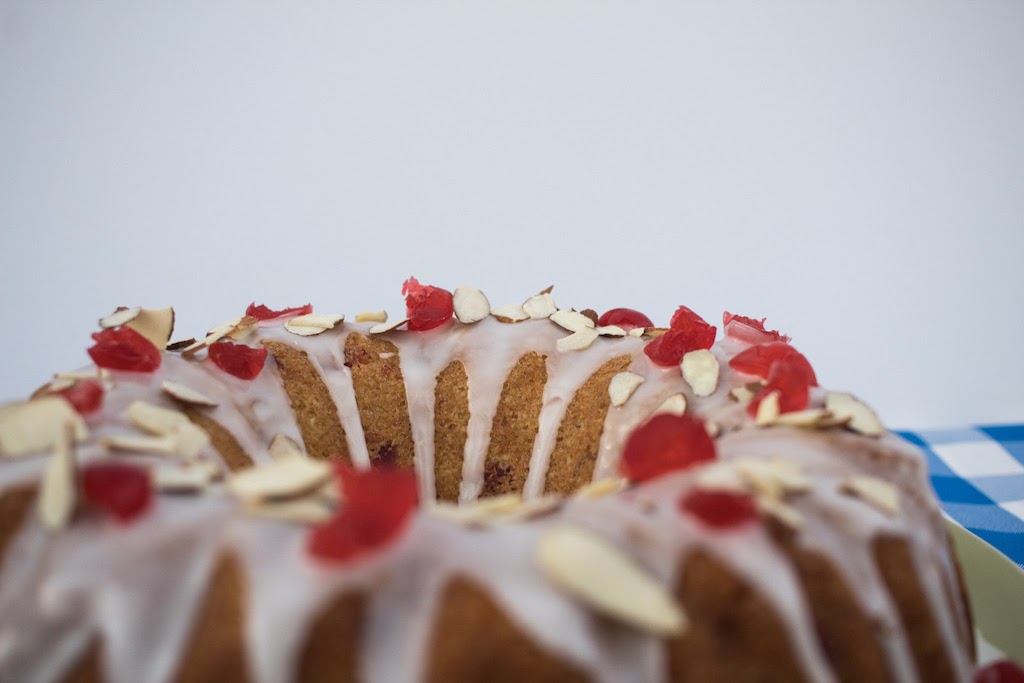
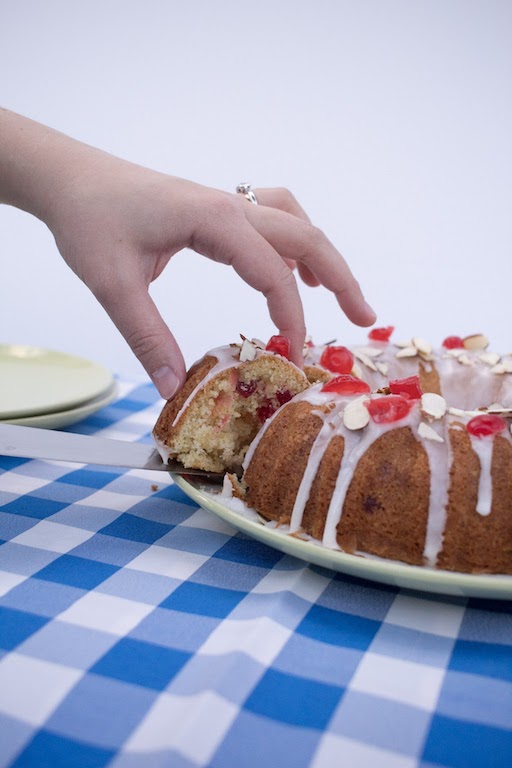
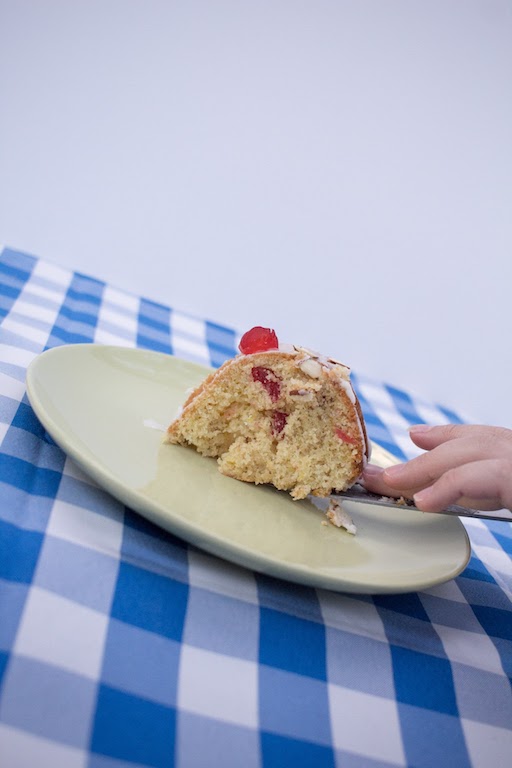
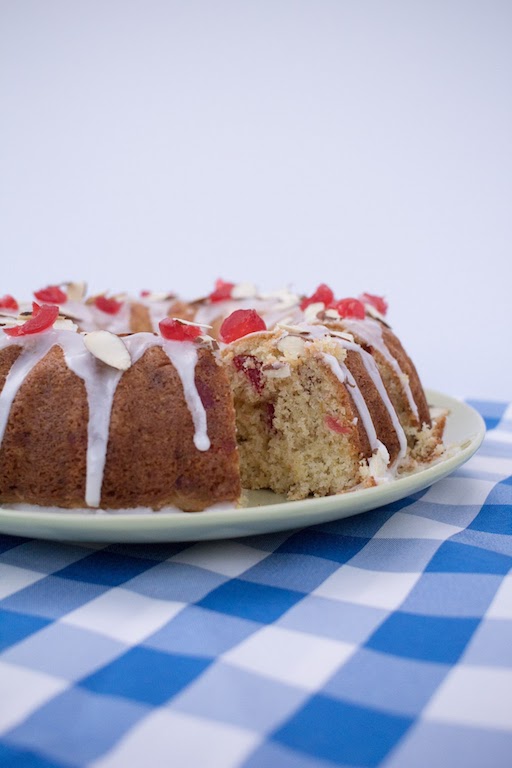
Bake #1 | Cherry Cake
The first baking challenge from Joy Lynn's "The Great Blogger Bake Along" based on The Great British Baking Show.
Alright guys, Bake #1 is in the books (or the blog, in this case). I'm going to try and be brief, but I'm also sharing a little note from my mom with photos of her bake, too!
The Challenge
Mary Berry's cherry cake. Make sure the cherries are evenly distributed throughout the cake, put your frosting on when the cake is completely cool so it doesn't run off the cake completely, and be sure it was a good bake and not over or under-done.
The Outcome
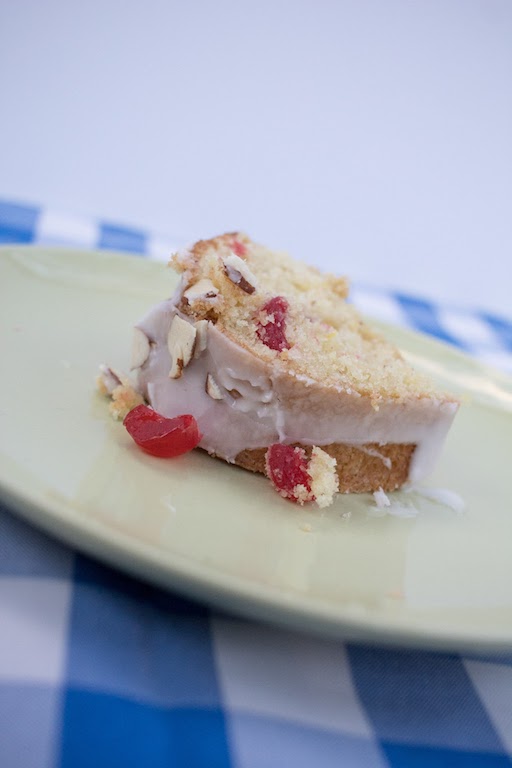
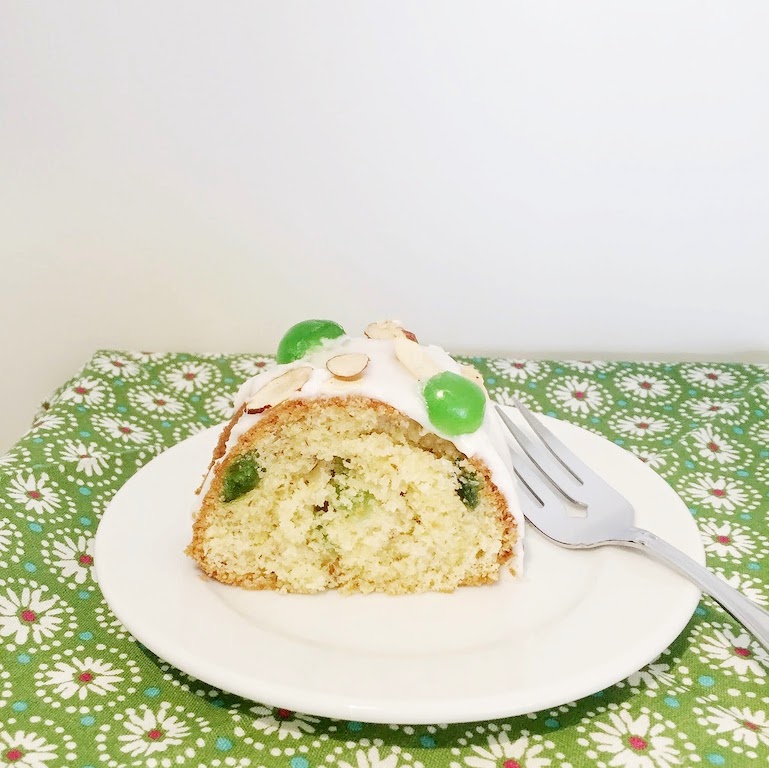
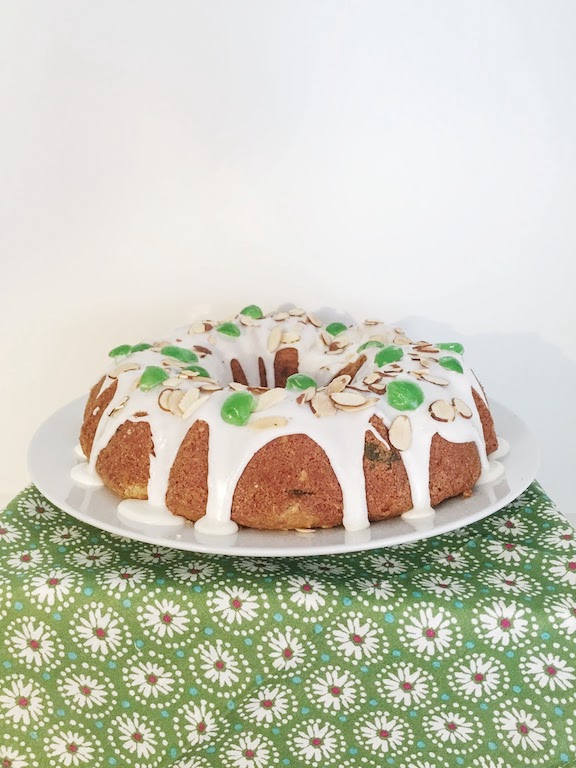
This was fun! My mom would also attest to this, because we're both learning so much. Even as experienced bakers, we're running into challenges that make us question our skills a little, which is good! One of the major challenges I know I'm going to run into for all these bakes are the different ingredients. I did find caster sugar and glace cherries, but I made my own self-rising flour just hoping it was correct. The cake came out beautifully, but both mine and my mom's seemed dry. I baked it for the minimum amount of time, and it was quite crumbly. Perhaps it was supposed to be this way? The flavor was delicious, but neither of us would call it a "cherry cake" as the lemon seems to be the overarching flavor in this one. Has anyone else tried this cherry cake? Is it supposed to be dry? We thought maybe so, as a lot of European bakes are described as "crumb cakes."
Would either of us bake this one again?
Nah. Good flavor, and lovely with a cup of coffee or tea, but not a favorite.
Here's the glamour shots...


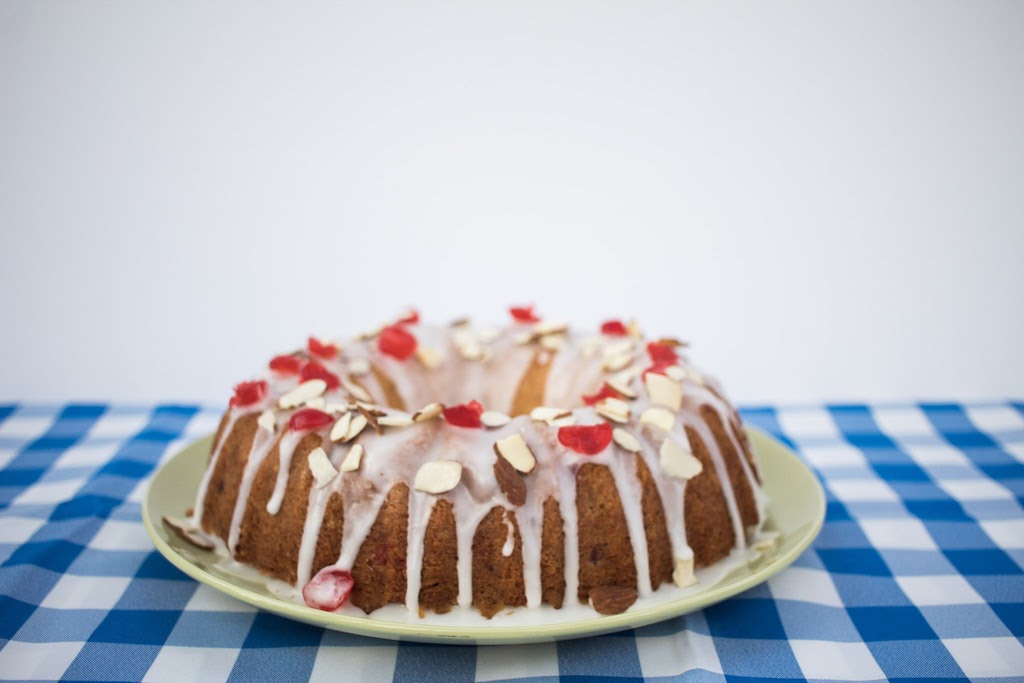
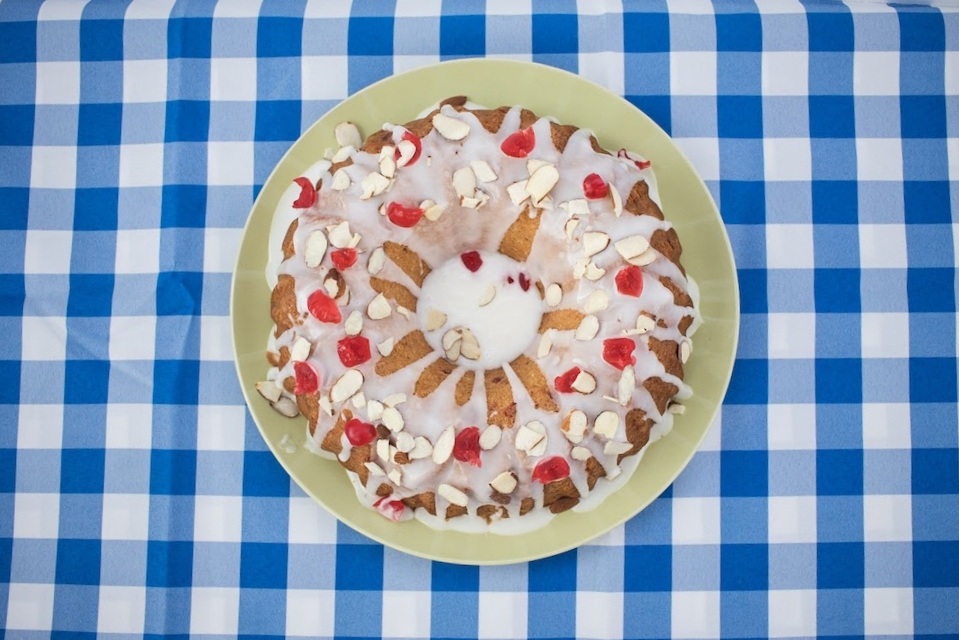
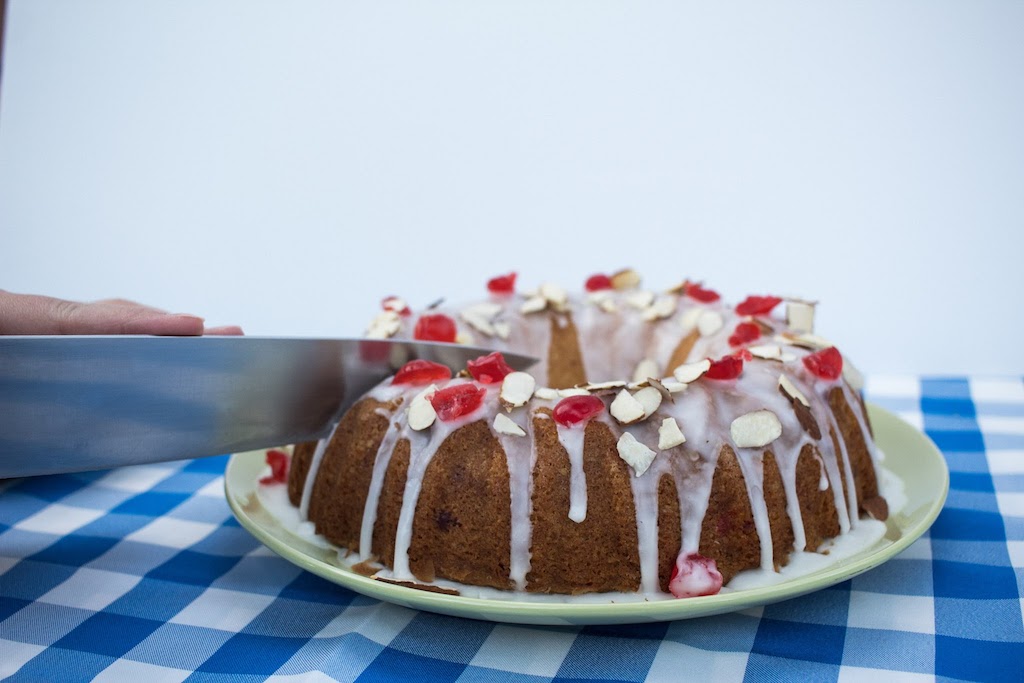
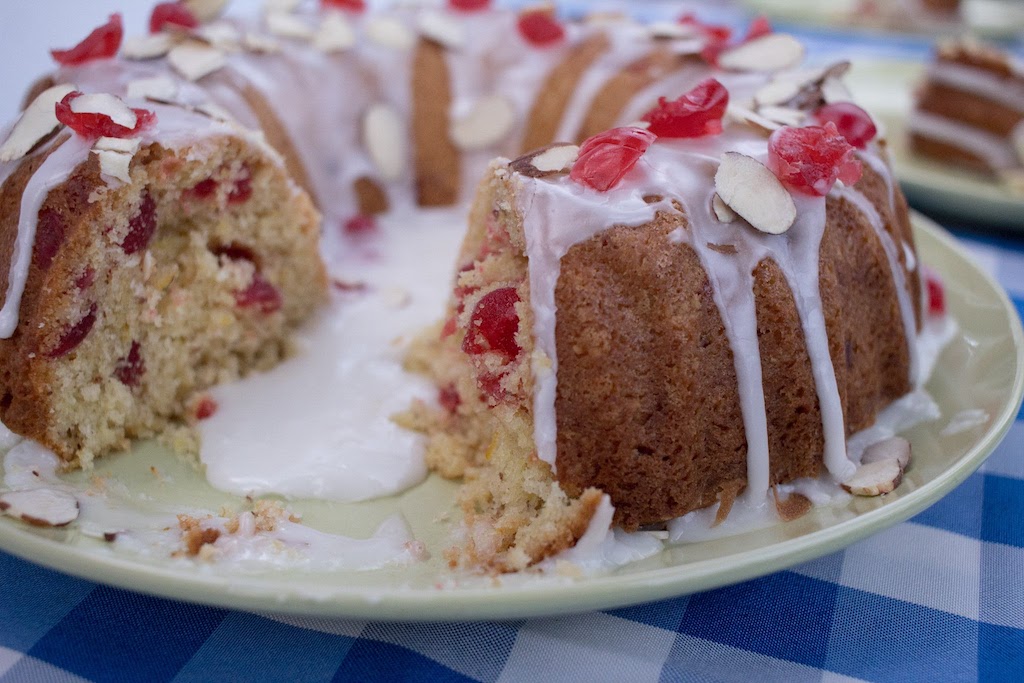
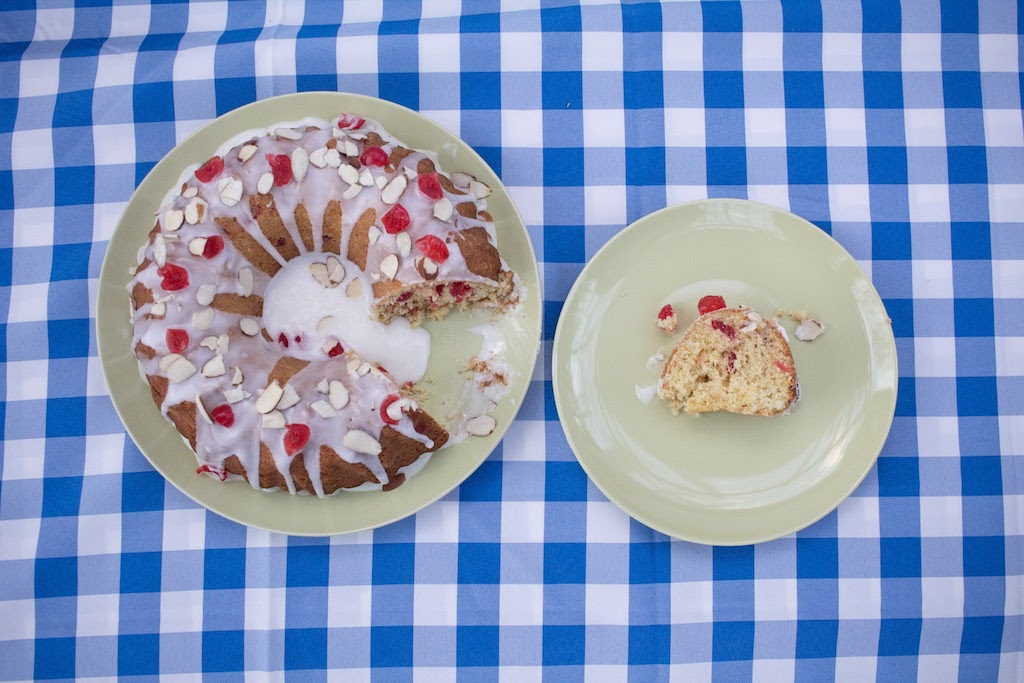

See my big mistake? The cake was actually quite cool, but I think my frosting was a tad runny and it pooled all in the middle! Womp womp!
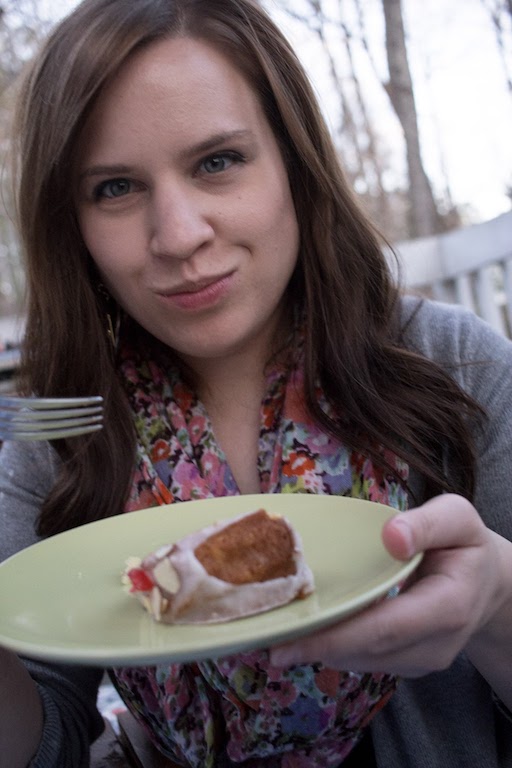
Okay, so you ready to see my mom's version? Here's what she had to say, including some background about her, and our baking endeavors together. Make sure you read this because my mom is a hoot.
"When Joy told me she was doing The Great British Baking Show on her blog I was immediately on board. My family has always told me that I should be in business because of my cooking. Well, that has not happened. Actually the thought of being successful makes me kind of tired. How on earth would I ever keep up if the demand for my products grew? (haha) In truth I really love cooking and baking for my family and friends, at a pace that I set. Another disadvantage I have is that I am a perfectionist and my standards are quite high. Everyone might be throughly enjoying something I have done and I am still disappointed with something (too dark around the edges, too runny, flavor is "off ", uneven layers, and so on). I learned to cook from my Mother and have great memories cooking and baking with my daughters. Even my boys can find their way around a kitchen. In fact each spring the men compete for the best rhubarb custard pie.
The best thing about cooking and baking with your family is quite often the fun that ensues. This picture was taken after Joy and I got out of bed and started baking for an upcoming visit from her college friends. What a sweet memory of laughter and talking - the laughter is my favorite!
Which leads to my assessment of our first challenge. The cherry cake.
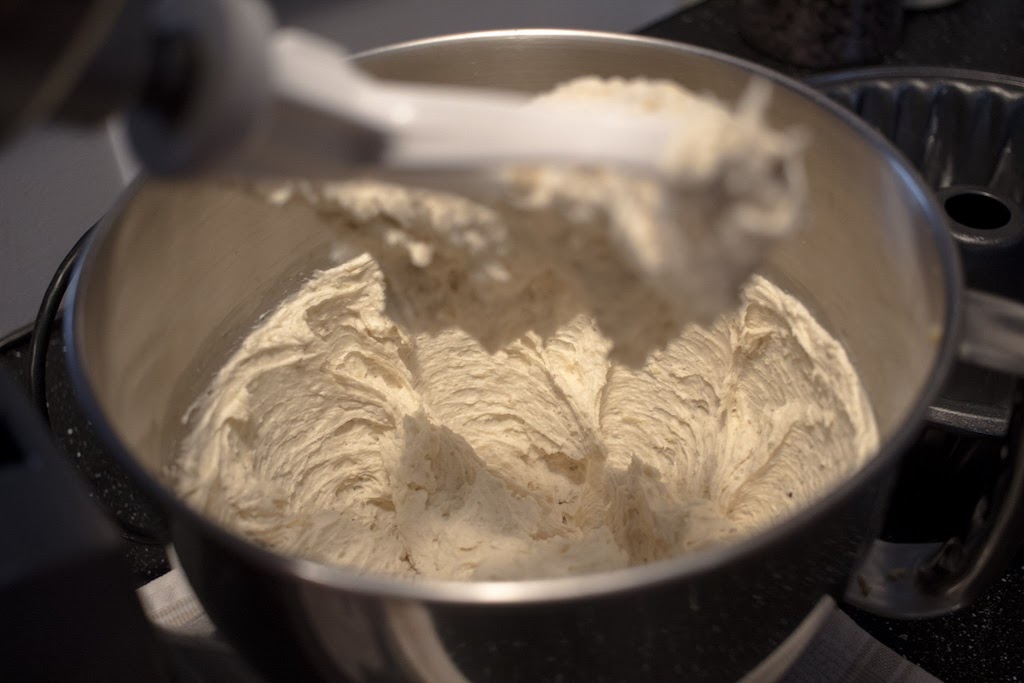
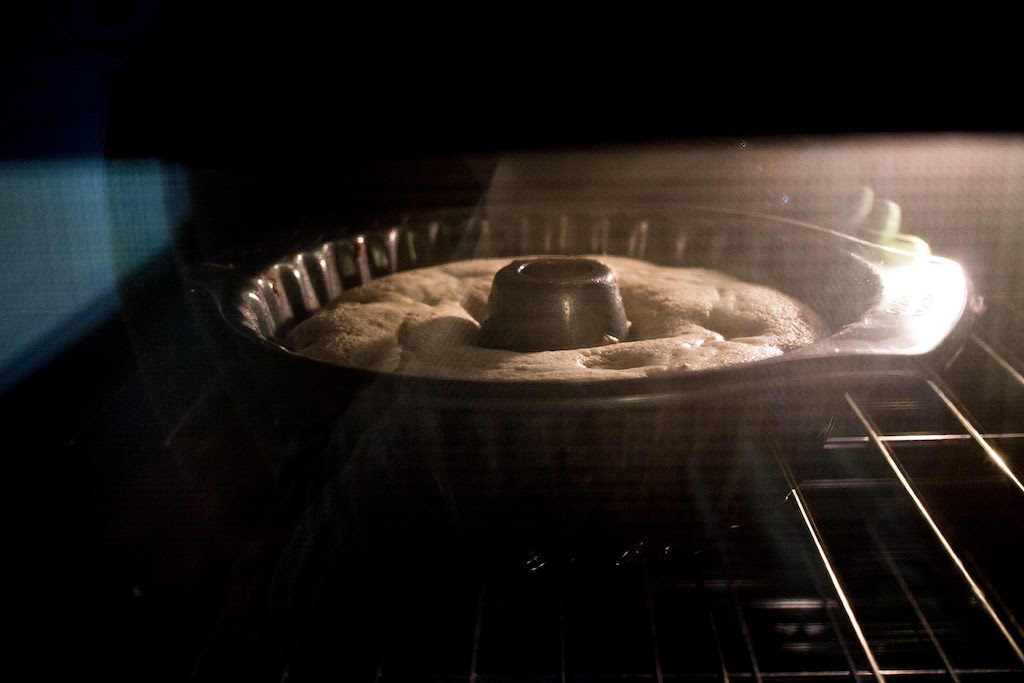
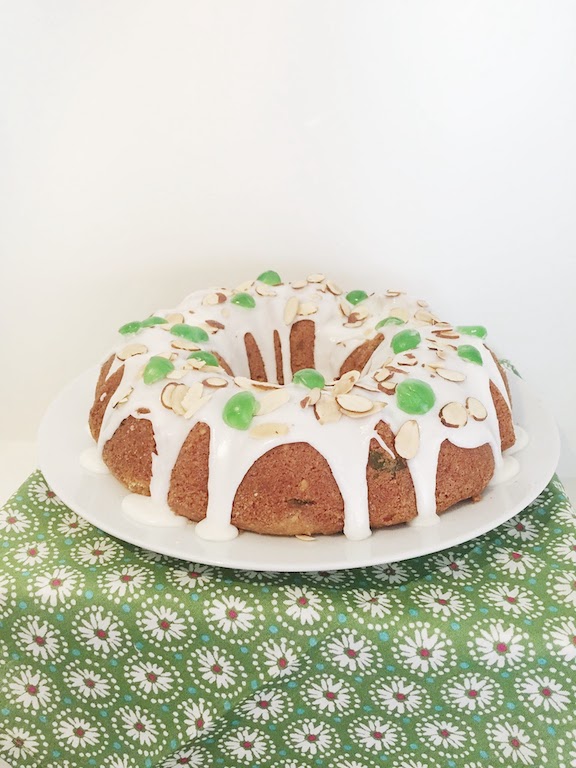
I learned that 2 tsp. of baking powder to a cup of all purpose flour is a substitution for British self raising flour. I discovered in my small town that candied cherries are only available during the holidays. I was fortunate to find one tub of green. The cherry cake you see pictured would probably be made for a St. Patricks celebration. That is, if it would ever be made again. It went together pretty easily and the cherries did not sink to the bottom which was good. So on that score it was a success. My bundt pan was old and when I put the thick batter in, there was some trepidation about it coming out of the pan. Joy and I happened to be FaceTiming when the cake was ready to be turned out. We both wish we had videoed the moment for you.... only half of the cake came out! (Laughter ensued for a really long time) If you look very closely you will see a gouge toward the back of the cake. Thank goodness for frosting. The cake had very nice flavor and the tart lemon frosting was delicious, but the cake itself was DRY, DRY, DRY! I won't have to make this cake again and couldn't really recommend it."
So there you have it, friends! Bake #1 is done and we're ready to take on the next one! Are you joining us? Tag your photos #JoyLynnBakeAlong for a blog post feature.