

The Best Mug Cookie
Did you guys know I have a sweet tooth? Because it's a pretty basic fact about me, so in case you didn't, now you do. Growing up, I spent a...
Did you guys know I have a sweet tooth? Because it's a pretty basic fact about me, so in case you didn't, now you do.
Growing up, I spent a lot of time baking with my mom. Breads, cakes, cookies, pies, etc. It wasn't just about making something yummy, it was about learning techniques, talking, laughing, cleaning up, testing out changes to a recipe, or figuring out different substitutes for missing ingredients. There is an art to baking that I whole-heartedly enjoy and it's often therapeutic for me to spend an afternoon baking.
And yet, sometimes, I just want the taste of something baked without actually having to make an entire batch of something.
That's where this little fella comes in.
This recipe has been tried and tested over and over until I figured out just the right ingredients, measurements, and microwaving time to get it juuuust right. If it looks familiar to other ones you've seen, I wouldn't be all that surprised, because there's only so many ingredients you can really use in a microwavable cookie without it turning out "too this" or "too that"... but I assure you, this one is purely from my own experience.
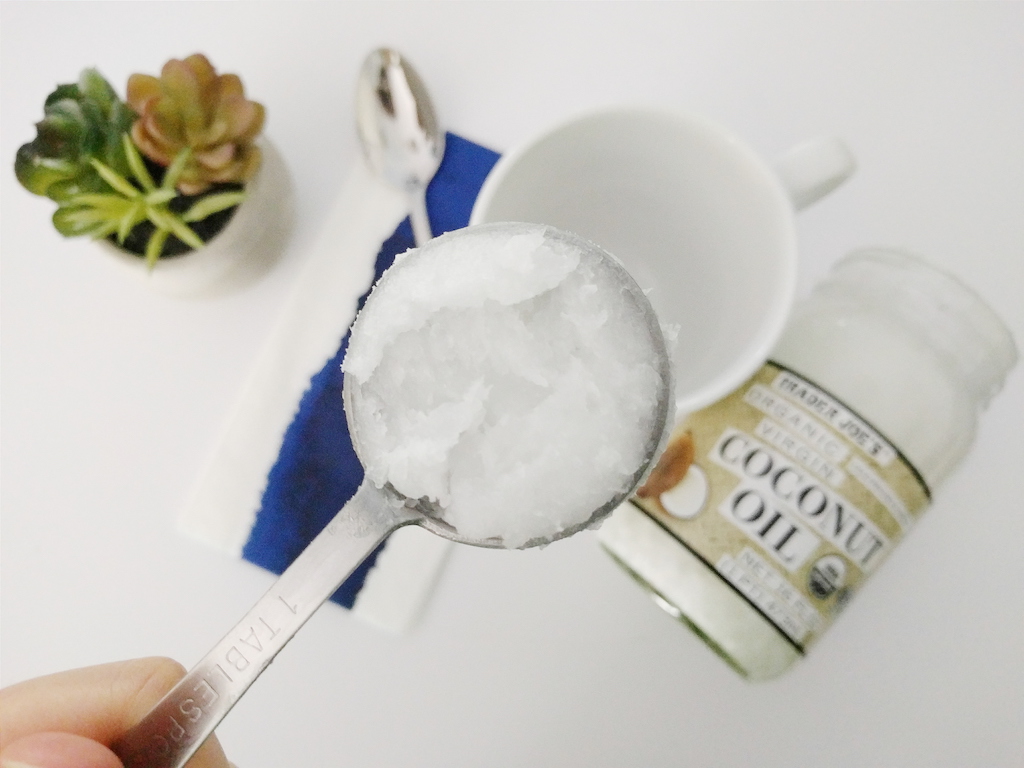
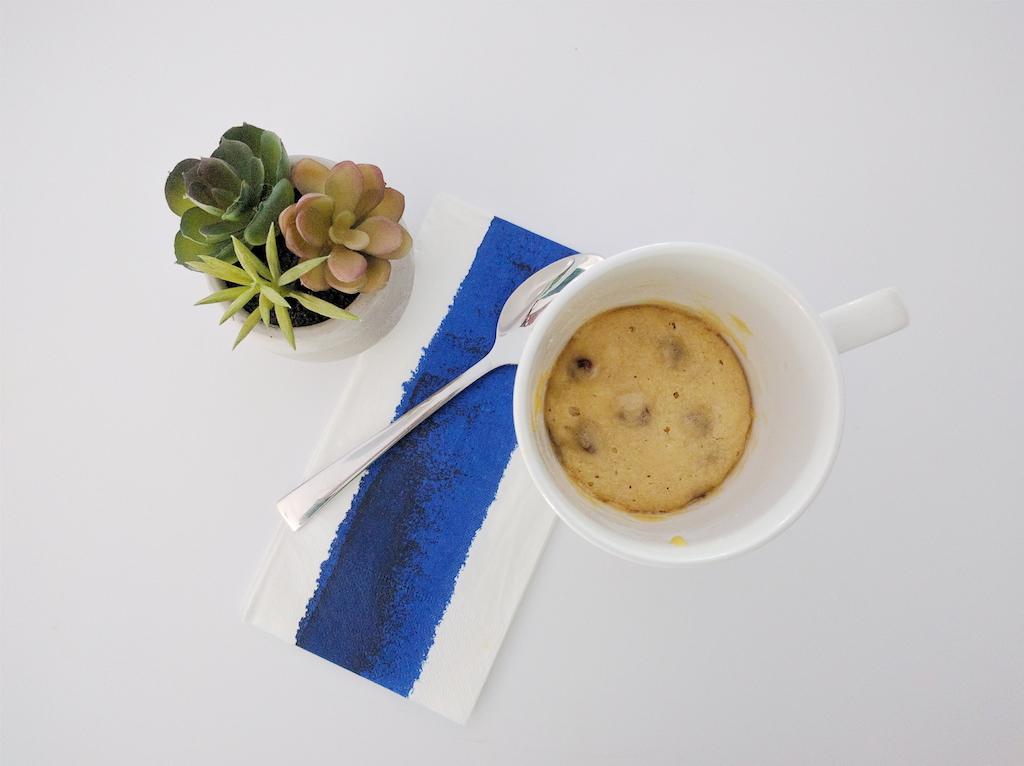
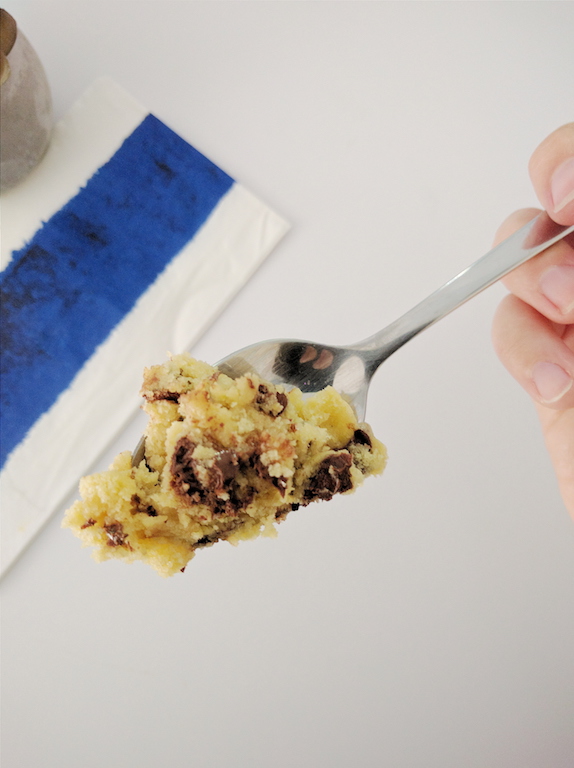
The thing I love about this cookie, is the coconut oil. Not only do you get that slight hint of coconut flavor, but it gives it the perfect amount of moisture so that the cookie doesn't get dry and cakey (a common problem among mug cookies). Also, by cooking it for less than a minute, it hits the just baked mark and is slightly doughy.
Below, you'll see what you need and how much, but as for the chocolate chips, feel free to sub them out for peanut butter, chopped nuts, or a mixture of whatever you like. Just remember to add no more than a total of a small handful of whatever you add, and you'll be golden.
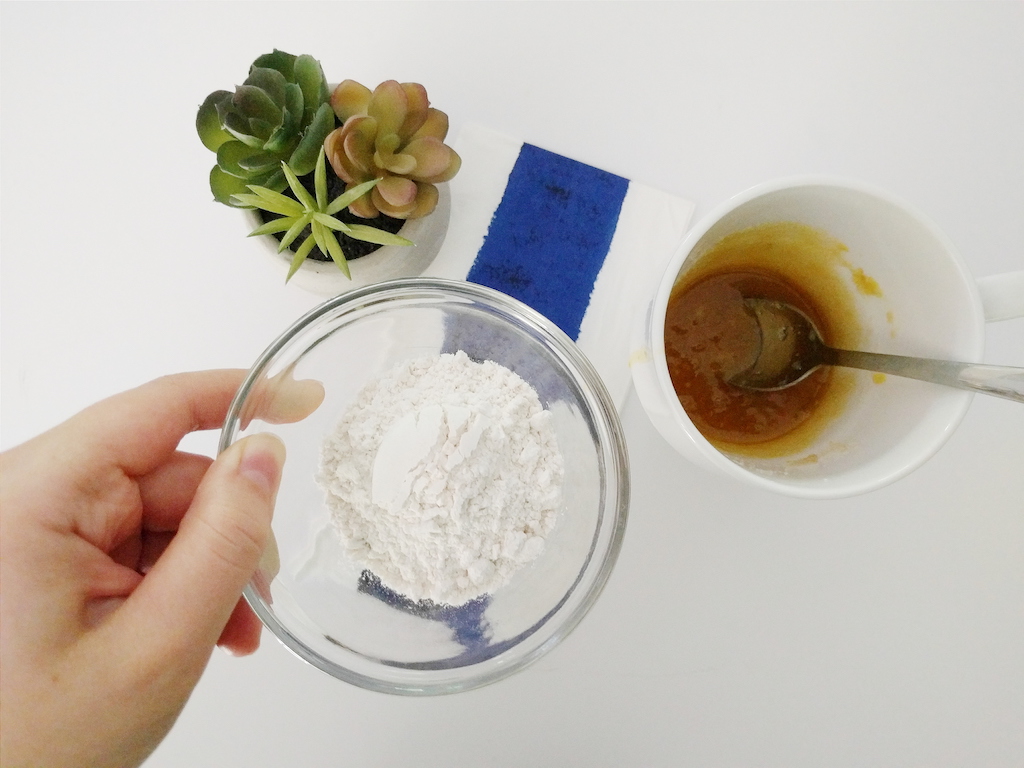
Ingredients
1 T melted coconut oil
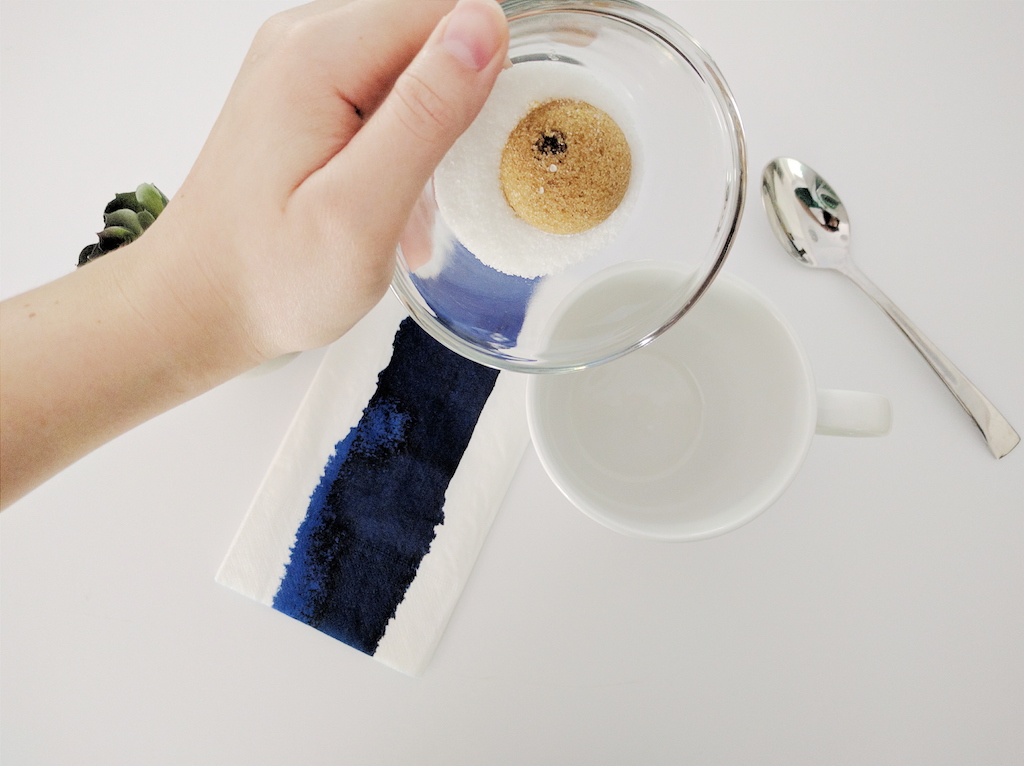
1 T sugar
1 T brown sugar
Pinch of salt
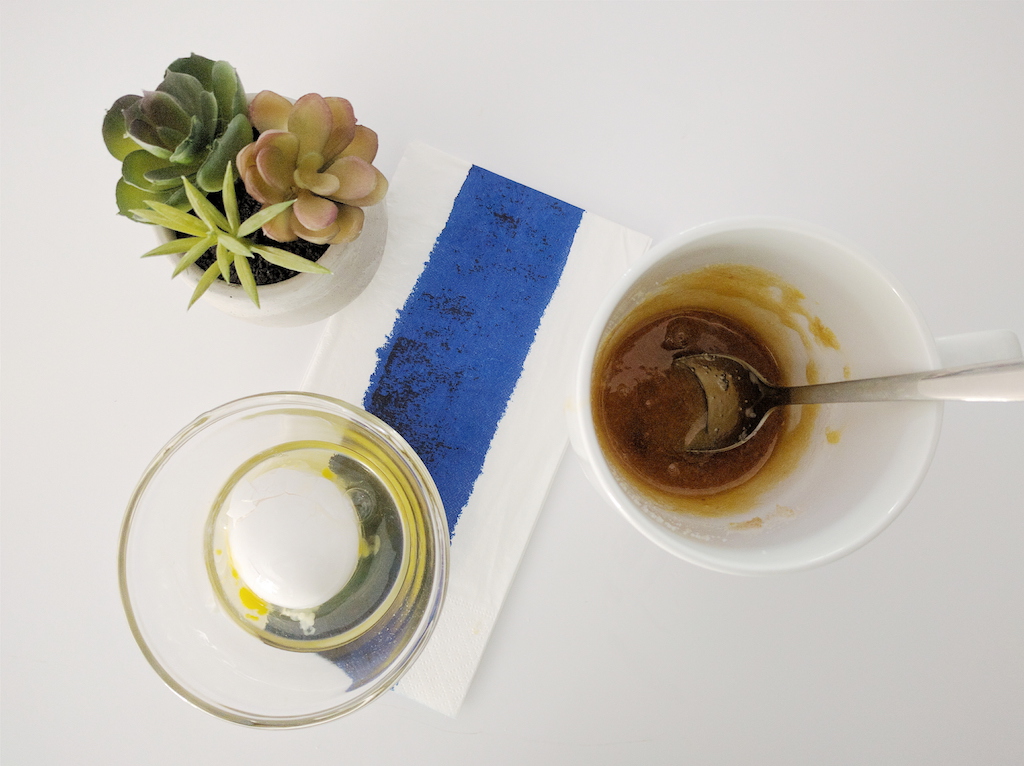
1 egg yolk
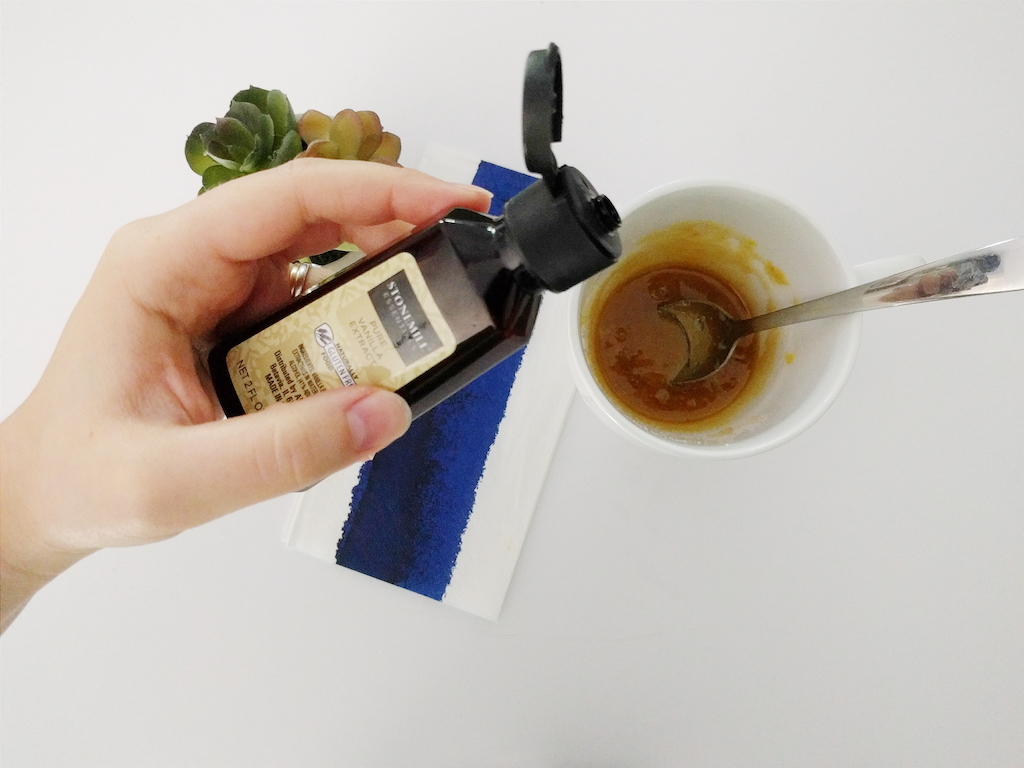
2-3 drops vanilla
3.5 T flour
Small handful chocolate chips
Directions

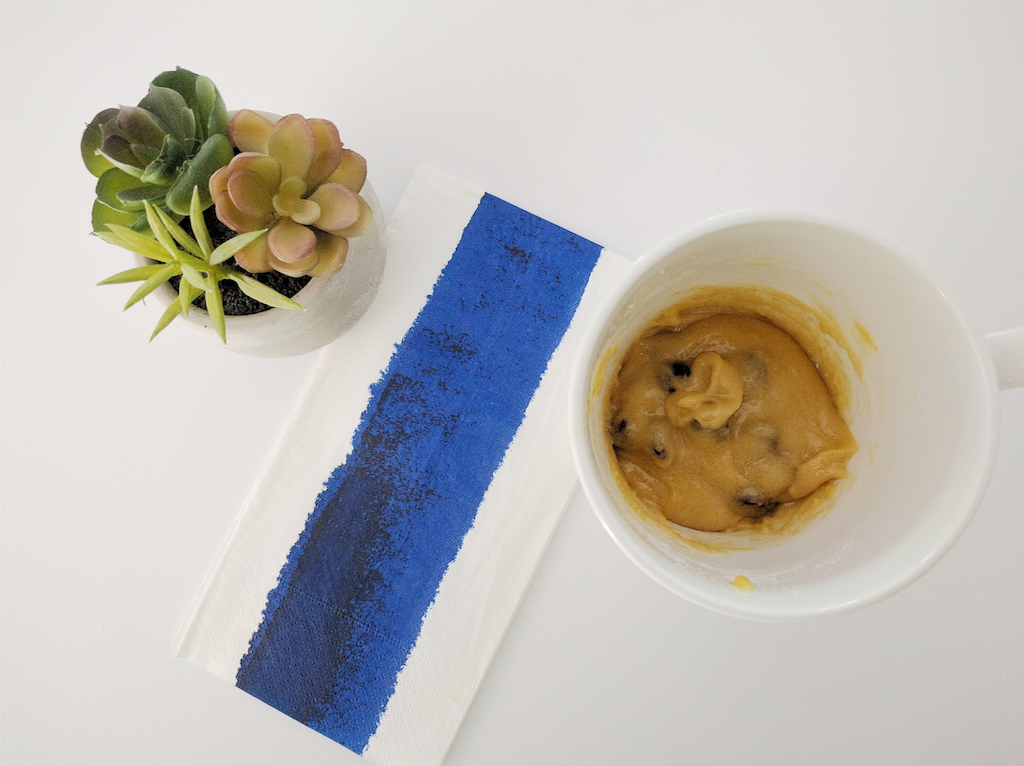
If you're planning on making more than one, be sure you treat them separately. Don't double this for one mug, or microwave two mugs at one time or they won't turn out right. I say all of this from experience... trust me!
These go great with ice cream or milk... but be wary... they can become terribly habitual to make!
Have you tried it? What do you think?

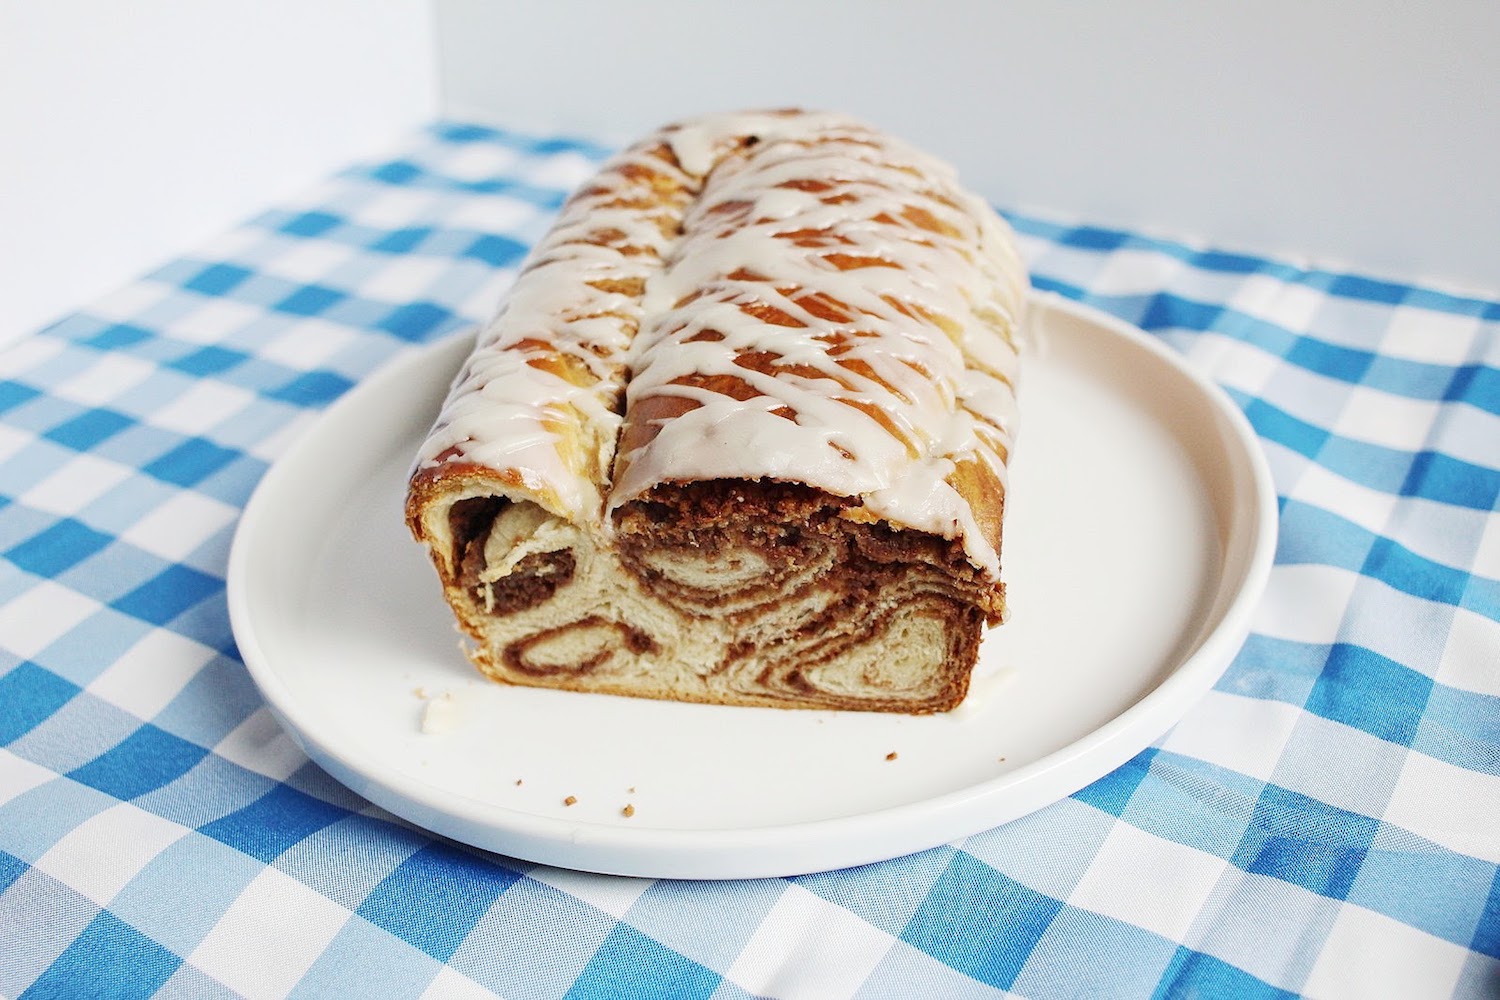
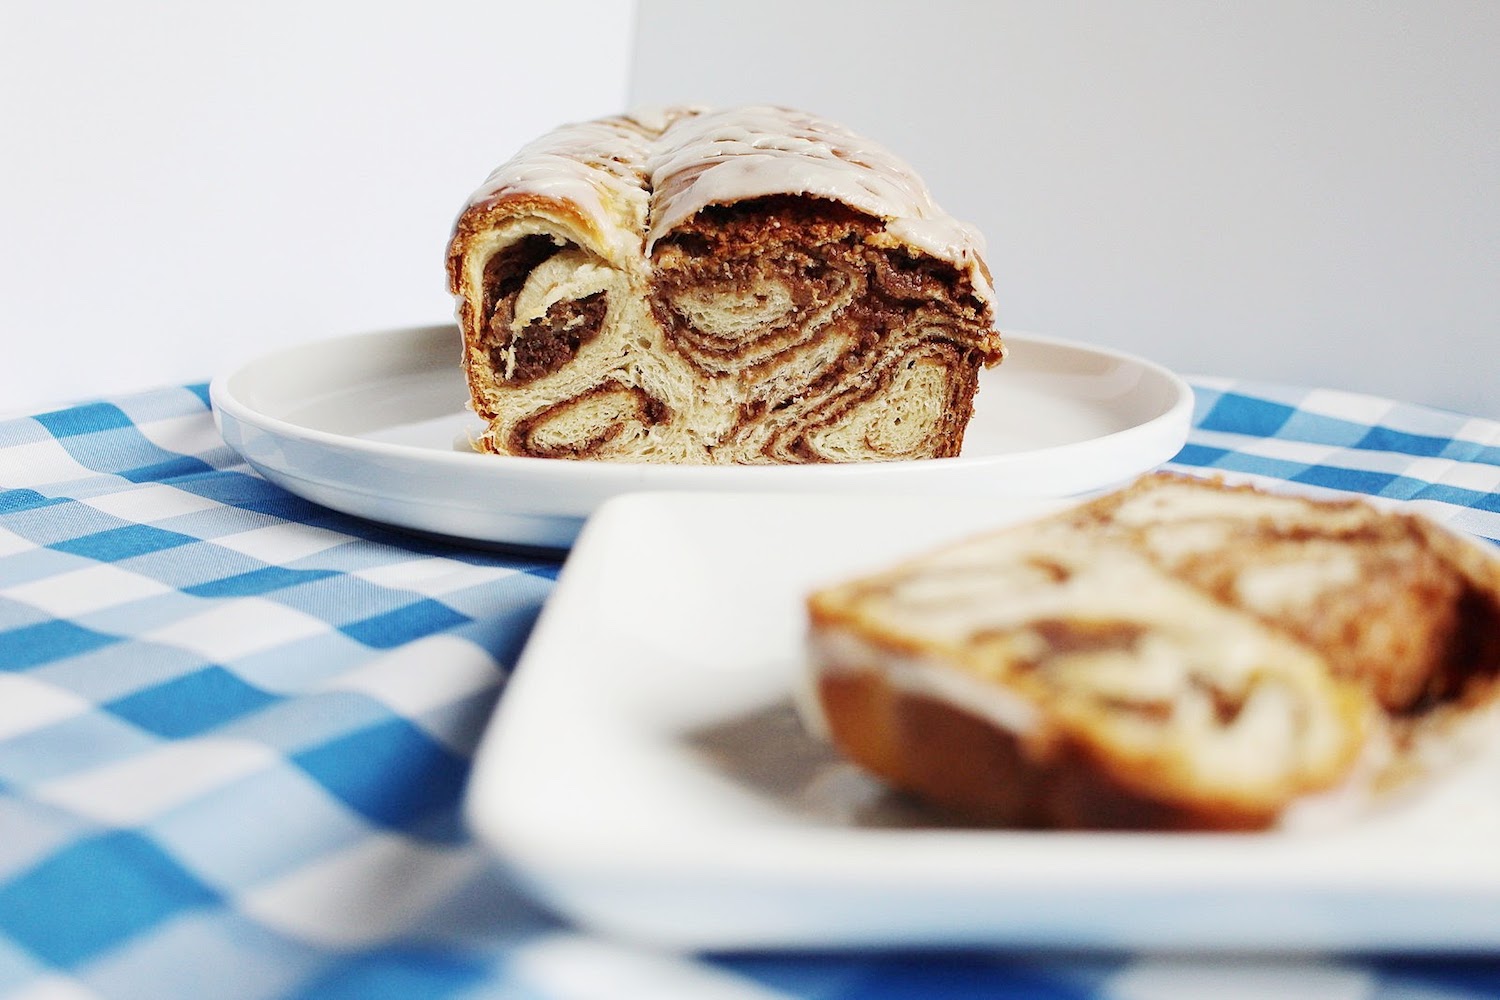
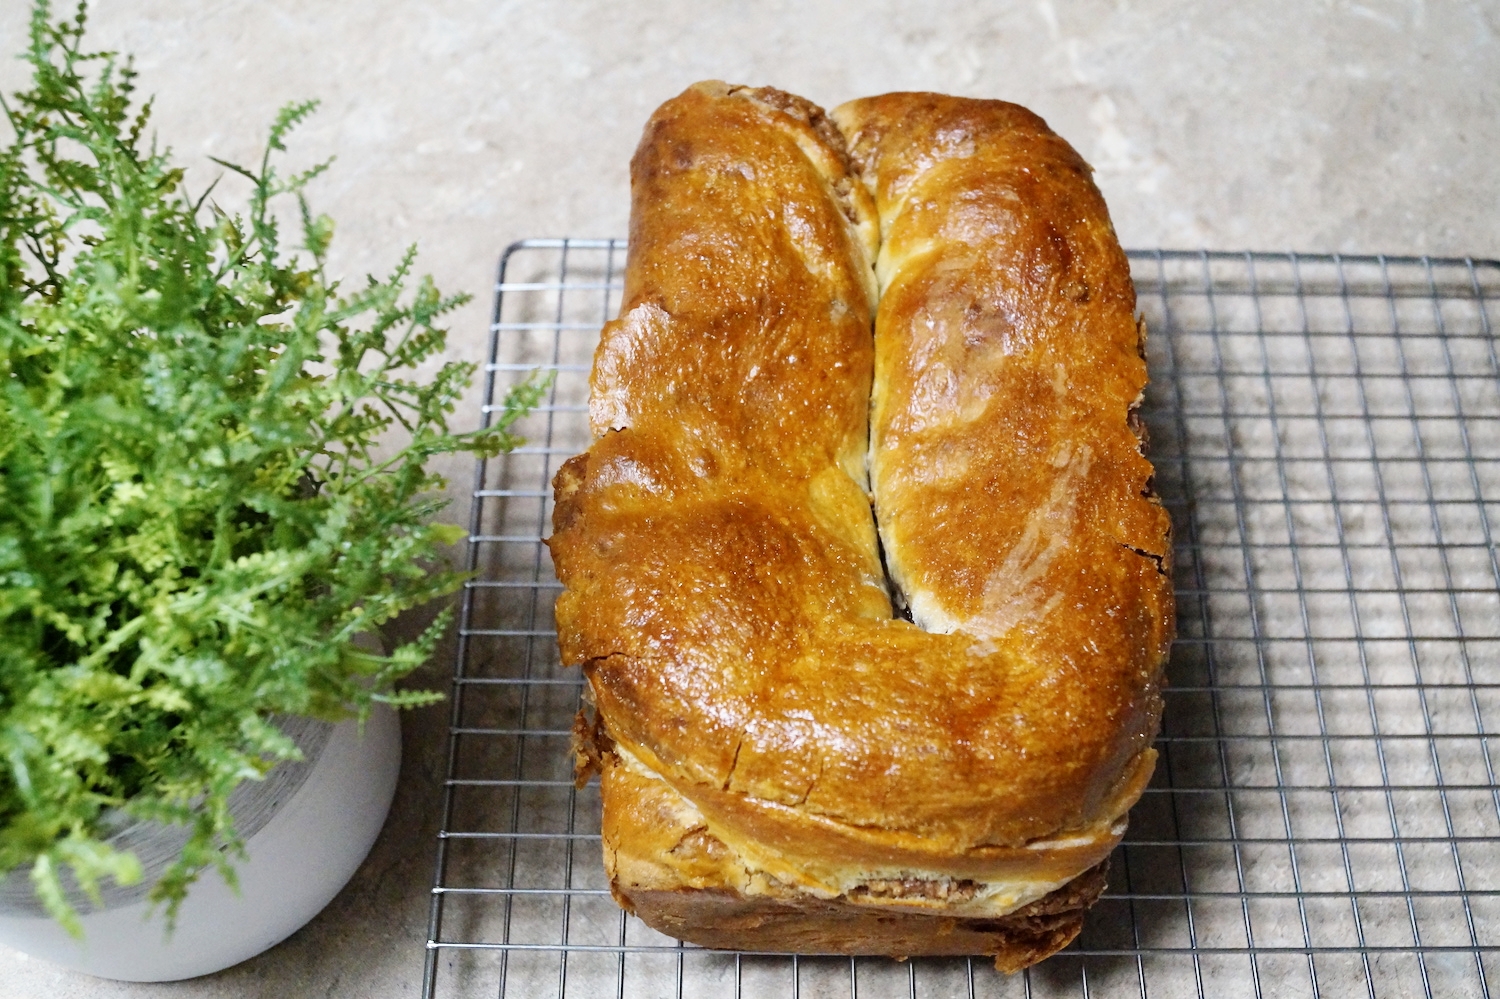
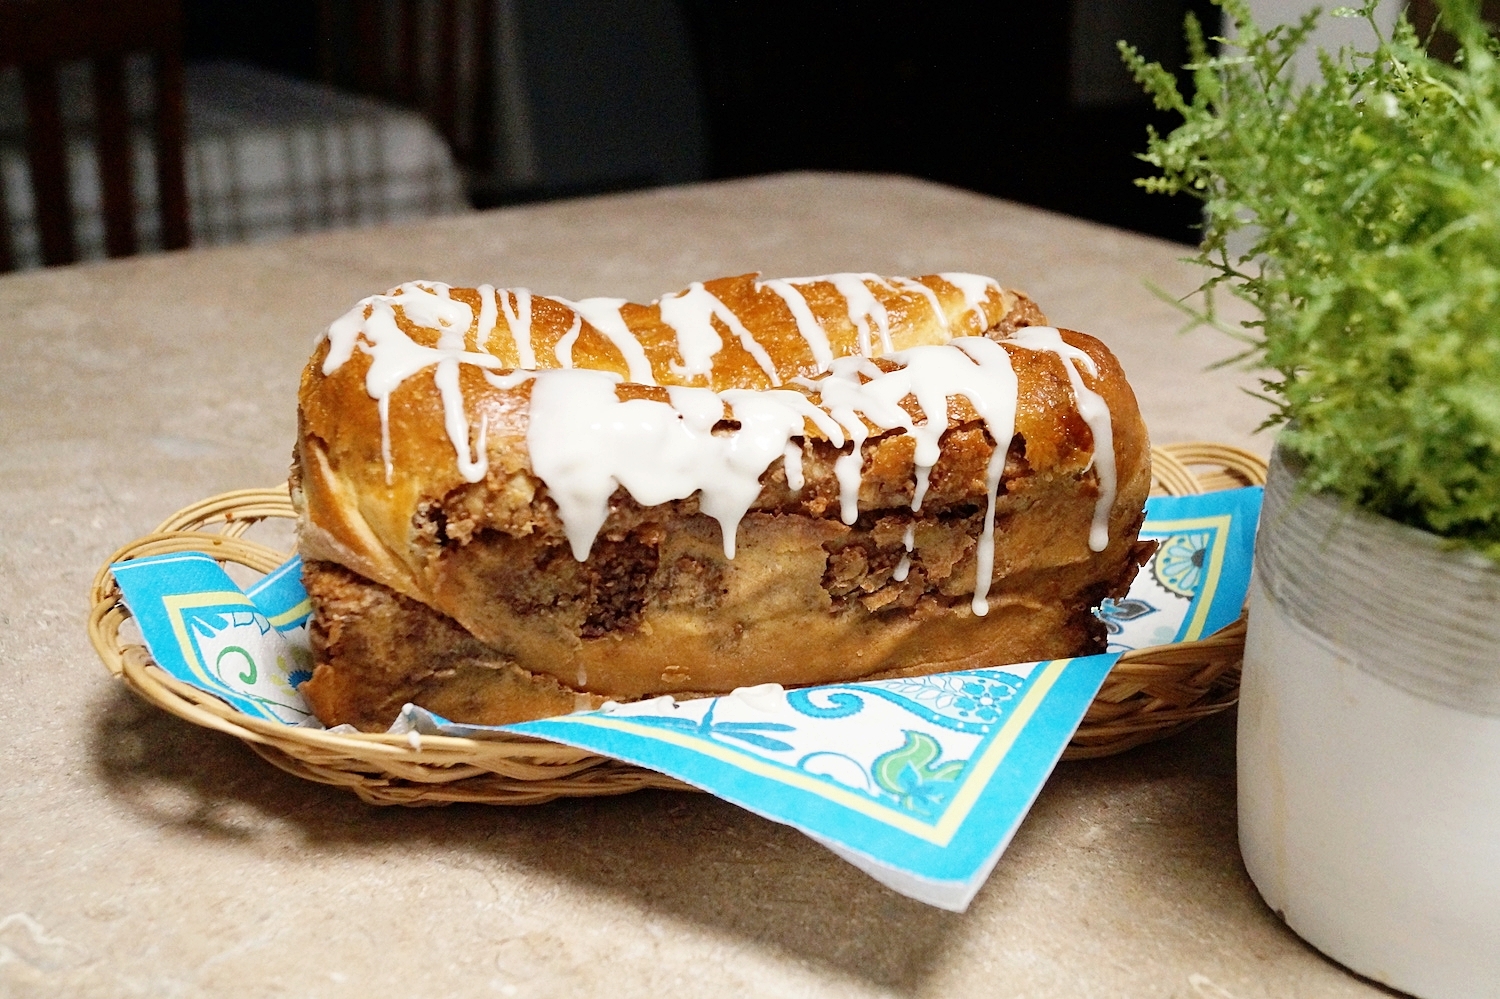
Bake #8 | Povitica
In case you're not up to speed, this is the eighth bake in The Great Blogger Bake Along series. Read about it here.
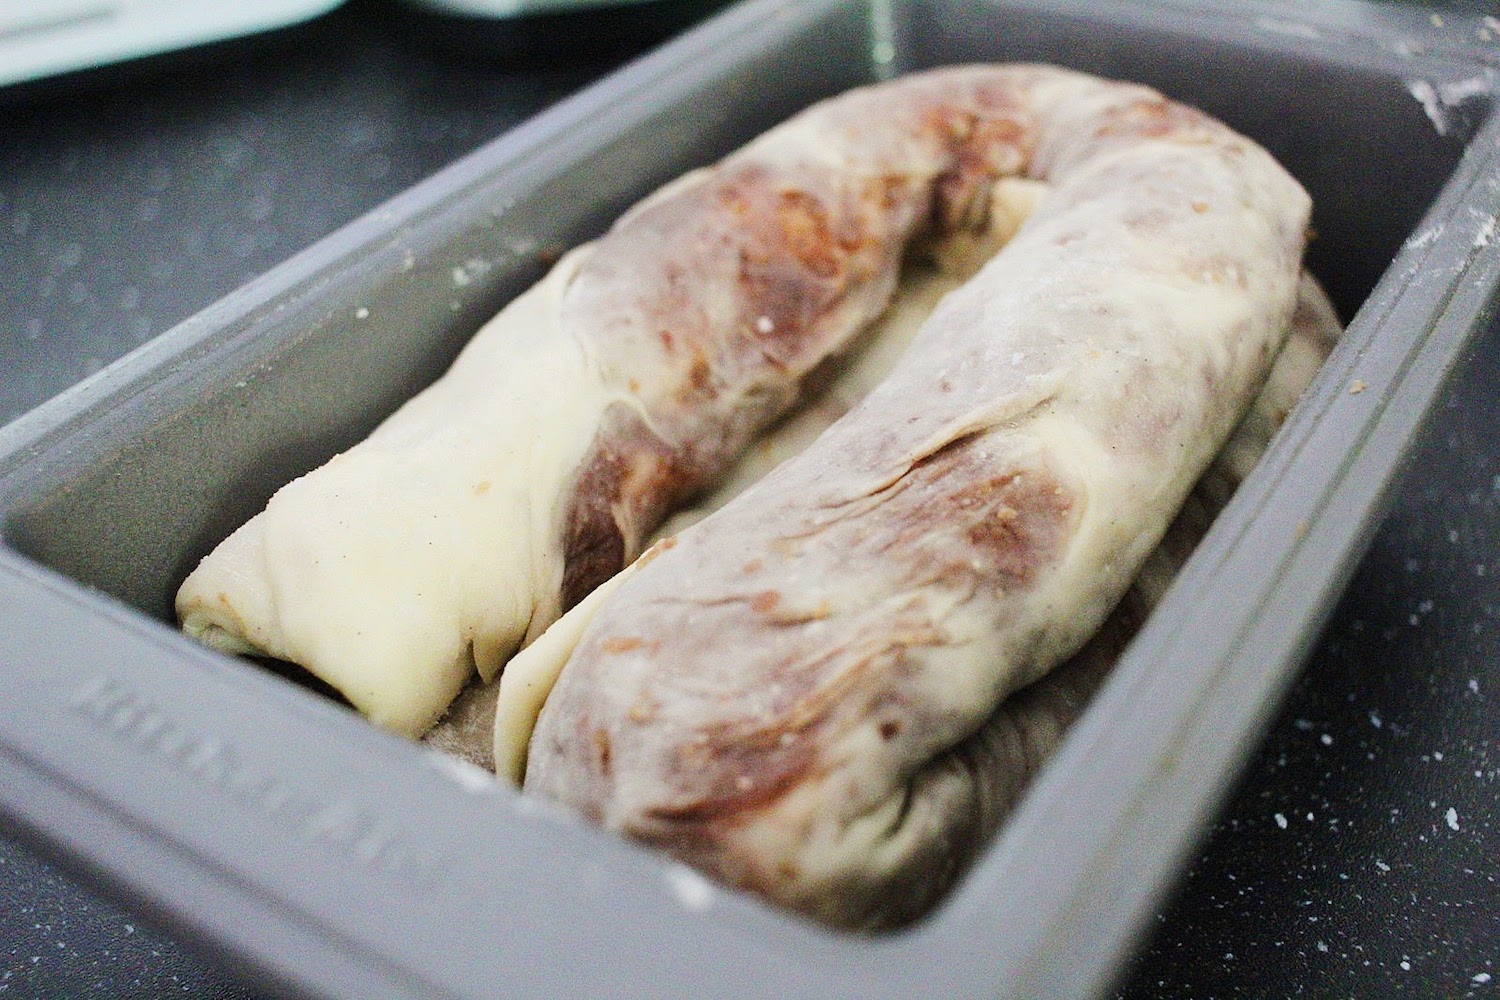
This one wasn't too scary... at least until I had to roll the dough out to FORTY inches. Yeesh. This was the first one that I had Tom lend a hand with. Let me explain in a moment.
The Challenge
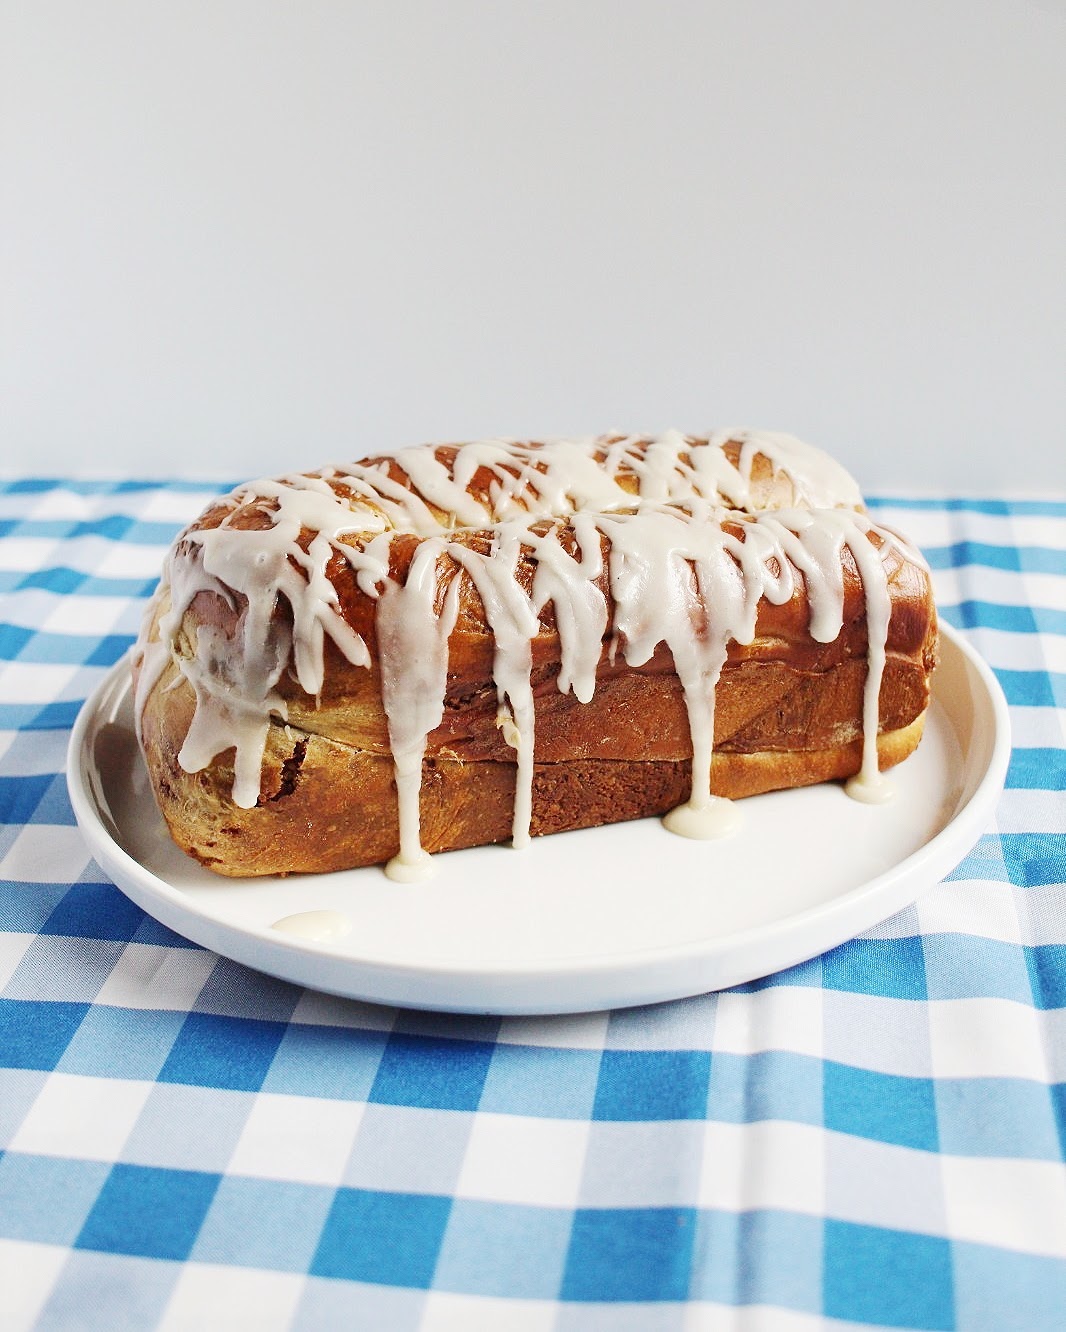
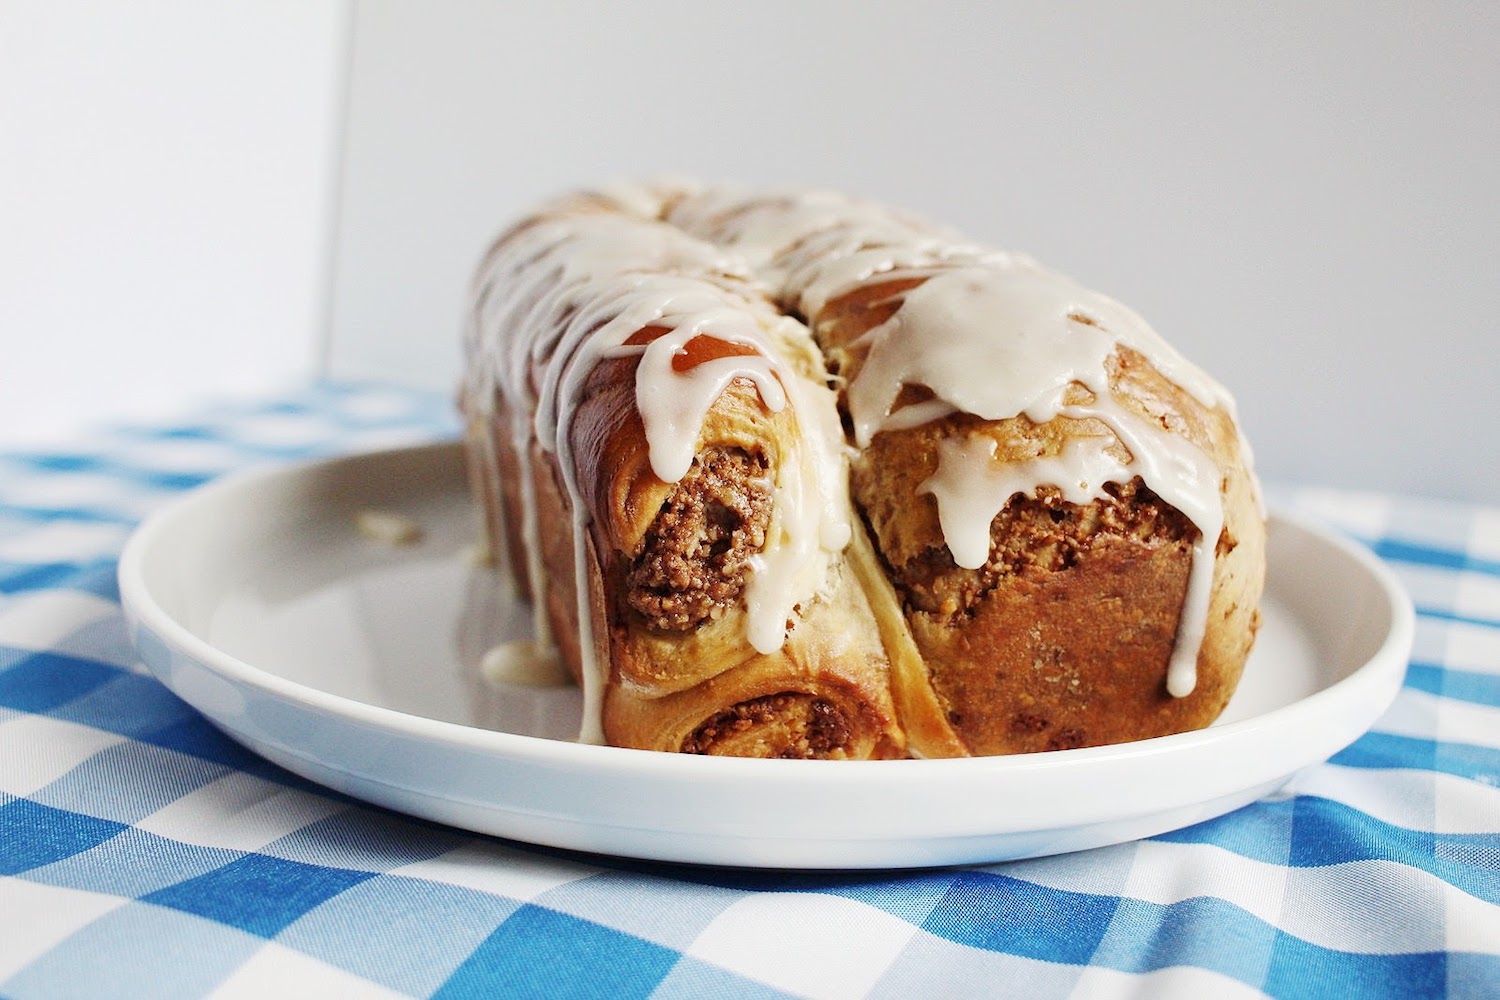
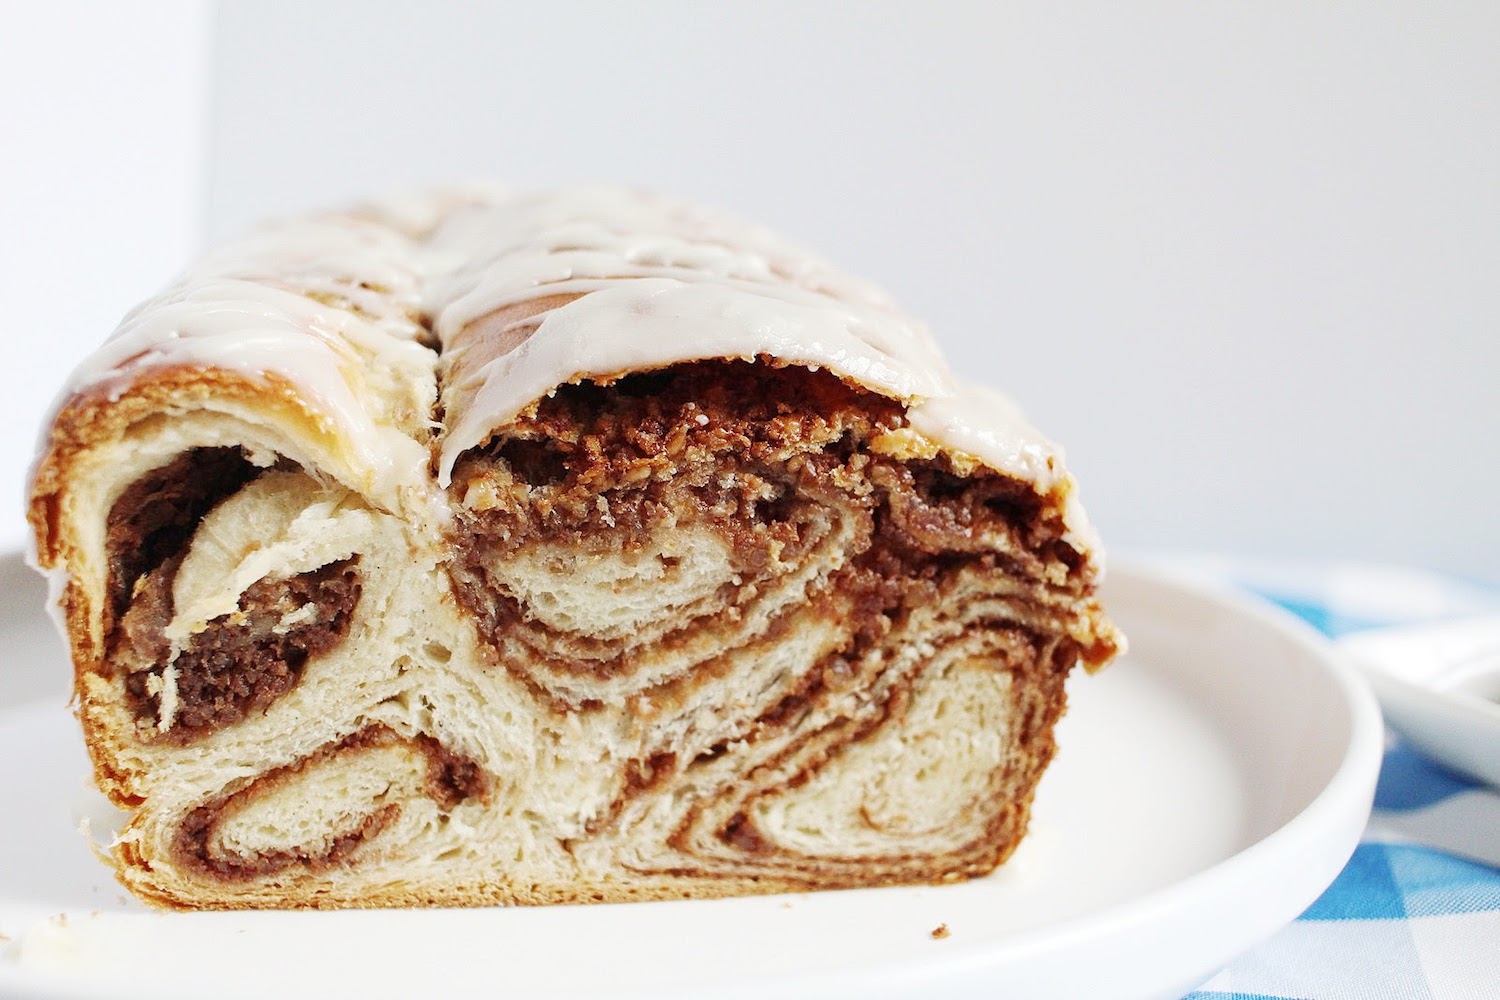
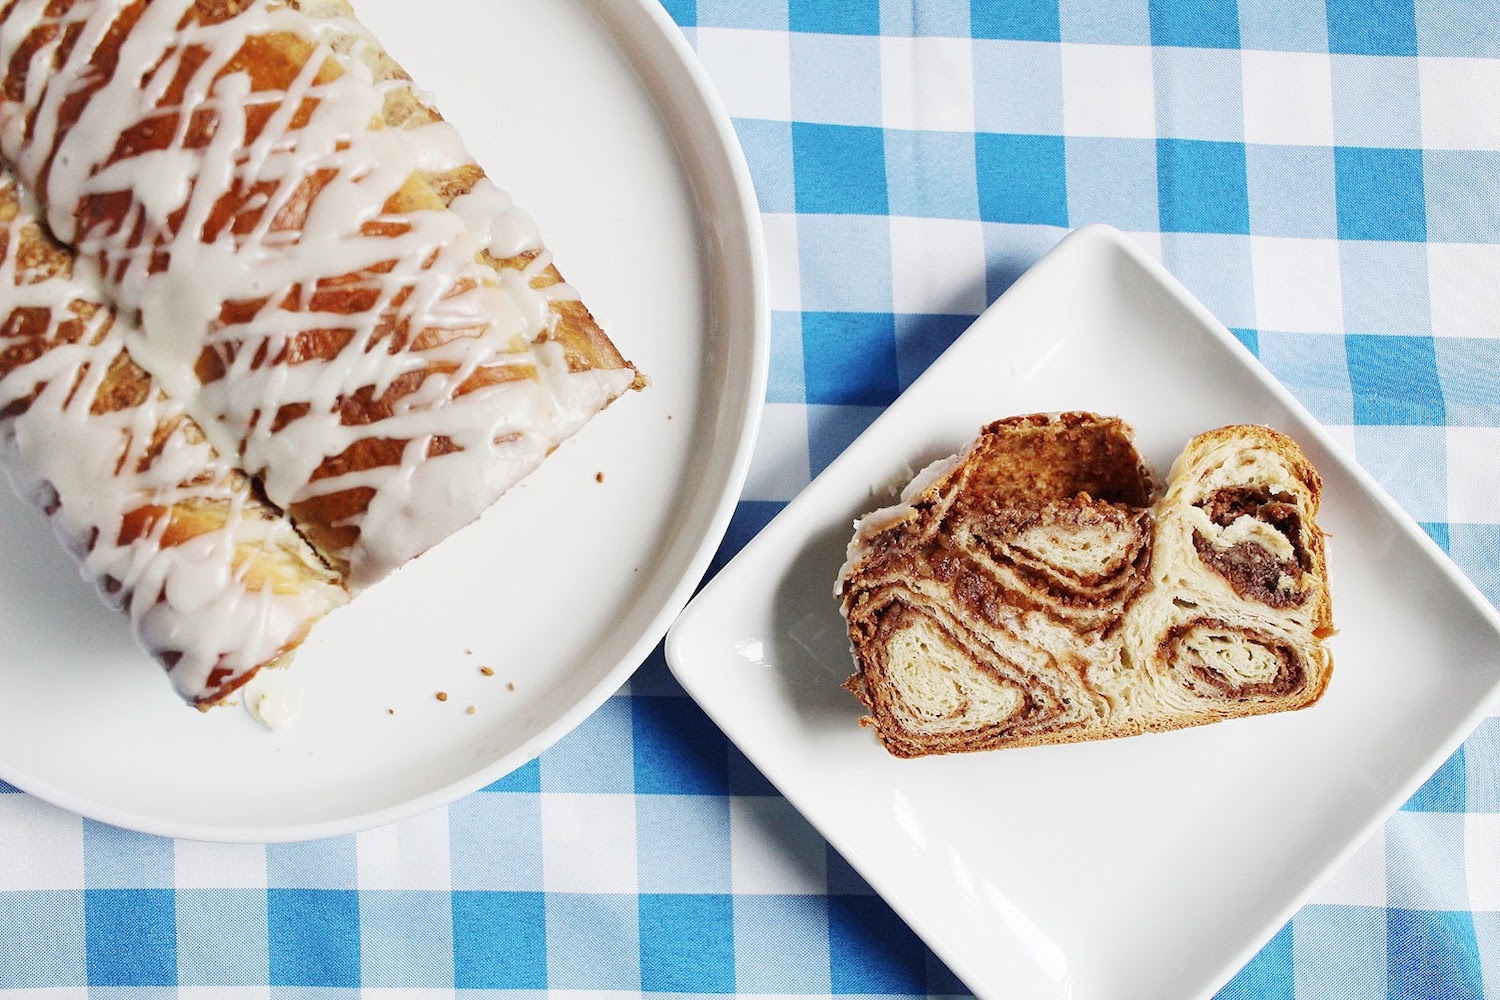
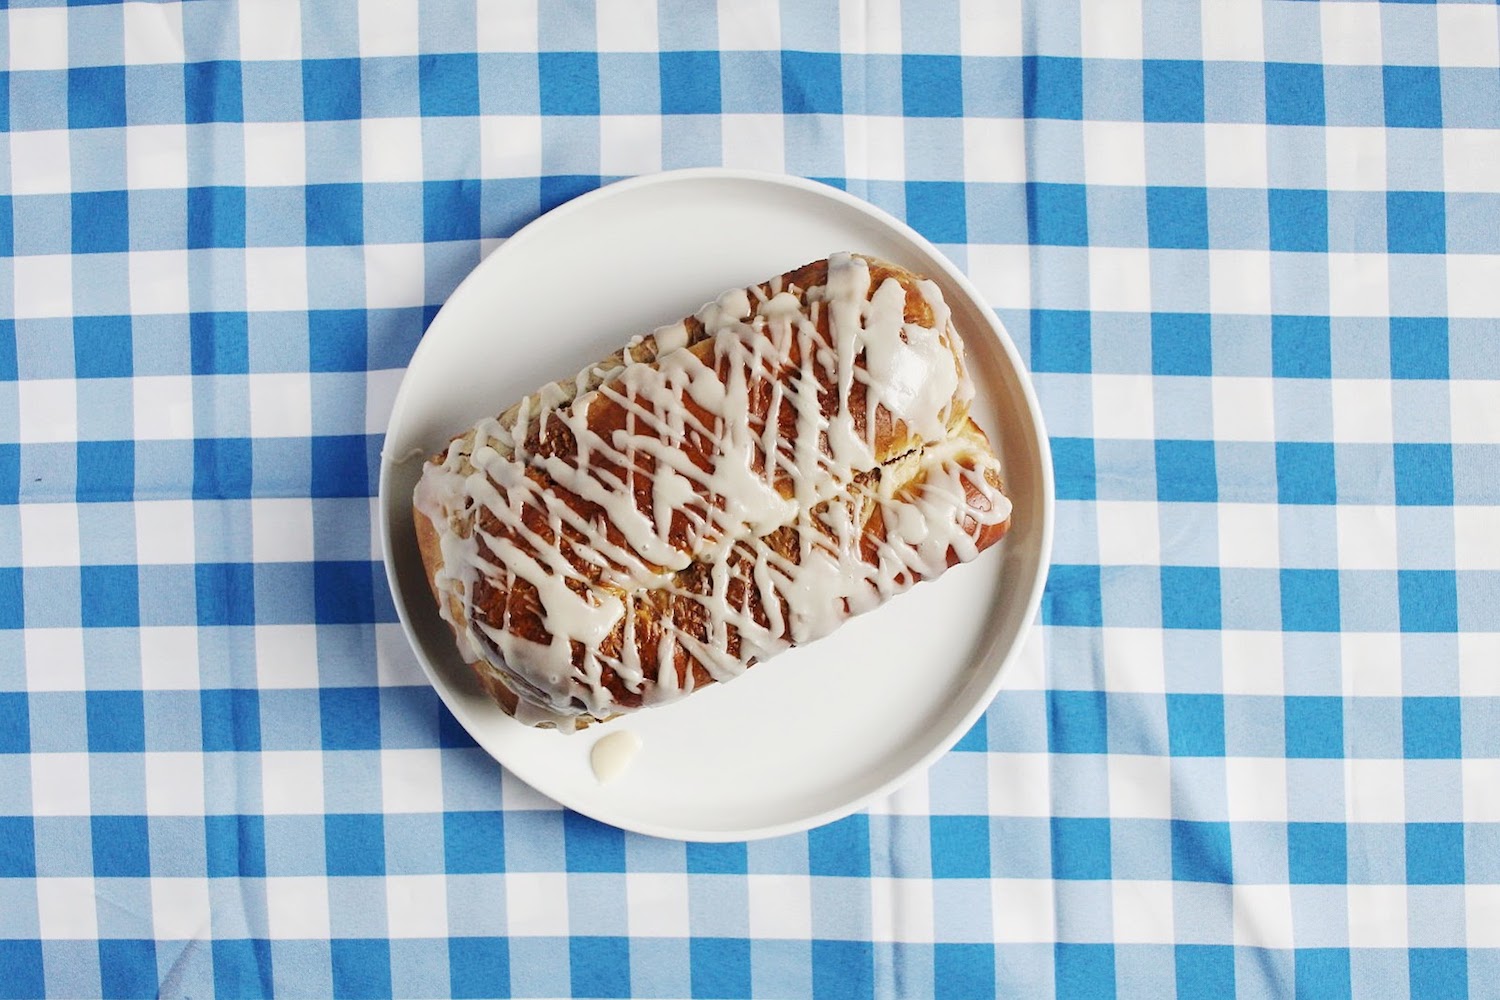
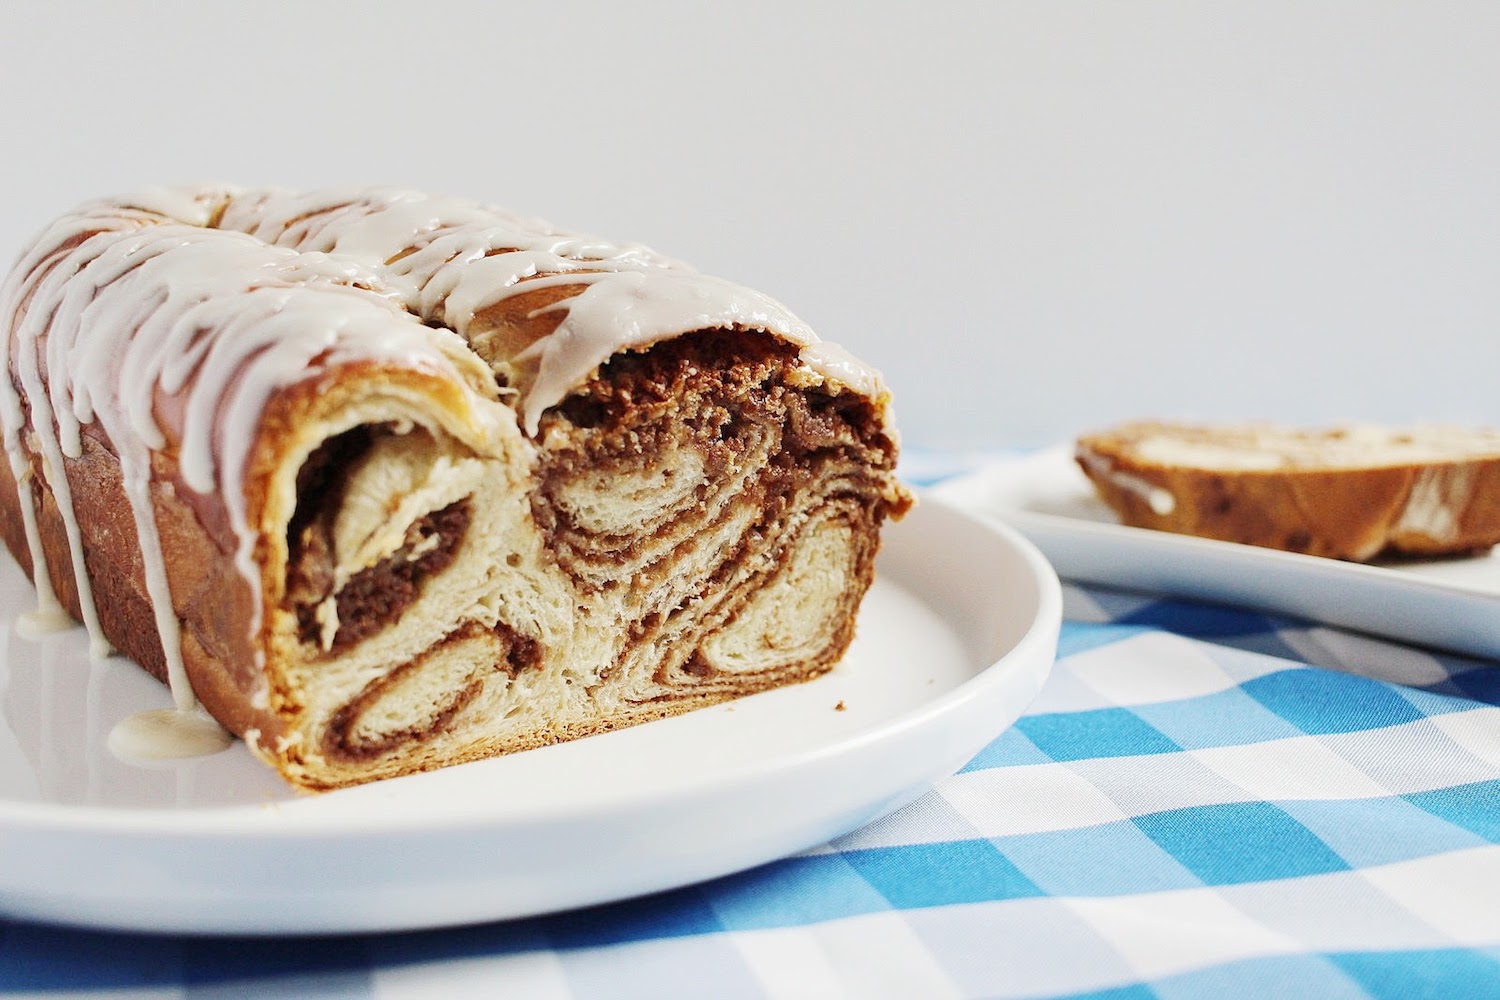
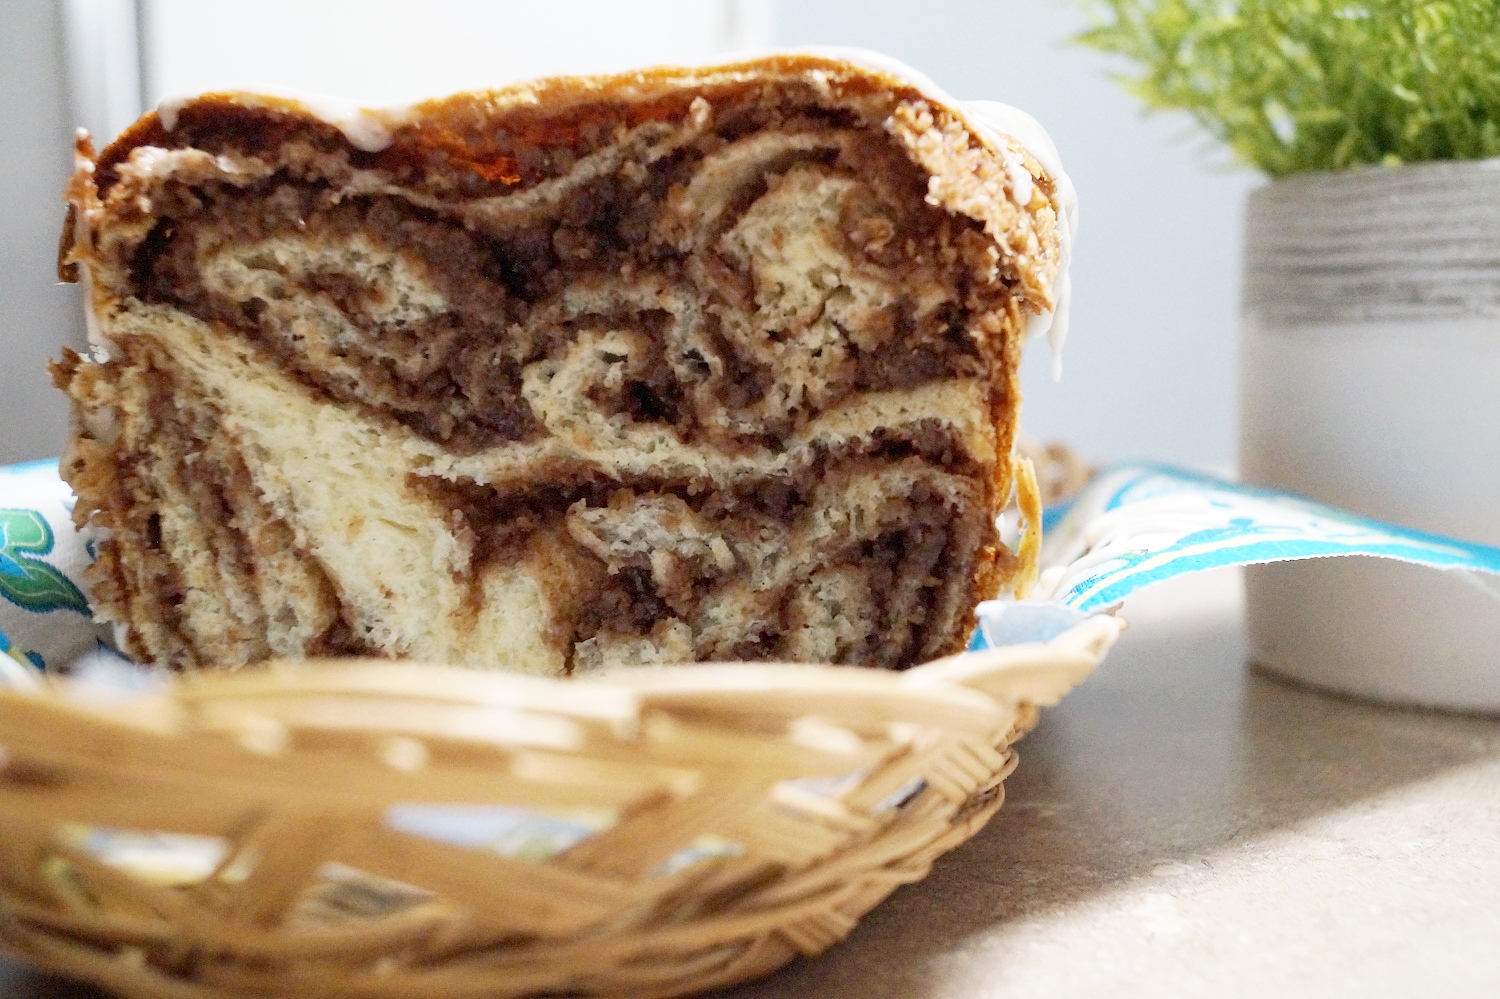
Povitica loaf with four rolls of layered bread and walnut/chocolate filling.
The Outcome
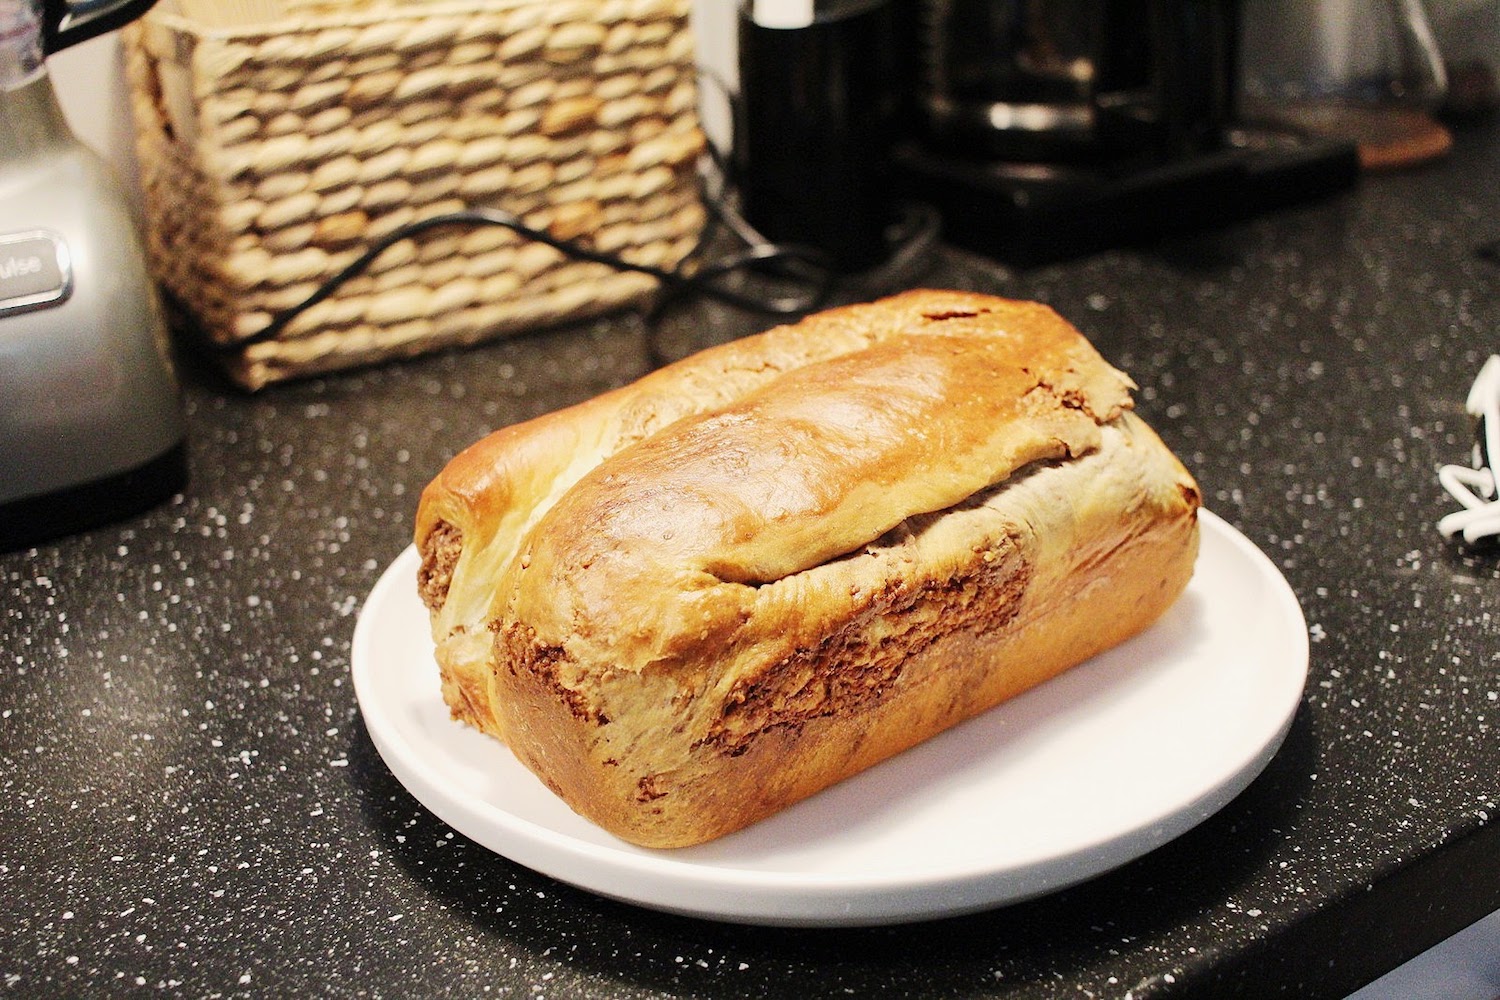
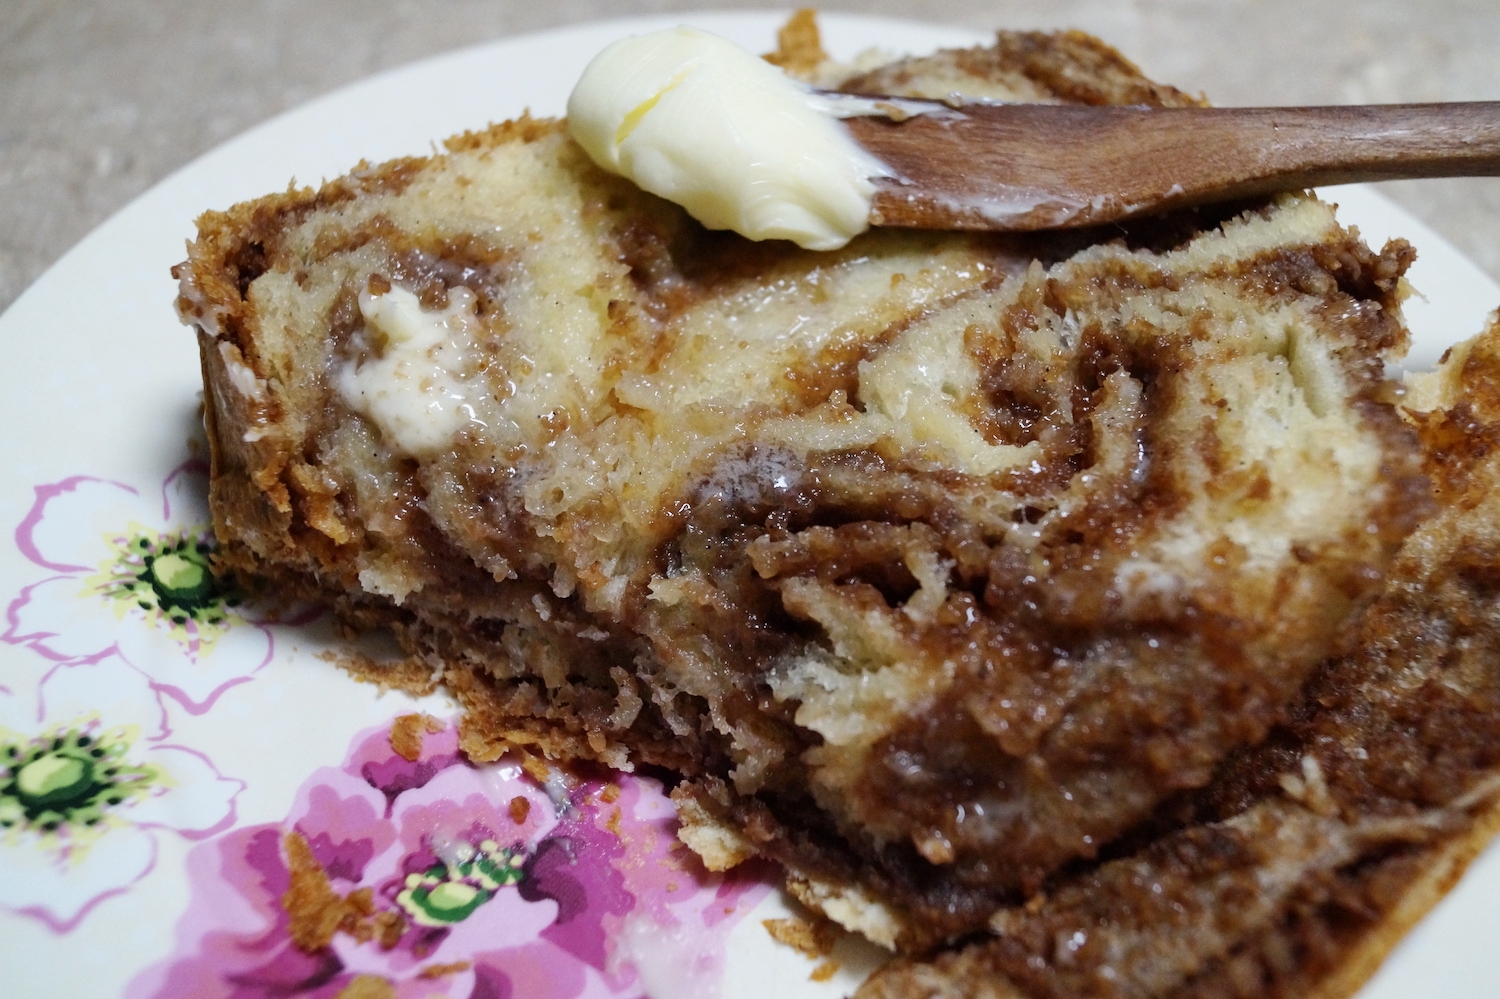
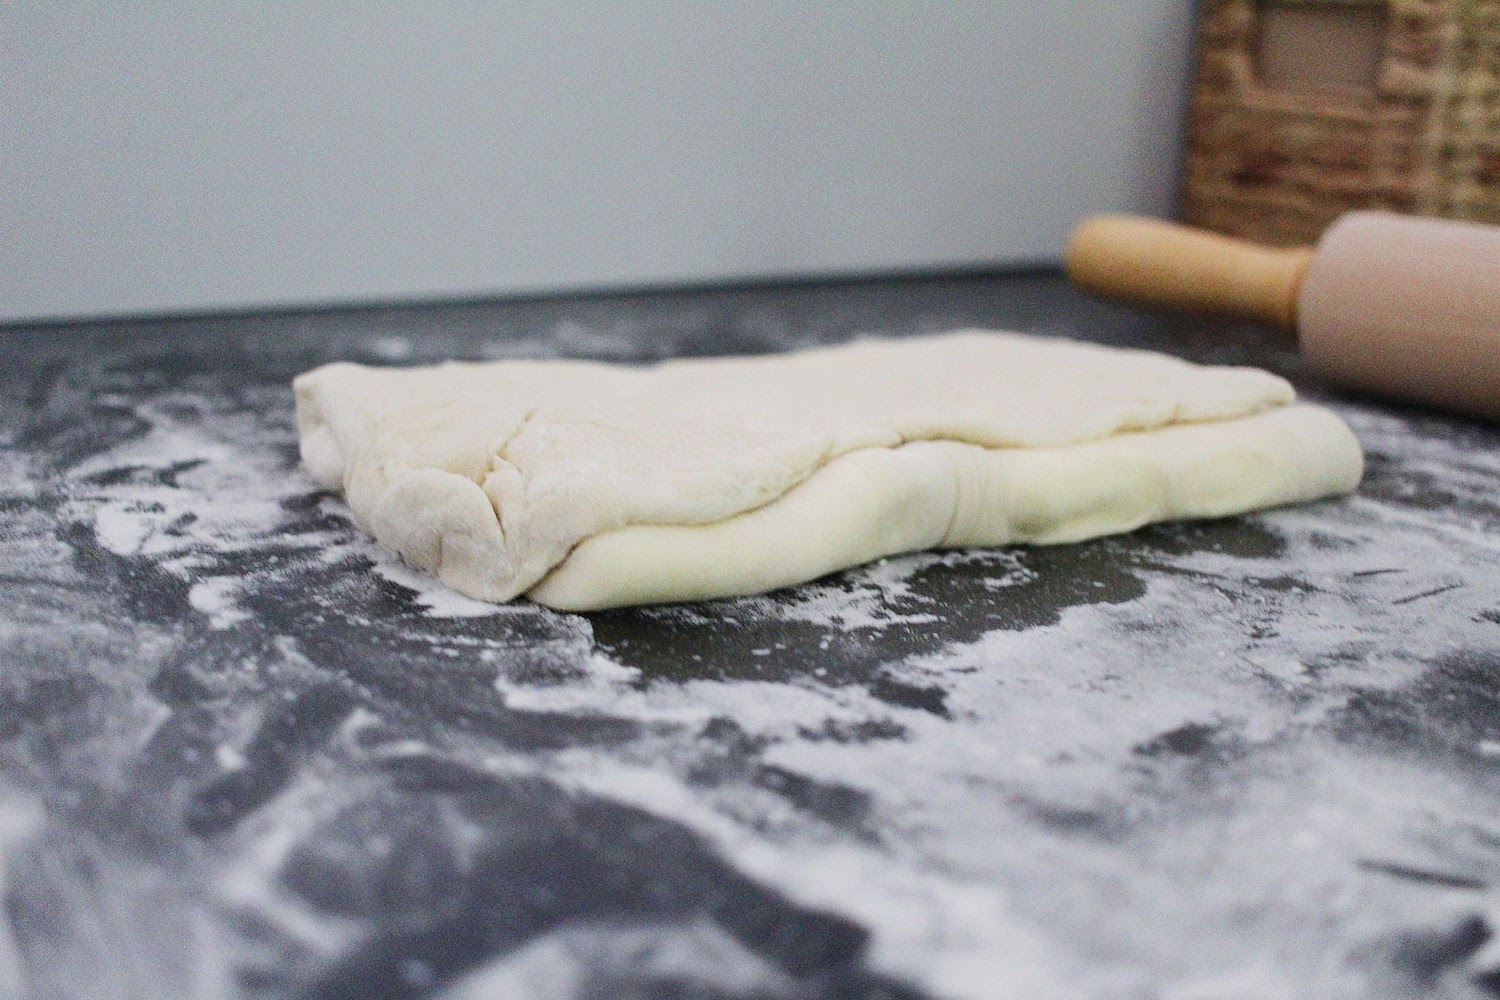
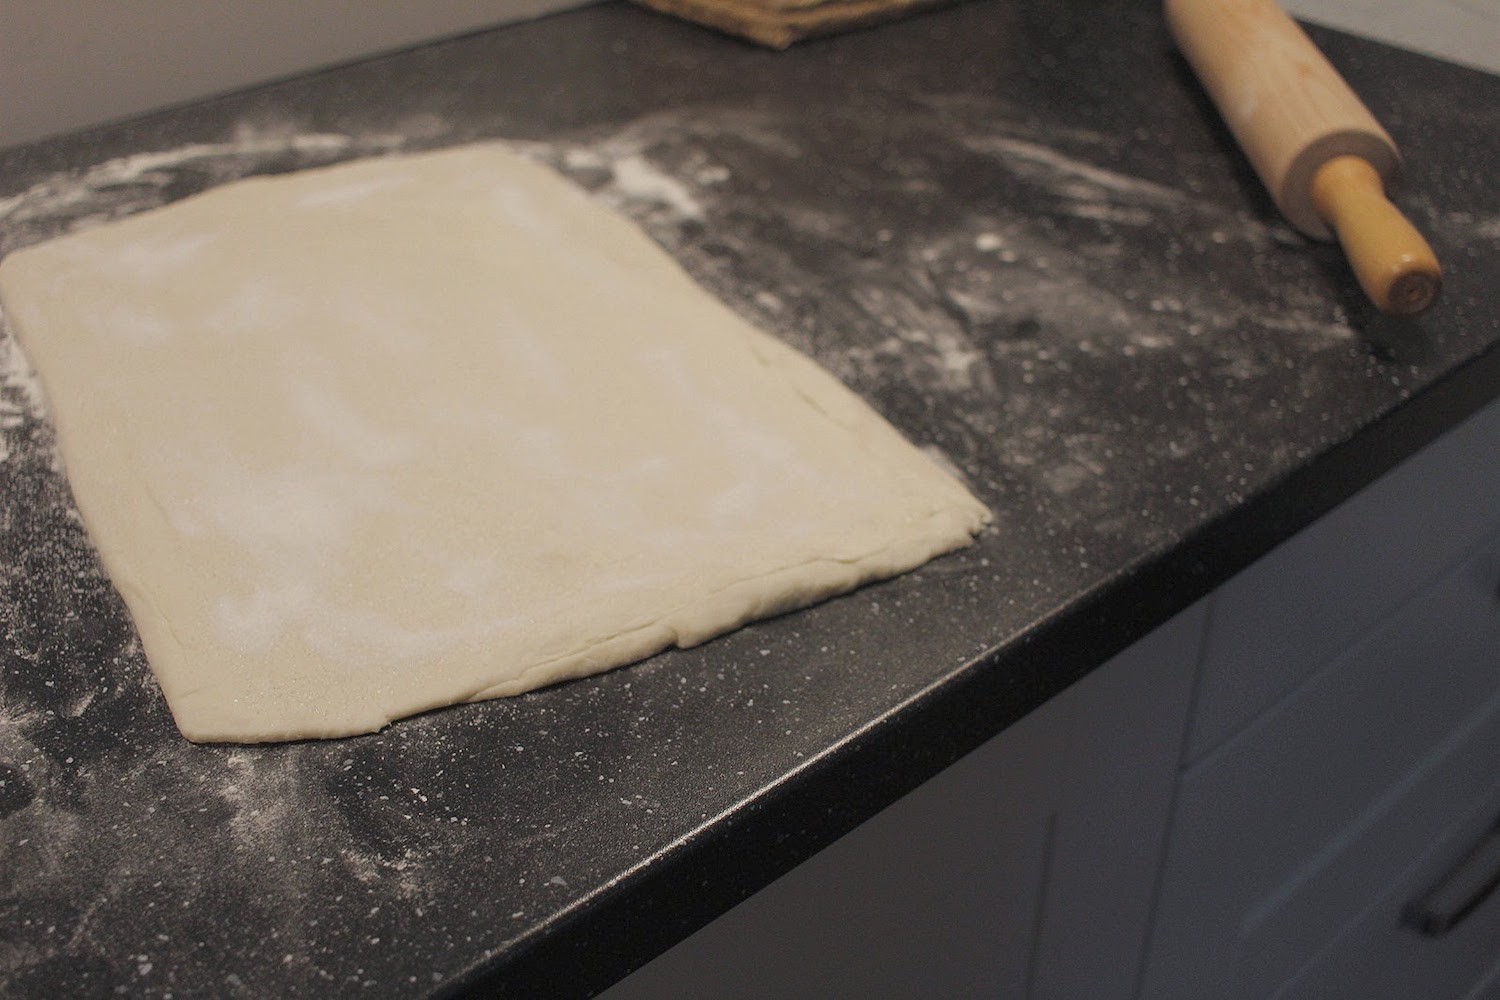
Bread is not my strong suit. For whatever reason, I have a terrible time getting anything to rise properly. I had the same issue with this. The dough comes together easily, but once I set it in a bowl to rise, it never got the bubbly height I had expected. My mom never has a problem with rising, so hers definitely beat me out on that mark. This also required you to roll and stretch your dough out to 40x20" - and this is where I had Tom come over and help me gently stretch it. I barely made it to the parameters, but it ended up being fine. Then we spread the filling over the stretched, super thin dough and laughed as it got all torn to shreds. I should have softened the filling a bit more, but I was worried it would cause the dough to under-bake if it was too wet. Finally I rolled it up and set it in the tin for another lousy rise - haha - but overall, my bake ended up being just fine in terms of size and texture. Tom and I didn't think the flavor of the bread with the walnut/chocolate filling was all that good, but my parents really enjoyed it. I'd have liked the bread alone without any filling to be honest! All in all, it was a pretty simple bake besides the 40x20 size (but read below and hear how my mom used an actual bed sheet!)
Would either of us bake this again?
My mom probably would, but I think I'd pass.
Here's the glamour shots...
Here's my mom's report
Another bread. Happy me! So far the breads in these challenges have been done with dough hooks, which is a very nice method. Hand kneading can be tricky. Using the mixer takes the guesswork out of the process and the result is a beautiful dough.
The directions were simple and easy to follow. The filling was also easy. Shaping the loaf was a bit challenging. By the time you were finished, the stretched out dough was to be paper thin 40" by 20". The directions recommended having a bed sheet laid out to do this. Knowing it would be so thin I did use a sheet which I floured generously. I managed to get the job done without too much trouble and was happy for the cloth underneath resulting in dough that did not stick to the counter.
I took 15 minutes off of the baking time. I wouldn't call it a pretty loaf, but we did like the taste. Bread and chocolate, a nice combination for someone who likes both. It was a tad dry, but the remedy for that came from my mom - a little bit-o-butter makes everything better! I would recommend this bread. Pretty yummy and not to difficult.
This was fun to make on a holiday at home with my husband :) And even better, I face-timed my mom and kept her company while she got hers rolled out to 40" and we laughed because we both made the same comment during that process, "Who even thinks to make something this way?! What in the world?!" Don't forget to use the hashtag #JoyLynnBakeAlong and join along on this super fun challenge. Coming up next...
Wednesday, June 7th
Bake #9: Schichttorte
(I'm looking forward to this next one! It's a 20 layer cake that my mom and I actually made together one night for Tom's birthday! Though, this version is a little different, but still fun nonetheless - stay tuned!!)

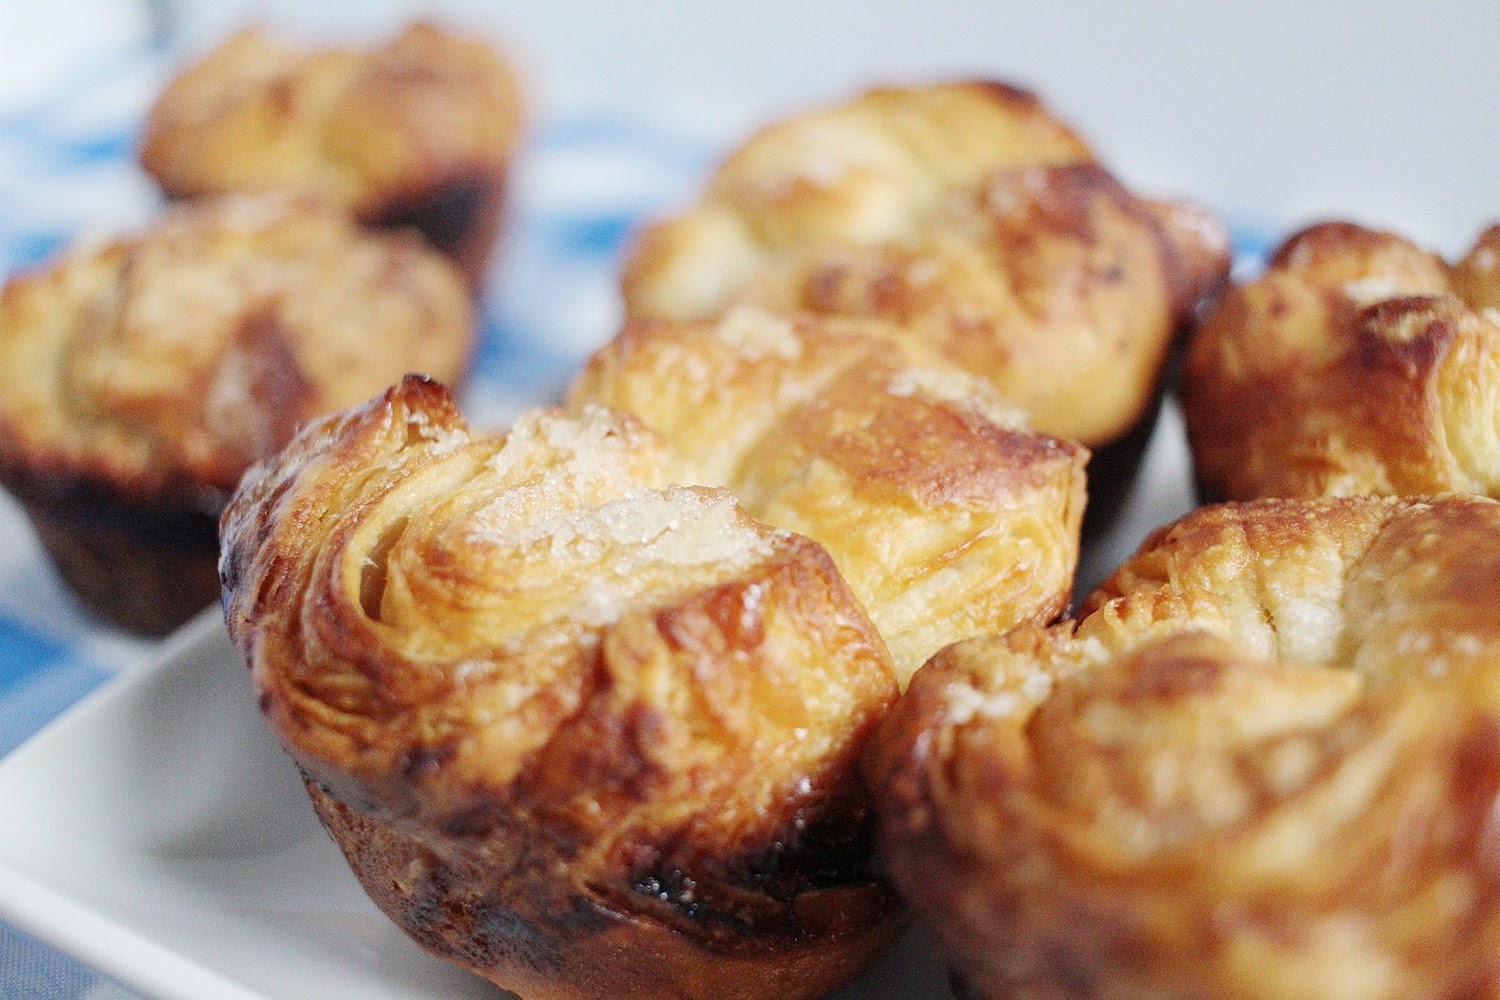
Bake #7 | Kouign Amann
In case you're not up to speed, this is the seventh bake in The Great Blogger Bake Along series. Read about it here.
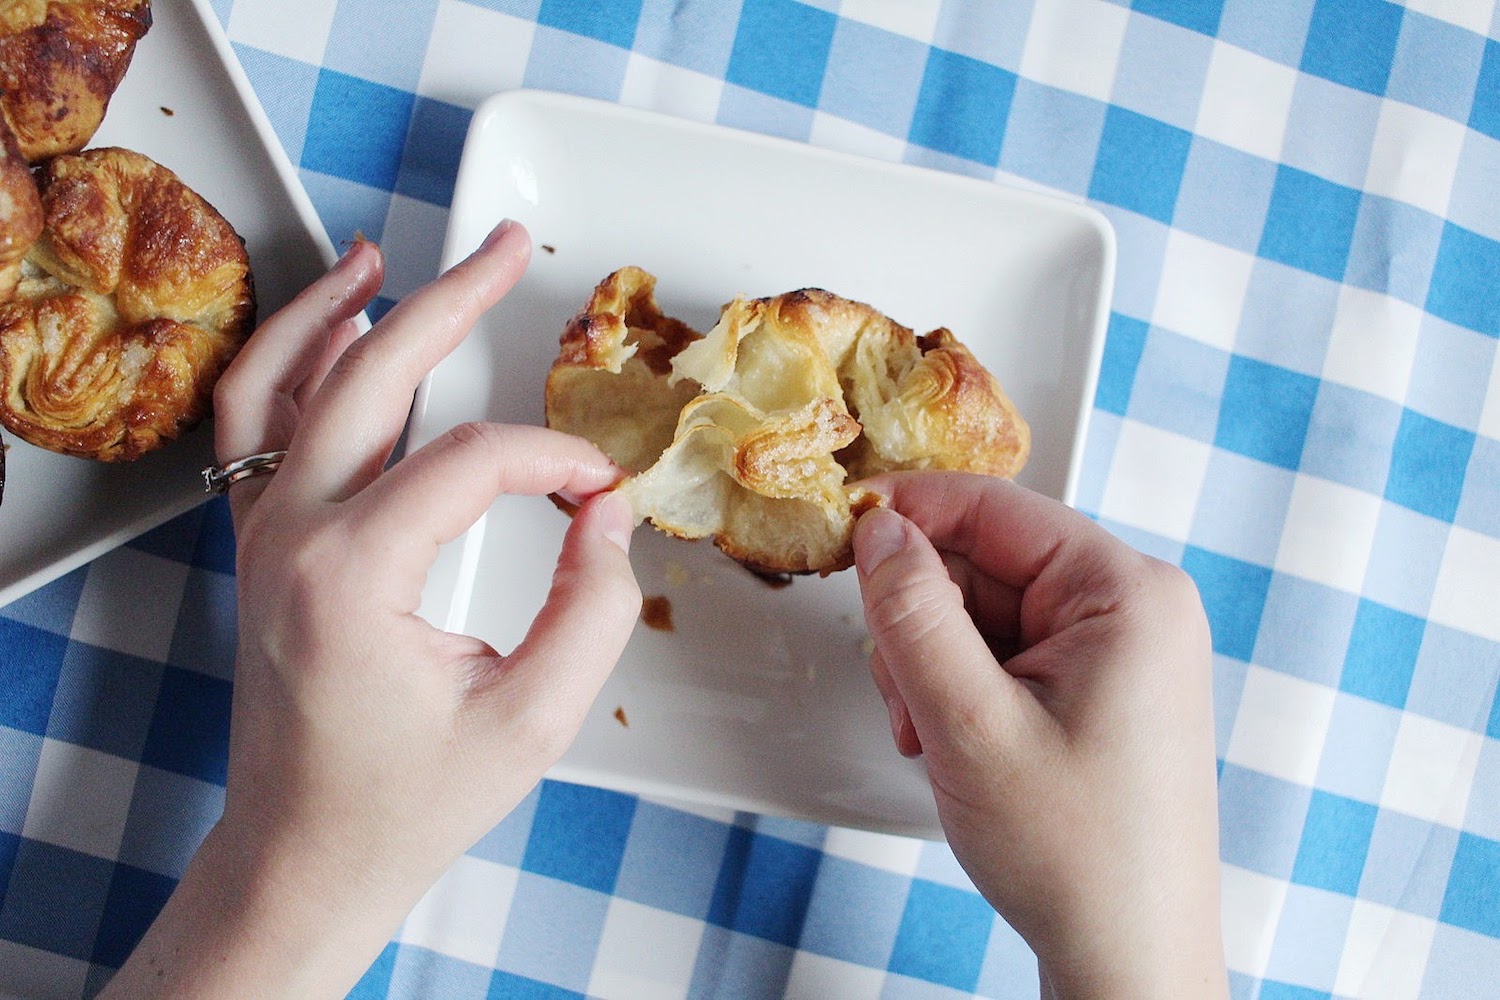
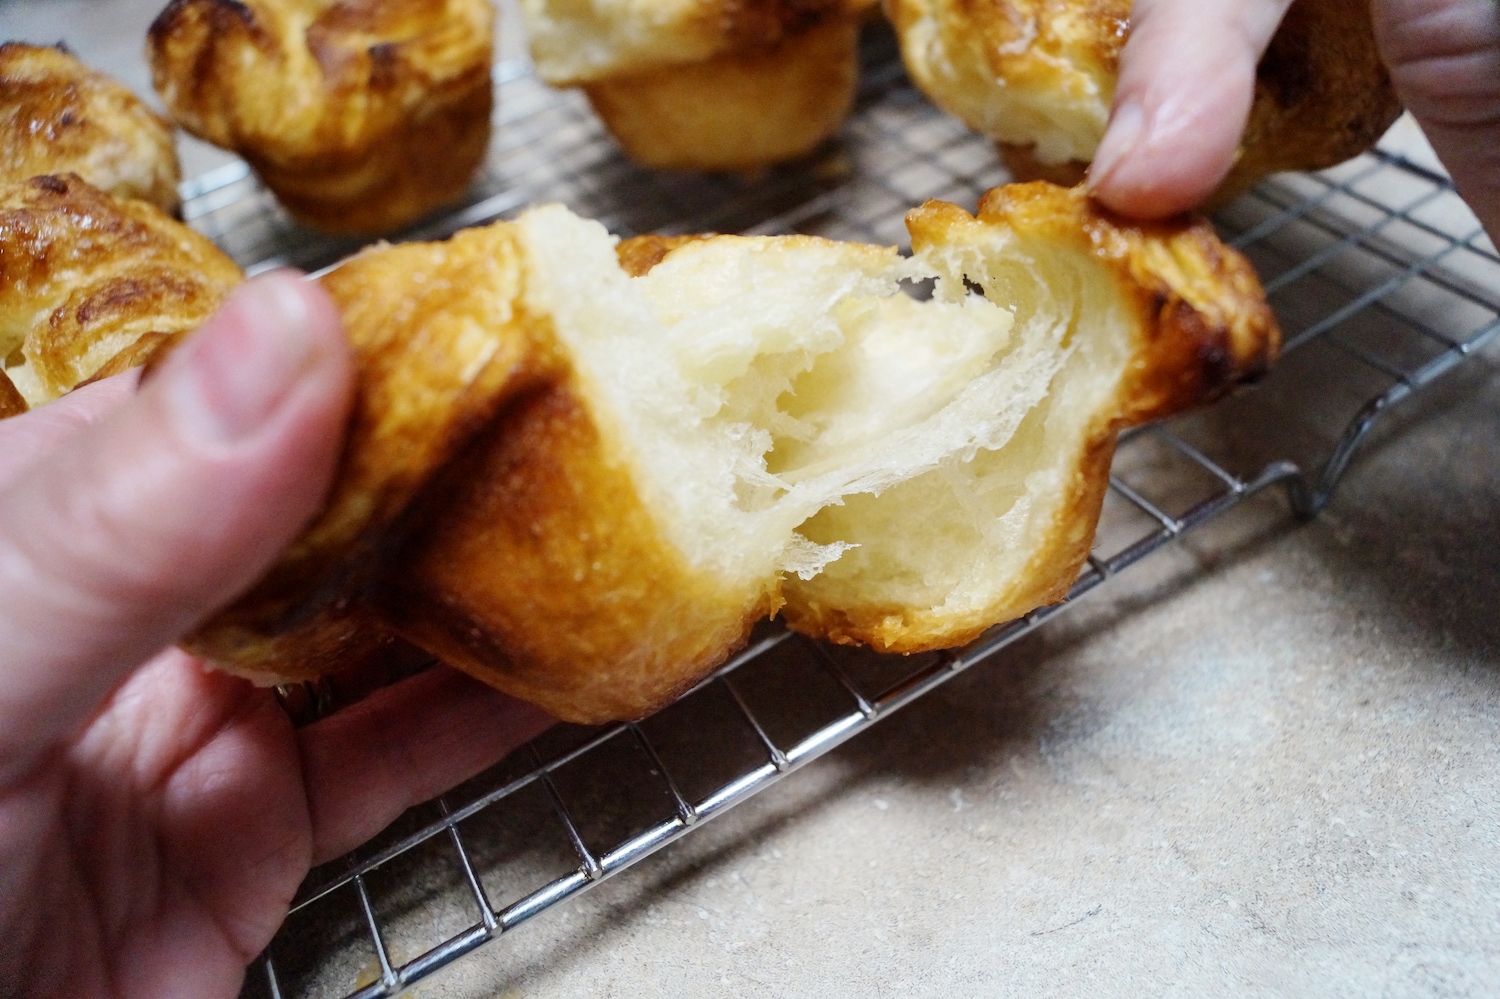
Stop what you are doing, go to the recipe link in the next paragraph, and make this. This has been the favorite bake in this house so far. Or maybe the florentines? Regardless, I think it's safe to say we're going to love the French and Italian cuisines on our Europe trip in the fall. Florentines and ciabatta are Italian, and these delicious pastries are French. I even got the stamp of approval on my Kouign Amann pastries by a real Frenchman earlier this evening!
The Challenge
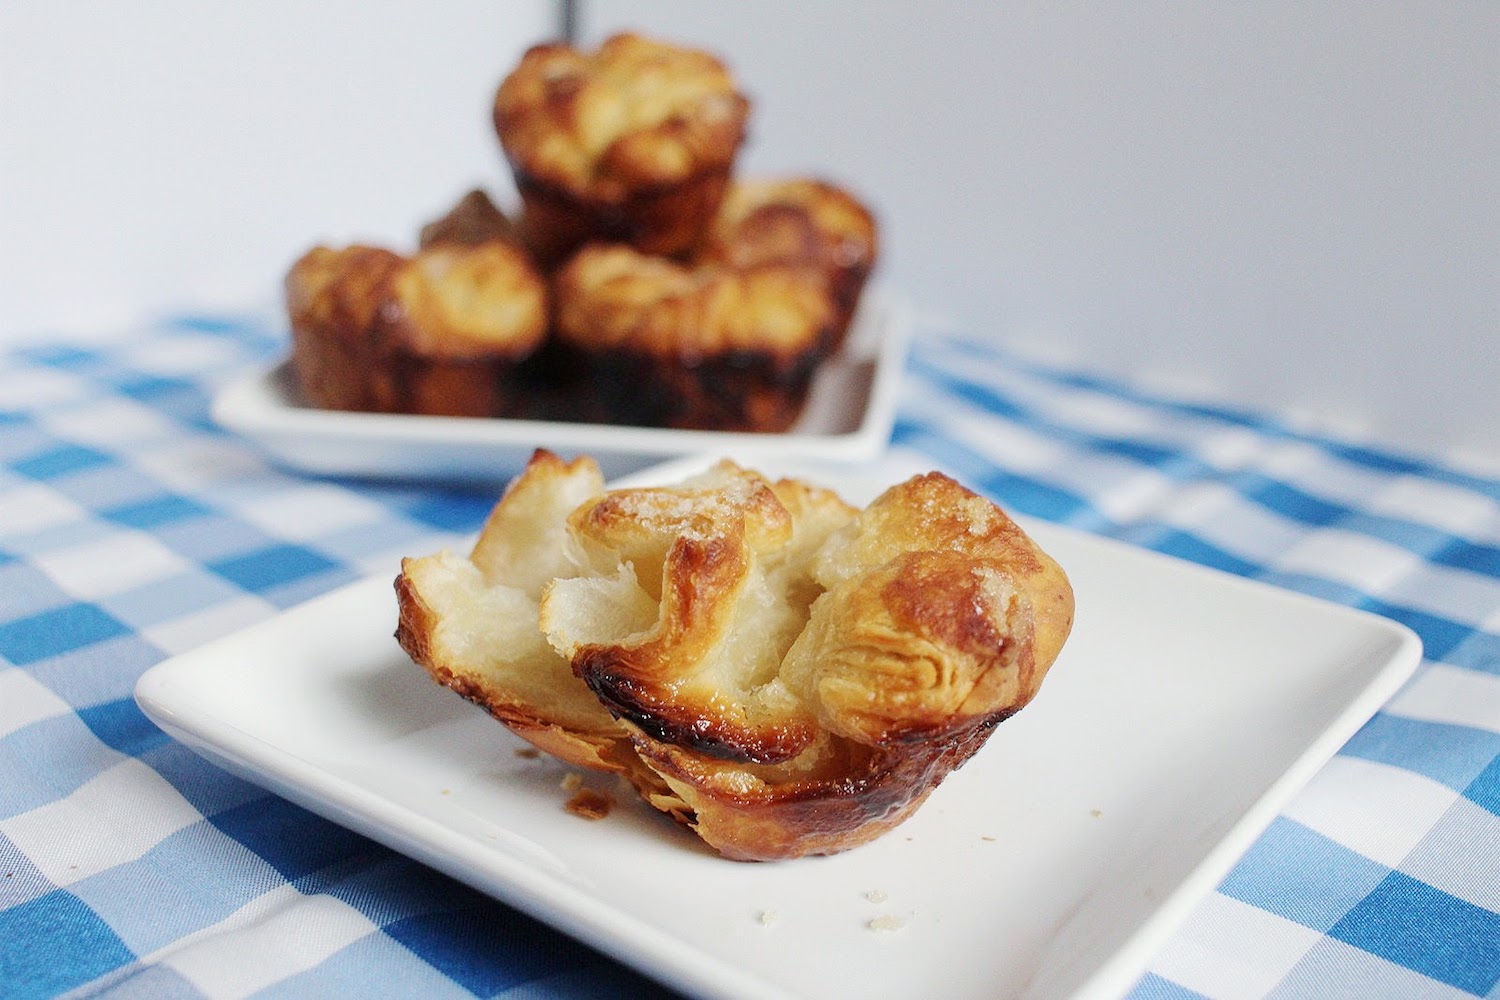
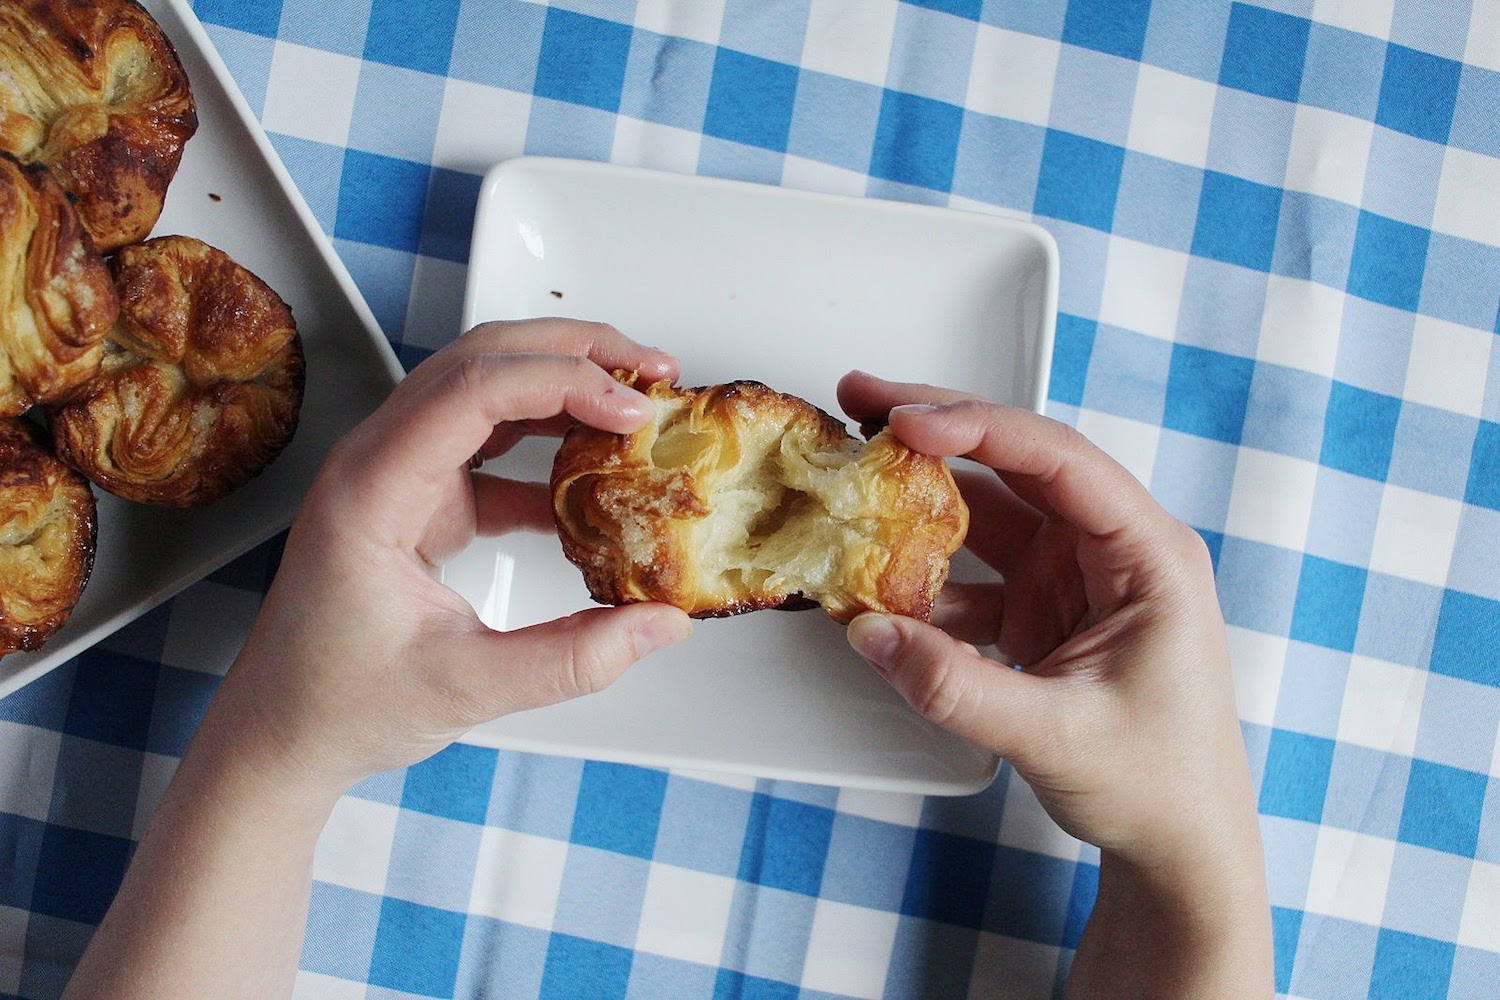
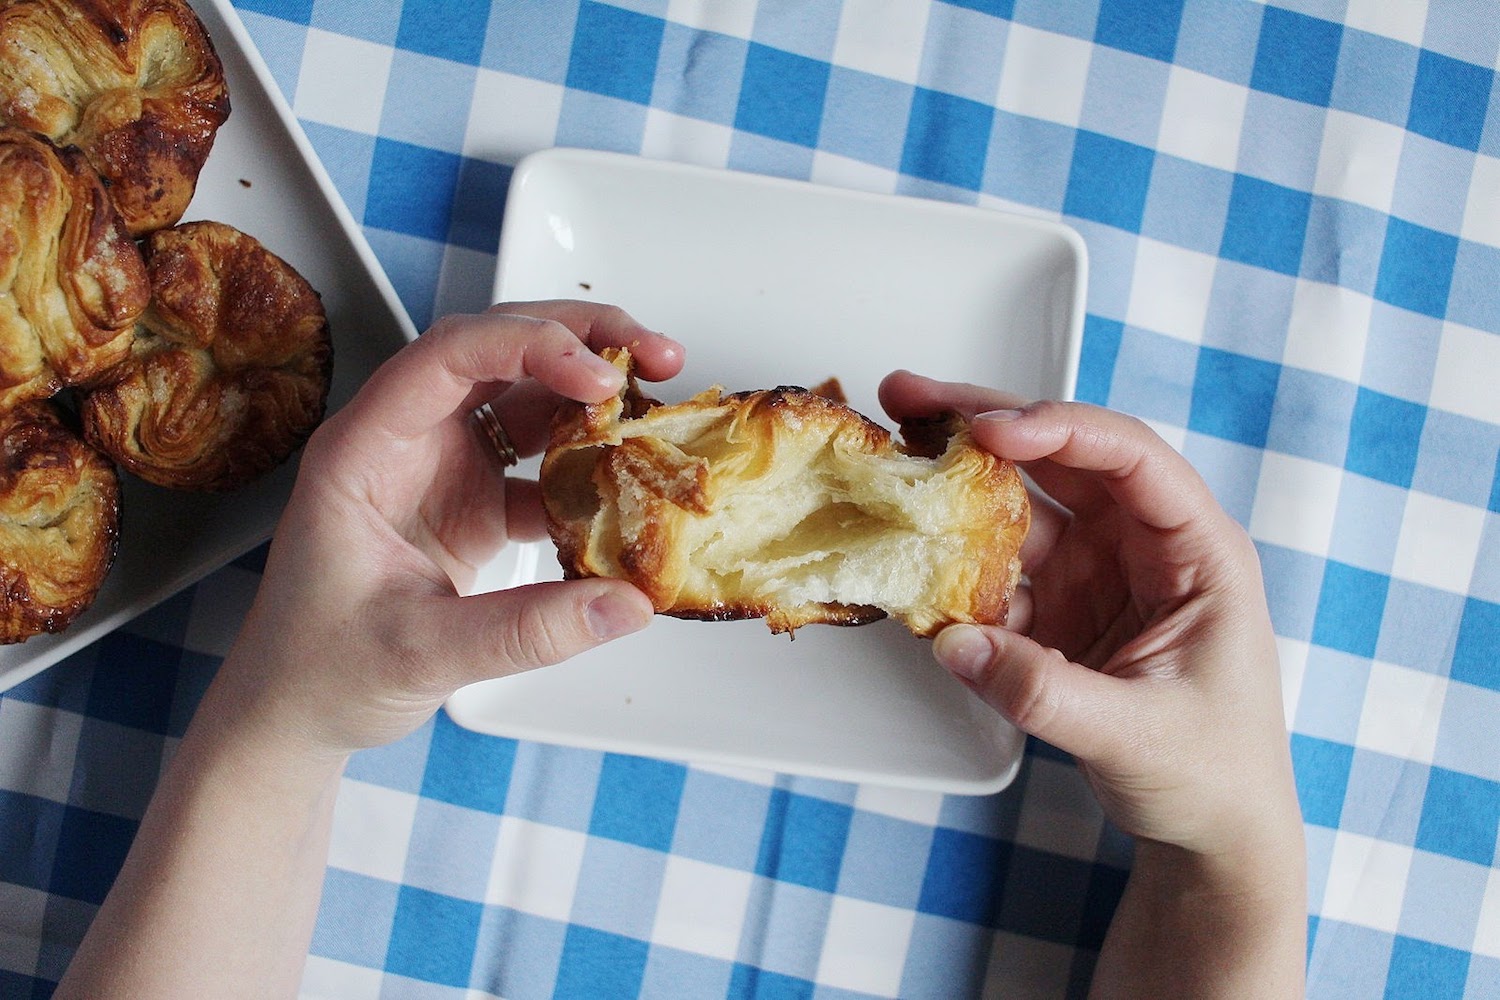
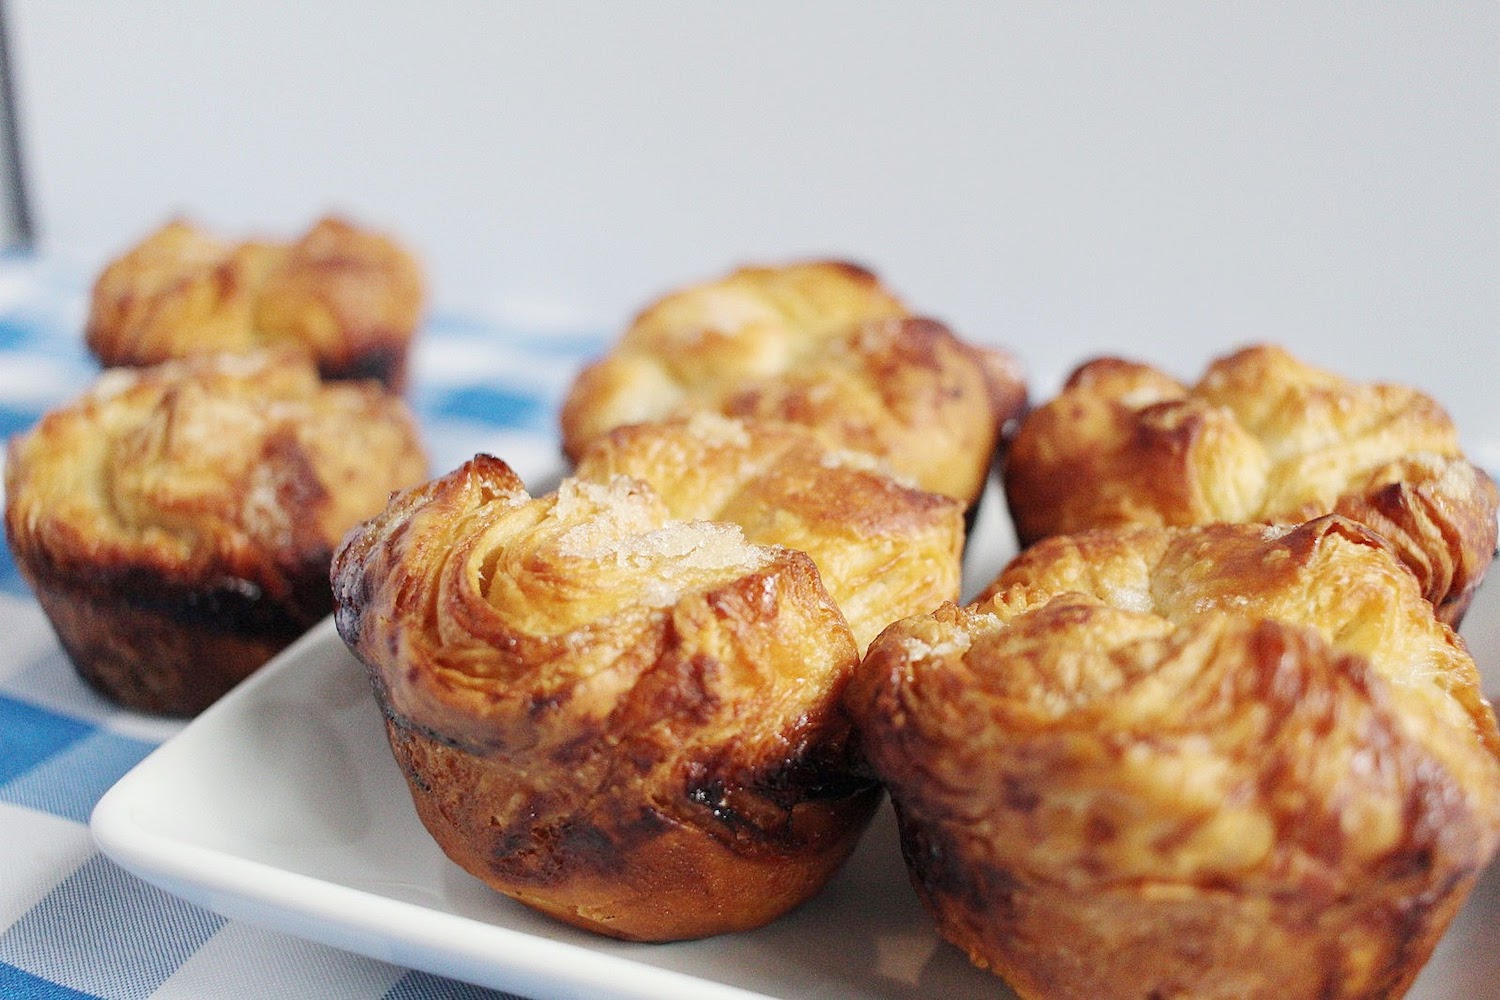
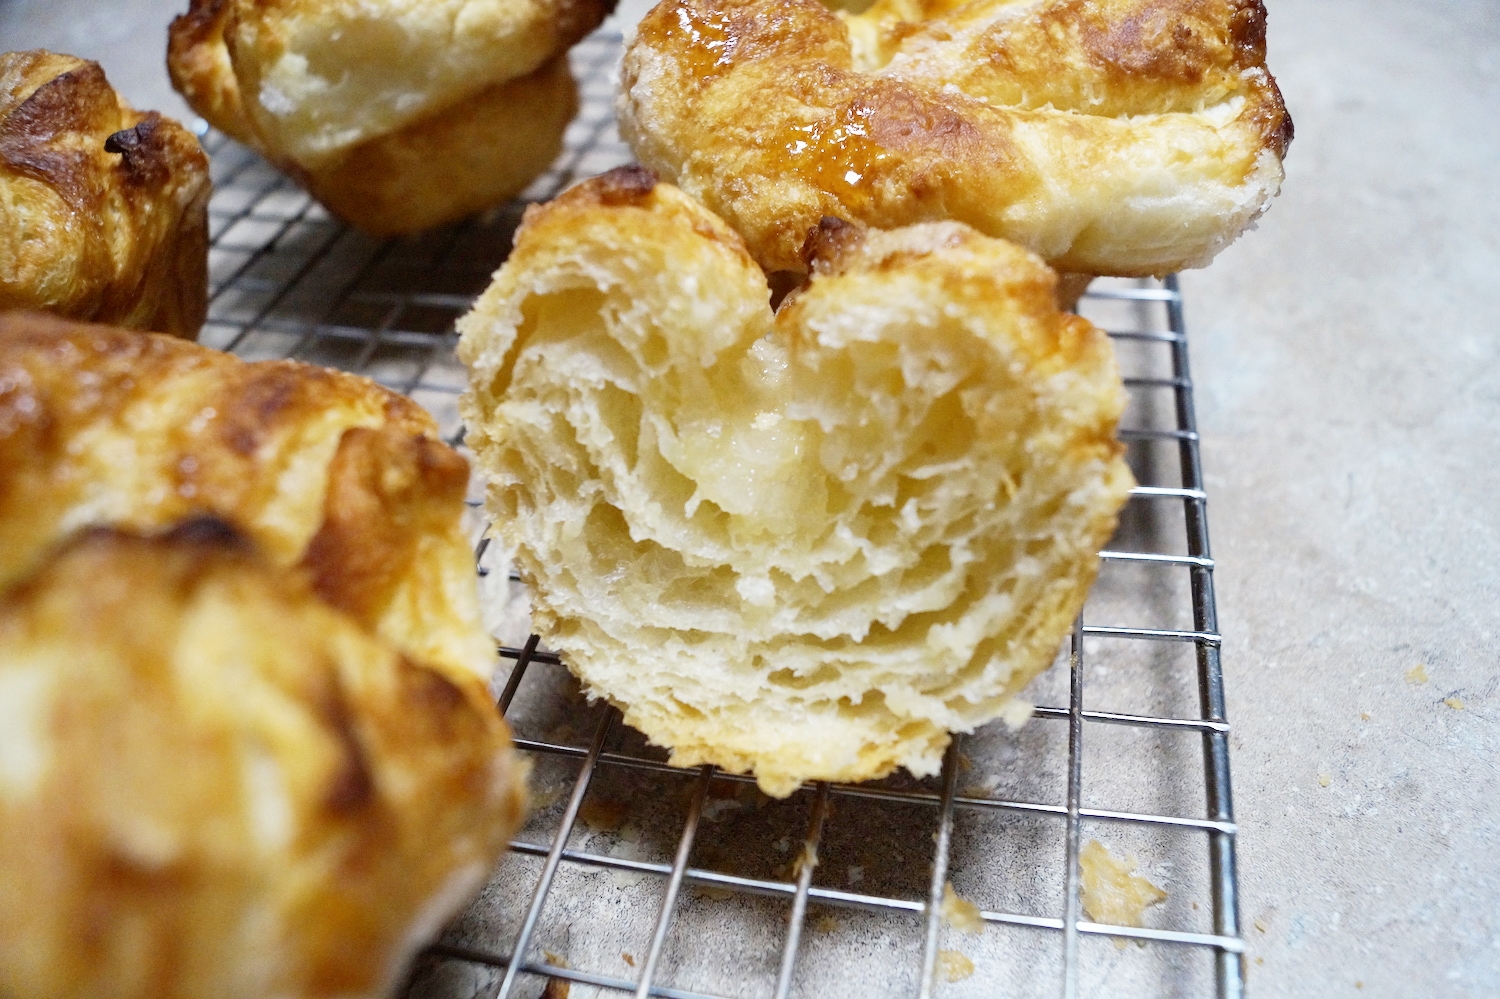
Kouign Amann pastries with a crusty outer layer and perfect, buttery, sweet layers inside.
The Outcome
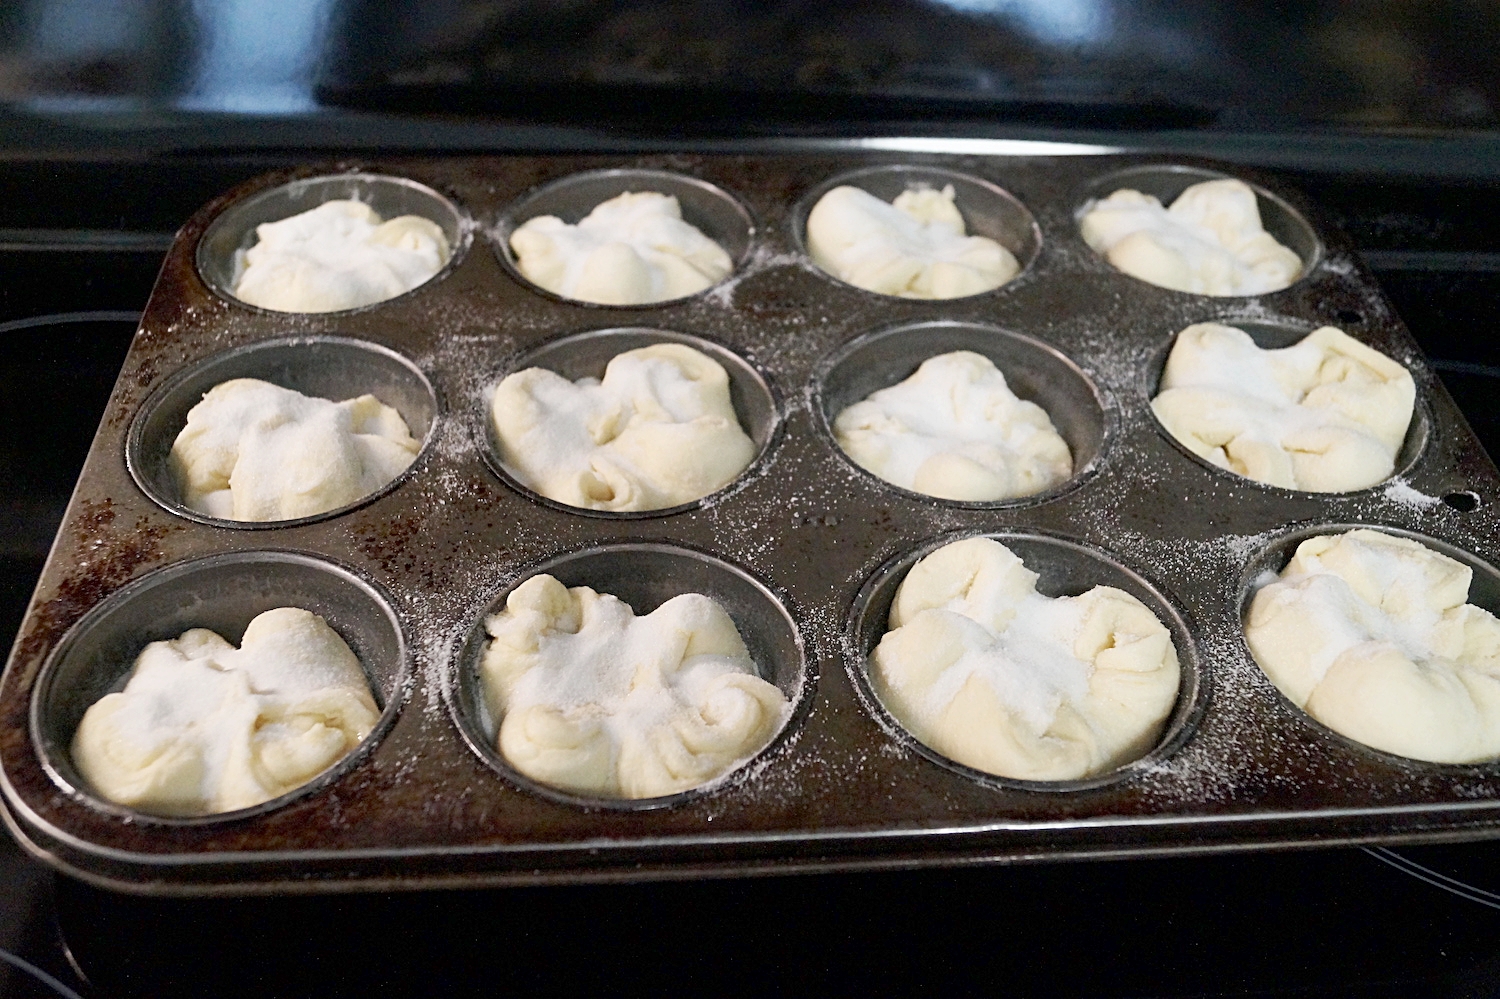
Incredible. Truly. My sugar may have slipped out into the side of my pastries, causing them to burn slightly, but TBH... I'm gonna make these ALL the time now. They come out like a sweet croissant. The layers are so mouth-watering, buttery, airy, and delectable. My husband arrived home from work shortly after they were removed from the oven, and I thought he was going to pass out from the overwhelmingly delicious flavor and texture - haha! I think he gobbled up two or three before I could even finish taking photos to share with you! This wasn't hard by any means, but took patience between chilling the layers of butter and dough. So worth it. Make these, you guys. You'll feel like a French pastry chef and want to strut your stuff to the owner of a French restaurant in Atlanta. No? Just me? haha.... ;)
Would either of us bake this again?
Well I think that's obvious... YES! Tomorrow maybe?! I'm in love.
Here's the glamour shots...


Here's my mom's report
Amazing, Amazing!
After last week's debacle with the Prinsesstarta Cake, I was looking forward to this since there were simple ingredients and minimal steps. Even though it required a commitment because of the chilling of the dough it was still easy. I have three basic cakes I really like and tend to use. Many adaptations can be done with fillings and frostings. Fancy cakes that are labor intensive and expensive don't trip my trigger. Bread on the other hand does appeal to me... any bread item. I rarely buy it in the store since it has an unappealing texture and preservatives. Give me a fresh bread that I have to freeze in order to keep fresh any day! Making homemade croissants has been a goal of mine and these made me think of them. They were pretty close with exception of the shape and these are sweet. Absolutely delicious! Light and crisp on the outside beautifully layered on the inside. If you want to feel like a french pastry chef make this recipe. There were no problems making them and am happy for the experience. A fun fact: the final proofing can be done overnight in the the refrigerator and baked fresh in the morning. If you do this, make sure you set them out long enough for the dough to reach room temperature before baking. What a great B & B breakfast item. Go for it, you won't be disappointed!


I can't wait to bake these again and perhaps add some fun flavors to my layers! Nutella? Chopped pistachios and honey? Cheese and garlic chives? The possibilities are endless! Don't forget to use the hashtag #JoyLynnBakeAlong and join along on this super fun challenge. Coming up next...