

Cost Breakdown : The Kitchen
So renovations are supposed to be this crazy financial burden, right?
Well, yes and no.
No doubt, this renovation was the most costly update to our home, but it was a fraction of what it easily could have been. In fact, when we had Home Depot and Lowes give us a design and estimate, it was well over 12K for the cabinets alone (and they were using smaller room measurements than we ended up with).
We still have a few small bits and pieces to add, of course, because curating your home from a blank slate takes time. We are still learning our style, but we definitely lean towards a mid-century modern minimalist look. It's important to me that the items I put on display are meaningful or serve a purpose. I'm just not one who cares for excess :) There is nothing left to do in this home that is necessary for living our daily lives, though, so it is nice to relax and enjoy finding those final little pieces as they come.
However, now that this project is behind us, I have gone through and sorted out all the costs and will be breaking it down for you. I have not been shy about telling our real life friends how much this thing was, mostly because I think people really should know that a kitchen renovation does not have to cost an arm and a leg. Granted, we saved boatloads by doing it ourselves, but even then, we really hunted around for the best quality for the best price, and I'm thrilled with how it all turned out. I'm super satisfied with IKEA... not only their products, but their customer service. The process for this project (especially since it was DIY) meant we had to have a lot of involvement. IKEA is well aware of the fact that their customers may be doing this themselves, so they are happy to answer any 'dumb' questions concerning installation or what each item listed is used for. That being said, living 40 minutes away from a store was pretty essential to our success with them. For more photos, see the reveal post.
Okay, okay. Enough yammering on... here is the cost breakdown:
Demolition
Blades: $12
Brown paper & tape: $15
Trash bins: $20
Shop Vac & filters: $65
Total: $112
Ceilings
Scaffolding: $0 (We owned a ladder and a bunch of weird wooden island things that came in super handy)
Mud: $35
Industrial sander (rented): $50
Primer: $30
Paint: $40
Total: $155
Walls
Materials for half-wall: $60
Drywall: $70
Mud and tape: (used what was left from ceilings)
Primer: (used what was left from ceilings)
Paint: $80
Trim paint: (already owned from previous projects)
Outlets: $100 (switches, covers, GFCI, boxes)
Electrical: $200
Trim brush: $6
Paint rollers: $10
Total: $526
Plumbing
Piping, valves, p-trap: $160
Total: $160
Appliances
Stove: $499
Fridge: $979
Microwave: $250
Garbage disposal: $50
Sink: $180
Already owned faucets and dishwasher.
Total: $1,958
Other
Cabinets (including handles): $3,900
Countertops: $256
Lighting: $140
Ceiling fan: $35
Misc decor (towels, placemat, planter, drawer liners, utensil trays, plate holders, spice holder and bottles, cutting boards, coffee container, candles, etc..): $300
Total: $4,631
GRAND TOTAL: $7,542
The pictures really don't do this place justice. Our cabinets are huge and very sturdy, our appliances are wonderful (yay for an ice machine!), and the counter space has made such a monumental difference in how we prep and cook.
So for less than 8K we completely re-did our kitchen and part of our living room (it still needs some built-ins on either side of the fireplace). Again, thousands were saved by the fact that we did not hire out for any of the work, but regardless, we did such in-depth research on how to pull this off without breaking the bank and I am pretty proud of how it turned out.
Do you guys have other questions about this project? I would be more than happy to cover any specific topics that you are wondering about!

Eating During a Kitchen Renovation | 6 Step Survival Guide
If you currently have a working kitchen, picture yourself without it for the next week.
How does that look?
Maybe a little inconvenient, but doable.
Now try 8+ weeks. No sink, dishwasher, stove, oven, garbage disposal, maybe even no fridge...
Let me speak for you.
It stinks. REAL bad. Not literally, but it really blows.
However, here we are, safely on the other side of our DIY renovation and we didn't starve. In fact, we kind of rocked it and I'm going to tell you how! It had its moments, but for the most part, we got creative and had some pretty easy systems going that made it bearable. Lemme just dive in.
1. Designate a space for a makeshift kitchen.
This took a bit of trial and error, but it was probably the most important part. Here's our first failed attempt at containing our makeshift kitchen:
I crack up every time I look at that photo. What were we thinking?! So sketchy. That table in there wobbled at the slightest touch and an electrocution was just waiting to happen. Good gracious.
So we cleared out another room that was full of our boxed cabinets and countertops and used this second bathroom for washing dishes exclusively and it turned out like this (week one vs. week bazillion):


I'll be honest, it still wasn't amazing, but it was definitely doable. We made it work! Give yourself some room to prep, room to store items, and even room to sit down and eat (we used my desk that's in our bedroom). I highly recommend the stainless steel table you see there. Before our renovation, our kitchen needed it for extra counterspace and at only $125-$150 it beats out any other little "island" you find in stores in terms of price and size. Trust me, I hunted around for the best deal on freestanding islands for weeks.
2. Give yourself several ways to "cook."
Since you won't have a stove, you'll probably use a microwave to replace it most of the time. But believe me when I say that gets old... fast. Have a couple other methods like a grill or a crockpot. We bought this grill for cheap and it's been a total champ. You may end up eating a lot of hot dogs, and grilling them helps you feel more settled than you really are. Plus, raw meat doesn't exactly microwave, so throwing a roast in a crockpot with some veggies is a great home-cooked alternative to frozen meals.
3. Get a wholesale membership.
My in-laws are amazing and gave us a Sam's Club membership as an anniversary gift, which happened to be right around the time we started our reno. This came is so handy in terms of stocking up on bags of microwavable veggies, meat, snack packs of chips or fruit, water bottles!!, and hot dogs/buns. It saved us a ton of money and kept us fed for ages.
4. Go disposable.
I know this isn't very "green" of us, but doing dishes in a little bathroom sink or bent over a tub just sucks. Paper plates and plastic utensils saved us soooo much time (and back-aches) and also saved us from breaking our good glass dishes. Of course, we had a few larger glass bowls for heating soupy items and serving veggies and such. To be honest, you eventually stop eating off of anything at all and you and your spouse pretty much eat straight out of serving bowls and paper towels. So maybe we were "greener" than we thought? Do your best to find disposable items that are biodegradable.
5. Find your favorites and rotate.
You'll probably find something really easy to make and begin to fixate on it. For us, it was hot dogs. But instead of eating them over and over and getting sick of them quickly, we had them every other day... and I'm actually - to this day - not tired of them. Other meals included:
- Grilled chicken, instant rice with cream of mushroom soup, and steamed veggies.
- Frozen chicken tikka masala and naan heated on the grill.
- Hot dogs, baked beans, chips.
- Marinated grilled chicken, potatoes, and steamed veggies.
- Toasted bagels and cream cheese, side of fruit.
- Sandwiches and chips.
- Canned soup.
- Microwavable asian meals.
- Frozen hot pockets, meat pie pockets, or burritos.
- Take out: Chinese, Vietnamese, pizza, Indian, etc..
If you can get creative and prep your food days in advance, you'll find it's not too hard to eat decent meals at home, and some frozen meals are really pretty tasty these days!
As wise people say, "it's not going to be easy, but it'll be worth it." True that. With the right tools, organization, and determination, you can survive a kitchen renovation and not starve.
Now, with a finished kitchen and lots of decorating to do, we are eating delicious meals with the help of a stove and oven. Baking is such a passion of mine and I am thrilled to finally be back at it! Worth it, indeed.
Have you lived in a house during a kitchen renovation? Any other kitchen reno questions for me? Leave a comment or contact me!
Kitchen Progress 2
I'm not sure how exciting and/or interesting this whole renovation may be to some of you, but considering it has been the complete and utter bane of Tom and my existence for the last two months, it's getting covered here quite a bit. I hope you enjoy it, but if not, you can rest easy on the fact that we are nearly done! Trust me, that comes as more of a relief to me than it does to you - hahaha! We have learned so much from this process and there are plenty of snippets of wisdom regarding a DIY renovation that I'll be sharing with you all soon. Seriously. We've learned some really weird things about renovating that no one ever warns you about. So stay tuned for some words of wisdom!
Today though, I thought I'd give you an update on our progress. This will be the last update (most likely) until the final reveal... but that won't come until July because we're waiting to hit the 4th of July sales for our new appliances. We got tempted by the Memorial Day sales, but we know the July round will be better. Not to mention, we've gotten pretty dang good about being patient. Two months without a kitchen sink or oven will do that to you. See? Wisdom.
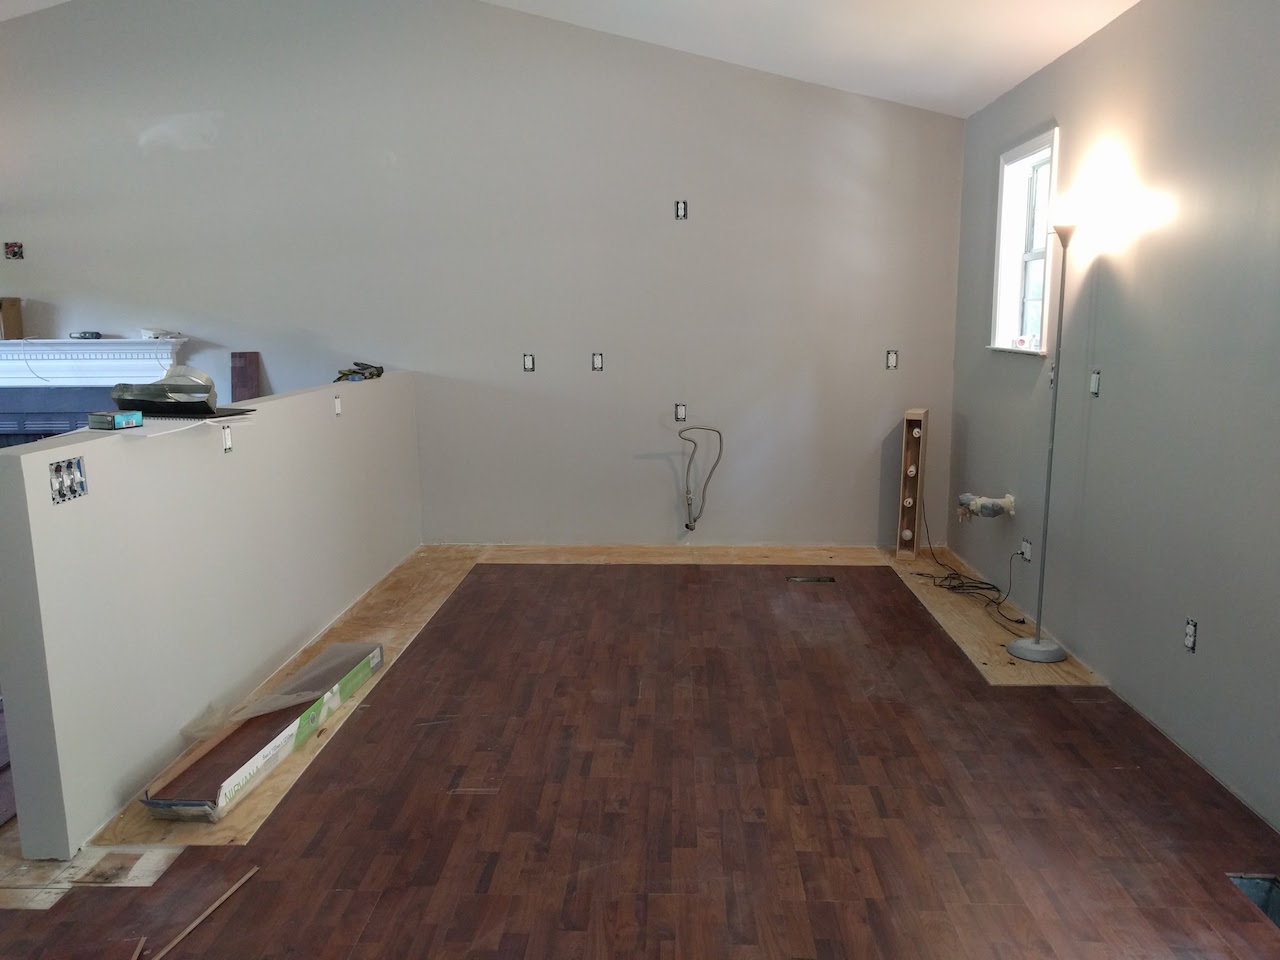
In my last update, we had successfully managed the demolition, electrical, and were patching up the drywall. You could make out the faint outline of a kitchen, but since then, we have made leaps and bounds. If I'm being honest, where I left off in my last update is about when we started to feel the burn of renovation life. We were tired of it, and it seemed like we hadn't gotten anywhere. But. About a week later, we finally started to feel the down hill speed picking up and have been trucking along ever since.
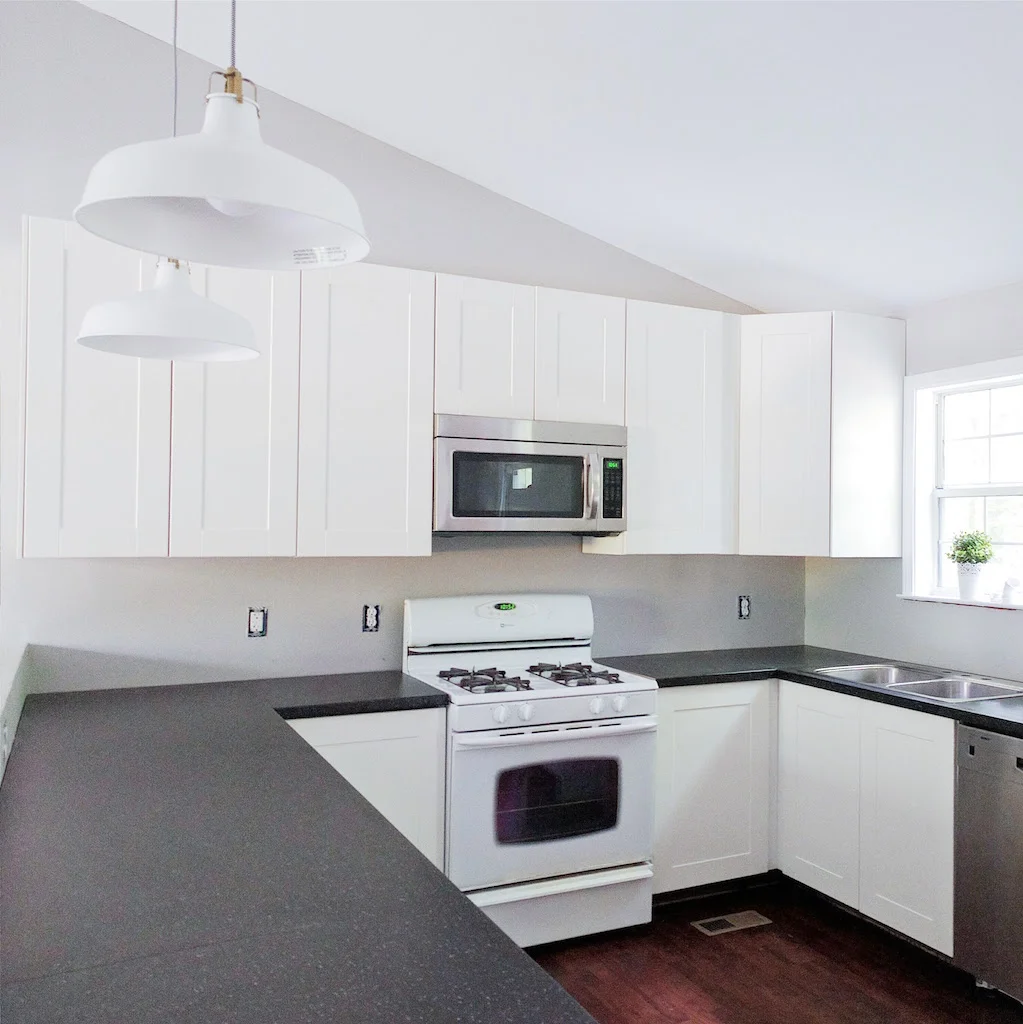
I tried to group the photos in "fours" of the same angle taken over the last month. Basically what you're seeing in terms of stages are: patched, sanded, painted, and current status. It's truly amazing how important the seemingly little things are in a functioning kitchen. We still have toe-kicks, faucets, outlet and switch covers, more lighting, a backsplash, new appliances, door/drawer handles, finishing touches on the counters, a pantry and fridge cabinet to assemble and install, shelves to place in cabinets, and more. So as close as it might seem, there is still plenty to be done. But heck, I'm just thankful I could actually bake a frozen pizza in a REAL oven last night. Praise Jesus.
Anyways, enjoy the progress photos and see below for links to a few products (lights, paint colors, etc..).


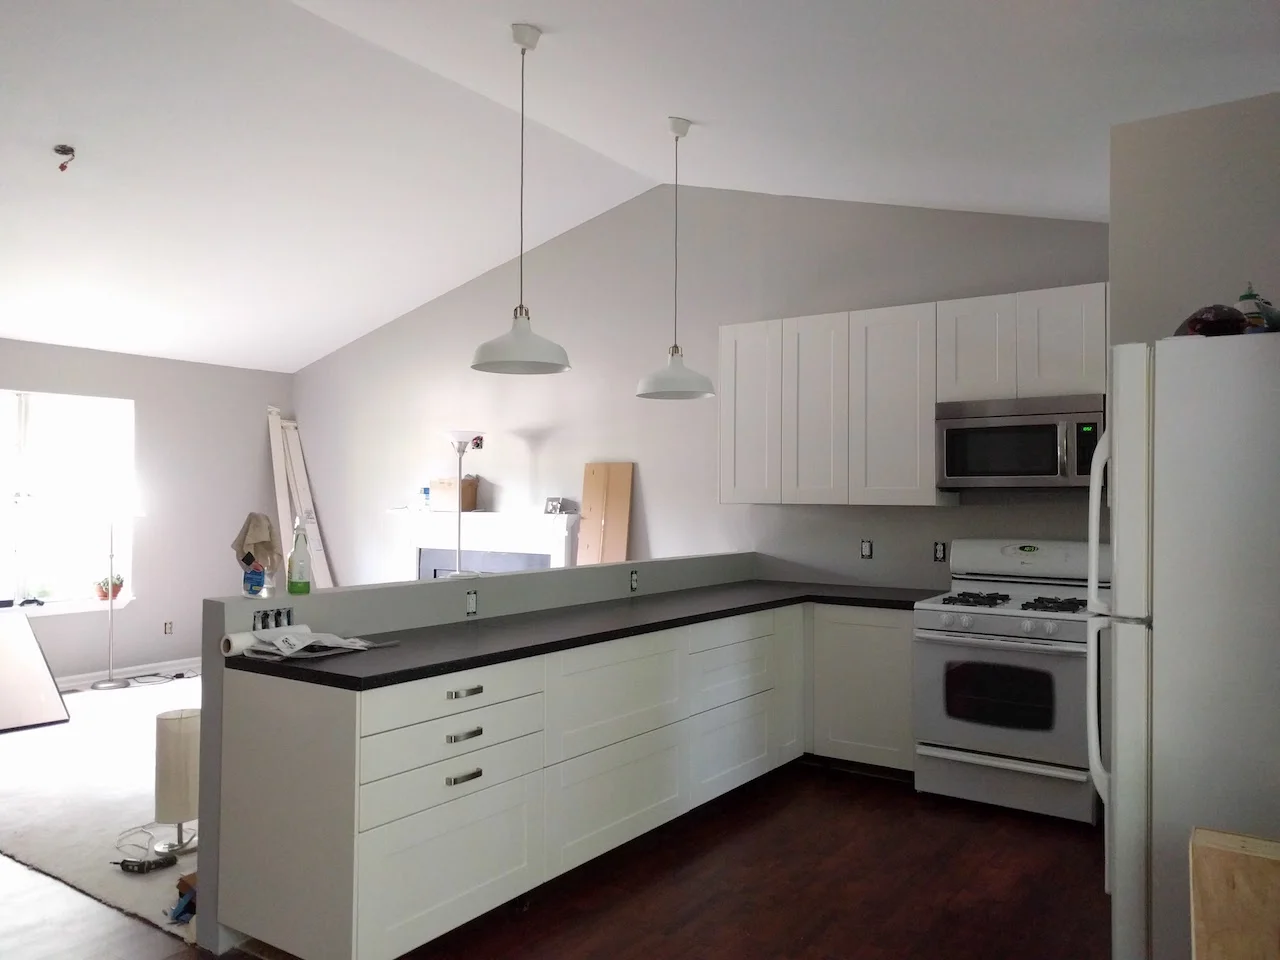


What do you think? We are soooo ready to have a couch in our home again and a TV on the wall. And maybe a few bottles of wine.... each. But hey, it's been totally worth it, who am I kidding?
Paint color: Silver City by Behr
Trim paint: Maui Mist by Behr
Pendants: RANARP by IKEA
Handles: VARDE by IKEA
Countertop: SALJAN by IKEA
Cabinet/Drawer fronts: GRIMSLOV by IKEA
Sink: KOHLER from Home Depot
Microhood: BETRODD by IKEA (fun fact: all IKEA appliances are actually Whirlpool)
Any questions? Drop me a comment or contact me!