

June | 2017
After such a busy May, it was nice to have a quieter month to follow. It still involved a week-long trip, but it was mostly a month we used to nail down our Iceland/Europe trip details and itinerary. I've been obsessing over this trip and it's honestly been really hard for me to focus on anything else because I don't want to feel like we're booking anything last minute (as in, a month or less before). Now I'm sorting through shoes, compact hygiene ideas, useful travel accessories, and backpacking tips.
This month, we did have some fun though. We...
- explored San Francisco
- saw family
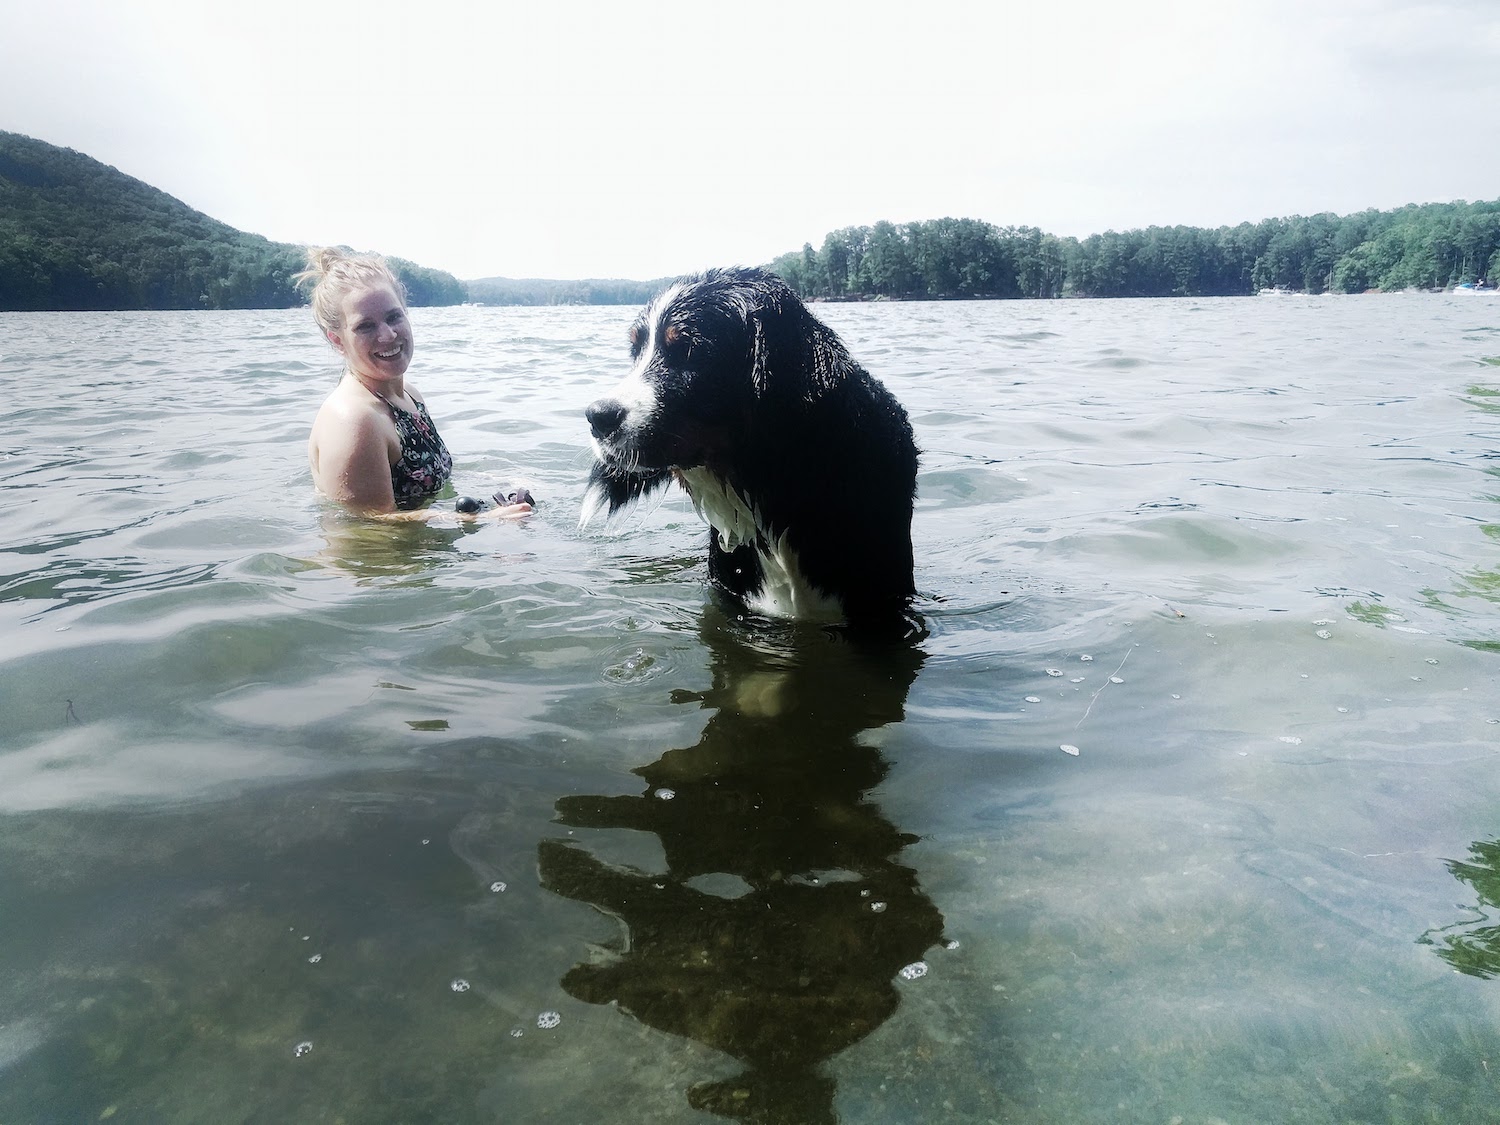
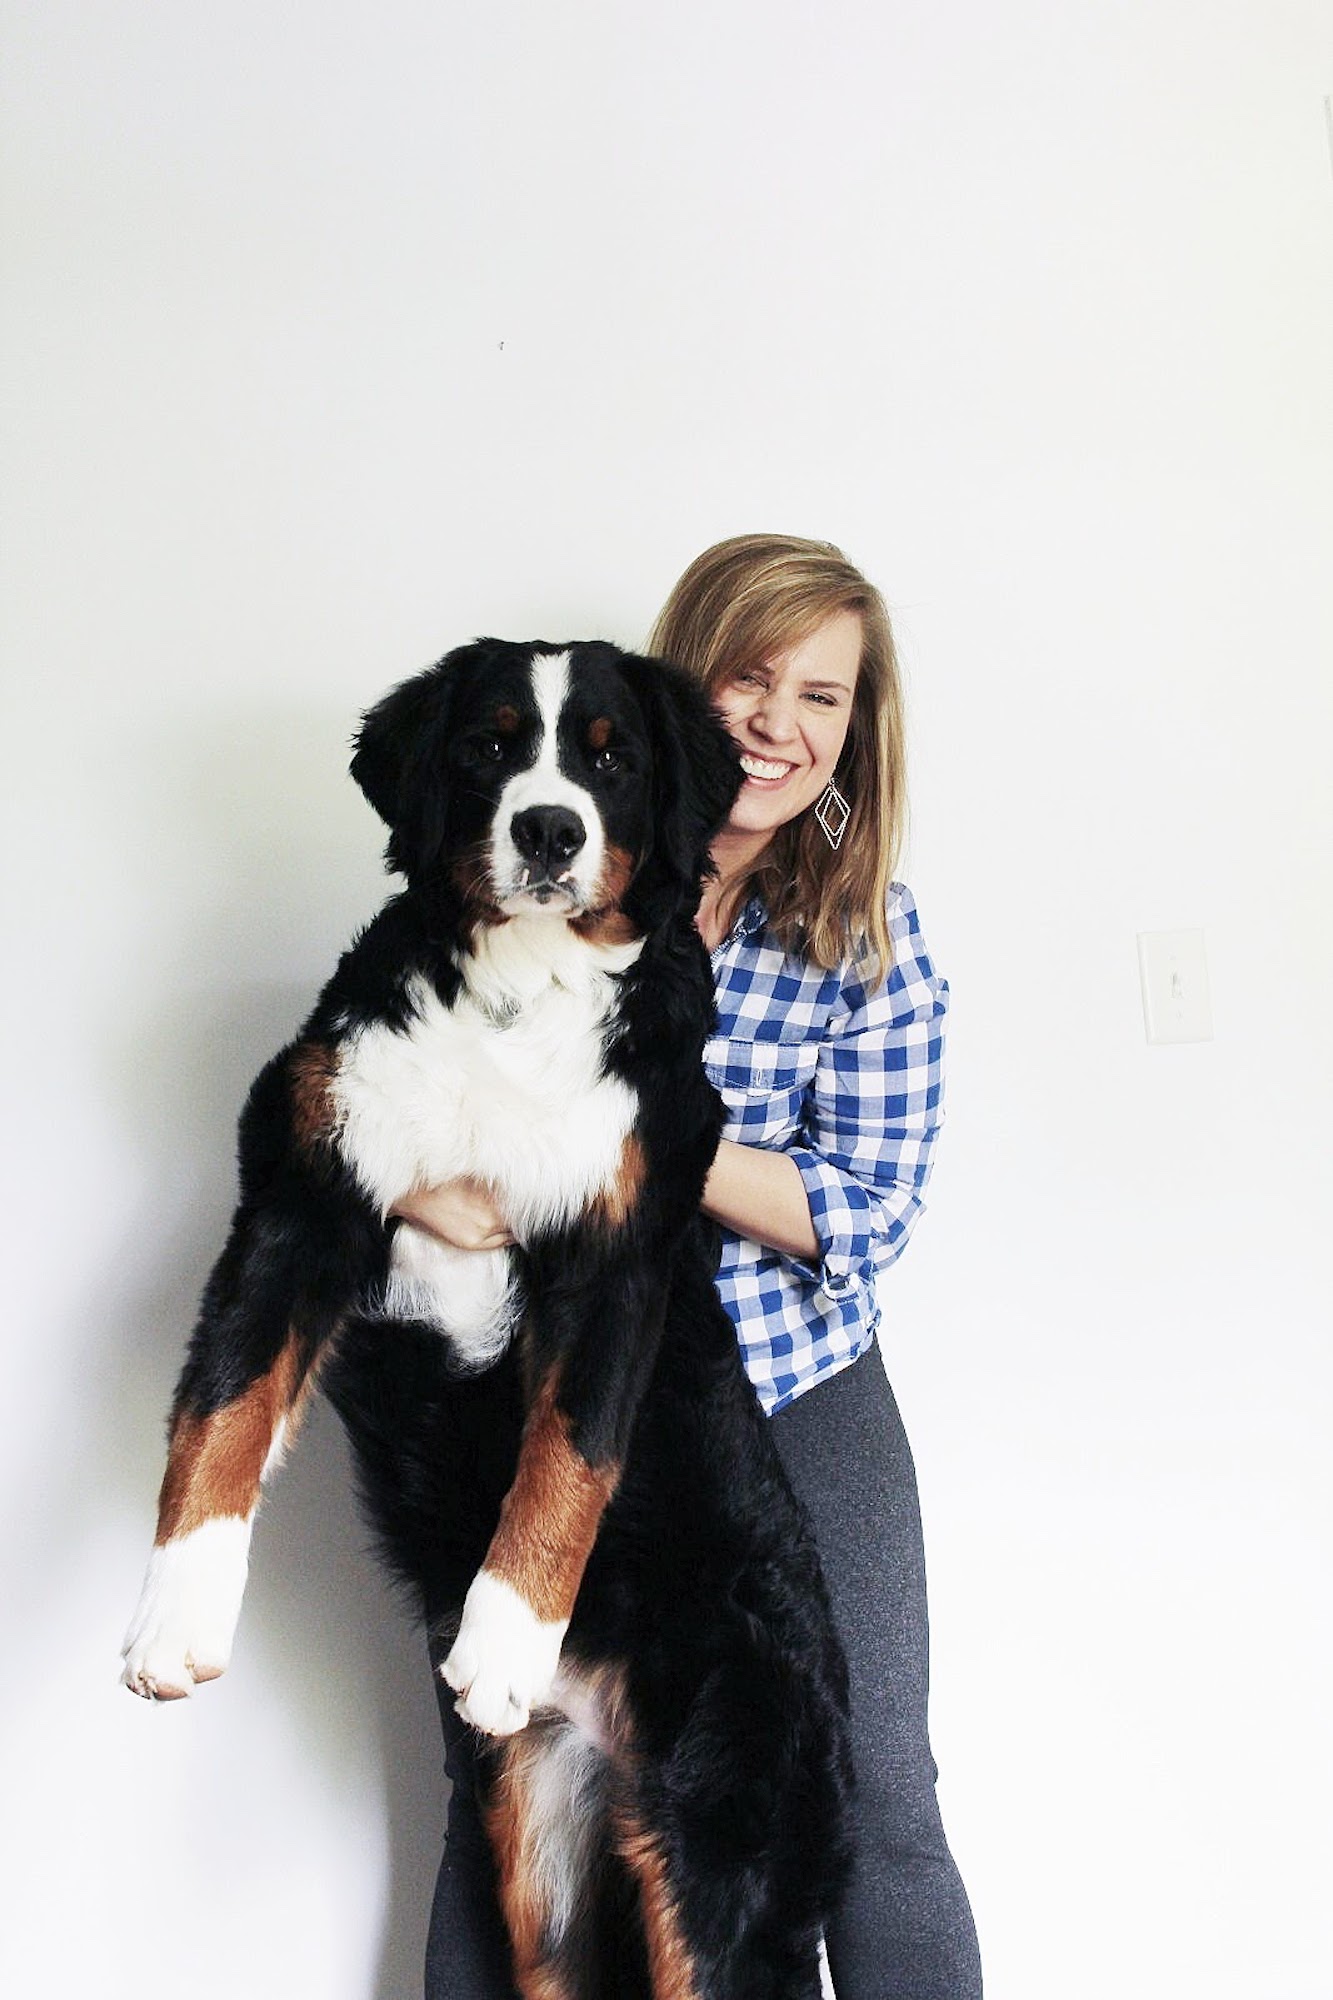
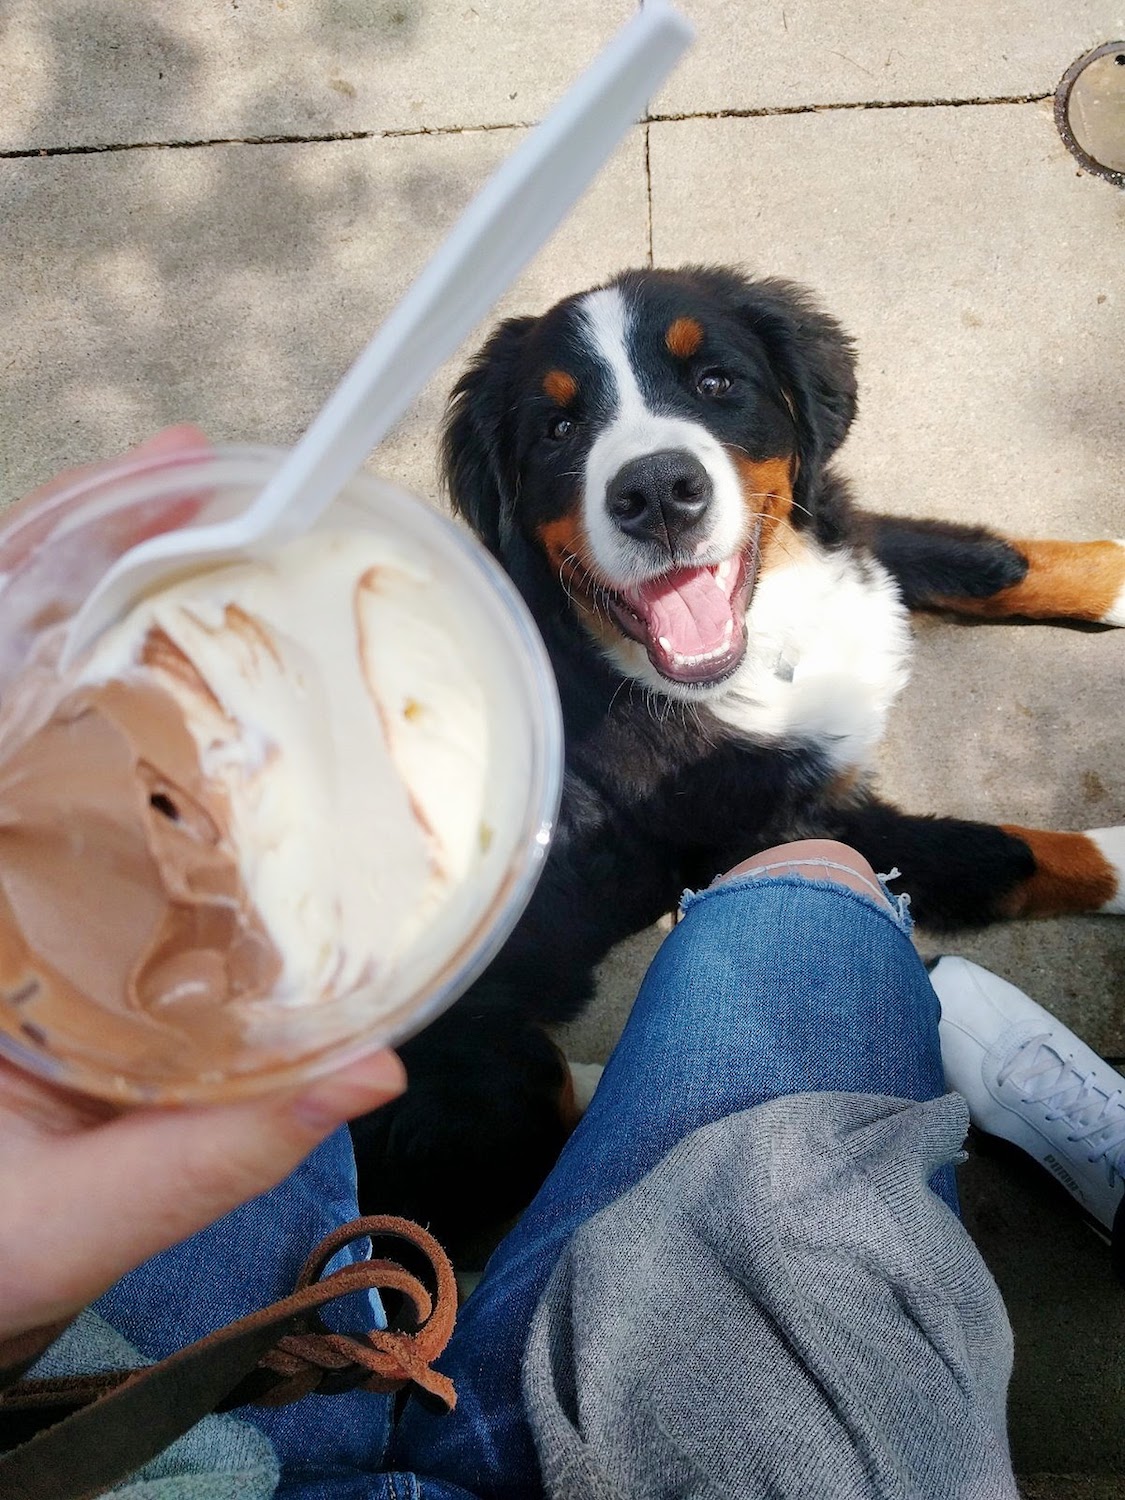
- took Hondo swimming
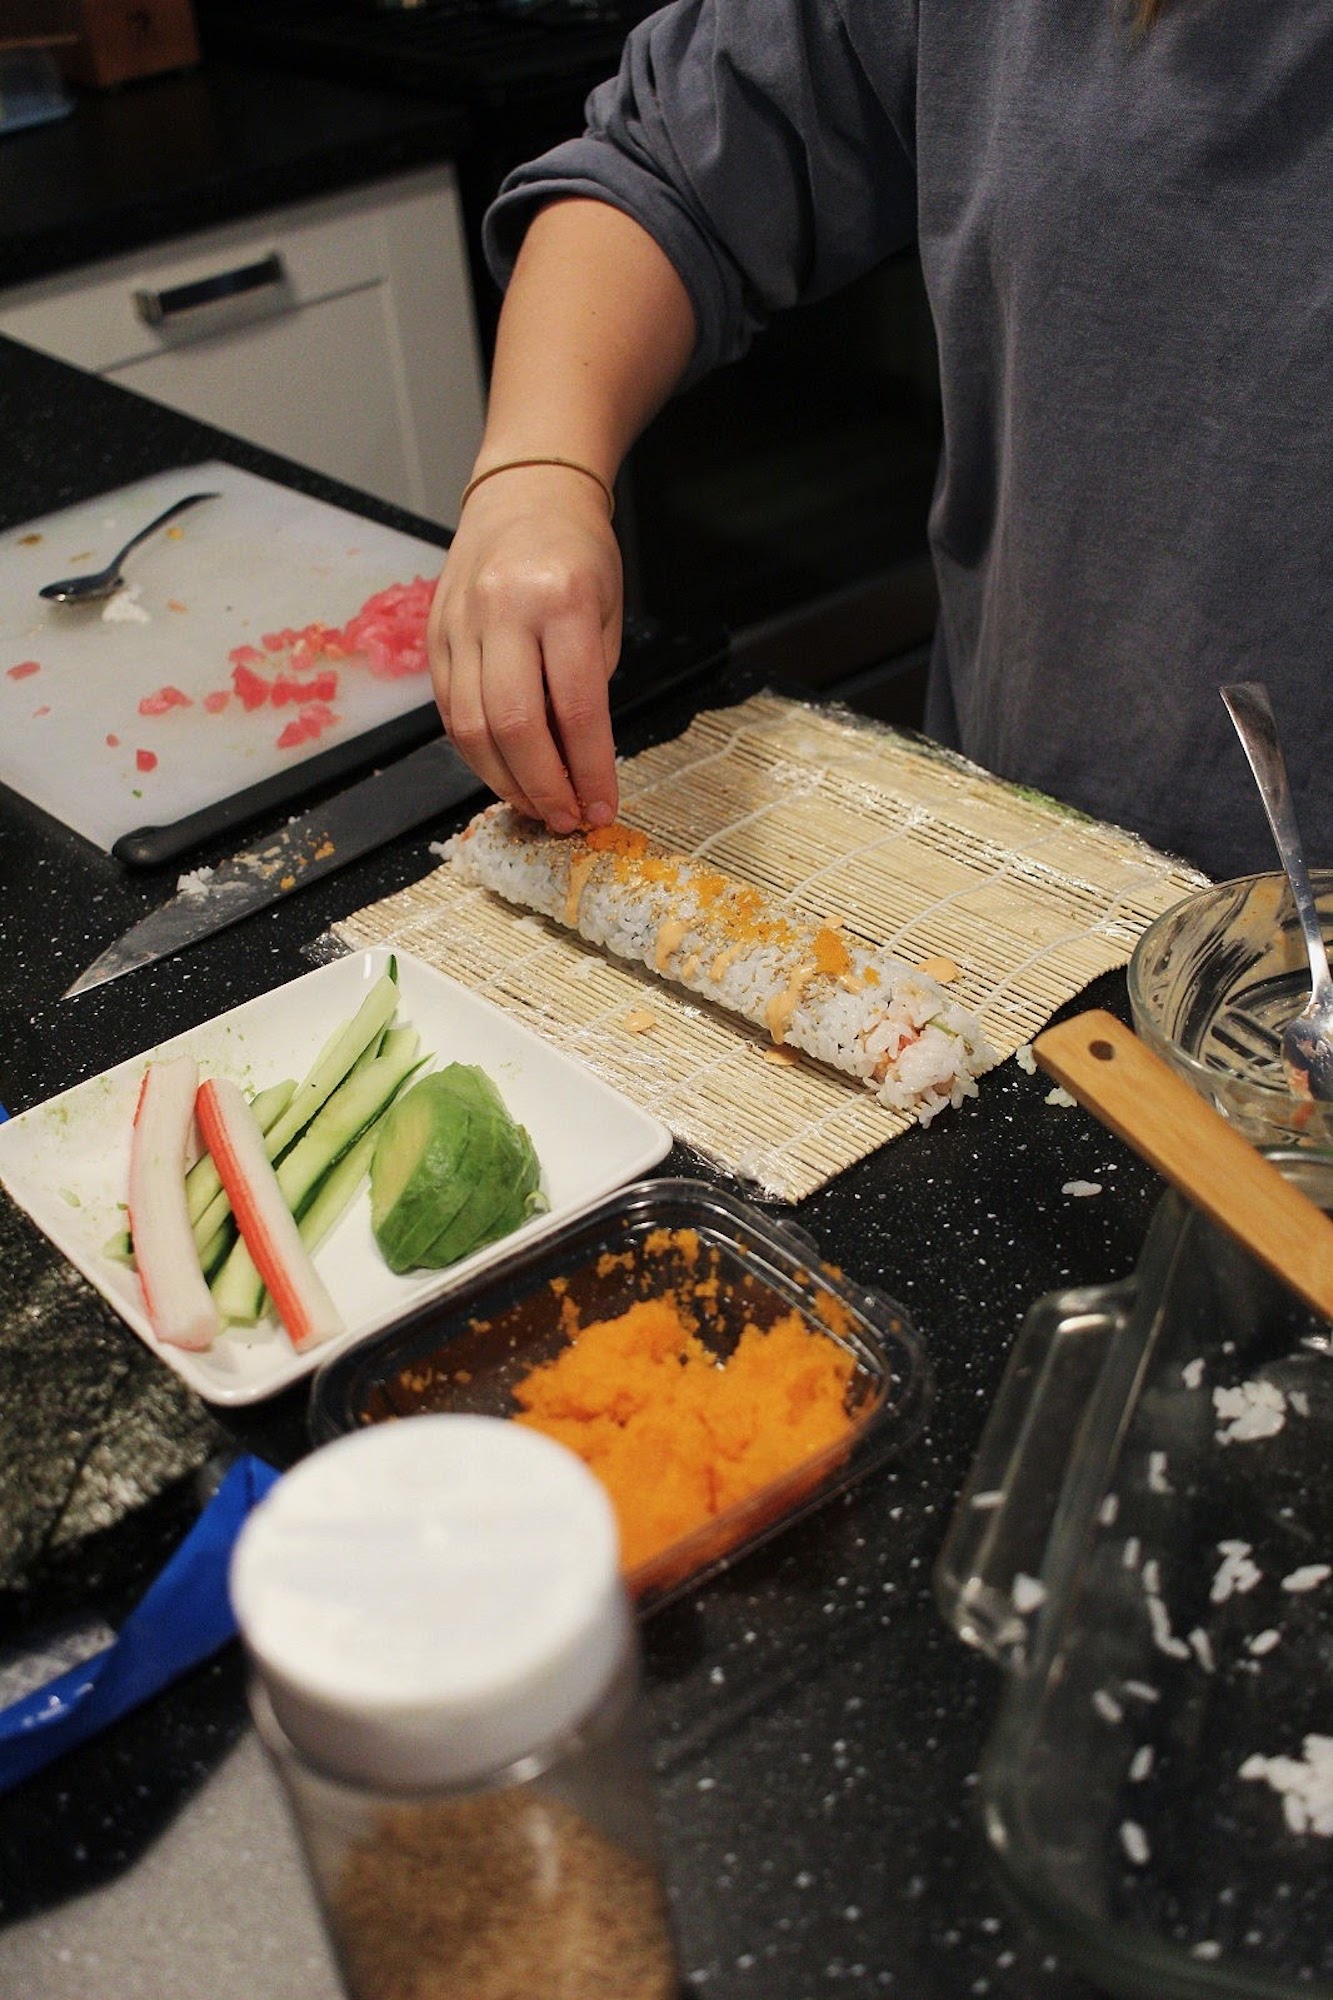
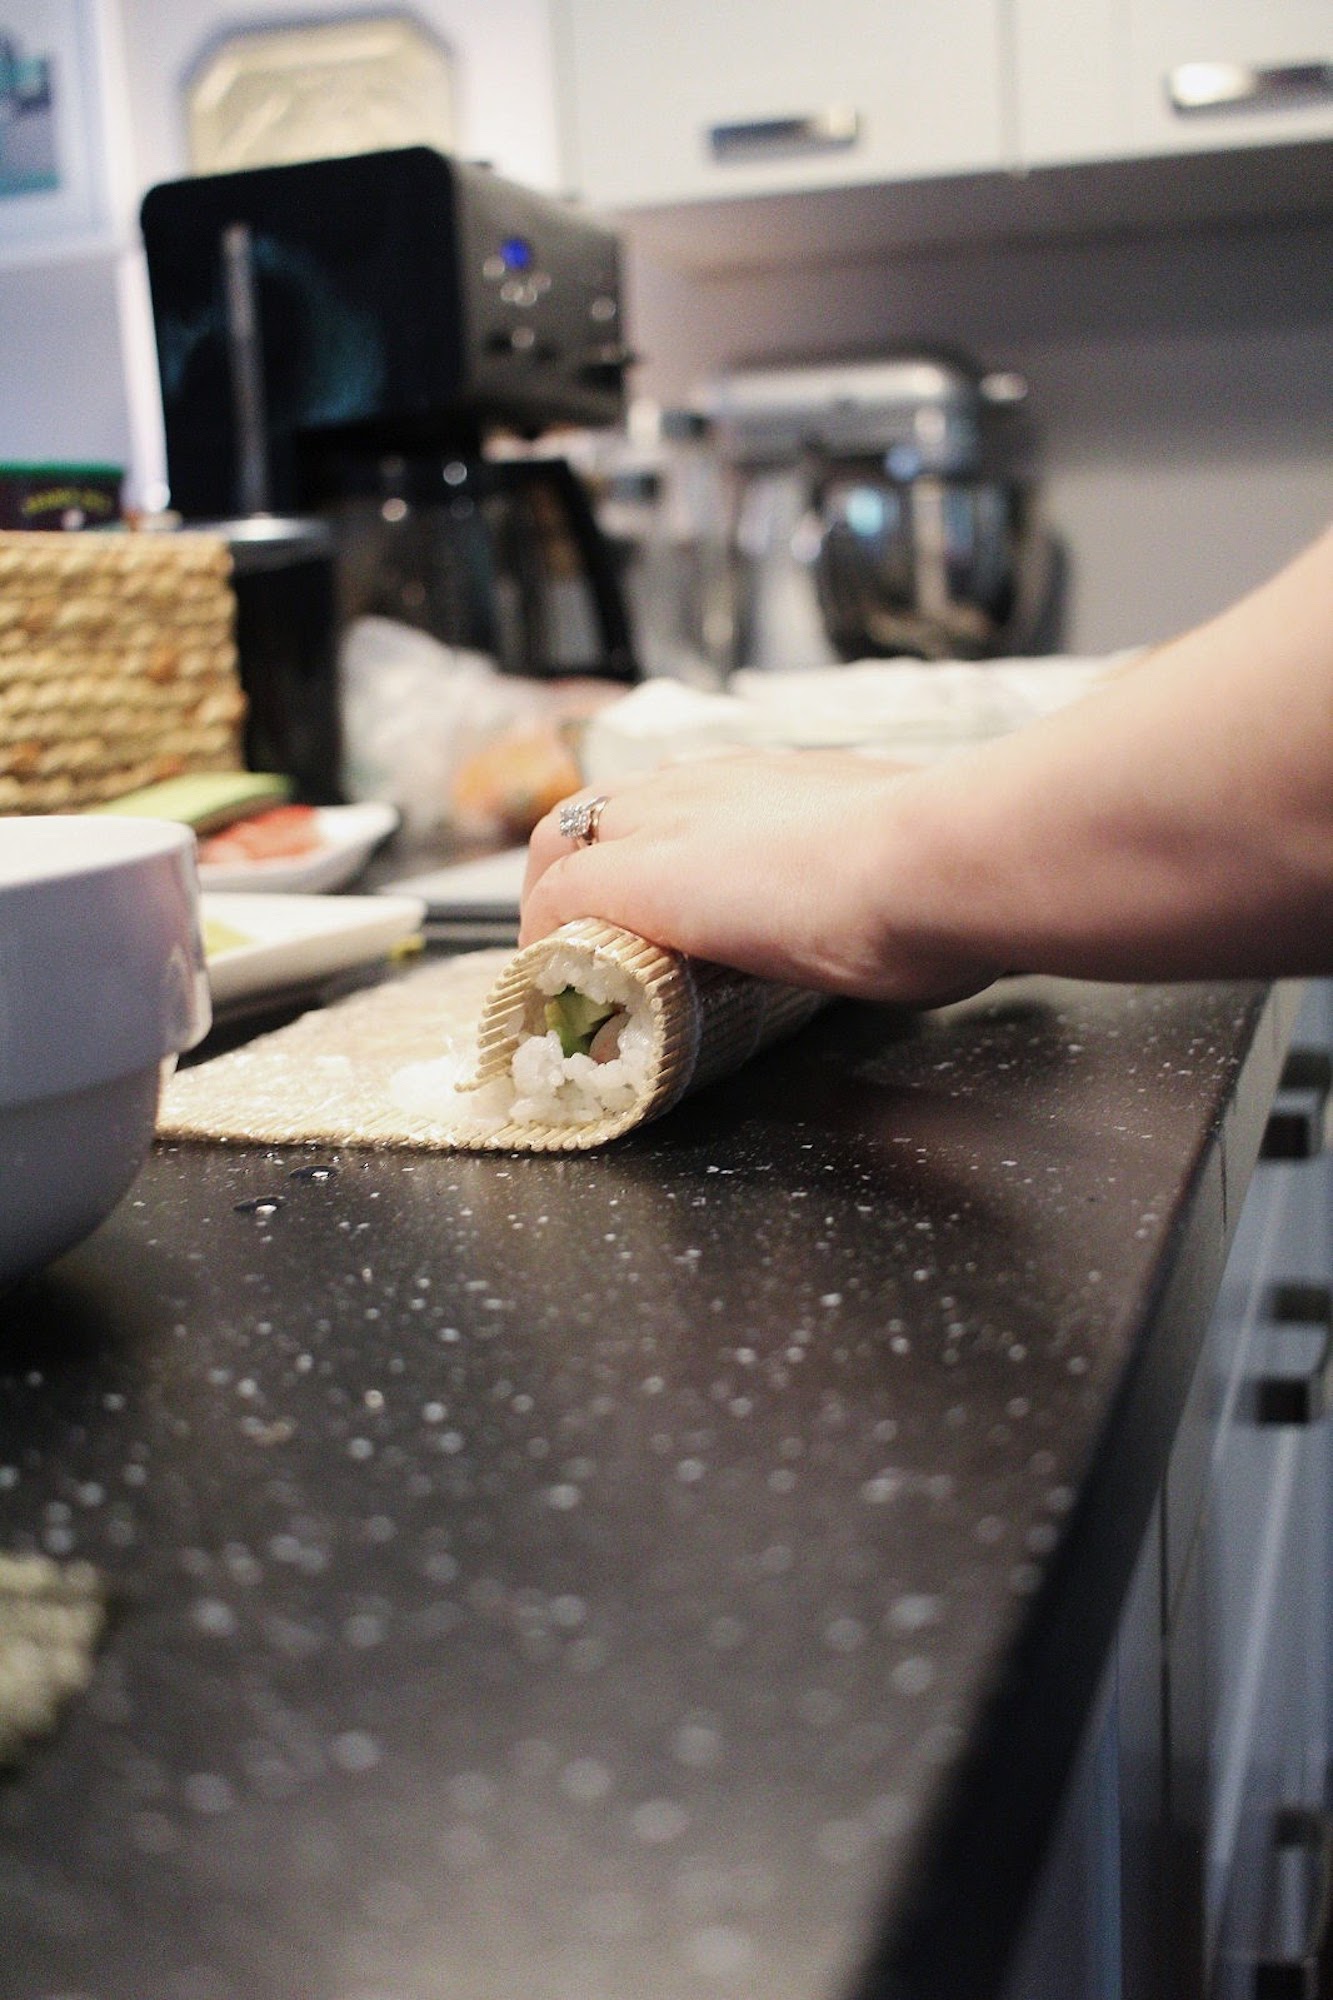
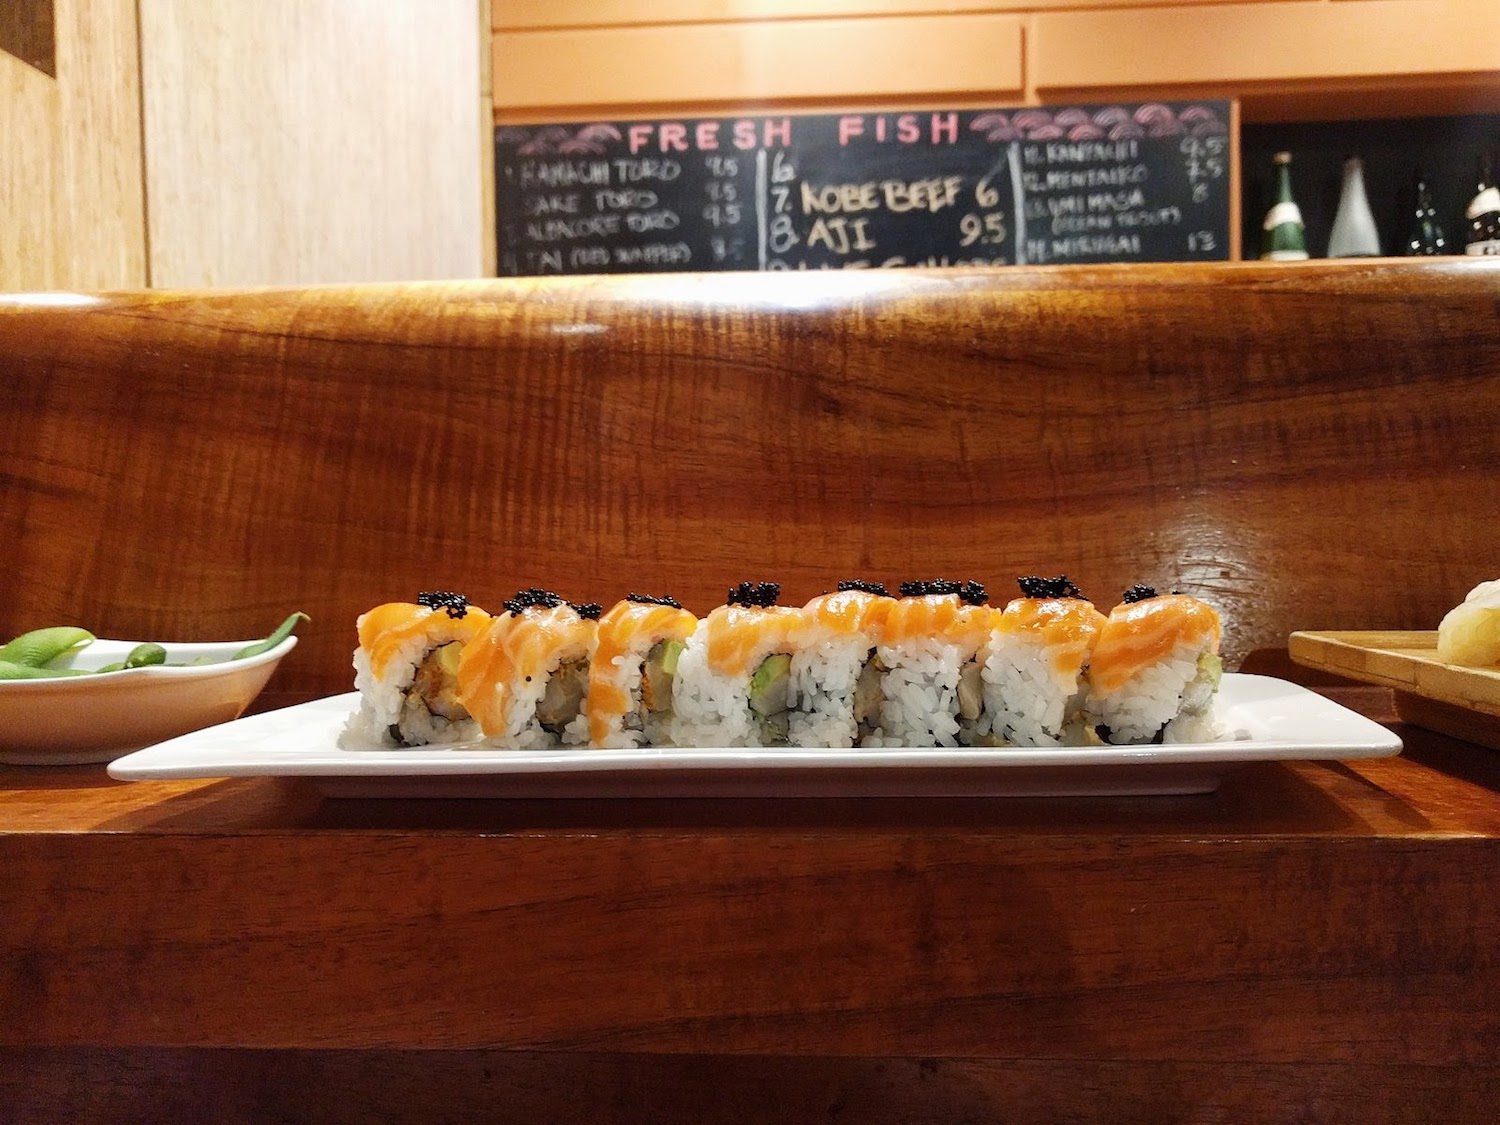
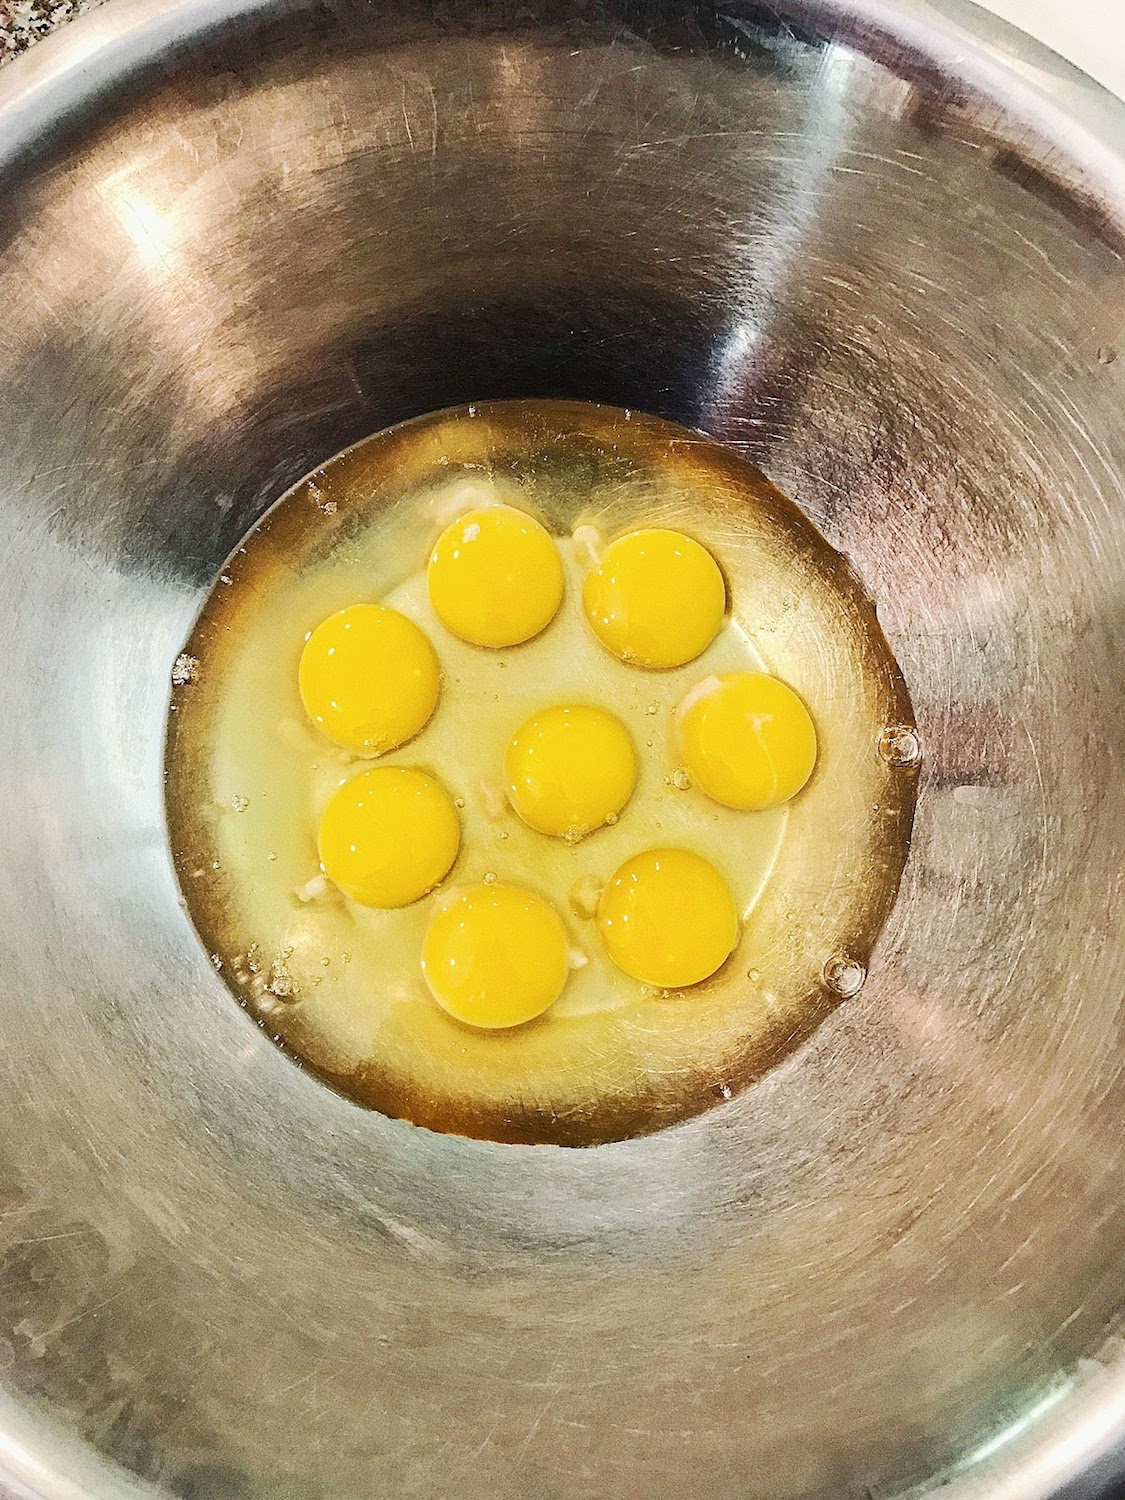
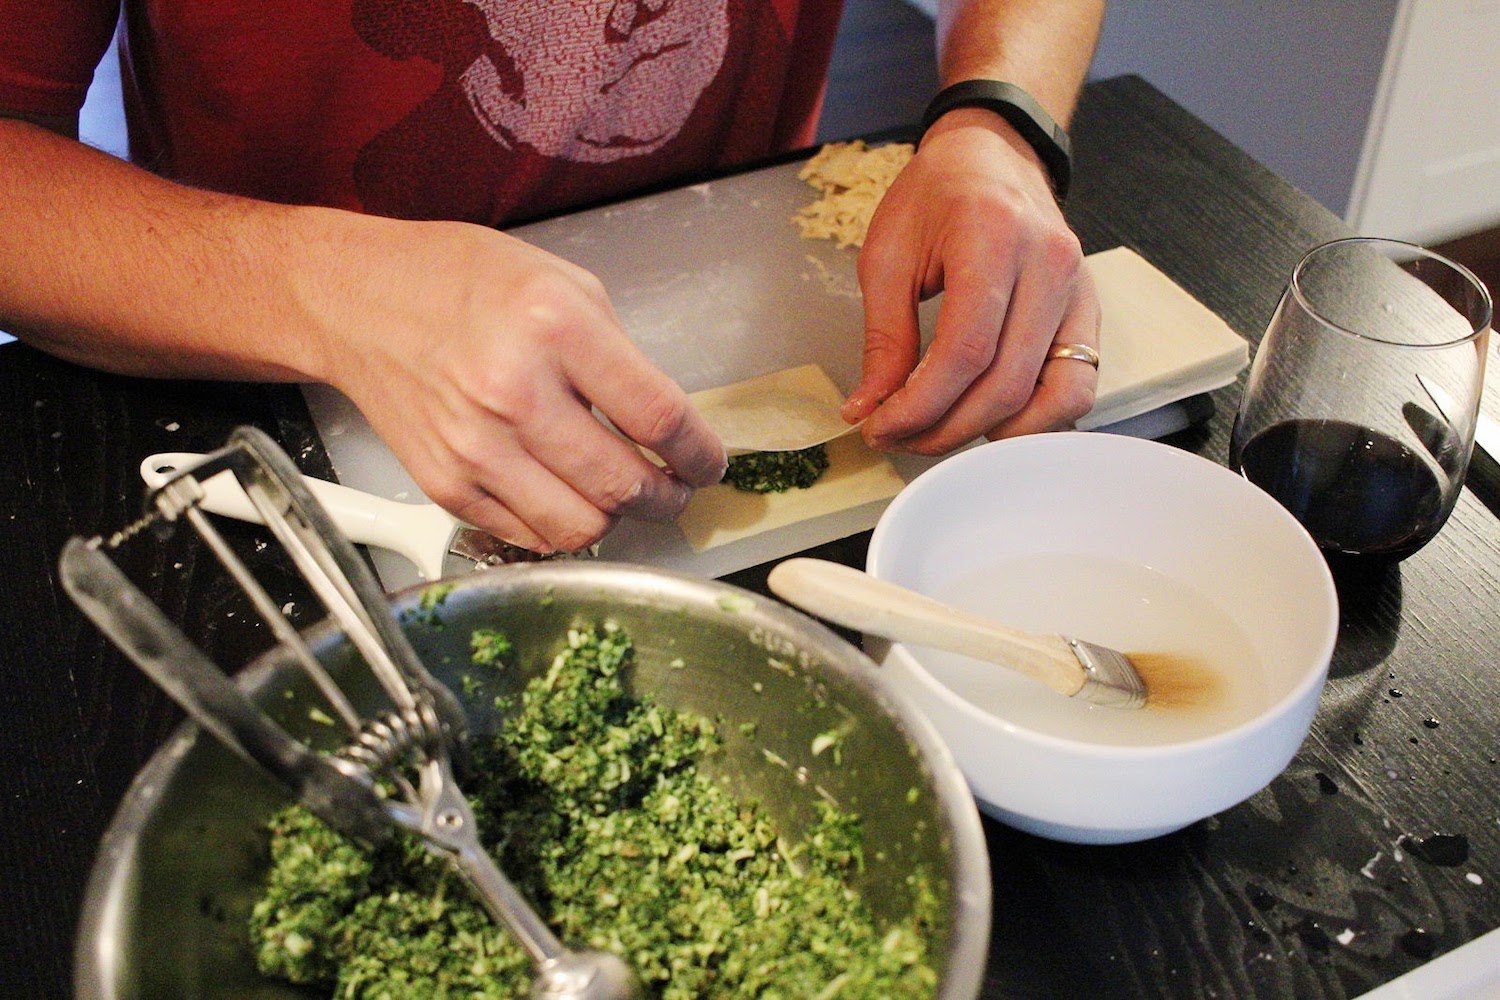
- made sushi (so yummy and fun!)
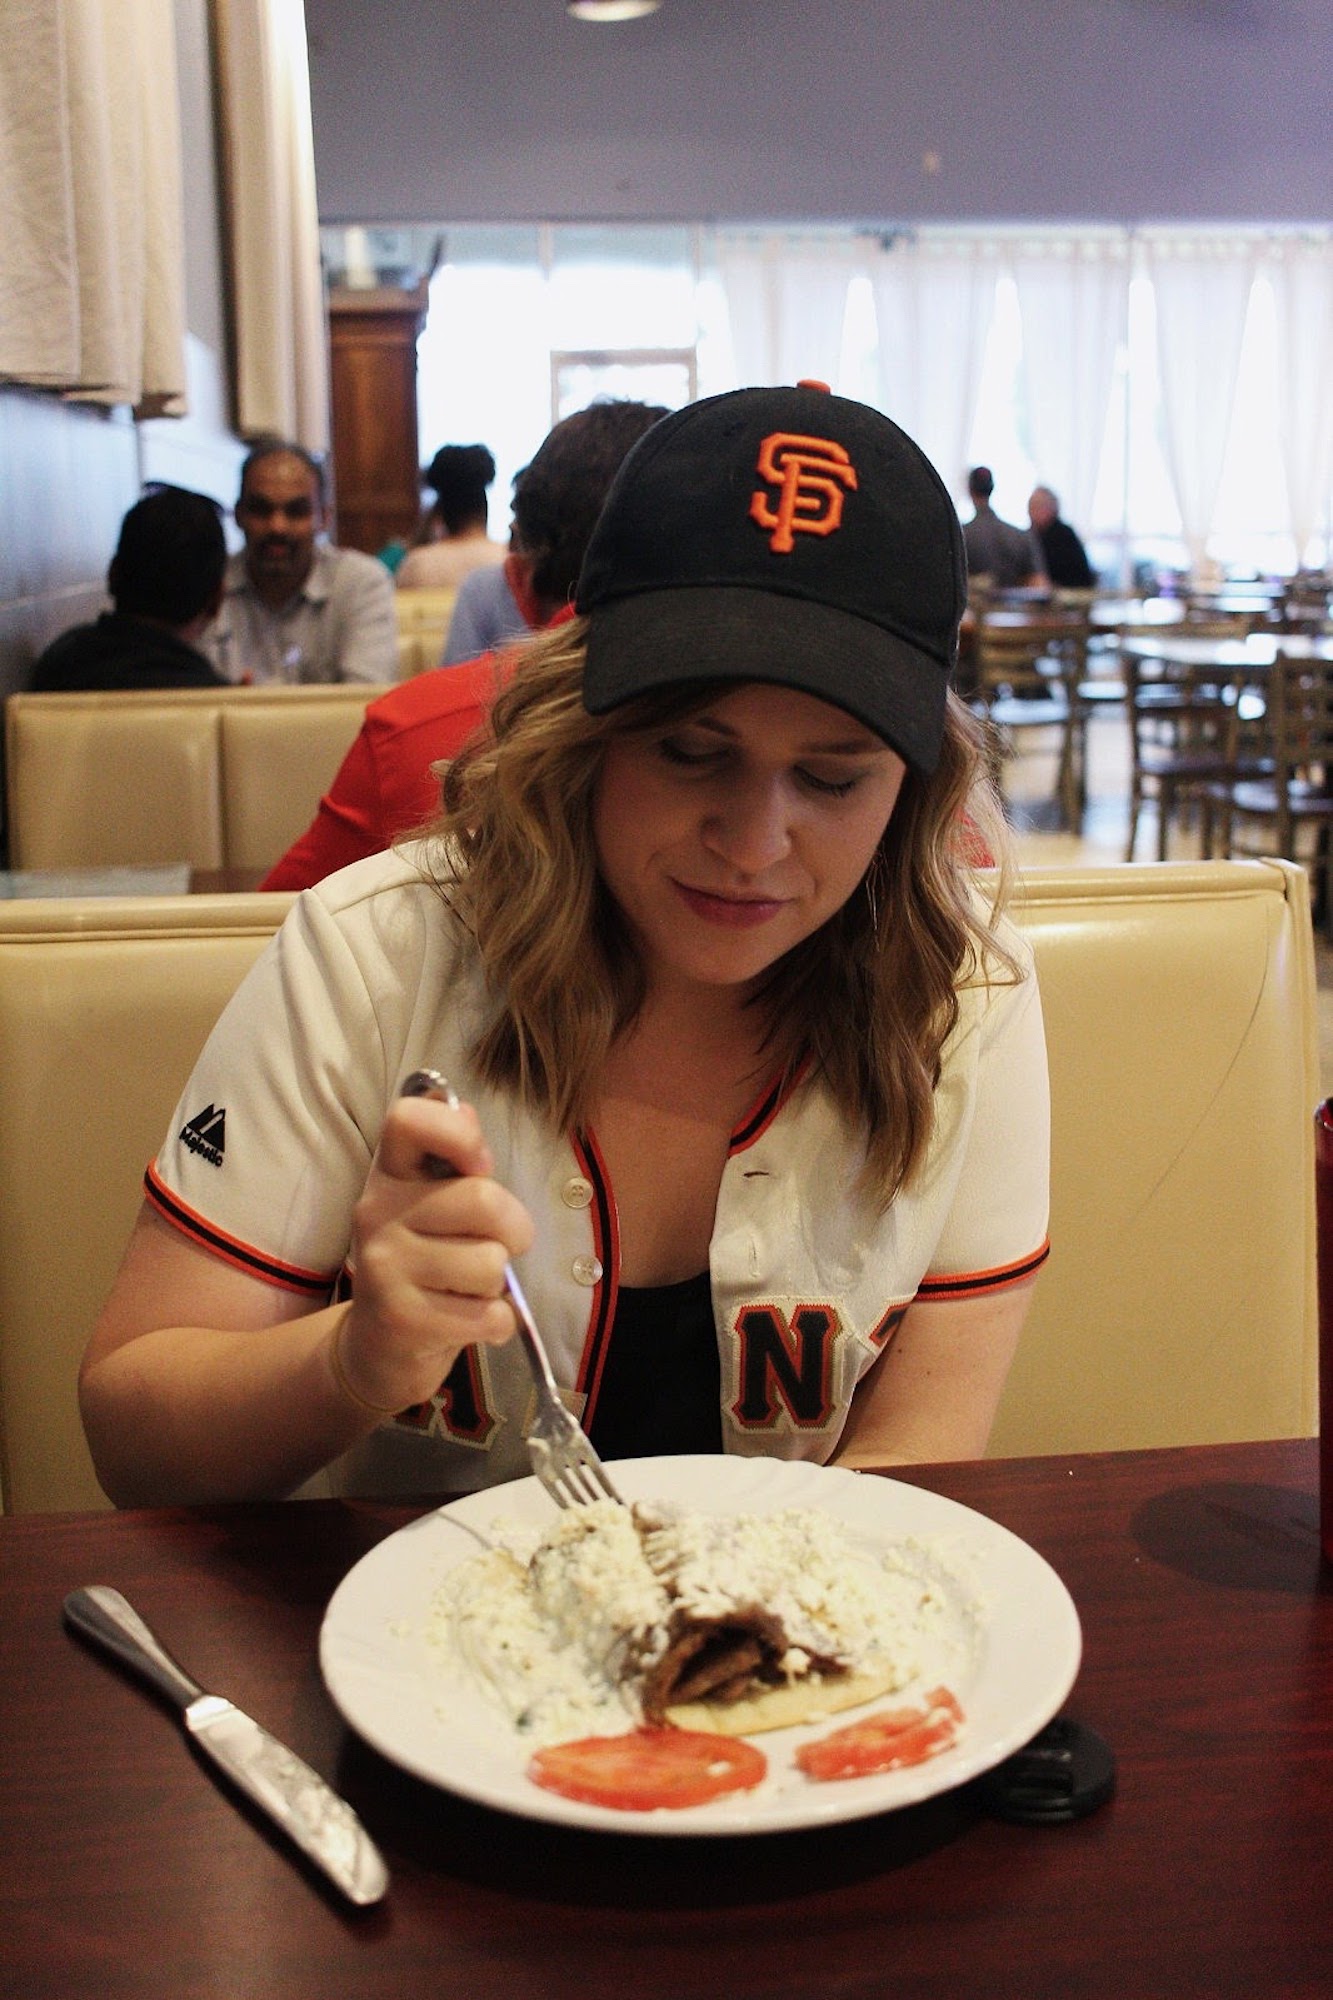
- watched the Giants play
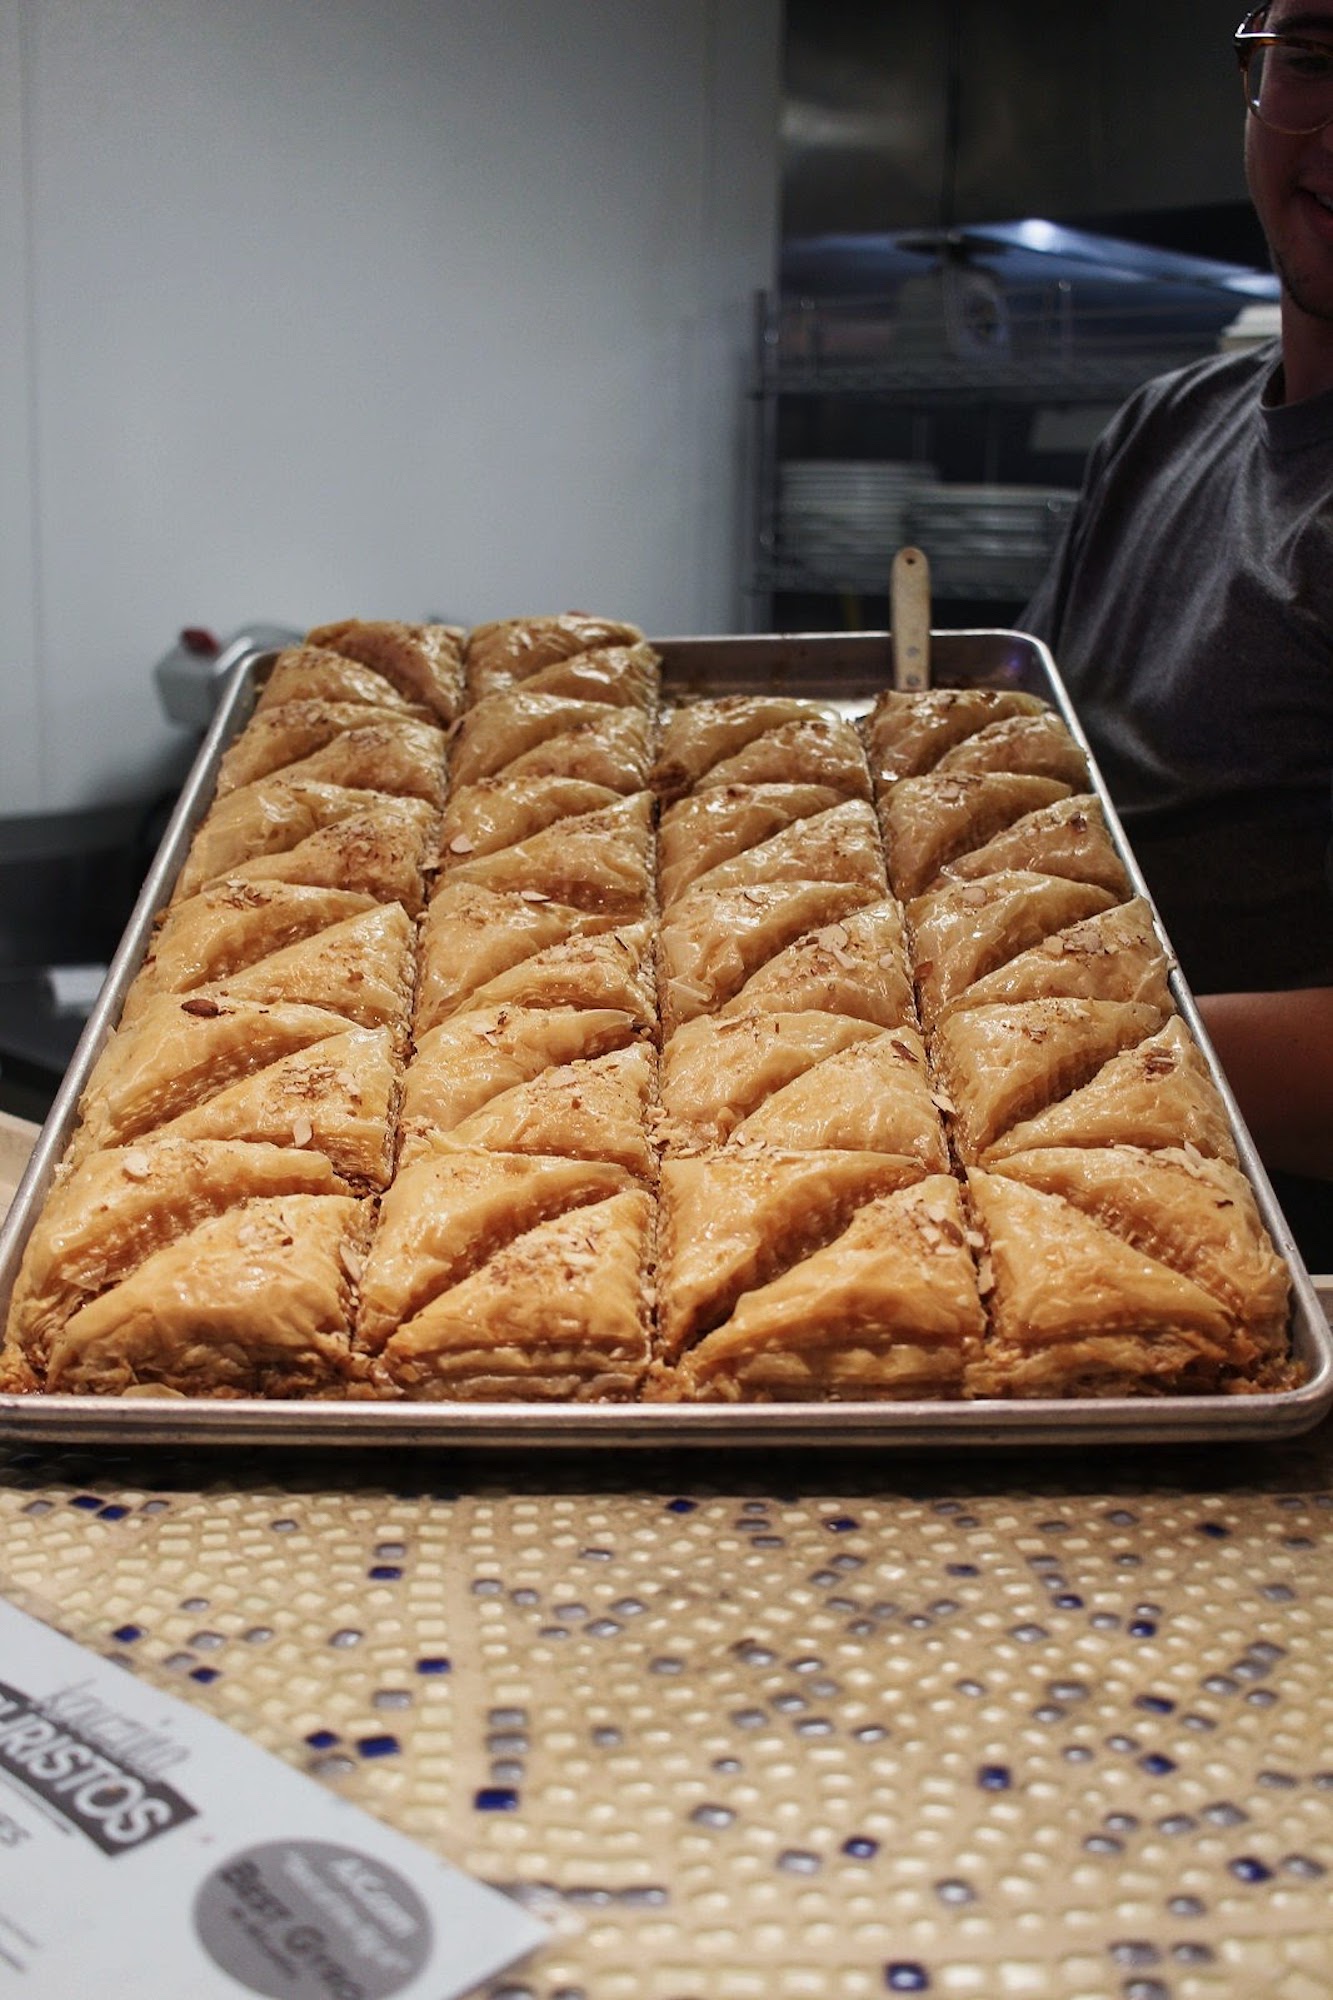
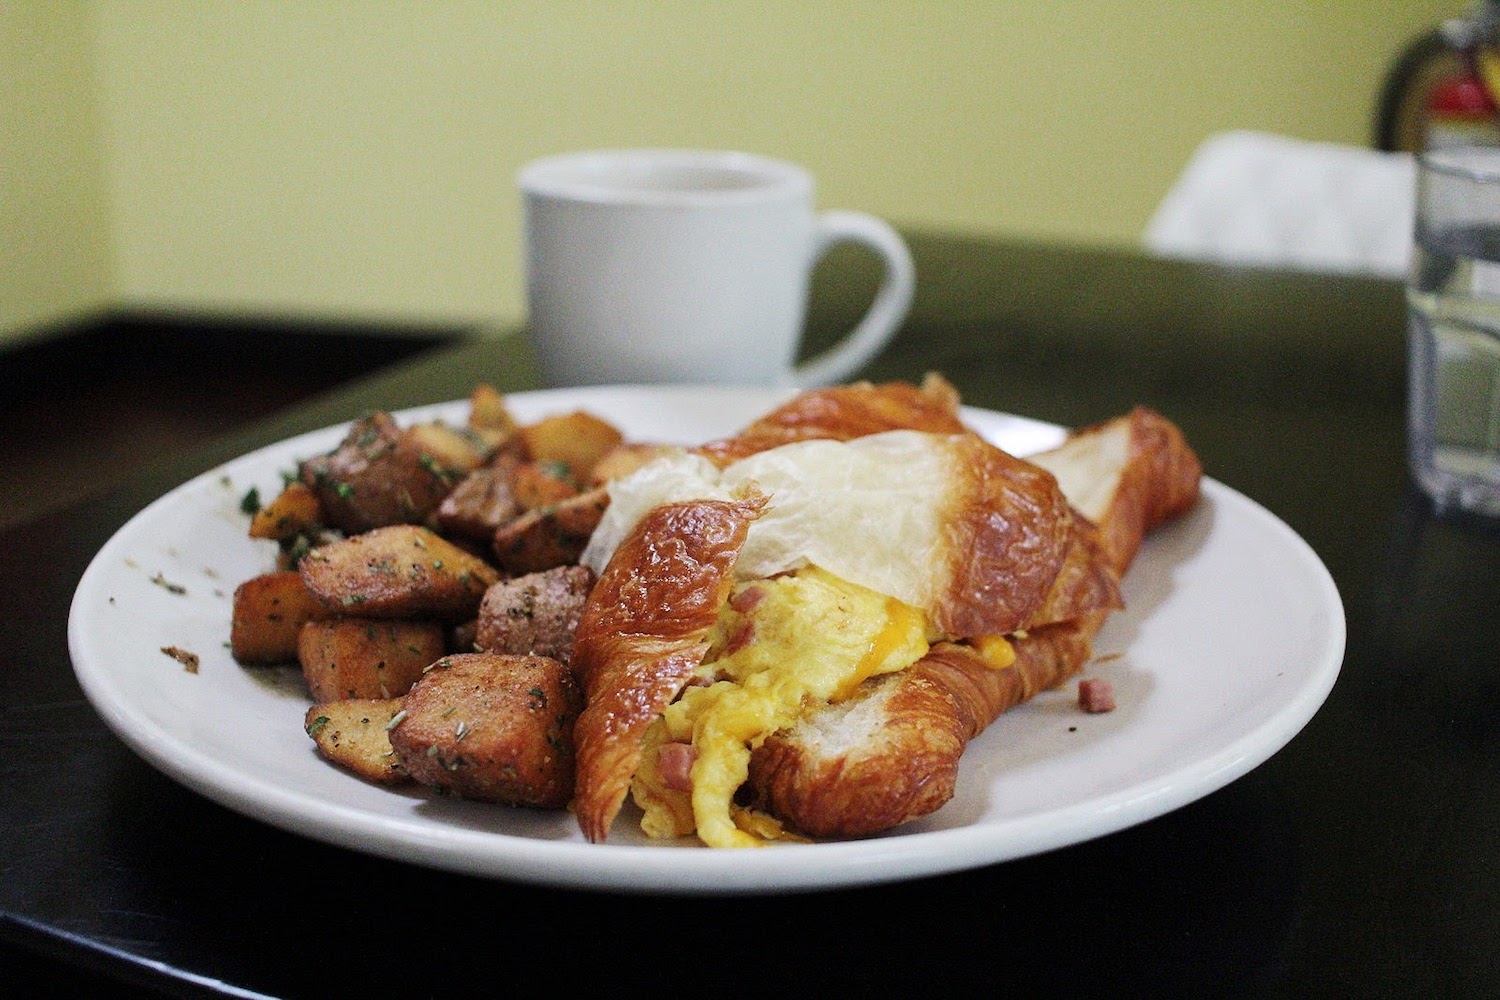
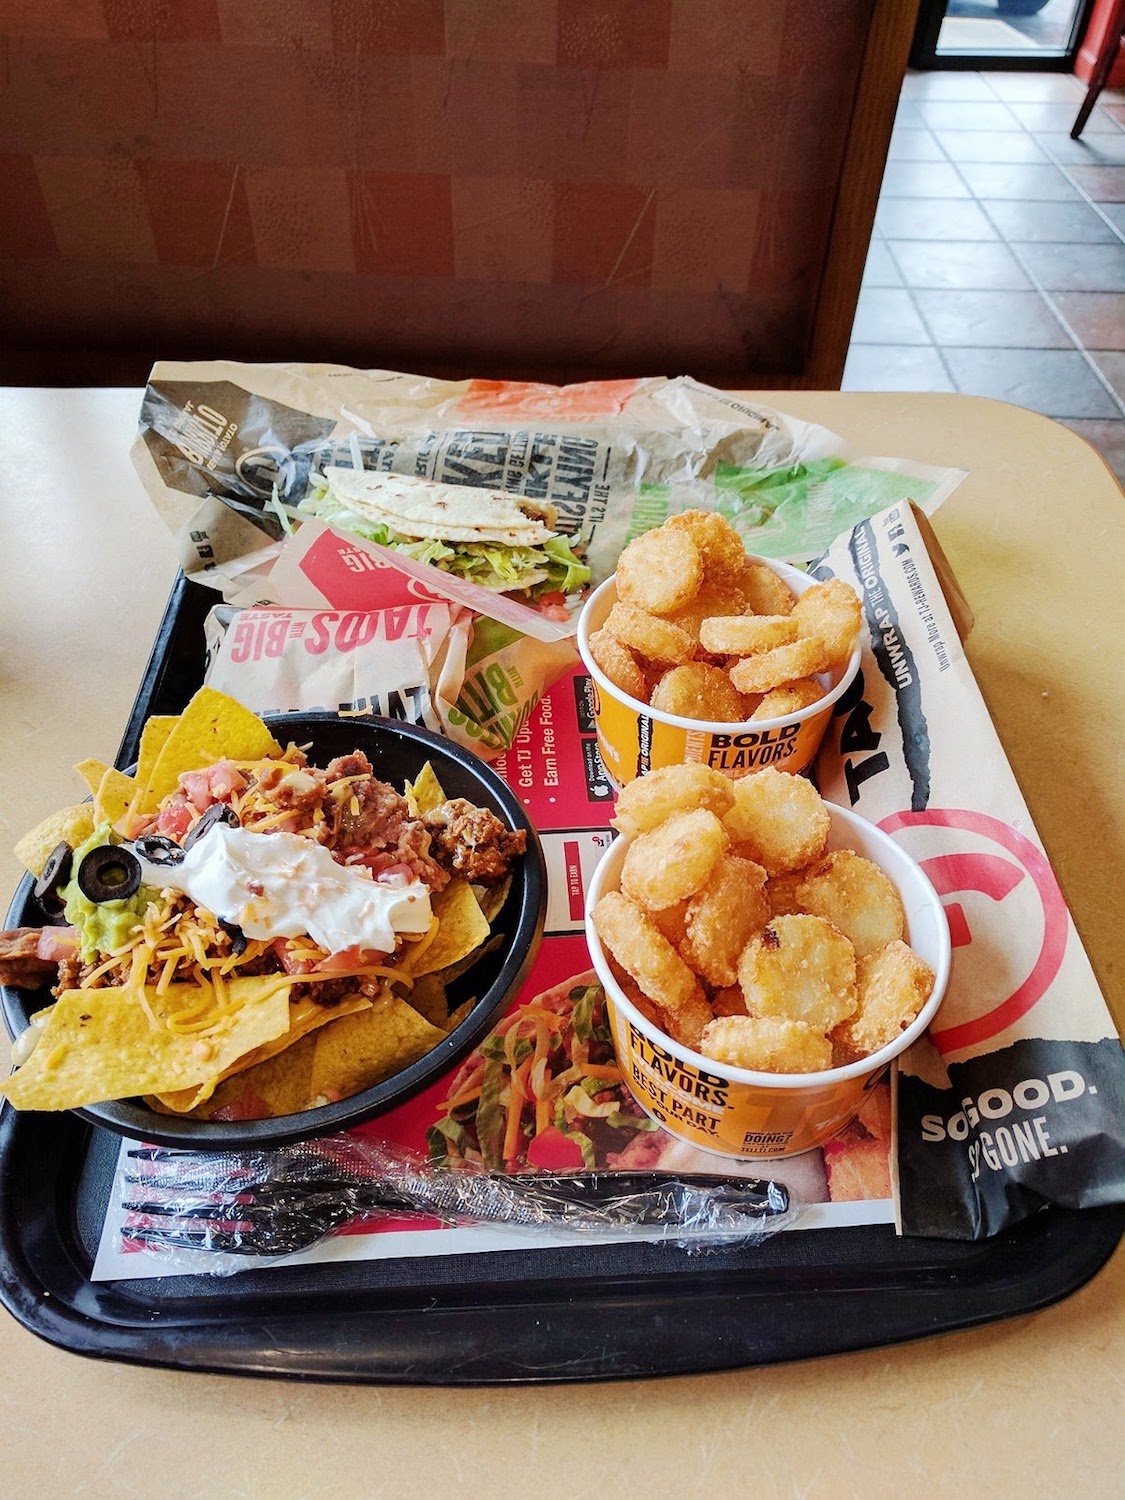
- ate gyros at Kouzina Christos
- started looking at new couches (not happening soon, but we're thinking about it)
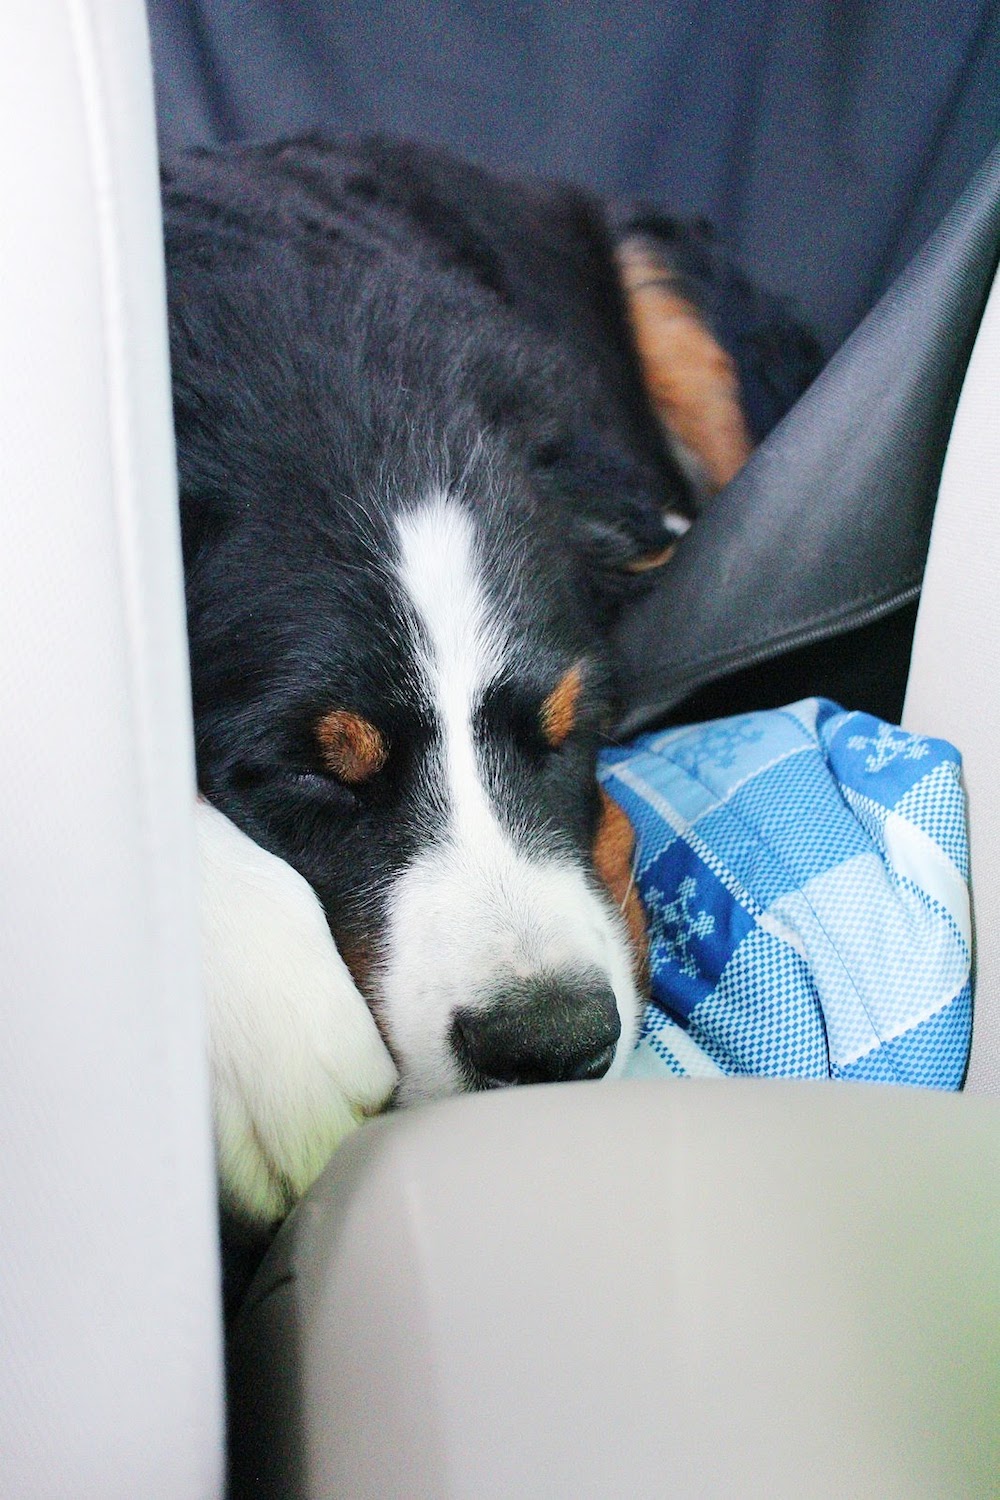
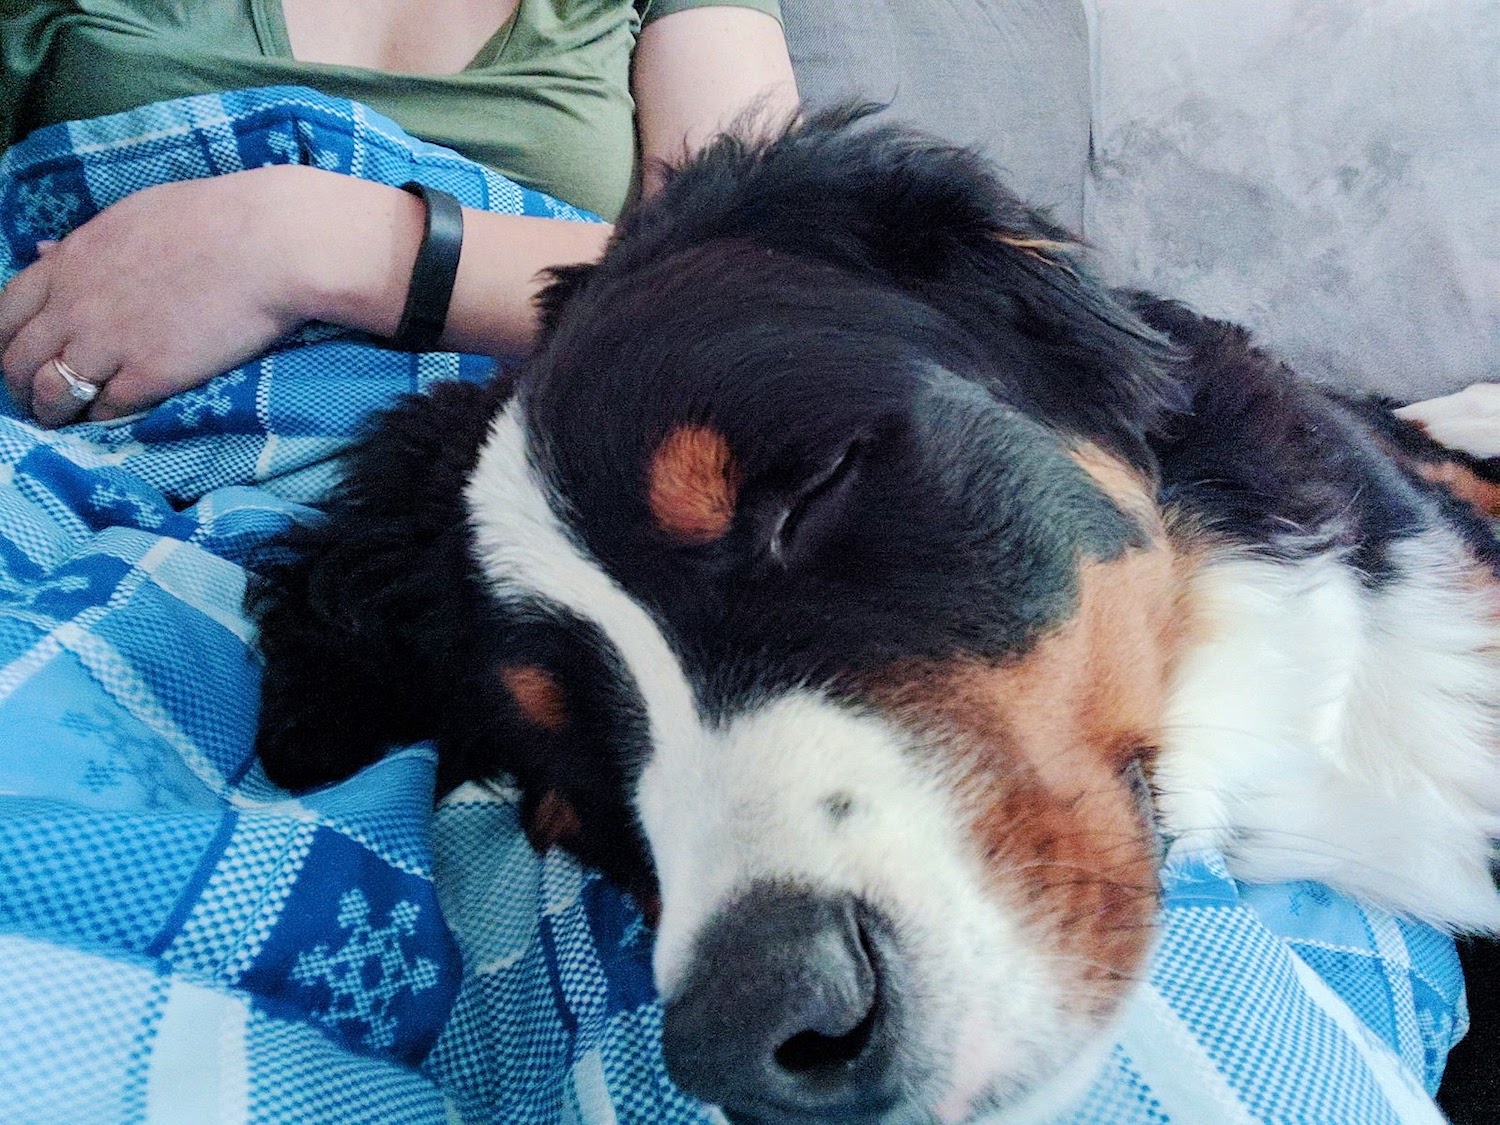
- witnessed our dog grow another 10lbs from last month (he's 75lbs now!)
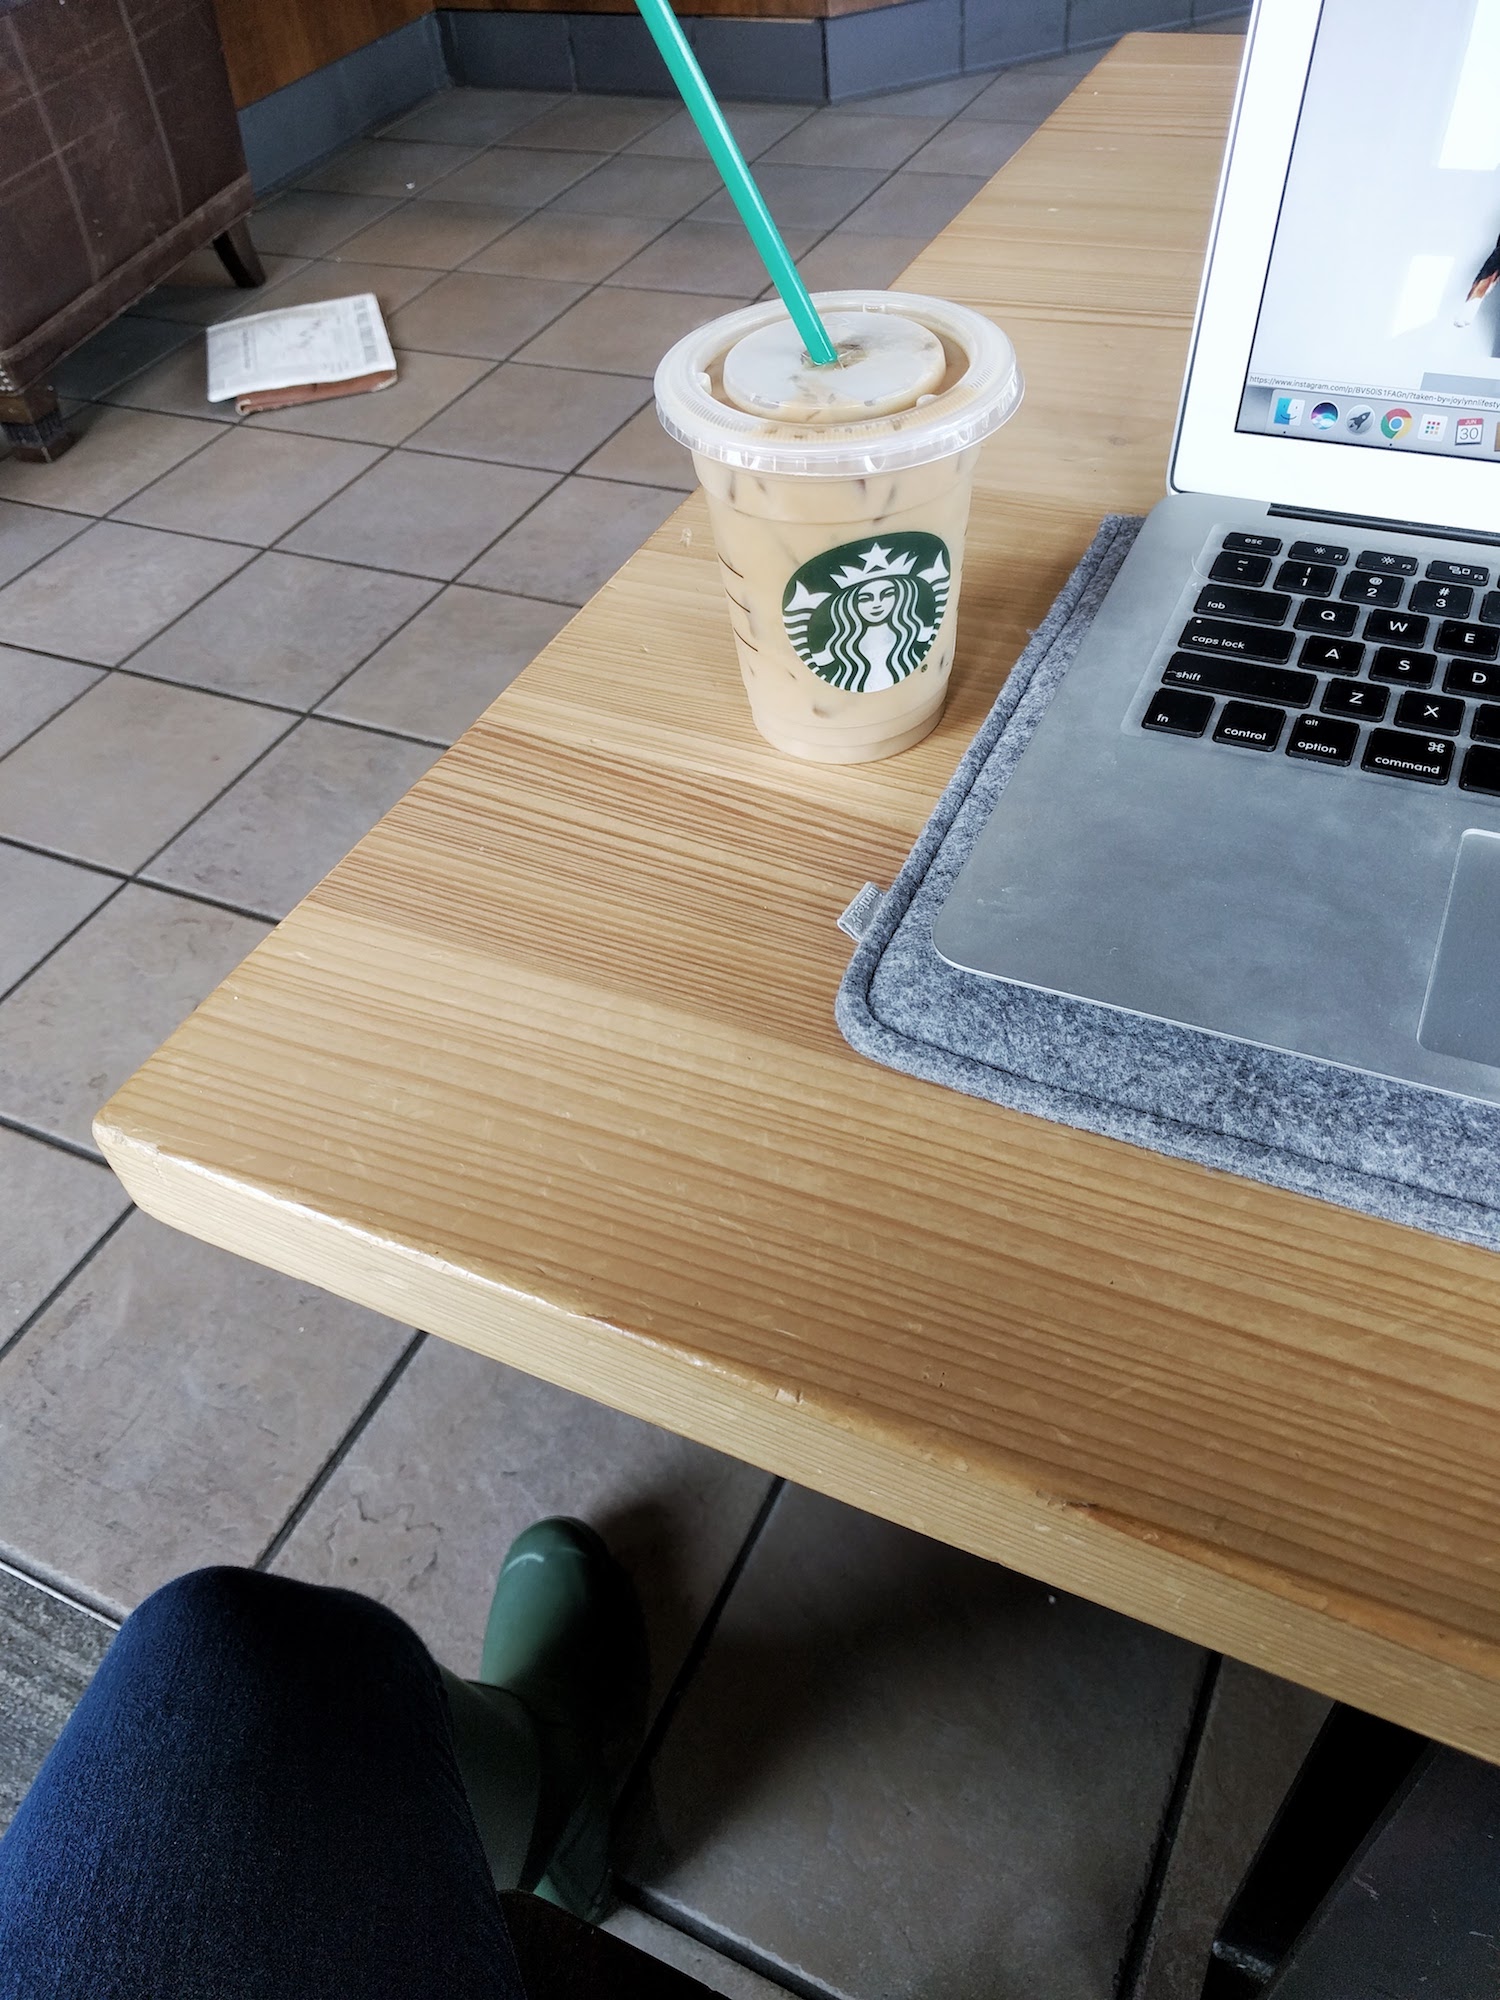
- had a coffee date
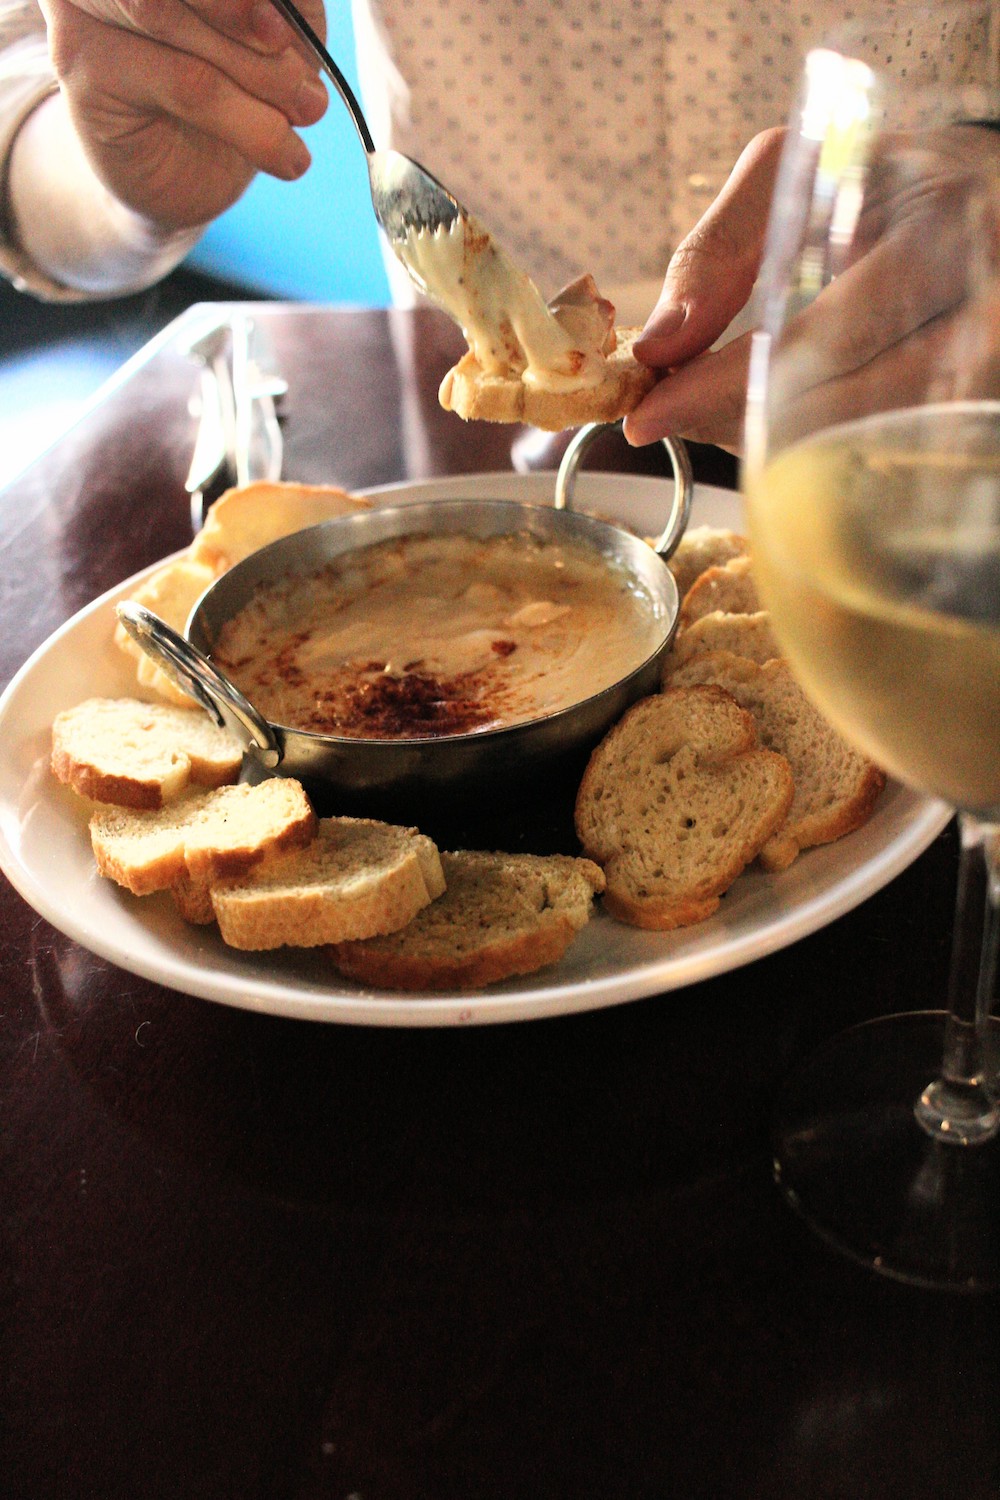
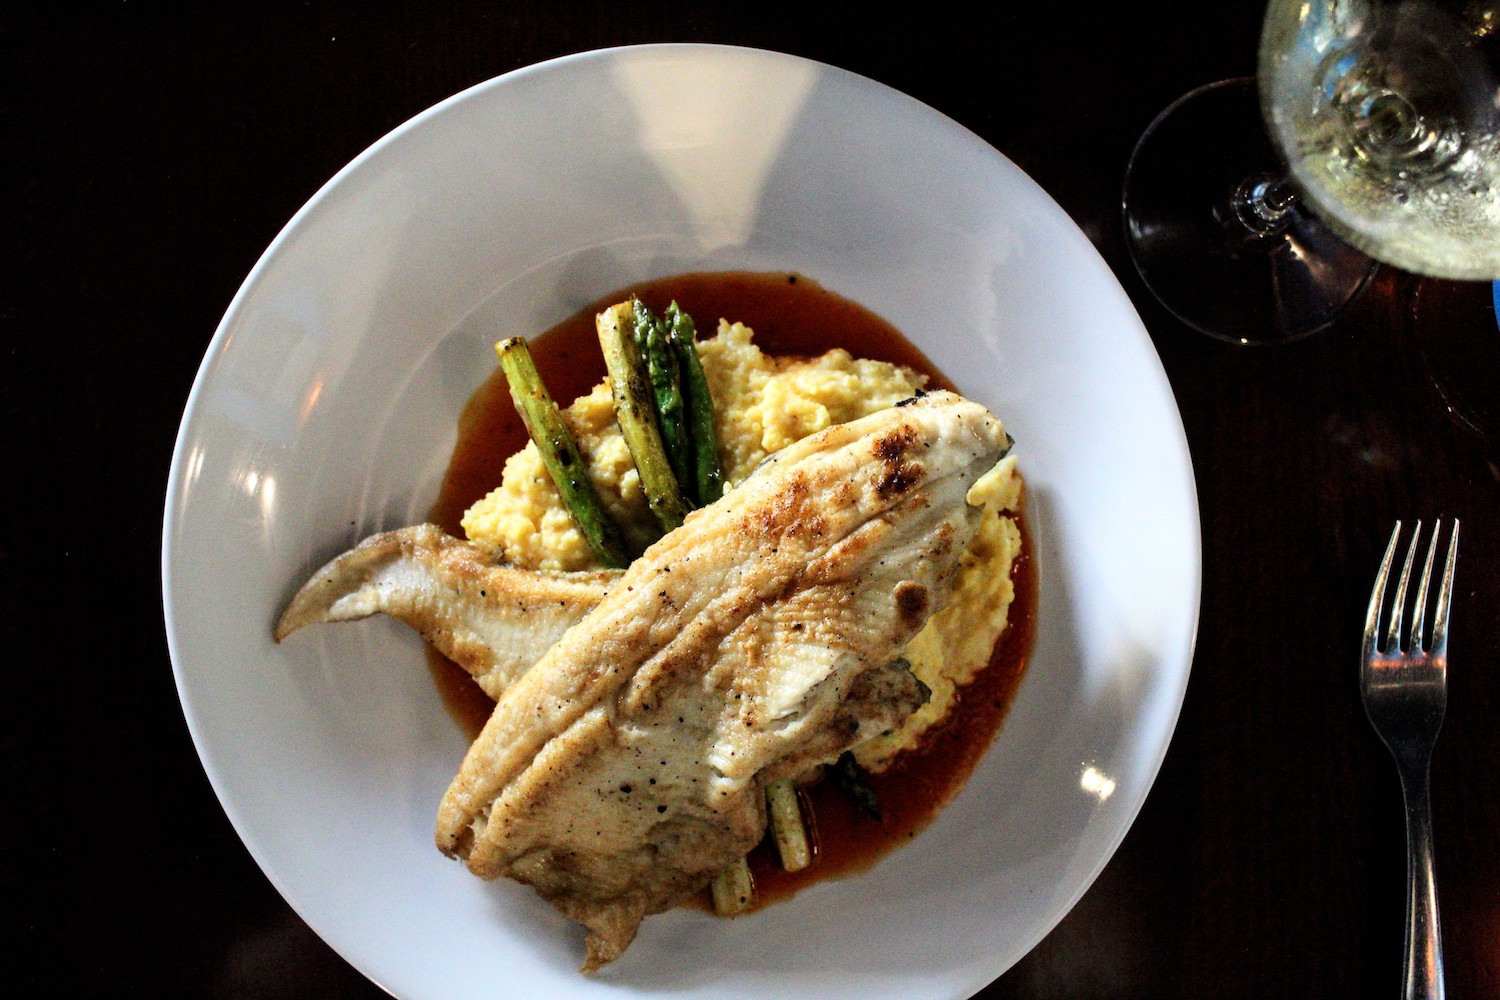
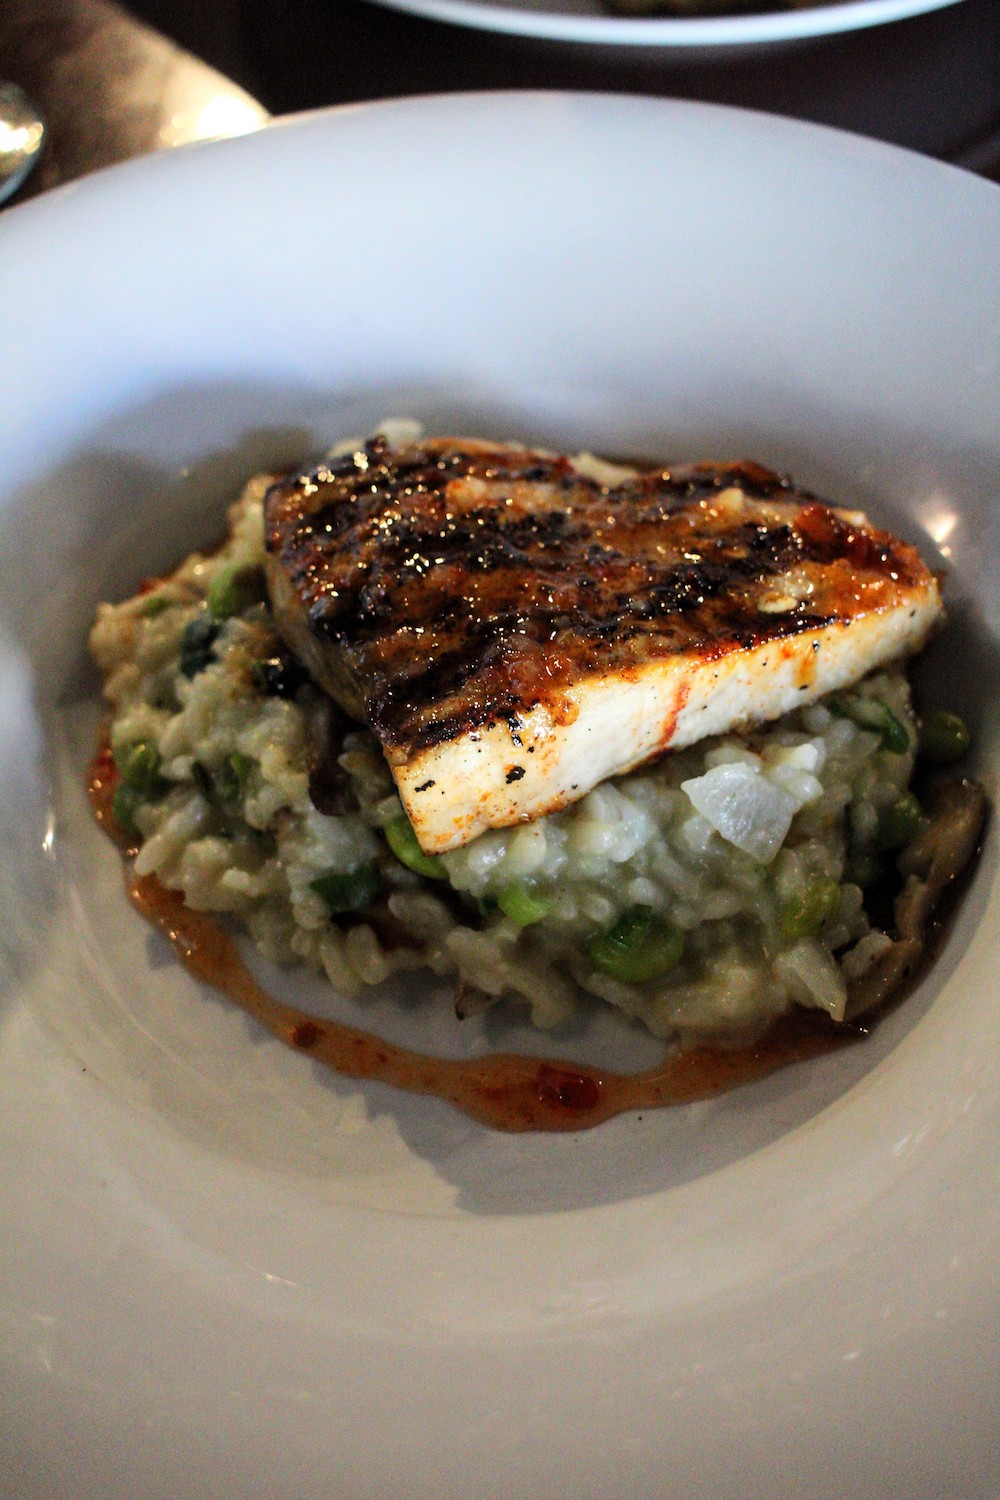
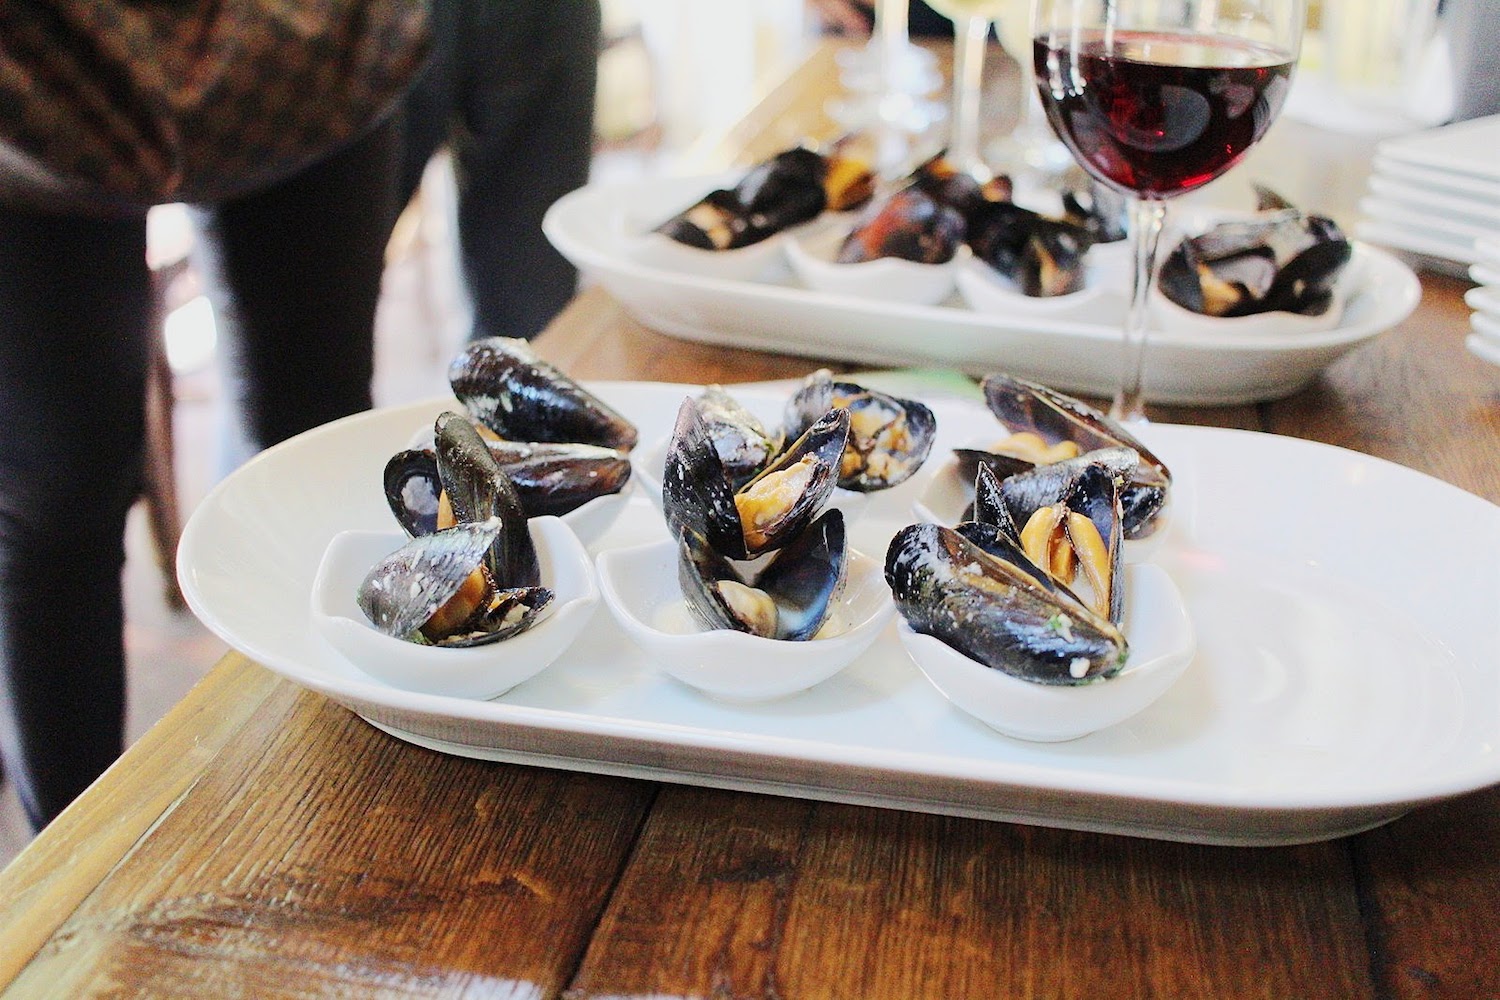
- enjoyed some seafood (trout and swordfish) at REEL


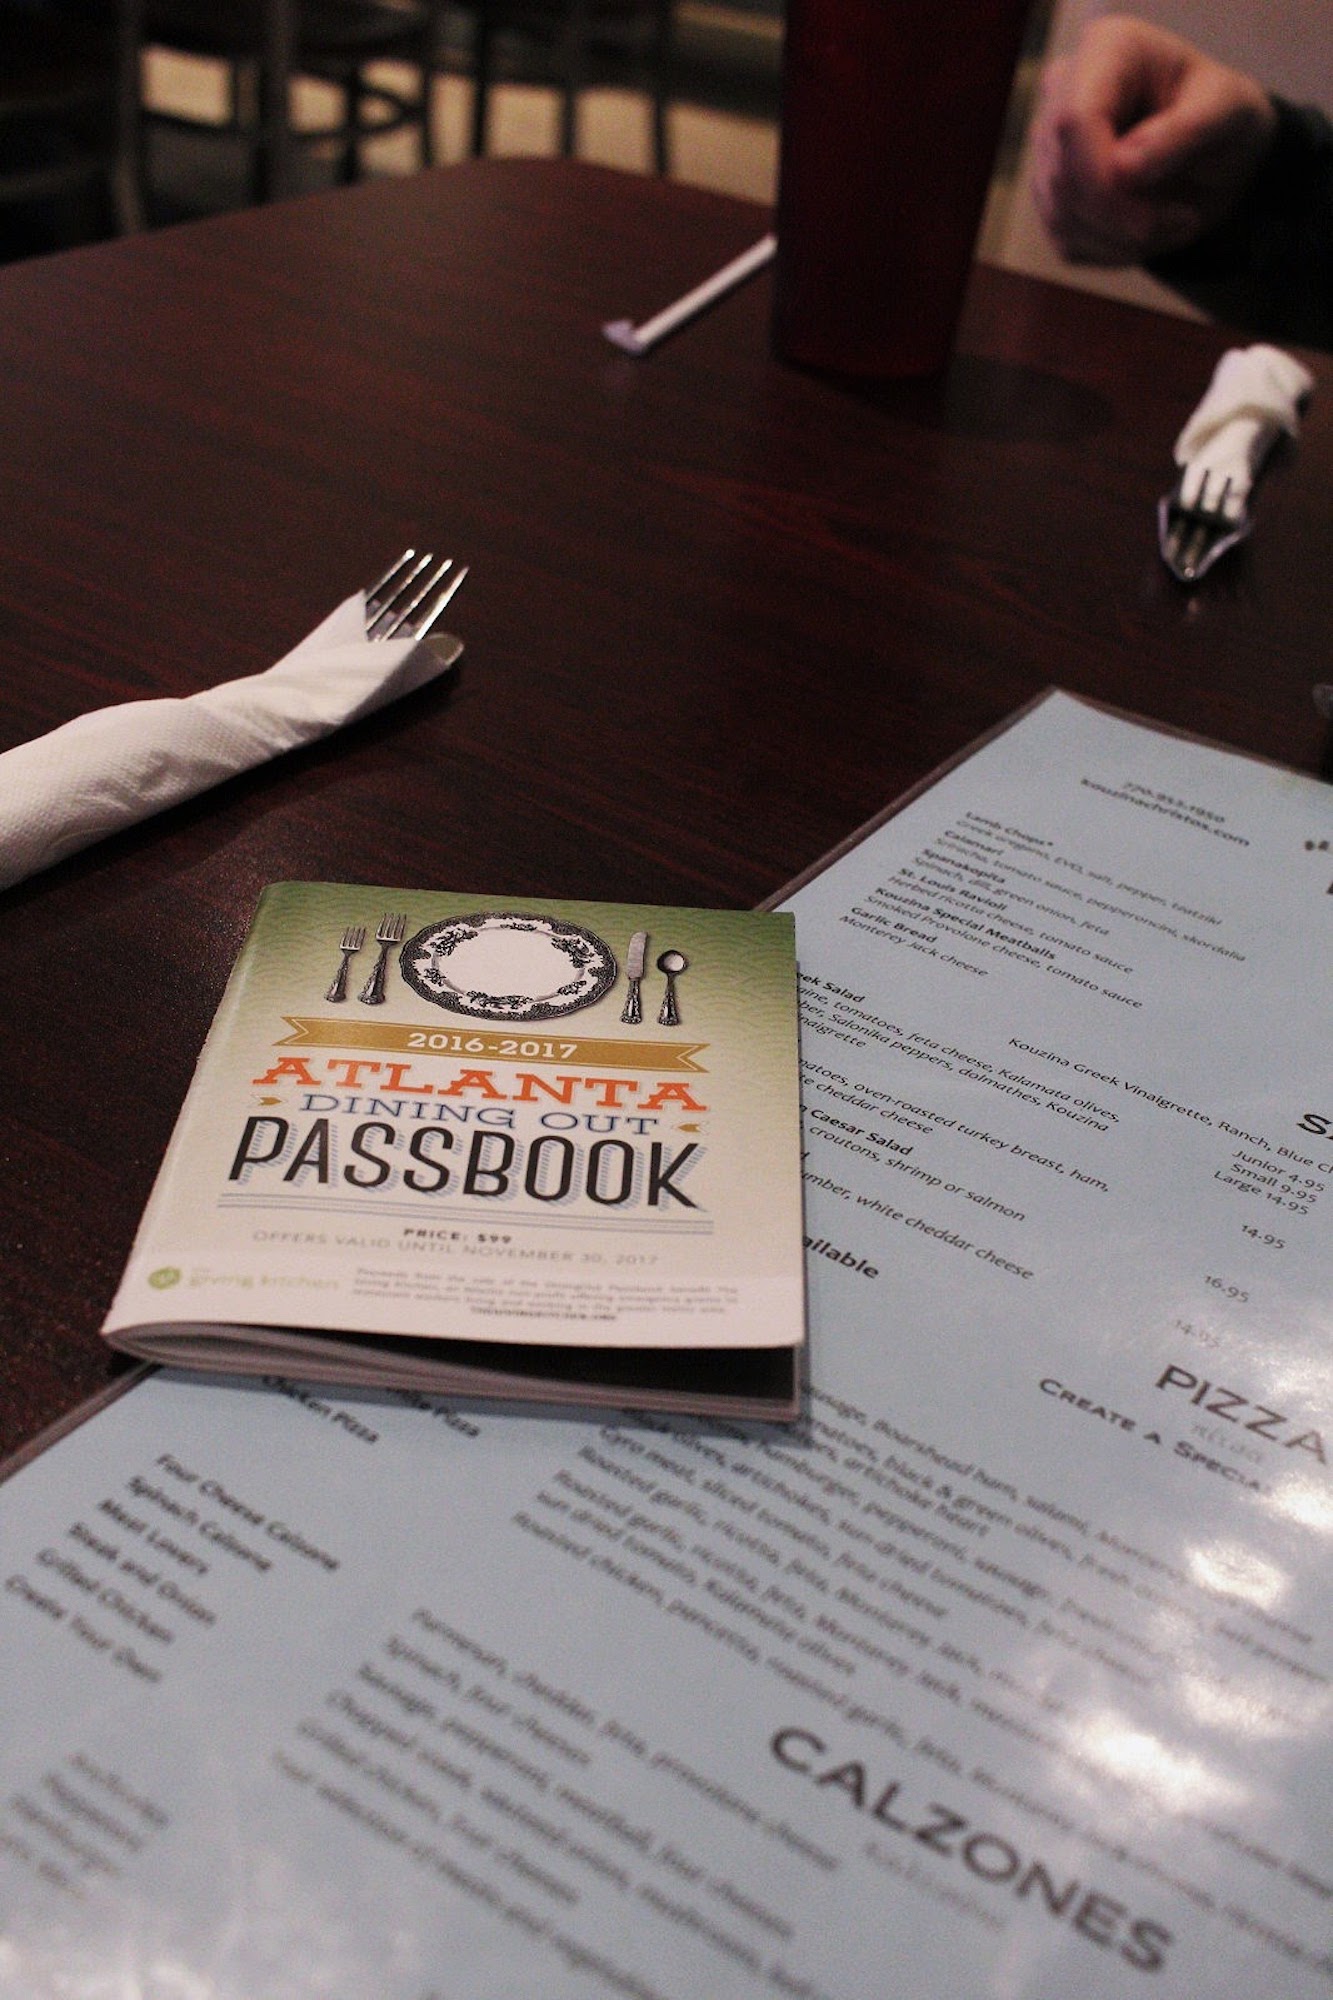

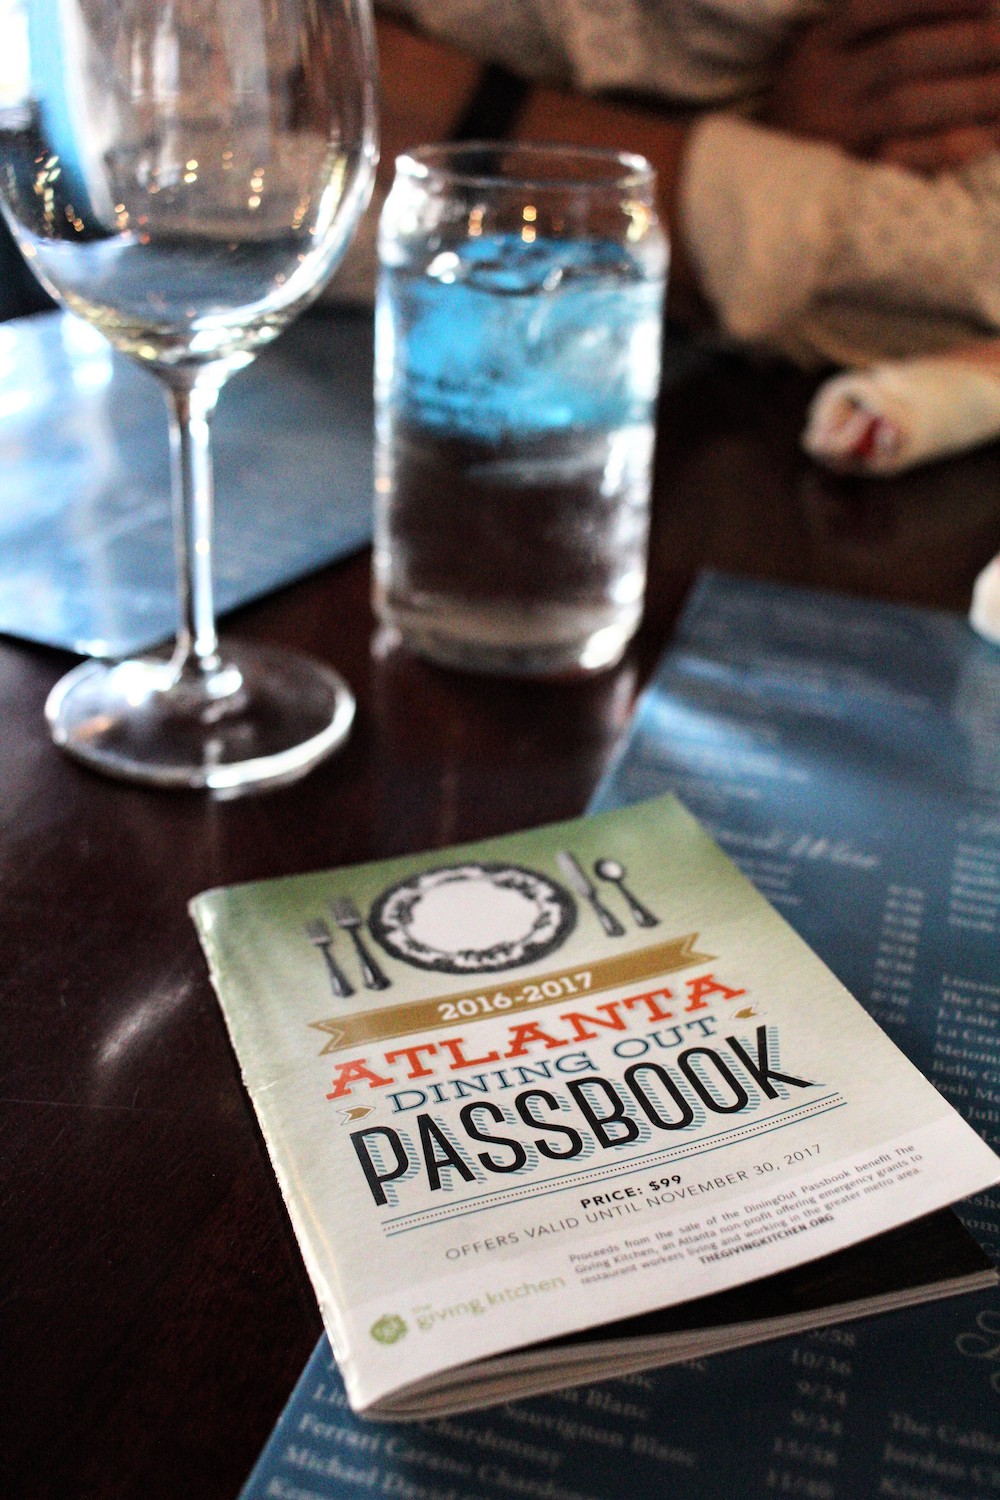
Don't forget to use my code: JOYpass2017 to get yours for only $35. It's filled with BOGO entrees at many of Atlanta's best restaurants. It has truly has become our date night sidekick!

In the next couple of months I'm hoping to share with you all the products and ideas I'm gathering up to pack for our trip in only a backpack. We'll be using the backpack pictured (but in black).
It's about the size of a typical carryon, so it's going to be a challenge to pack for nearly three weeks in a bag of this size, but I'm really looking forward to packing light and putting a greater focus on just being in these amazing destinations!
The challenges I foresee:
- shoes
- hygiene products
- hair styling tools
- clothes that roll up really small and wash/line dry easily
- fitting electronic stuff and chargers
It's going to be a serious adventure! If you have any brands or products you think I might love for this trip, please share!
Don't forget to follow me on social media to stay up to date and connected. Feel free to message or email me with any content requests, ideas, or collaborations!

Our Wedding Was Plan B
Recently I shared this post on my Facebook page about our beautiful morning wedding and brunch reception. It was a gorgeous, picturesque day...
Recently I shared this post on my Facebook page about our beautiful morning wedding and brunch reception. It was a gorgeous, picturesque day with an intimate guest list, but it was actually our Plan B.
Originally, we planned to elope!
Tom and I got engaged late in the summer after our college graduation. We were the last children to get married in each of our families, and several of our siblings and others who had been married for a while would often tell us "Just elope! Skip the whole big wedding, save the money, and just get married!"
Well, for once, we thought we'd listen. Though we were the party animals of our friend groups in school, when it came down to it, we just wanted to be married. We didn't need the day to revolve around us, we didn't need a great big party with lots of booze and gifts... we just wanted to be husband and wife.
This, of course, came as a shocker to our family and friends (the few that we told), but after having stood up in so many weddings when money was tight, and traveling to dozens of weddings over the course of two years, we thought we'd be different. We'd save people the hassle, the money, and the travel. We'd tell our parents the plan (even have them at the intimate ceremony), hire a photographer to take normal wedding photos, and then jet off on a honeymoon. Upon our arrival back home, we'd send out surprise announcements of our marriage (which wouldn't be all that surprising since everyone knew we were engaged) with a photo of our elopement, and invite everyone to a reception/party on an upcoming date with a casual, sweet, fun setting.
This plan (to us) was ultra romantic, surprising, happy, and unique. It felt very us. It was unpredictable, off the beaten path, and exciting!
In the end, we realized not everyone saw it that way. We completely understood the feelings of our loved ones and were happy with our Plan B, but boy... don't let anyone tell you a wedding is about you! Haha!
Our Plan B wedding was perfect too. We were engaged for eight months and had our reception at a stunning historic Villa overlooking Lake Michigan in Milwaukee. I'm glad we shared it with family and our closest friends and chose a brunch reception over a party till midnight... not because we aren't the type to dance till our feet fall off (because we definitely are), but because in the end, this union was between God, Tom, and me... yet I know it meant a lot to those who were there to witness it.
If you want to know the truth though? I'd still choose Plan A ;)

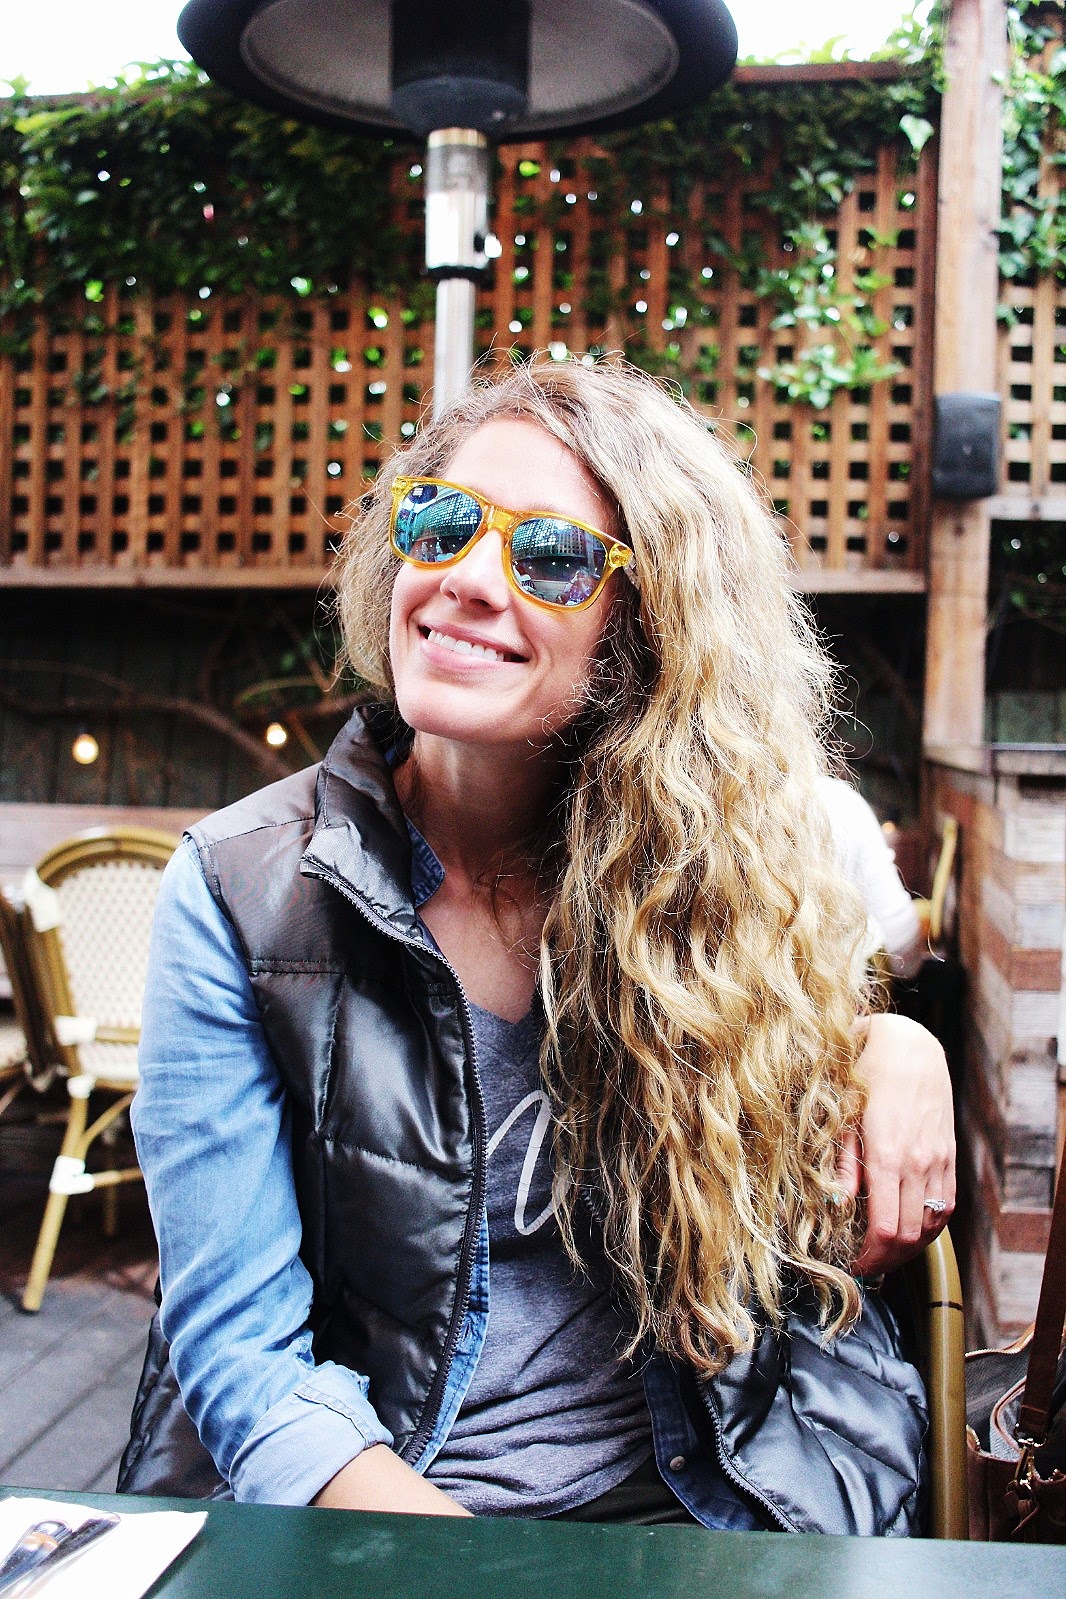
San Francisco, CA
It's been a while since I've had a destination travel post for you all! We've made a few small trips to see family, but not to anywhere new...
It's been a while since I've had a destination travel post for you all! We've made a few small trips to see family, but not to anywhere new until this past week. I'm going to be brief and simply share the list of places we went, ate, stayed, etc... along with lots of photos, and if you're ever looking for some fun ideas of what to do while hanging around SF, maybe this will be a good place to come back to. As much as a travel itinerary is nice for those of us who are nosey, they can be a little overly detailed for the those who prefer to skim for main things to note. So let's try it the 'skim way' today!
Trip basics:
One week.
Half in San Francisco. Half in San Jose.
This was a business trip for Tom, who had a conference, but we spent the last several days with Tom's oldest brother, wife, and kids - so it was a bonus to see family as well! During Tom's conference I was able to spend a couple days seeing one of my best friends from college in SF, and near where she lives in San Jose.
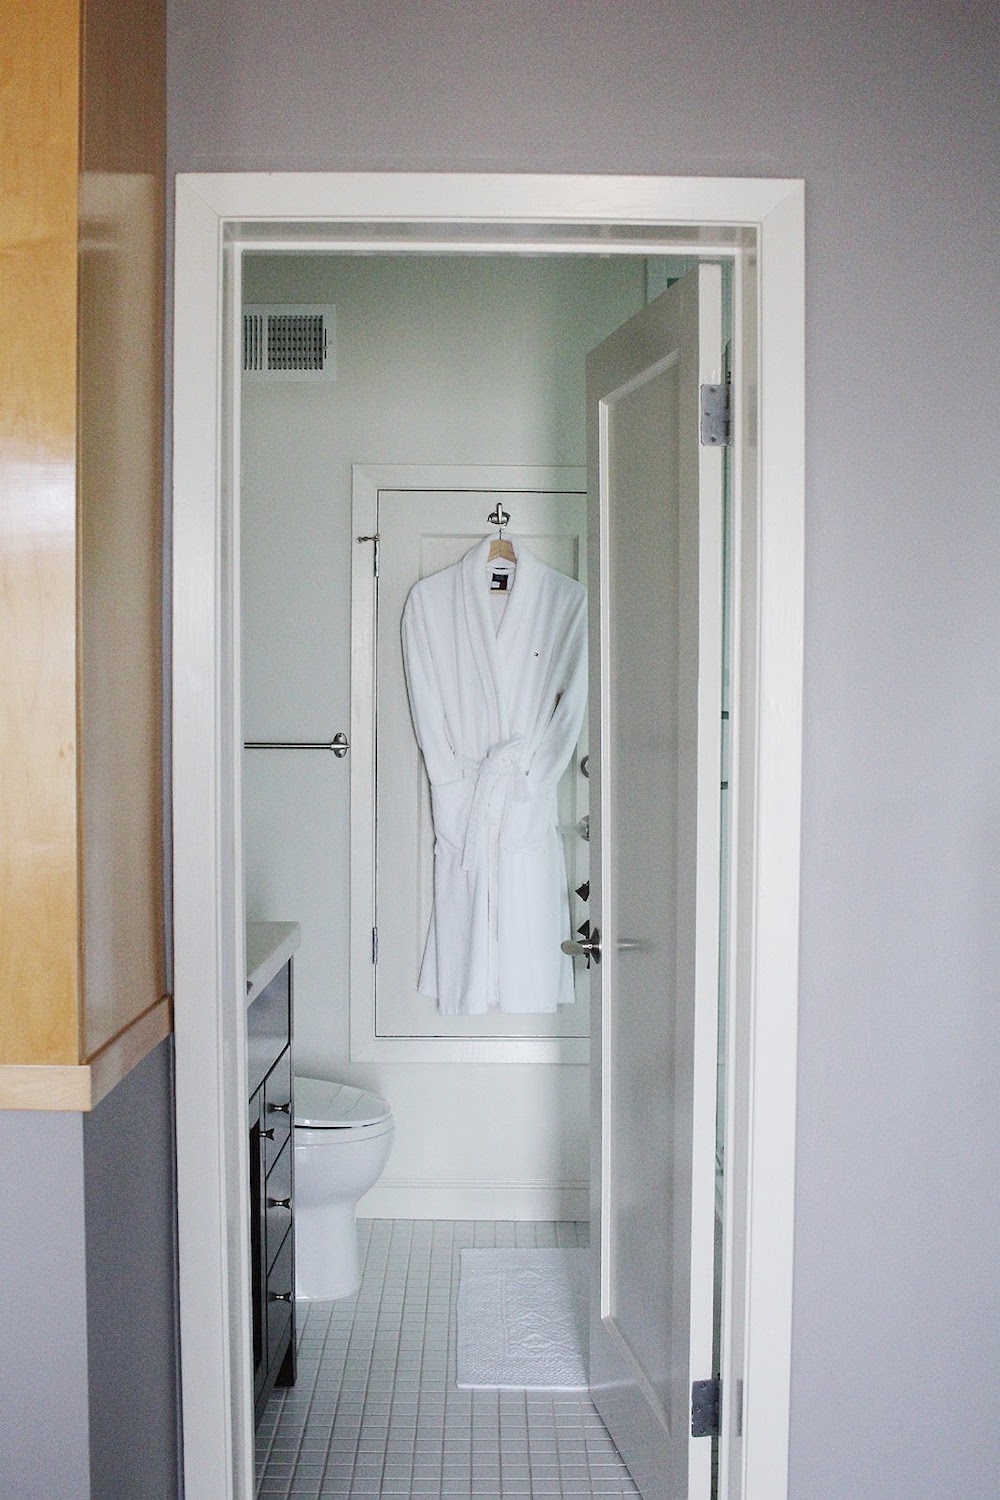
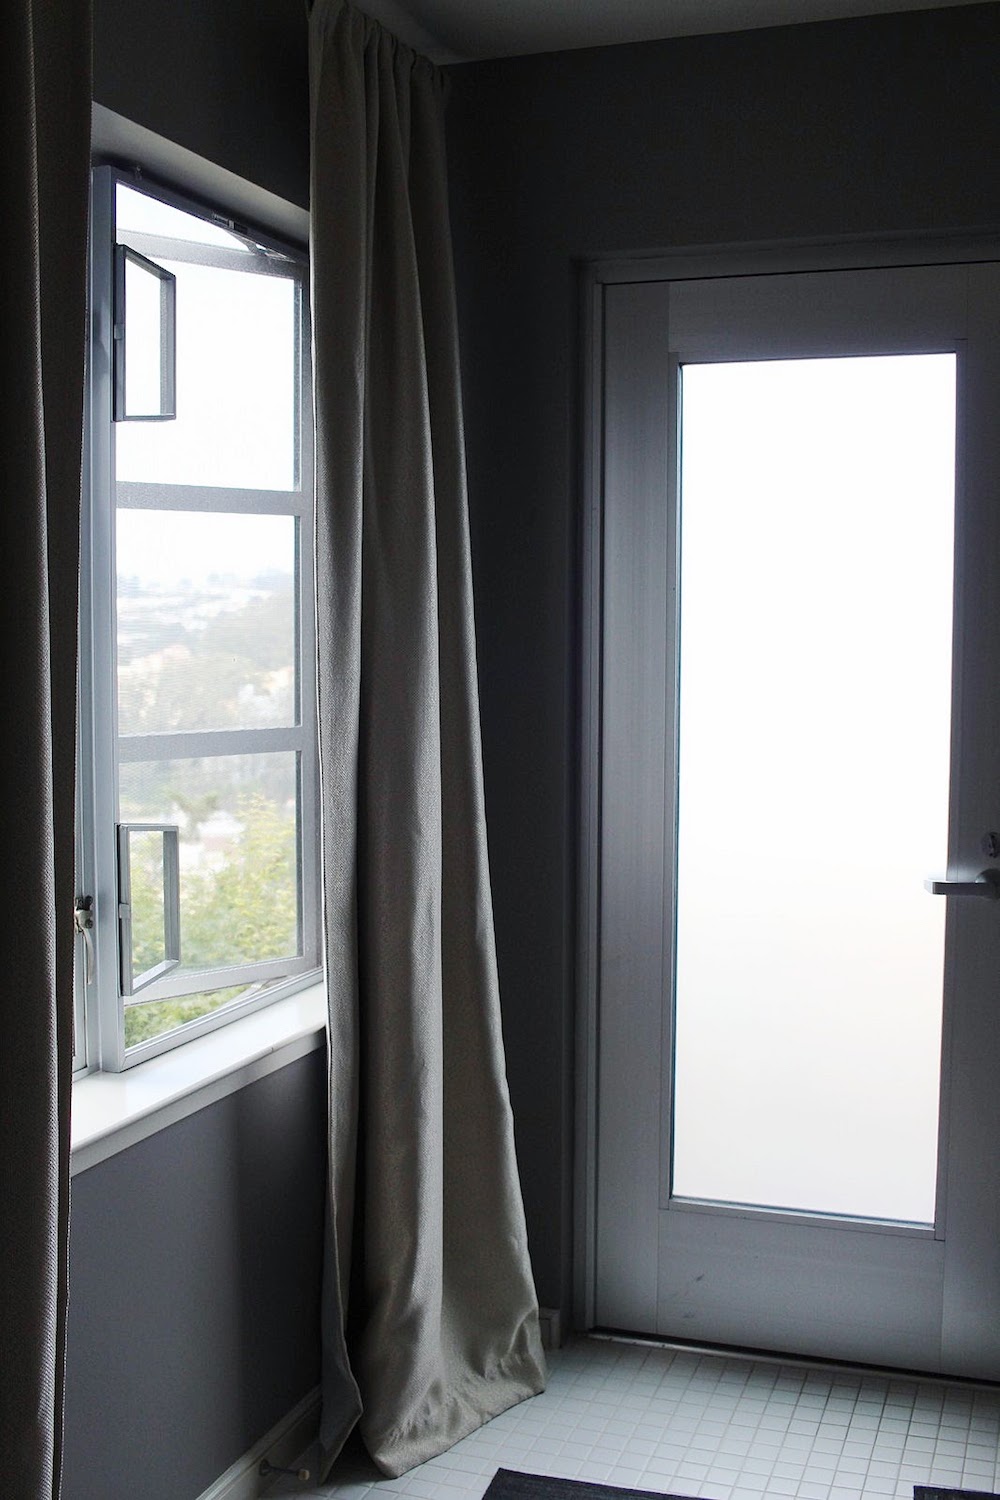
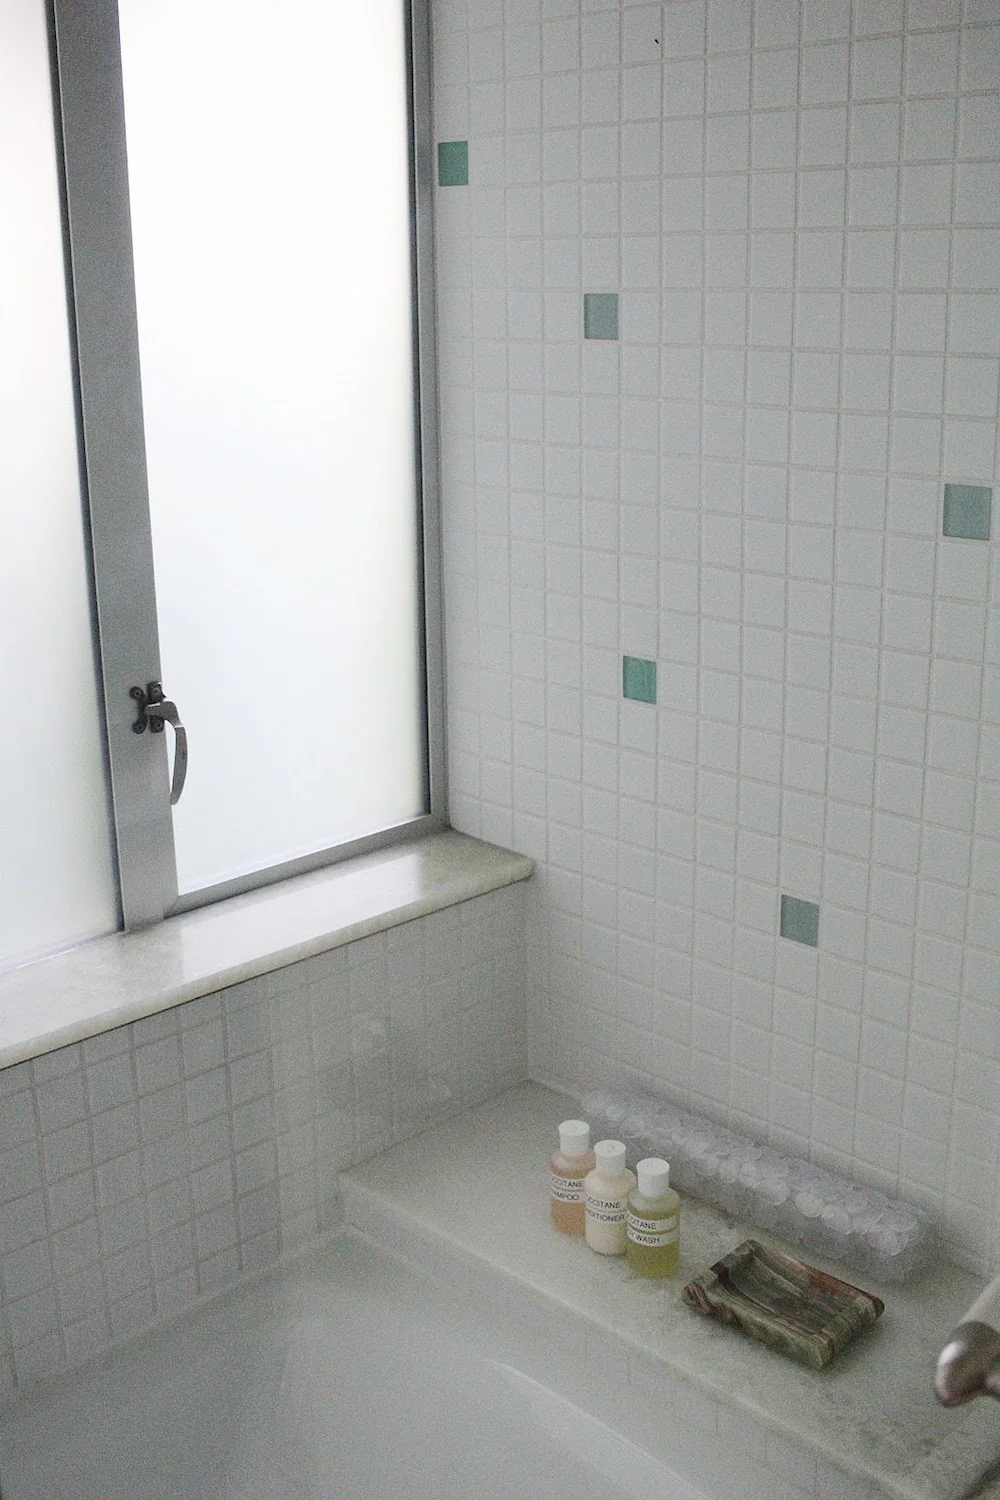
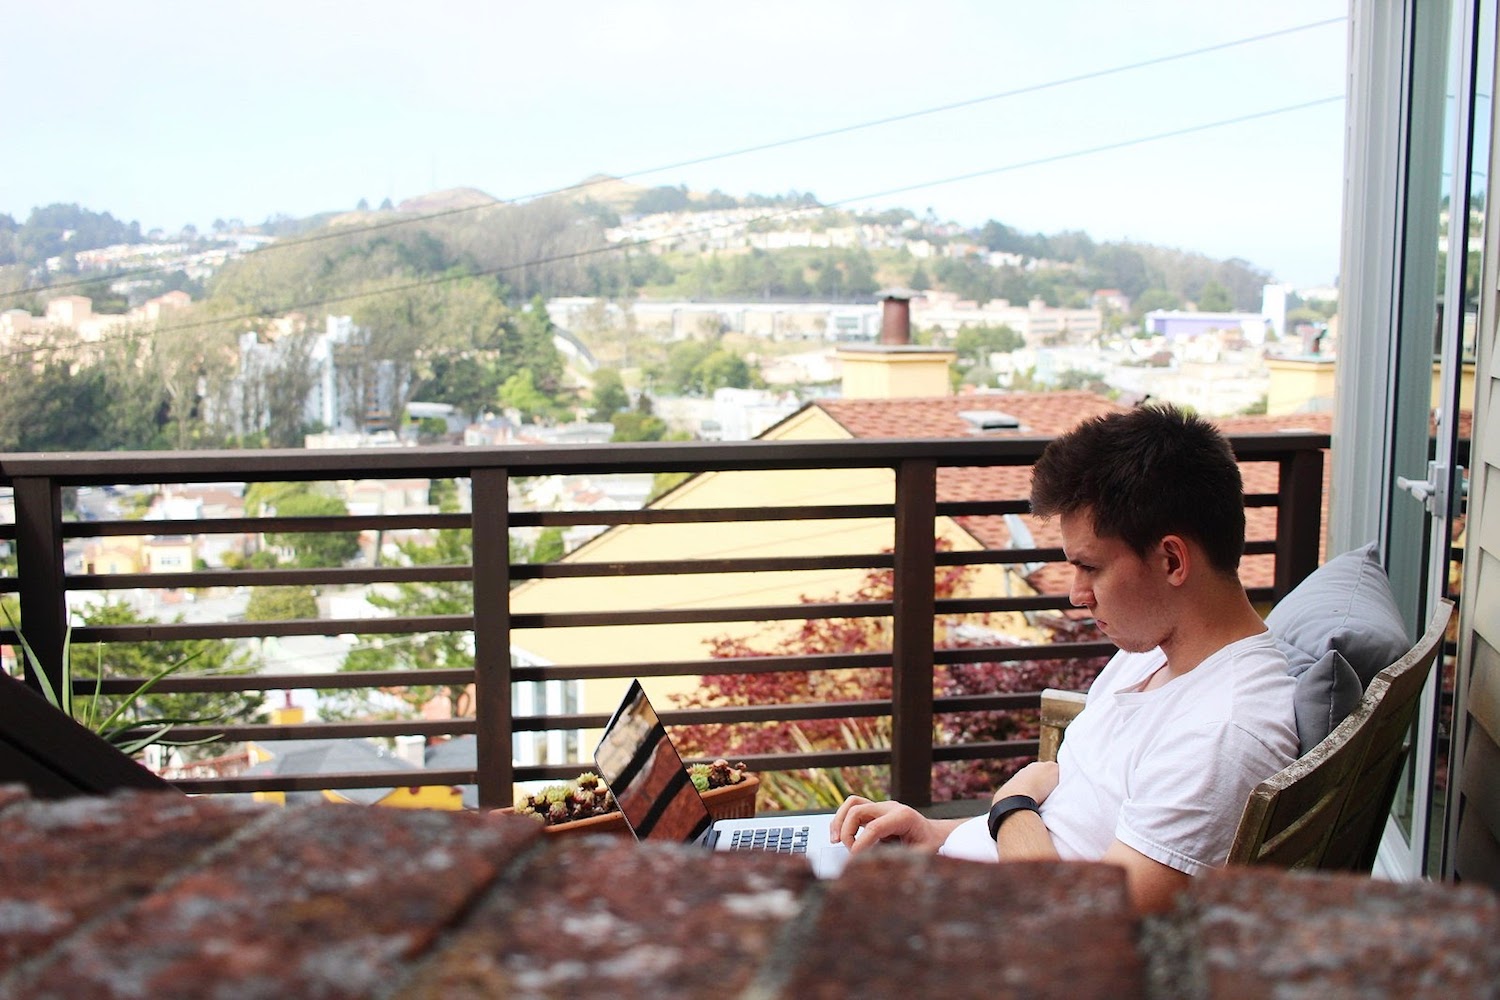
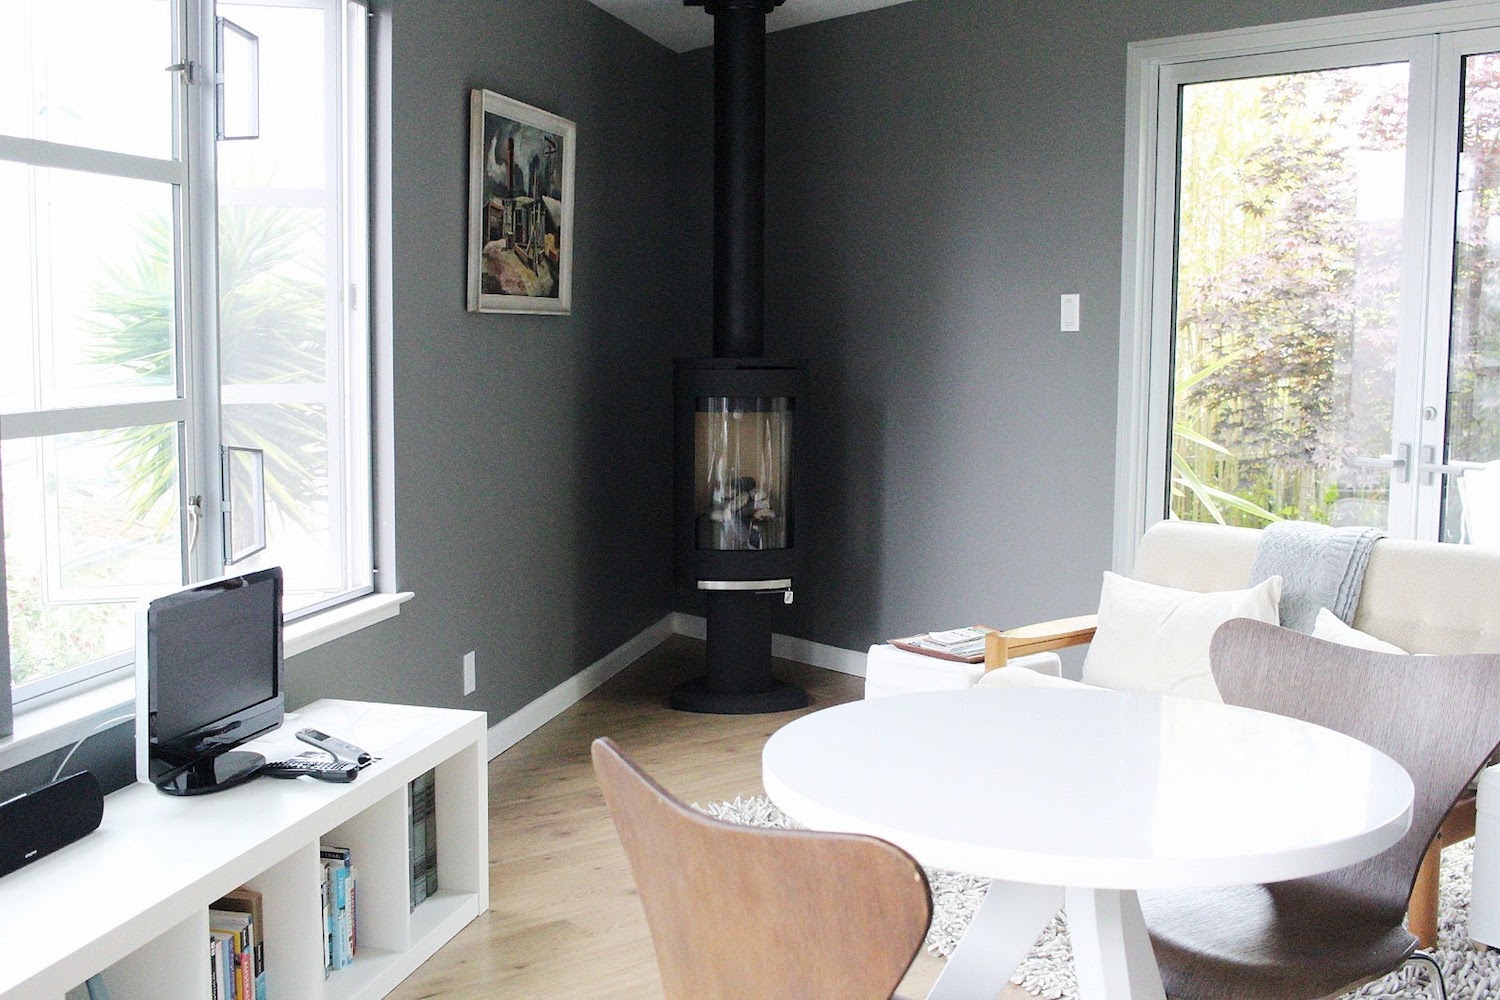
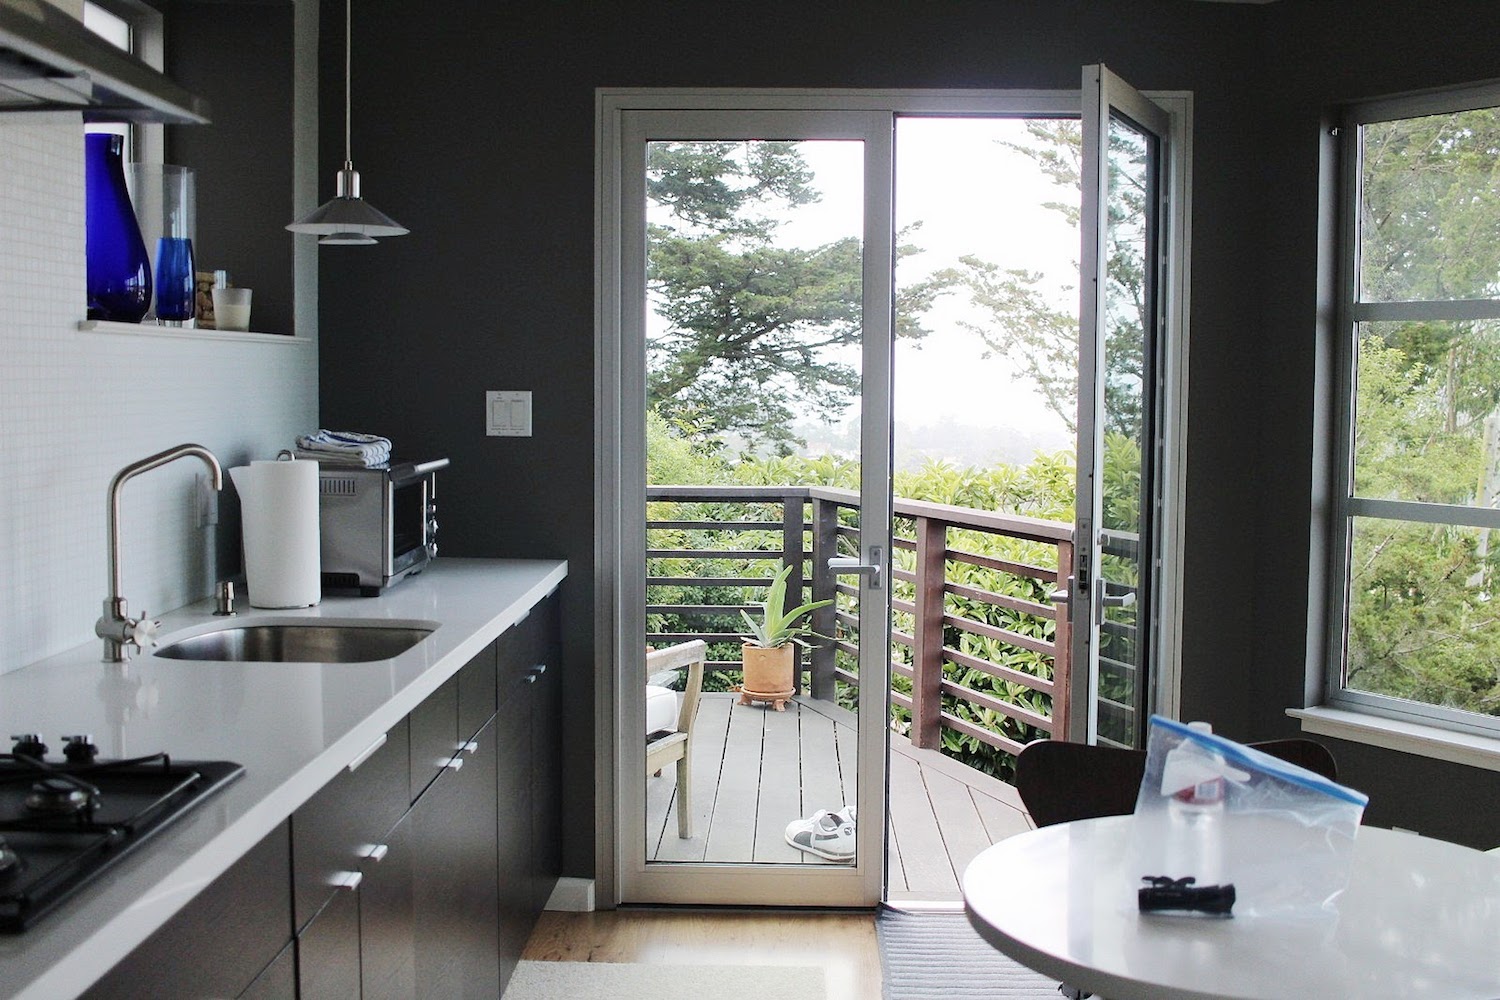
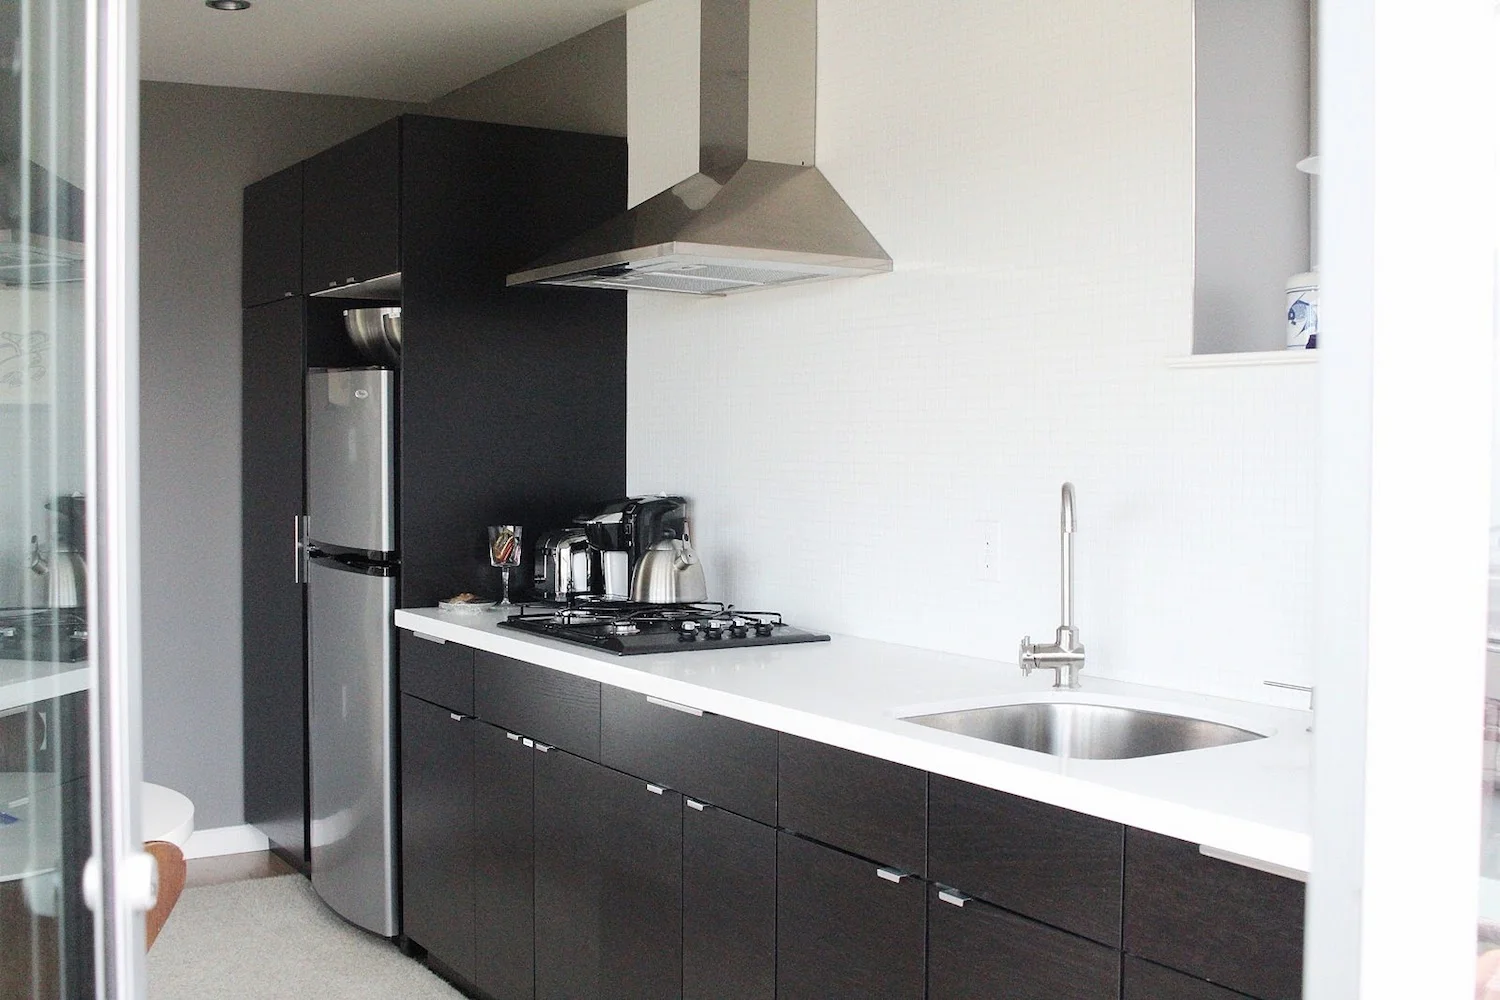
Where we stayed:
During the conference, Tom needed to be nearer to the downtown area, so we stayed in this incredible Airbnb near Twin Peaks. It was one of the best Airbnbs we've used to date (and we use Airbnb a LOT). If you've never used Airbnb, be sure and sign up using my referral so you save $20 the first time you use it: www.airbnb.com/c/joyj6
The second half, we stayed with our family.
Where we ate:
Near SF:
Delfina (pizza): https://goo.gl/maps/P7cq9yg6WoQ2
The Ice Cream Bar: https://goo.gl/maps/8qV49jyuyT72
Tony's Pizza: https://goo.gl/maps/YZEASjHq3st
Squat & Gobble (brunch): https://goo.gl/maps/Y3YeoC76J6E2
Zazie (brunch): https://goo.gl/maps/Bykn4uXuho52
Ebisu (sushi): https://goo.gl/maps/gBf3f7YWbkG2
Piccino (coffee, pastry): https://goo.gl/maps/3hZfGYccAAM2
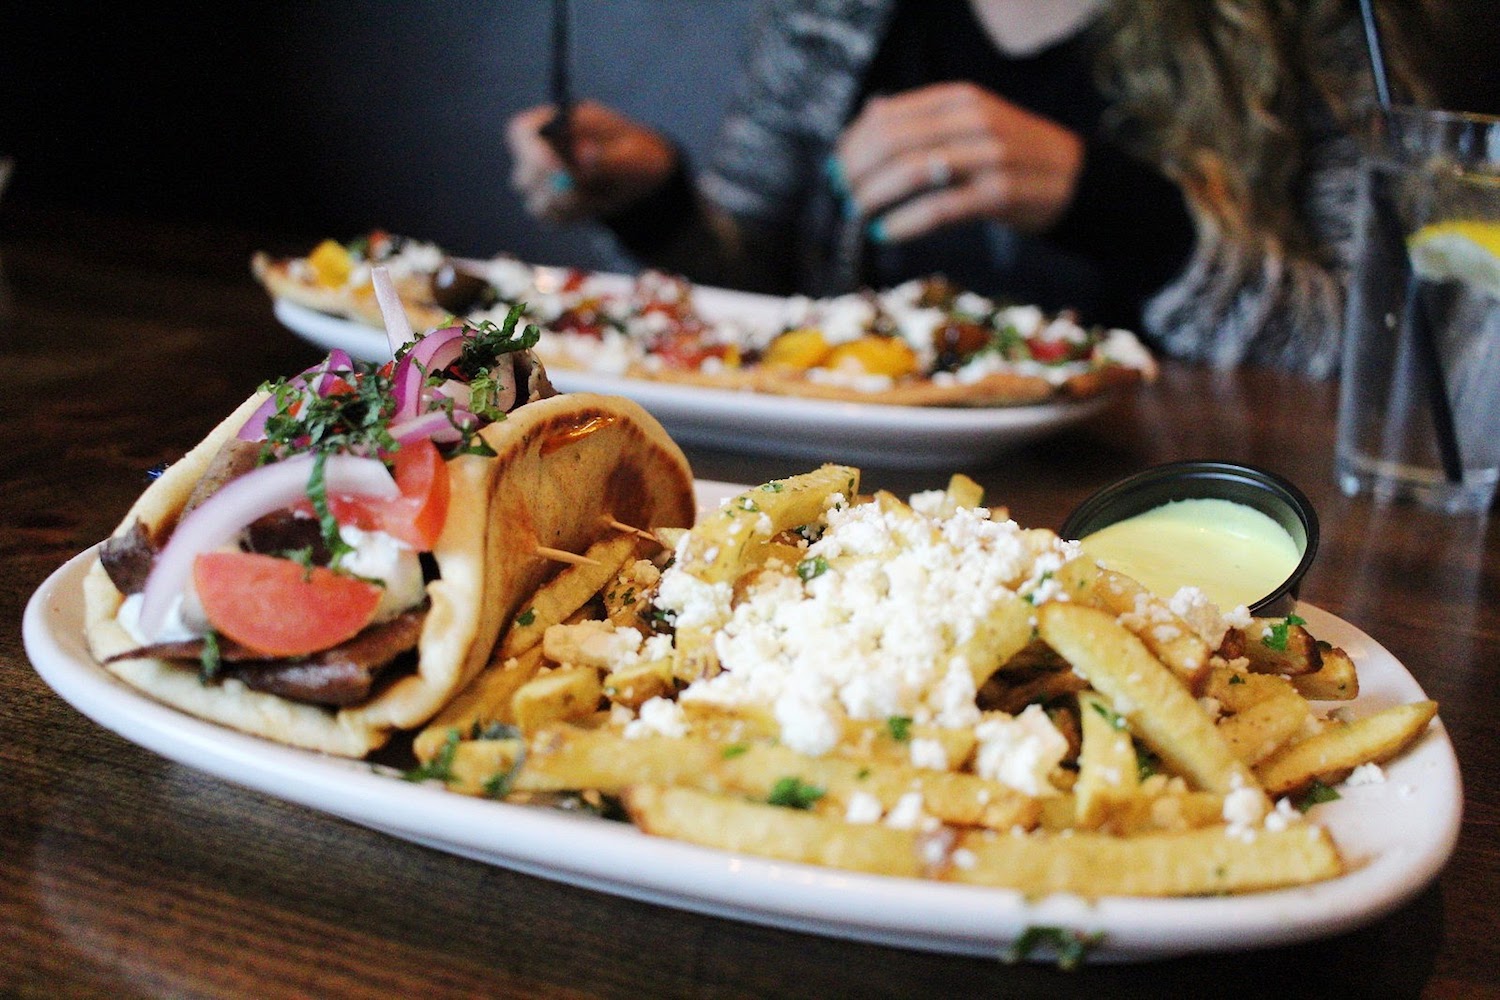
Near San Jose:
Opa Authentic Greek Cuisine: https://goo.gl/maps/7bKAAmEqonT2
Maria Elena's (Mexican): https://goo.gl/maps/iPVPiE34b9F2
Philz coffee: https://goo.gl/maps/kYDFoxoCnow
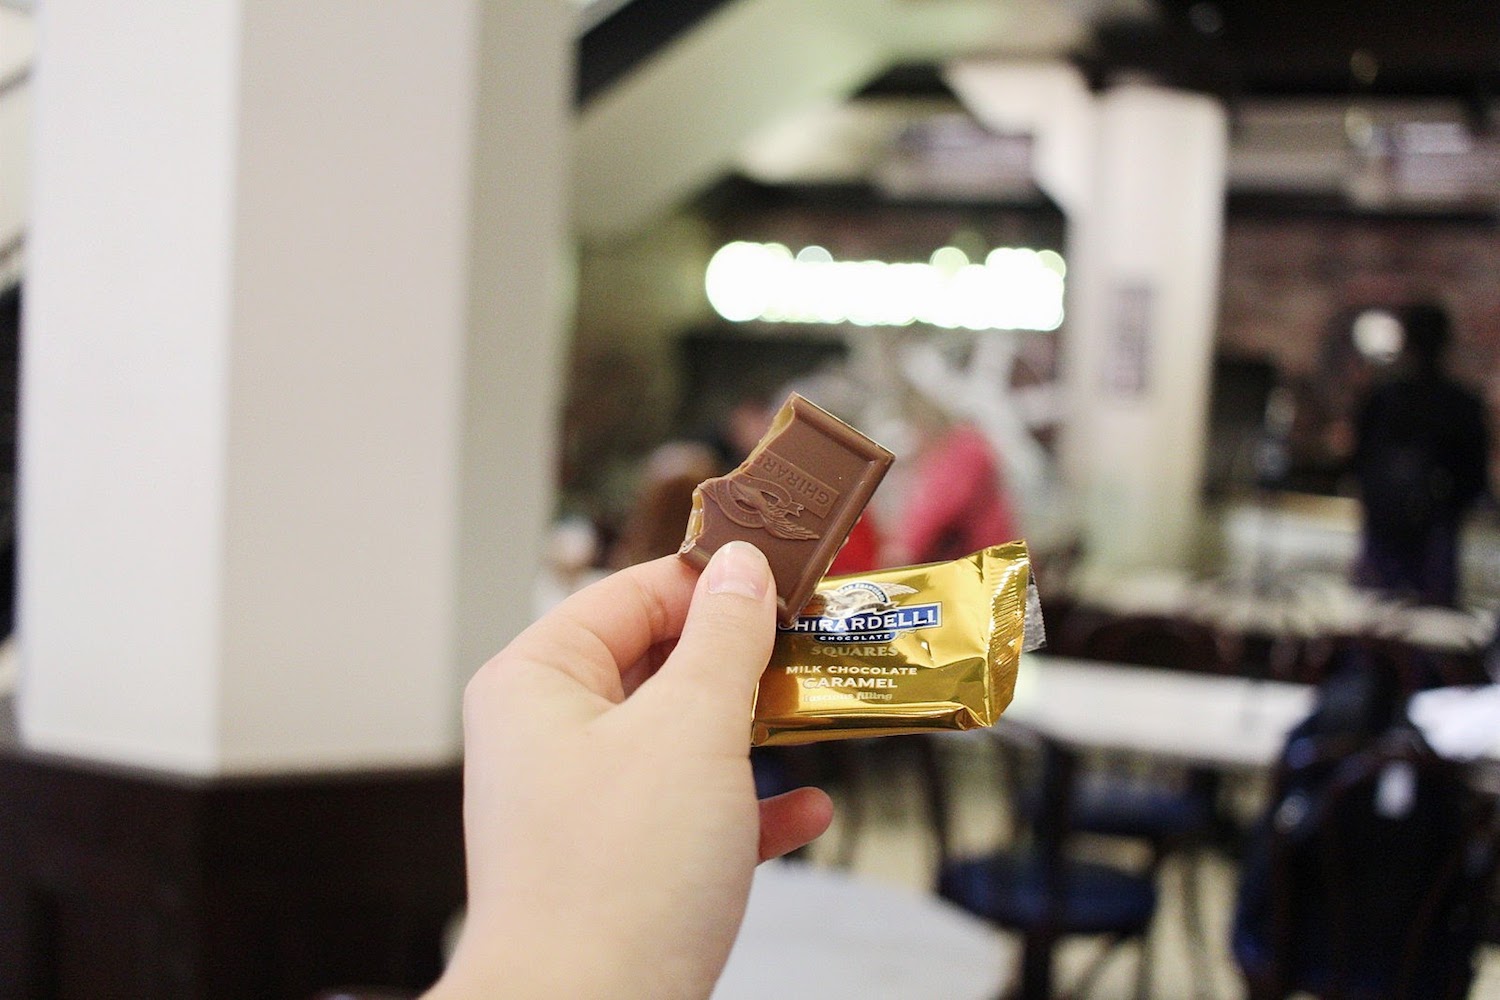
What we did:
Ghirardelli Square (for free chocolate and bay views)
Walked the SF neighborhoods
Went to Twin Peaks
Went in every bakery and candy store we saw
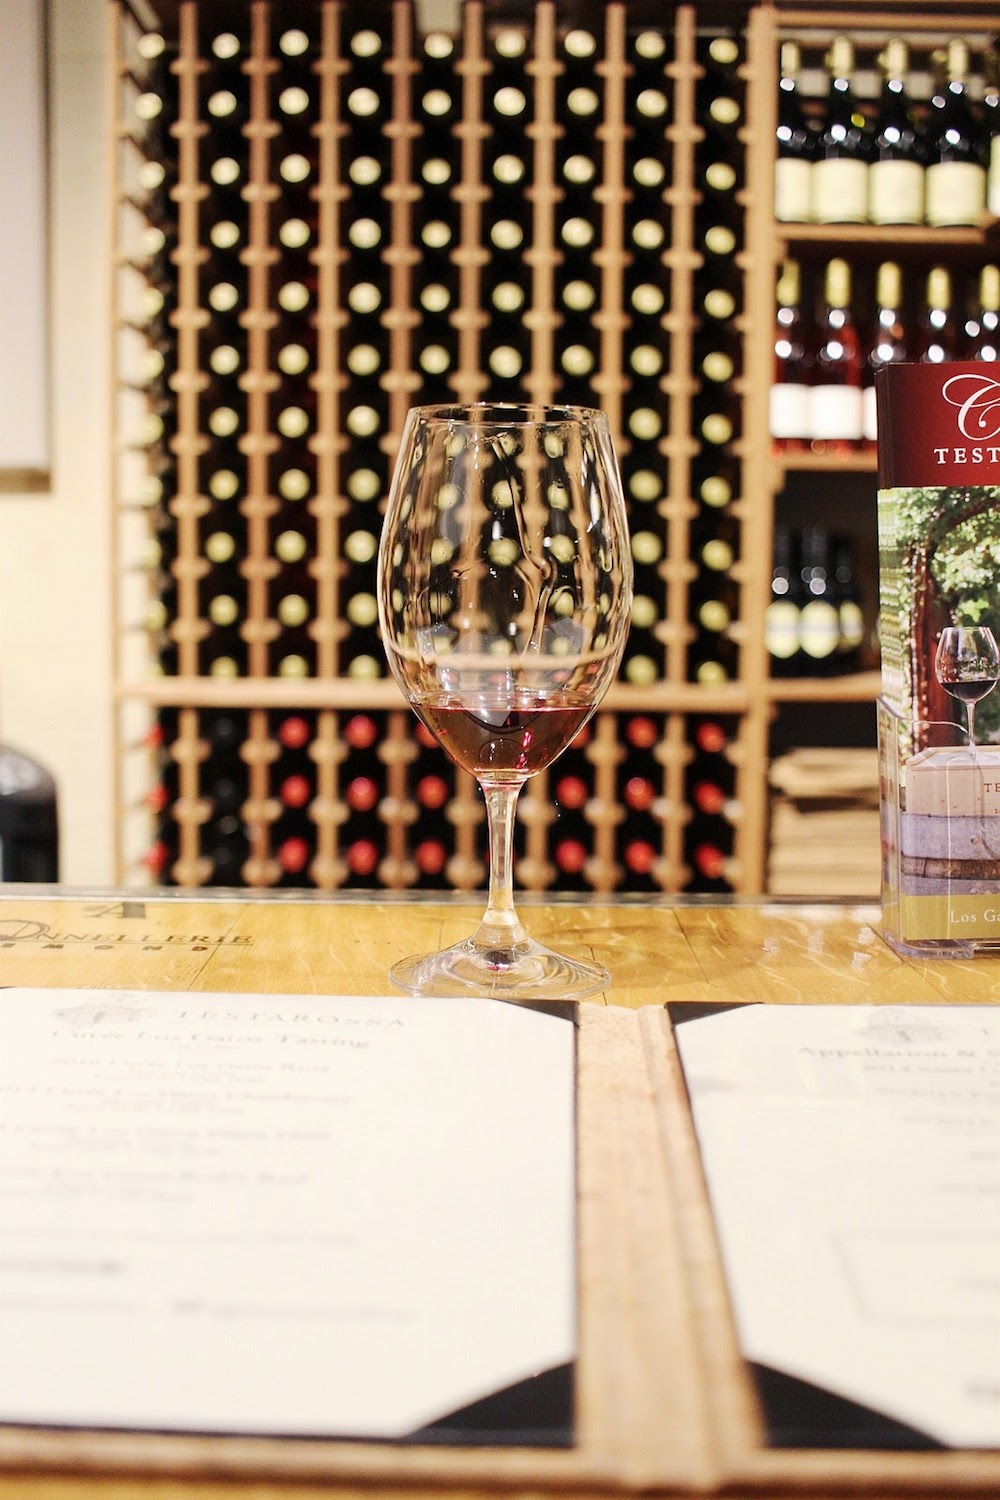
Visited Testa Rossa Winery (and did a tasting)
Took the Caltrain
Window shopped on West Portal
Walked a LOT
Stopped by a Google building for a little tour
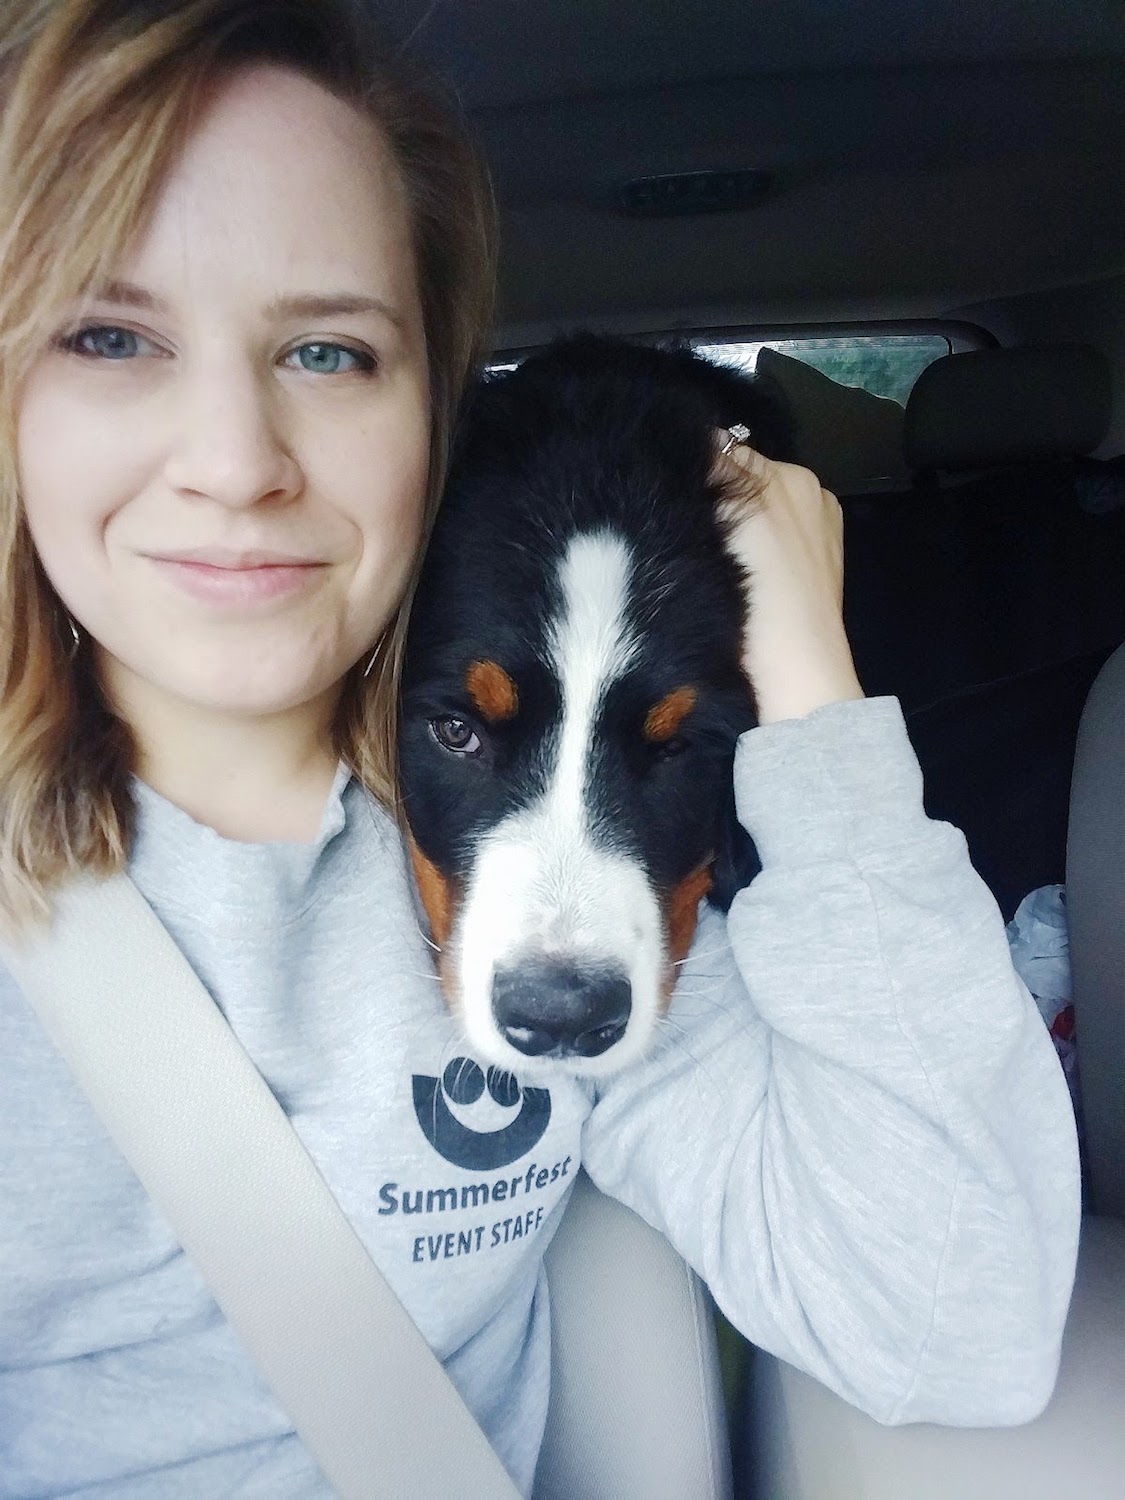
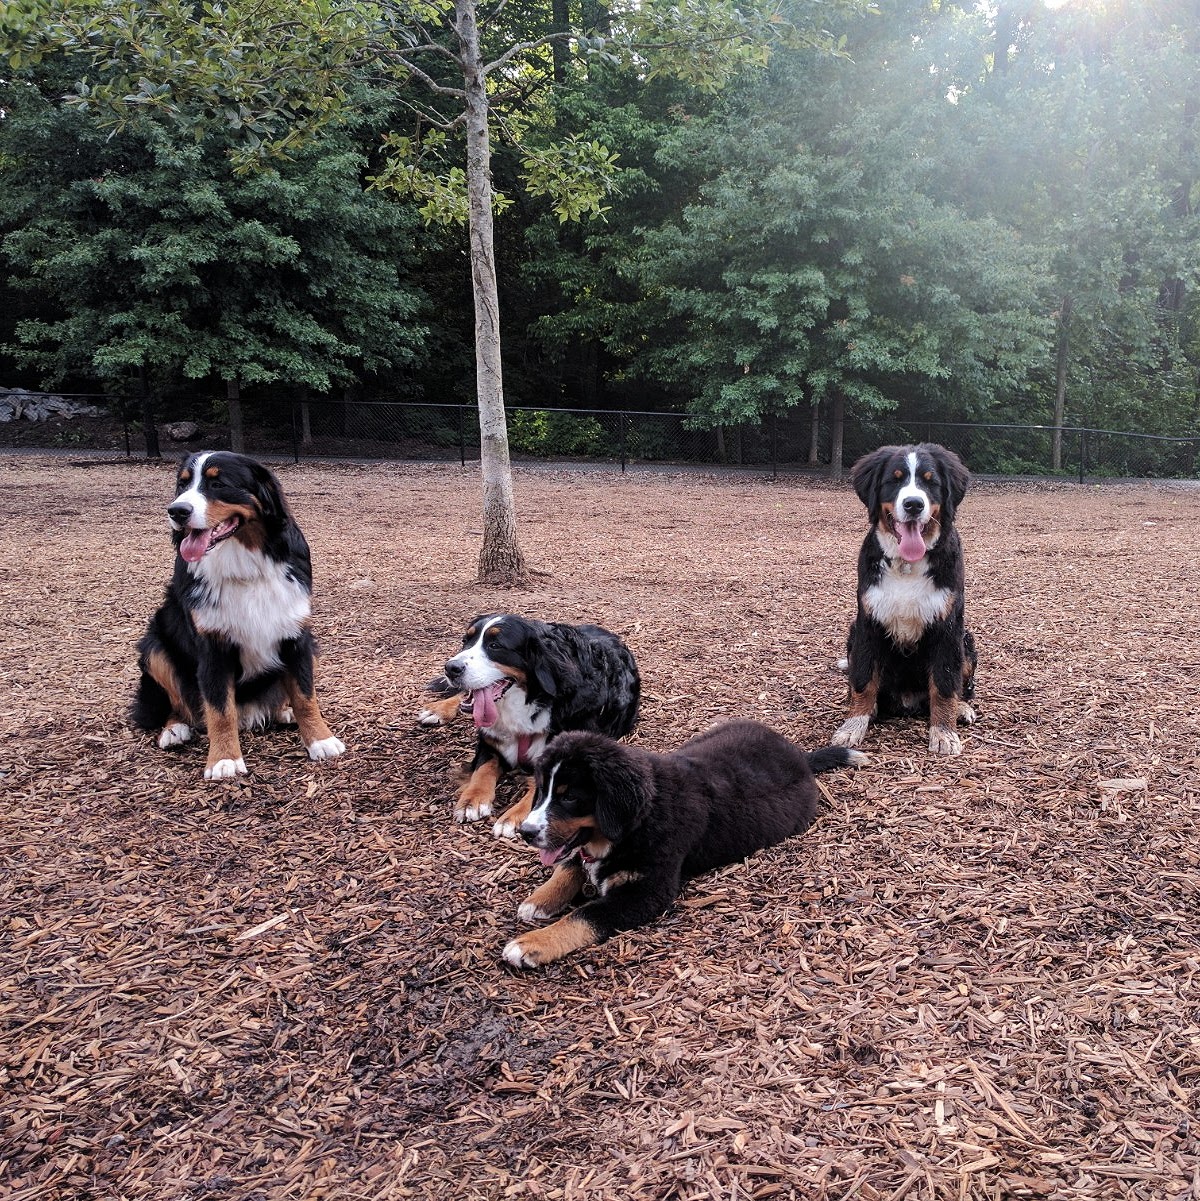
Snuggled a Bernese Mountain Dog that I saw from a mile away
Had great coffee
Ate delicious things
Loved the cool, not humid weather
Had an equal parts relaxing/adventurous trip
Day 1
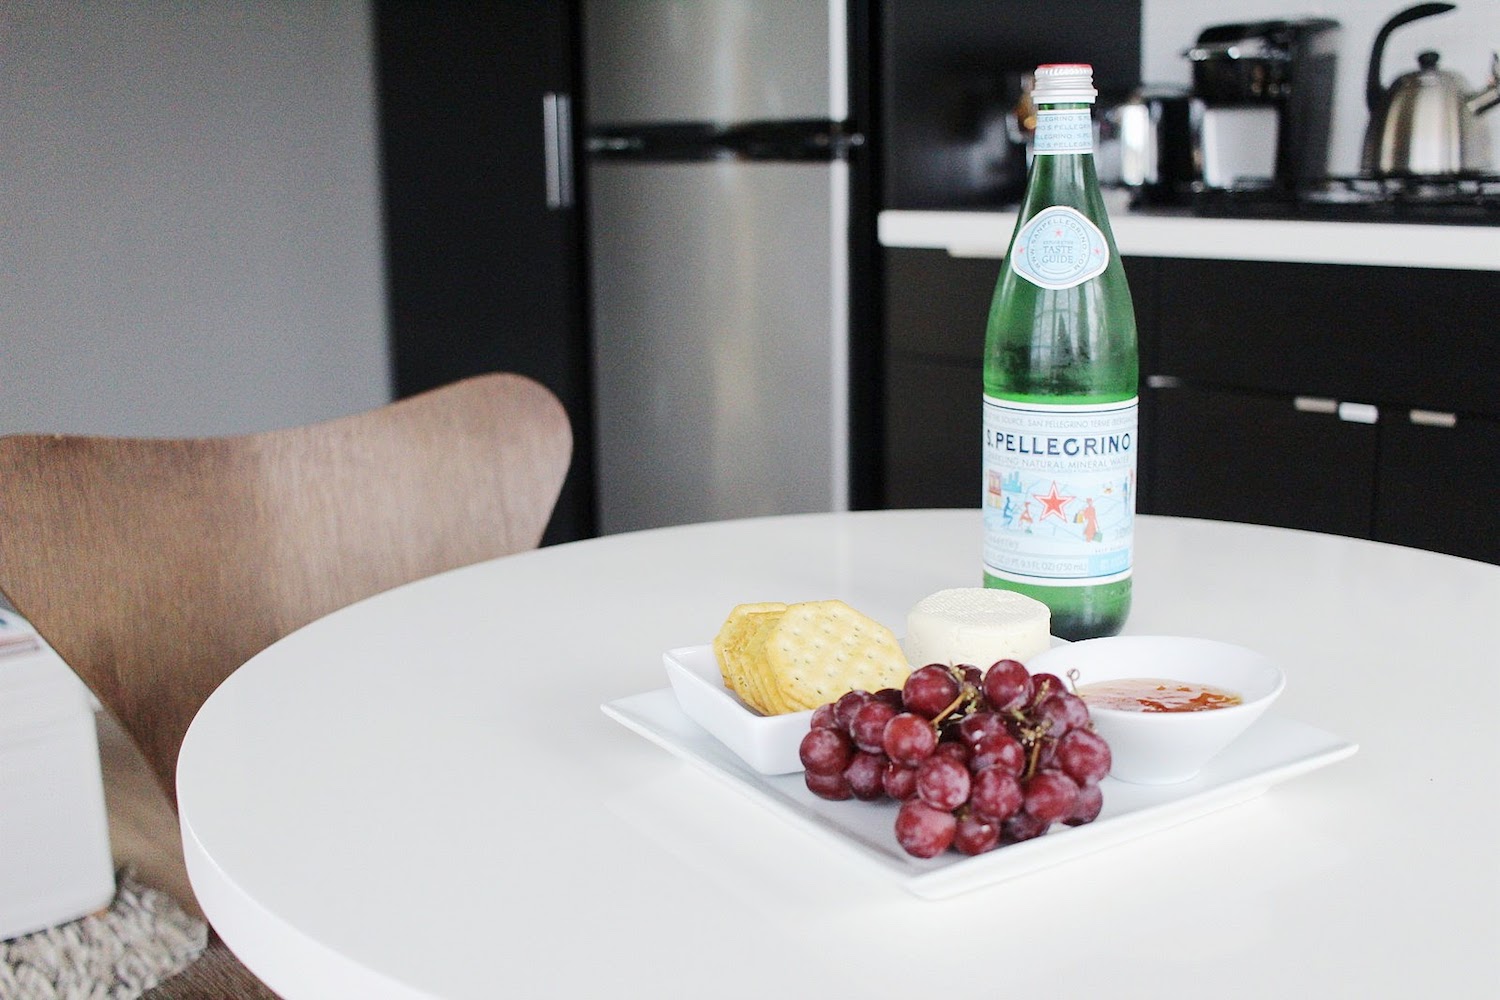
Checked into our Airbnb, relaxed, had the complimentary cheese plate from our hosts, and later ordered dinner. It took us a few days to go from Eastern Time to Pacific, so our eating/sleeping schedule was wonky for a while there. Stunning views from our Airbnb and truly wonderful hosting.


Day 2
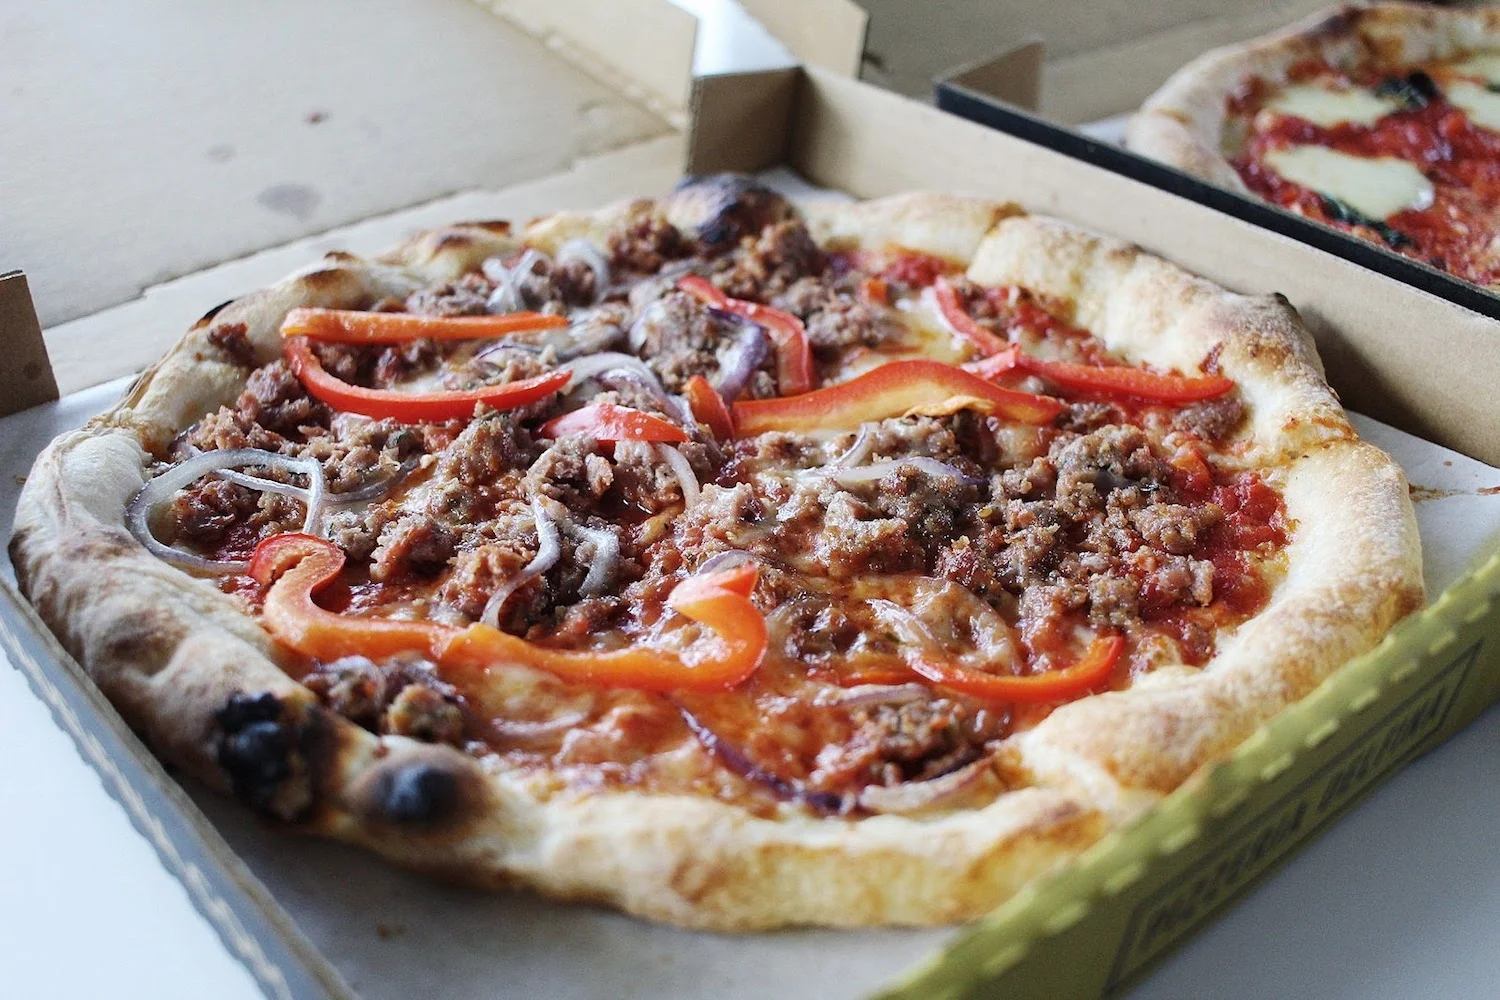
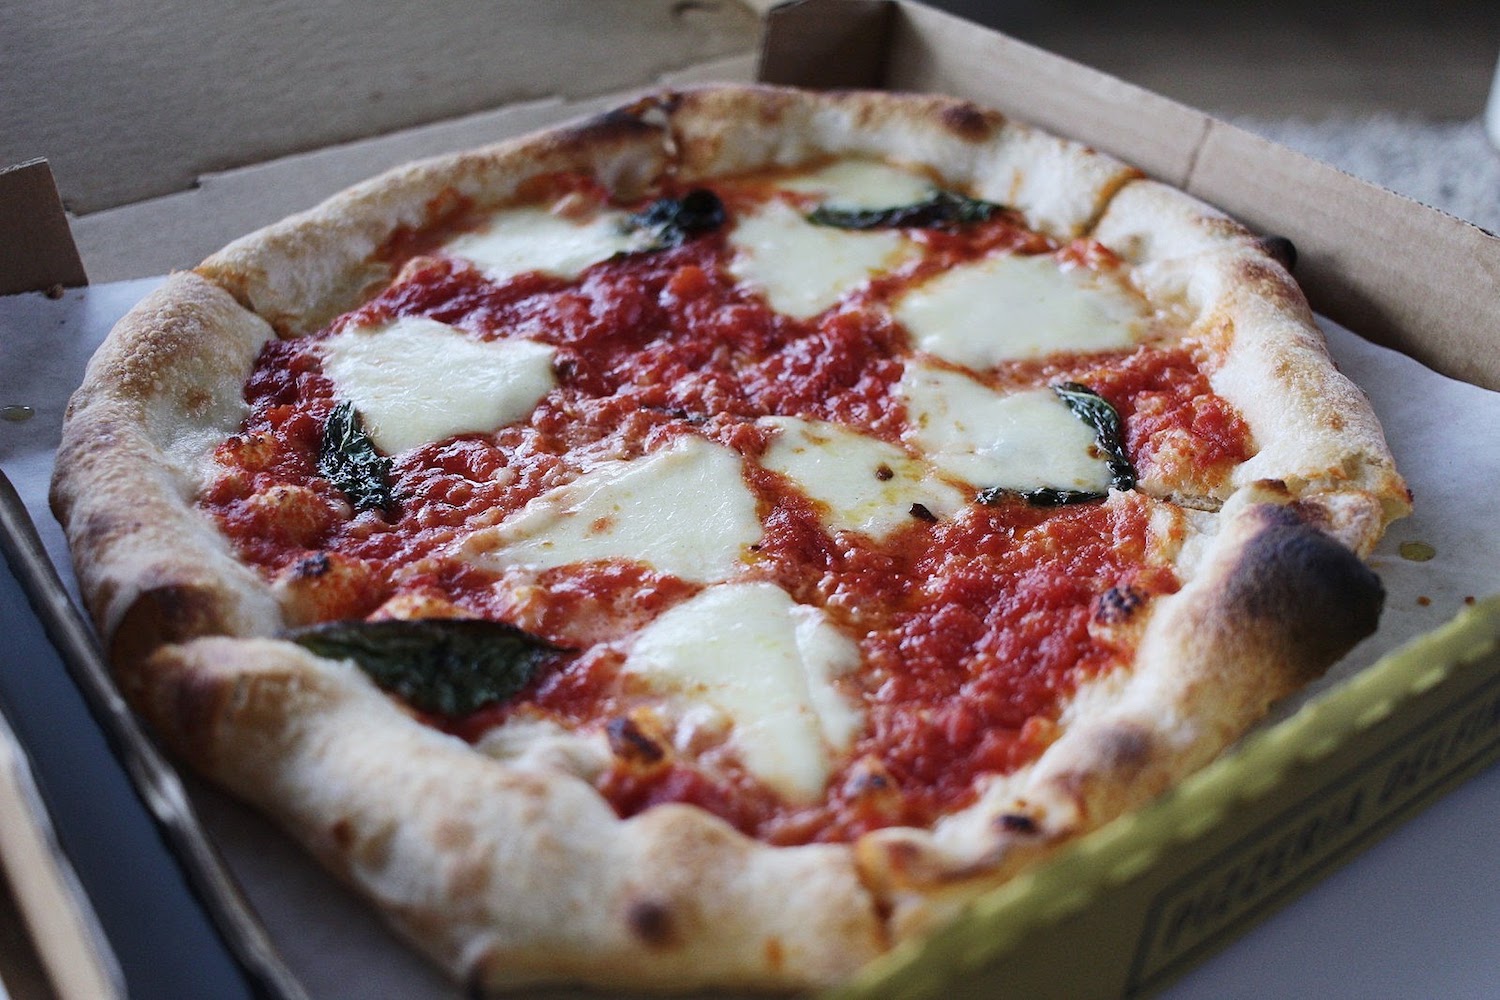
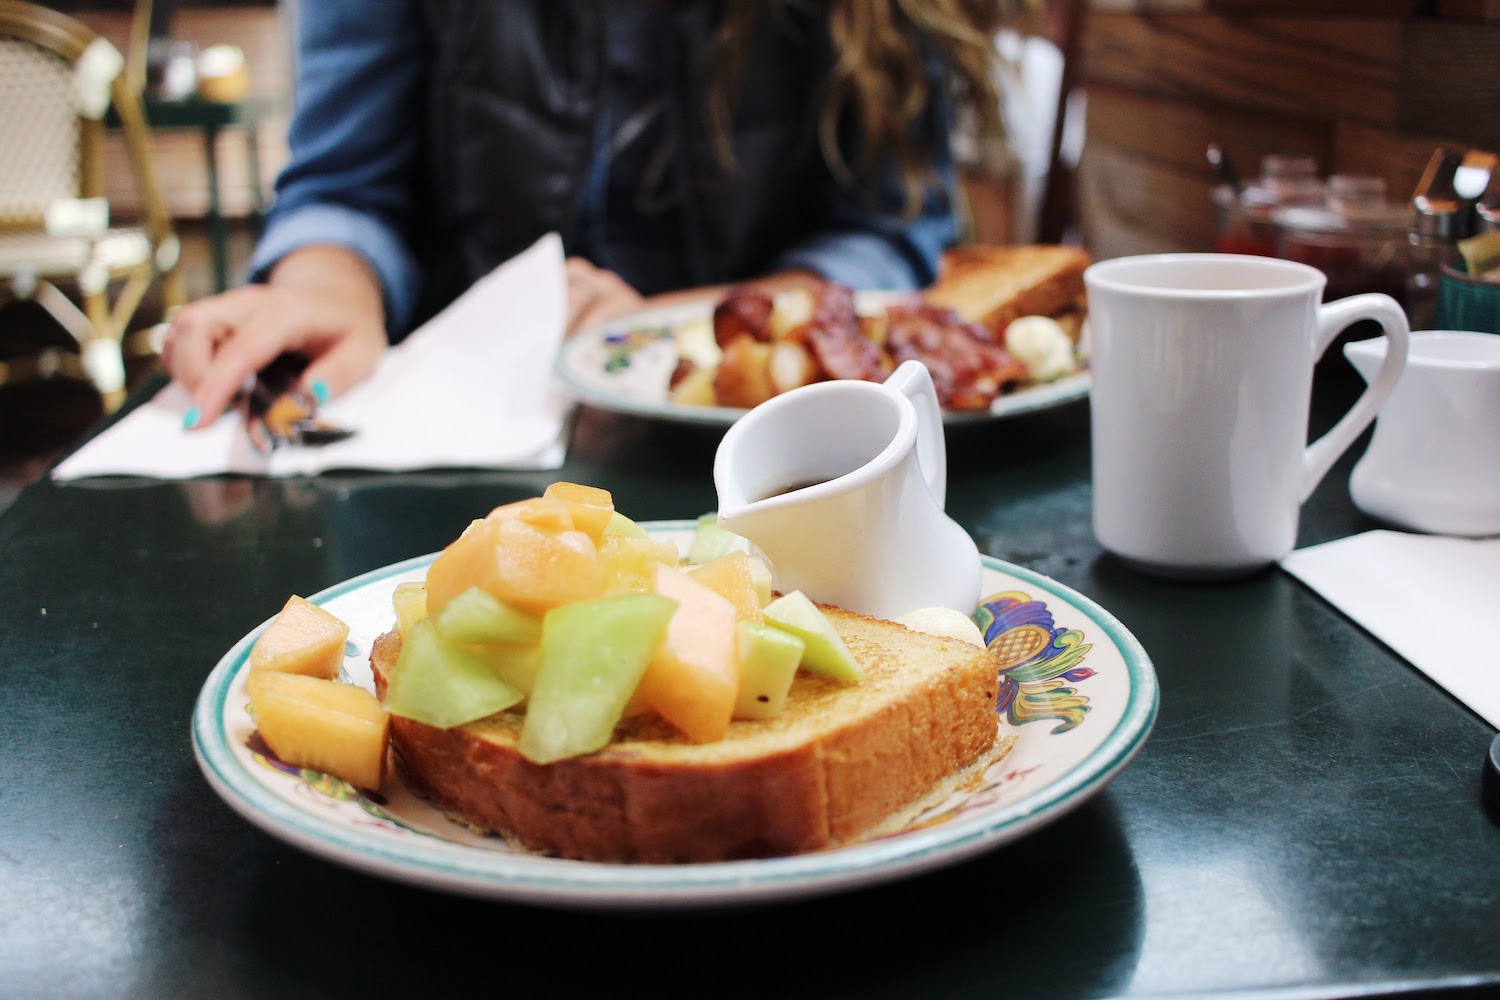
My college bff came over from San Jose to take me around San Francisco. We had brunch at Zazie's, got lost plenty of times, found all the candy shops, had pizza, saw the bay, walked all over, talked forEVER, and laughed a lot.


Day 3
This time, I managed to find my way up to her. I took my first Uber pool to the nearest Caltrain station, and got all the way up to San Jose without a hitch! We spent the day cruising her area, found a winery in Los Gatos, ate yummy Greek food, window shopped, ate some baked deliciousness, and then laid around their apartment and looked at her wedding photos that I had never seen in two years! It was another day filled with laughter and adventure.


Day 4
This was our last full day in SF, so I stuck around at the Airbnb and got some work done and enjoyed the area by myself a little bit (if you watched my Instagram stories, this was the day I walked to and from our Airbnb and nearly died because #hills). That night, Tom and I had a date night and went out for a little sushi and ice cream and Twin Peak touring.


Days 5 - 7 were spent with family,
and I typically don't pull out my devices with family unless there's just some downtime in the evenings. So there's no photos I need to share of those days! We had a wonderful time with our two farthest nephew and niece and their parents. It was the first time we'd seen their latest home in the Bay Area and we went on walks, played at parks, talked, read lots of bedtime stories, and just spent time catching up.
San Francisco and the Bay Area as a whole, are super fun areas to visit and tour around. There's tons to do, it's surrounded by other incredible places to visit, the weather is pretty near perfect, the food is delicious, the sites are beautiful, the public transit is easy, and no one talks to each other in Uber pools... unless you're the wide-eyed, spunky-spirited Midwestern girl who wants to know what everyone else knows. I may or may not have awkwardly brought up the silence of San Franciscans TO the San Franciscans and thankfully was met with laughter and a, "You're right, we ARE too quiet - thanks for livening up our Uber ride!" and then continued to speak with a super sweet young guy about gangs and how cool tech nerds are in SF while our driver got lost finding my Airbnb. Overall, though, it's a place I hope to visit more often and where at the very least, you can find an amazing cup of joe.

Towering Torte | Showstopper Bake by Cameron
This is the second and final bake (at least until we eventually start up the challenge again with the next season) from our Star Baker, Cameron! I never know what she has baked up for us until about the day before her post goes live, and let me tell you... when I opened her email my jaw about hit the ground (and so did my husband's!). This is a showstopper to be sure! Be sure and read through Cameron's process of this bake - she is a gifted writer as well as baker, and you feel as if you're watching her as a Great British Bake Off contestant!
If you missed her last bake, find it here: Mini Lemon Cakes
And be sure to find her on Instagram for more mouth watering photos: Cameron's Instagram
Sit Down for This One… A Towering Torte to Tempt Your Sweet Tooth
I have watched and baked along with The Great British Bake Off for years. When Joy sent me the schedule of the episodes that I could select from for my bakes, I thought….now is the time for a challenge. When it came to this post I had narrowed it down between multi-tiered pies and tarts or the decadent dobos torte.
Obviously, the legendary Hungarian delicacy would be uncharted territory, so I opted for the challenge rather than the tried and true.
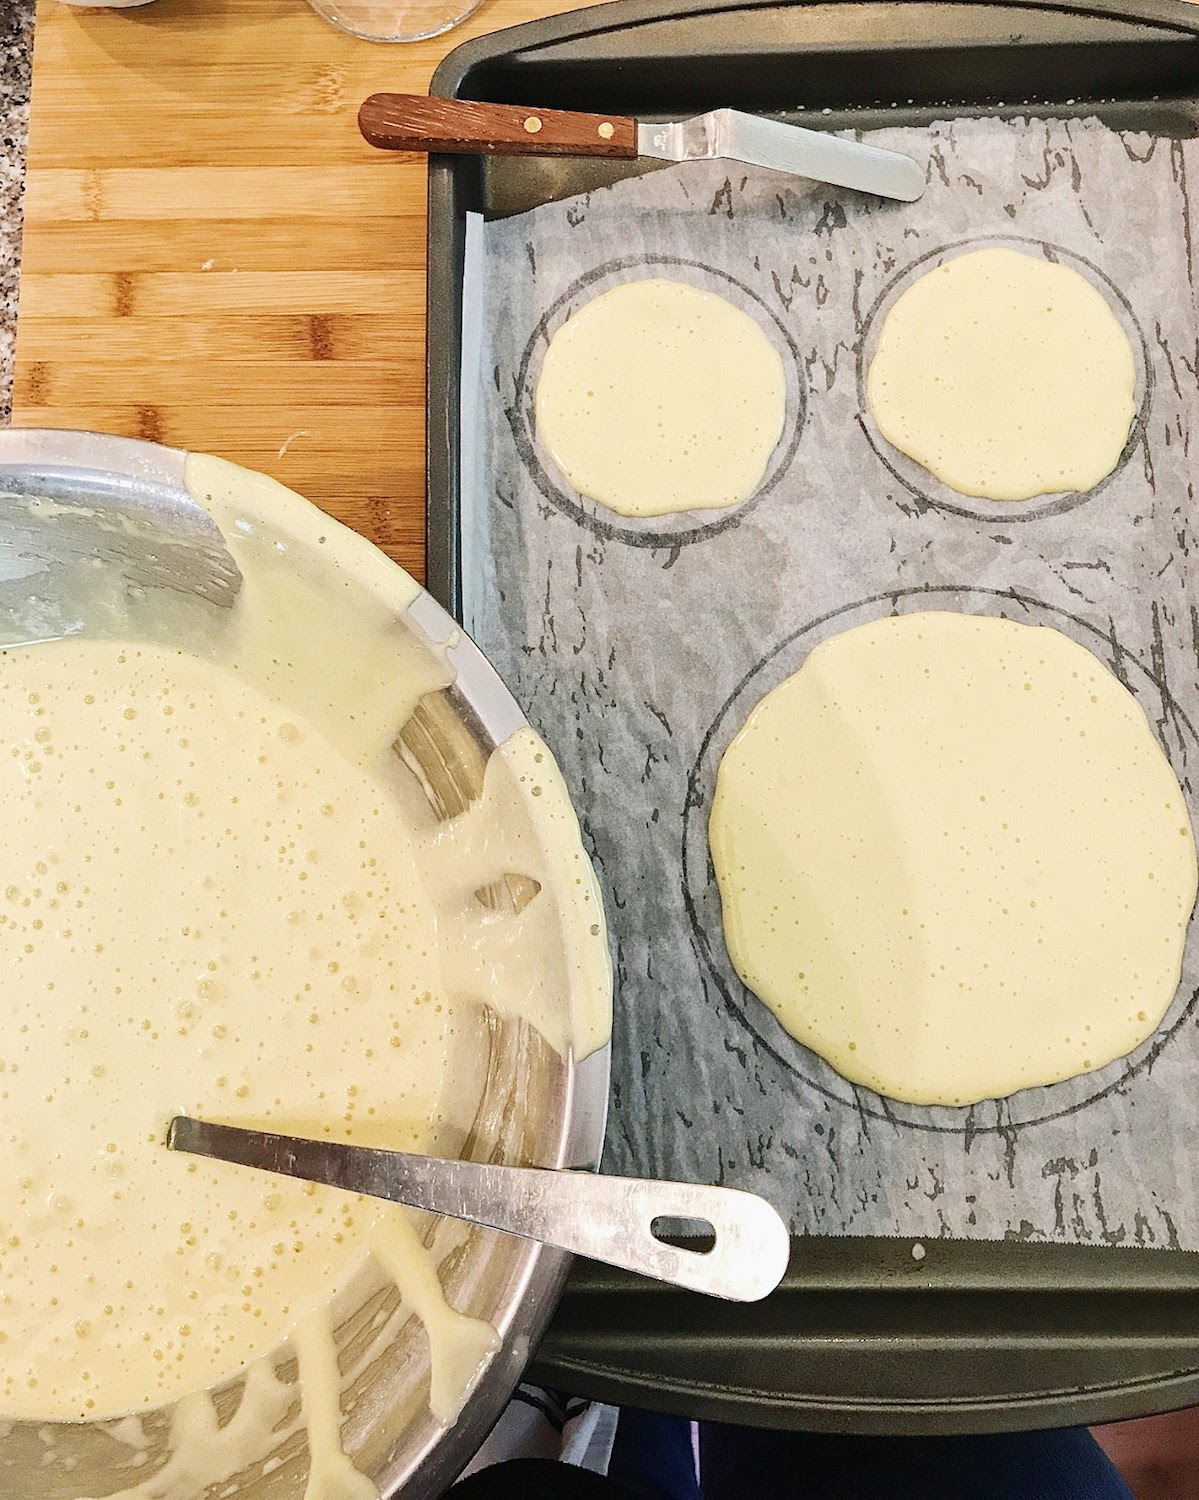
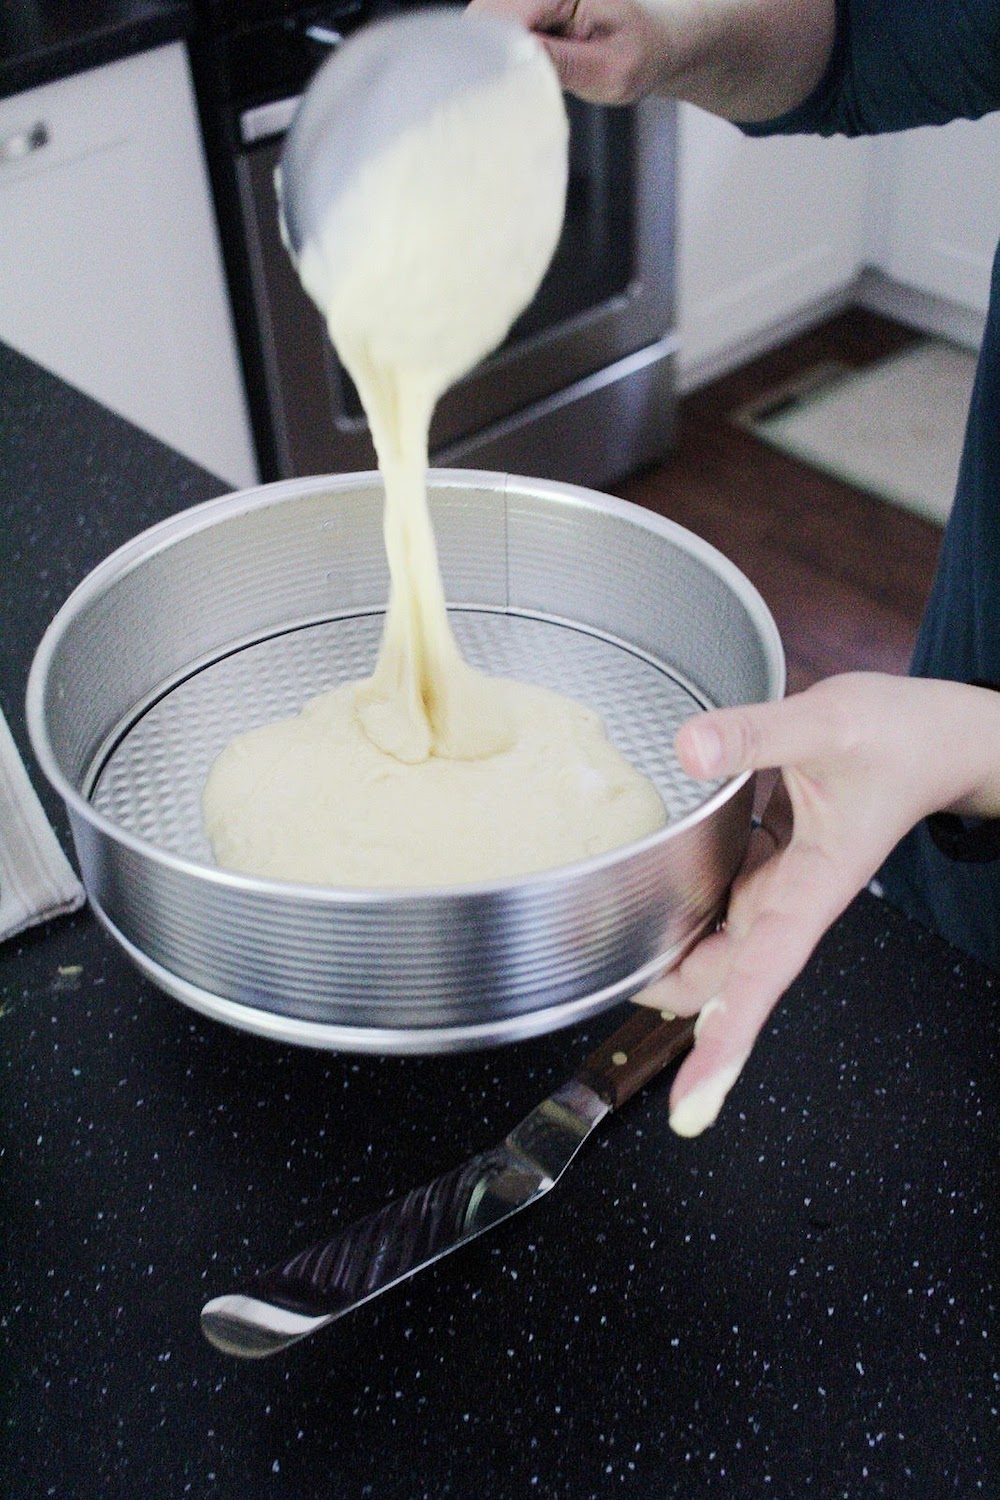
I must be honest, once I started ladling layer upon layer of fluffy batter and flattening it with a pallet knife, a little part of me wished I had gone with something more familiar. Now don’t get me wrong, this towering rich cake was delicious and seems more overwhelming than it is!
First things first, this is based on Mary Berry’s dobos torte recipe. Never having attempted this bake, I looked to the “Queen” and master for guidance. Notice that I have taken liberties with Mary Berry’s recipe and added my own personal twist to this traditionally chocolate/caramel massively layered torte….a bit “cheeky” I know….but my taste testers validated my deviation from the traditional with resounding “oohs and ahhs”. I hope you find the modifications a delight to your palate as well should you also venture into the dobos torte baking adventure.
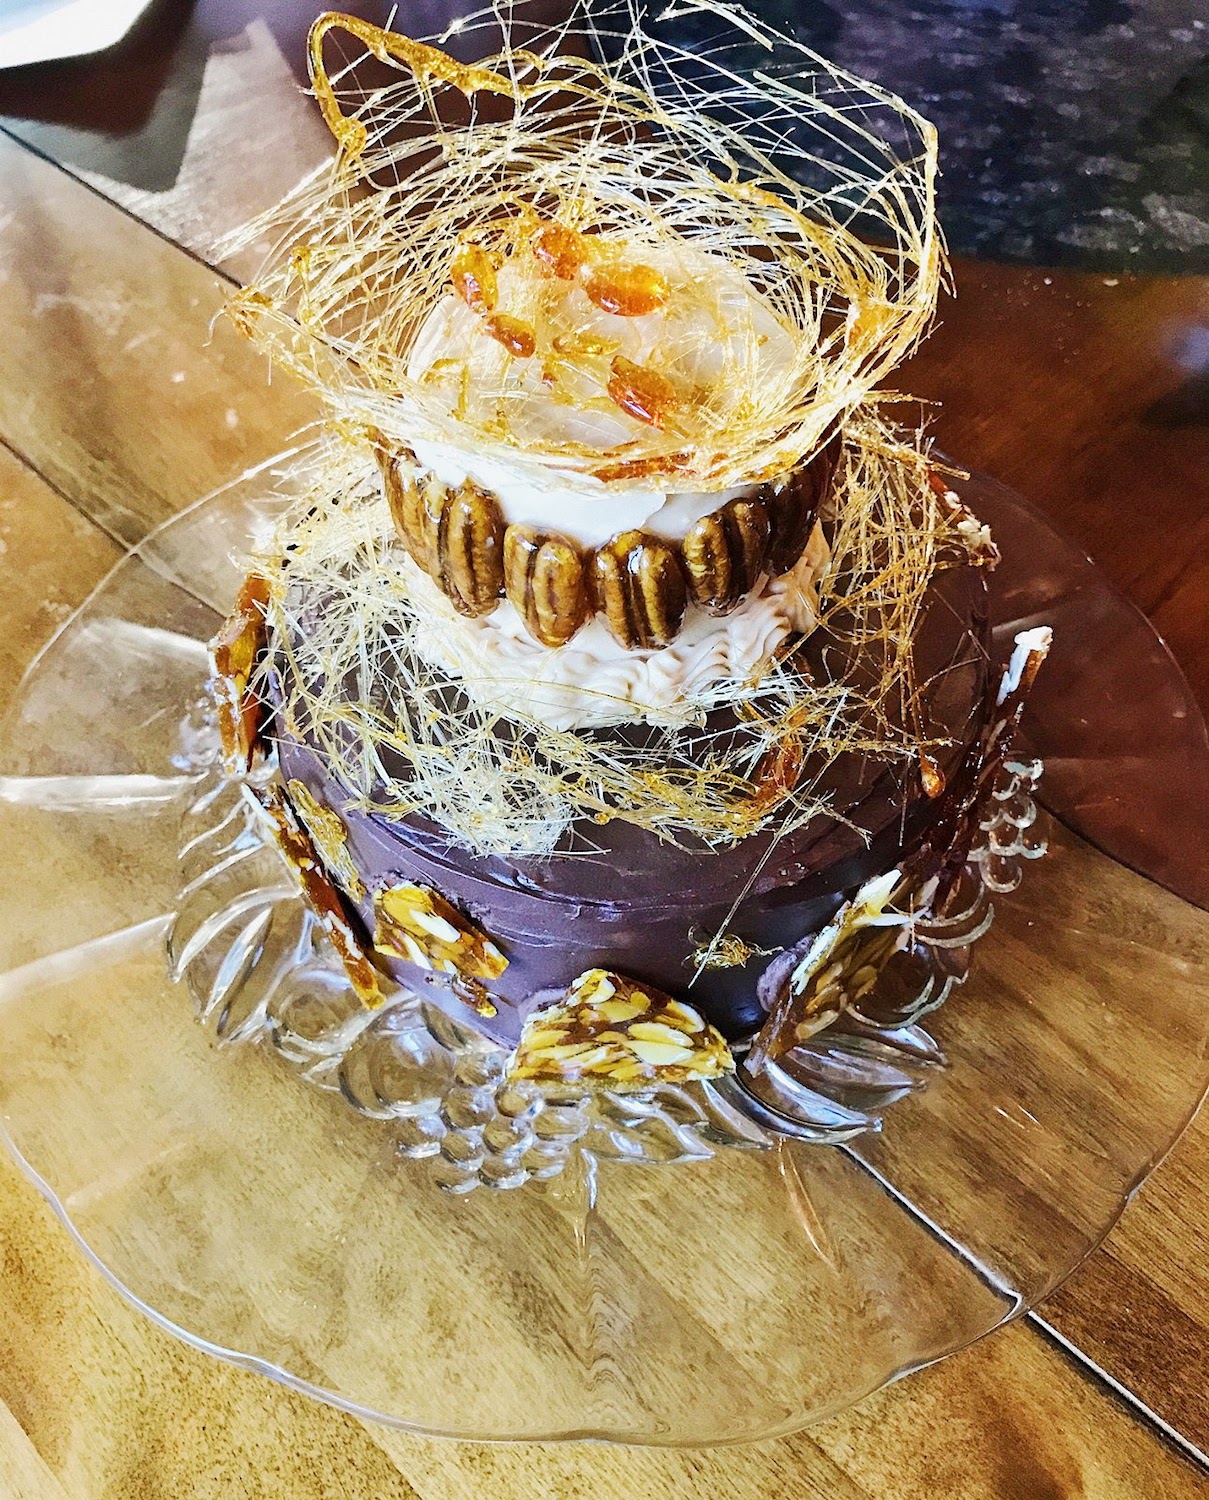
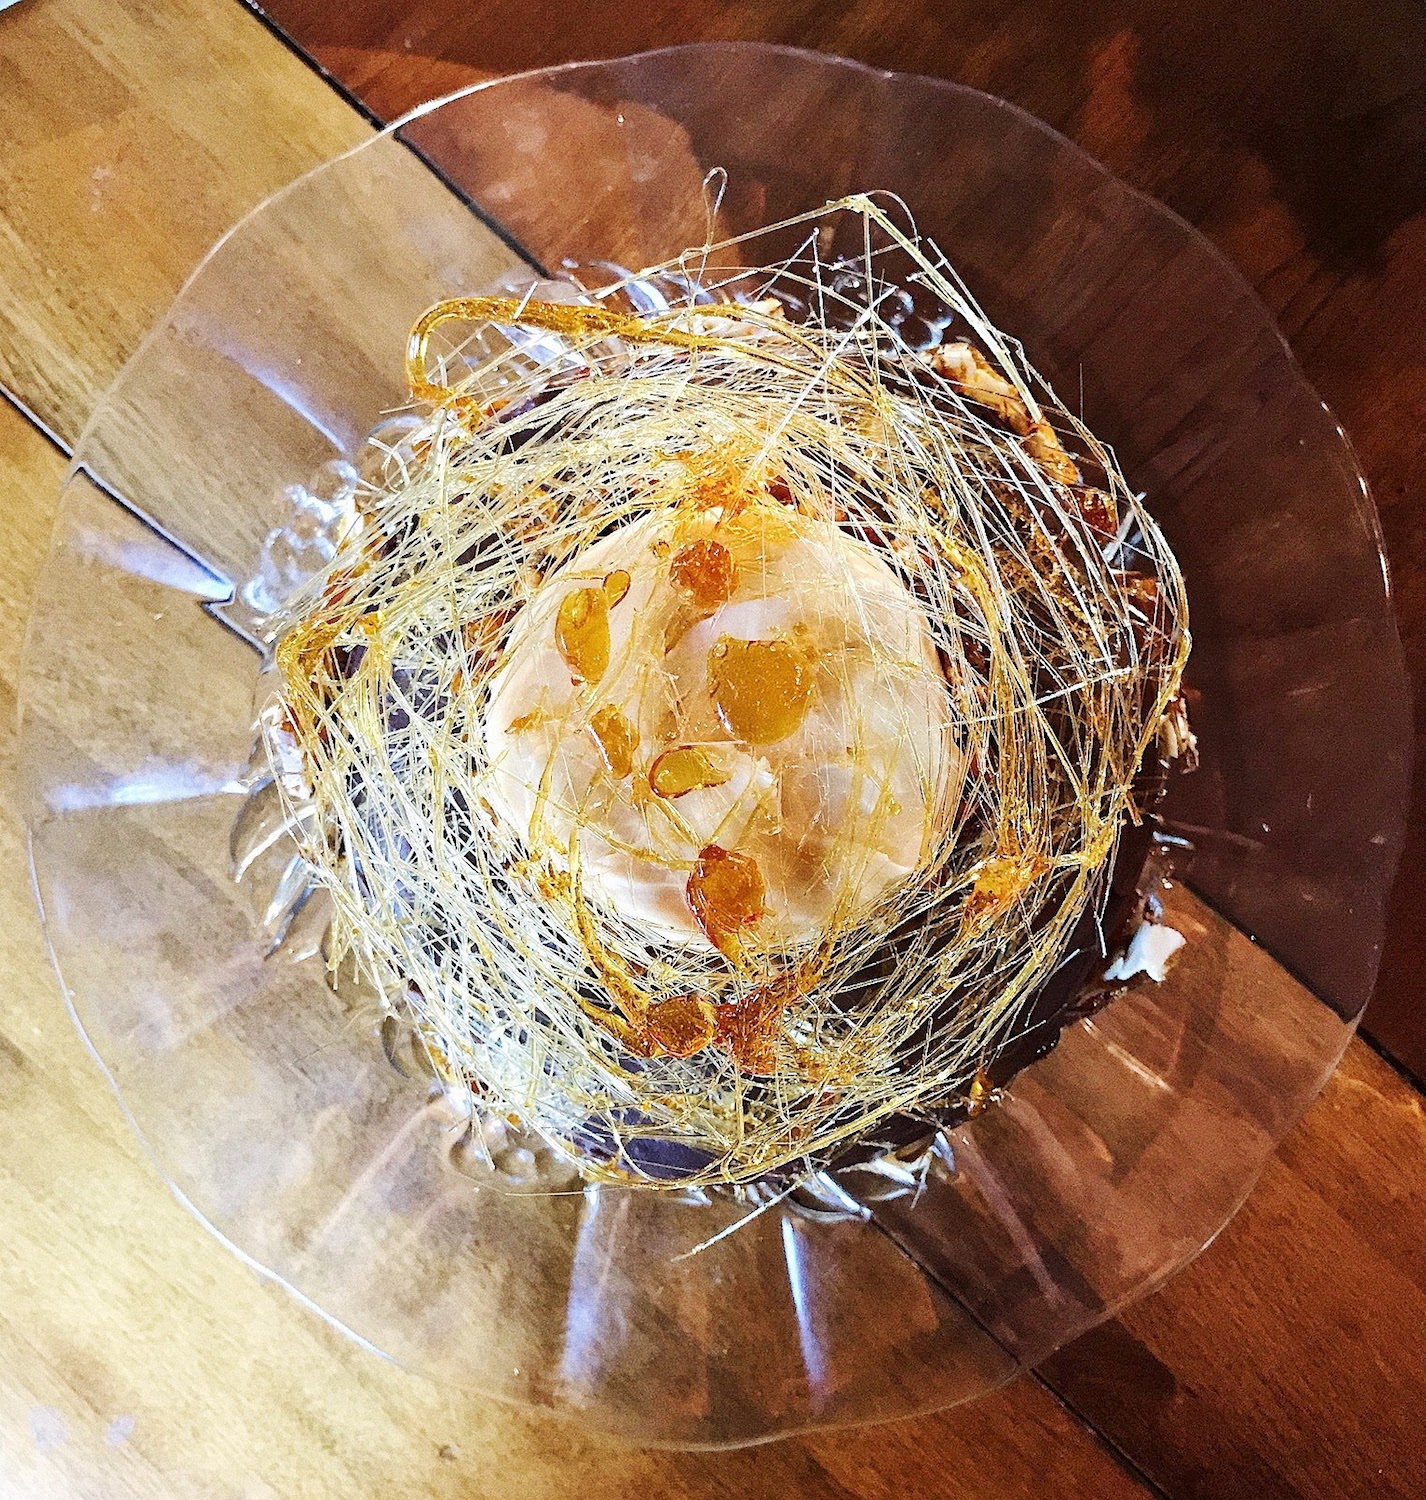
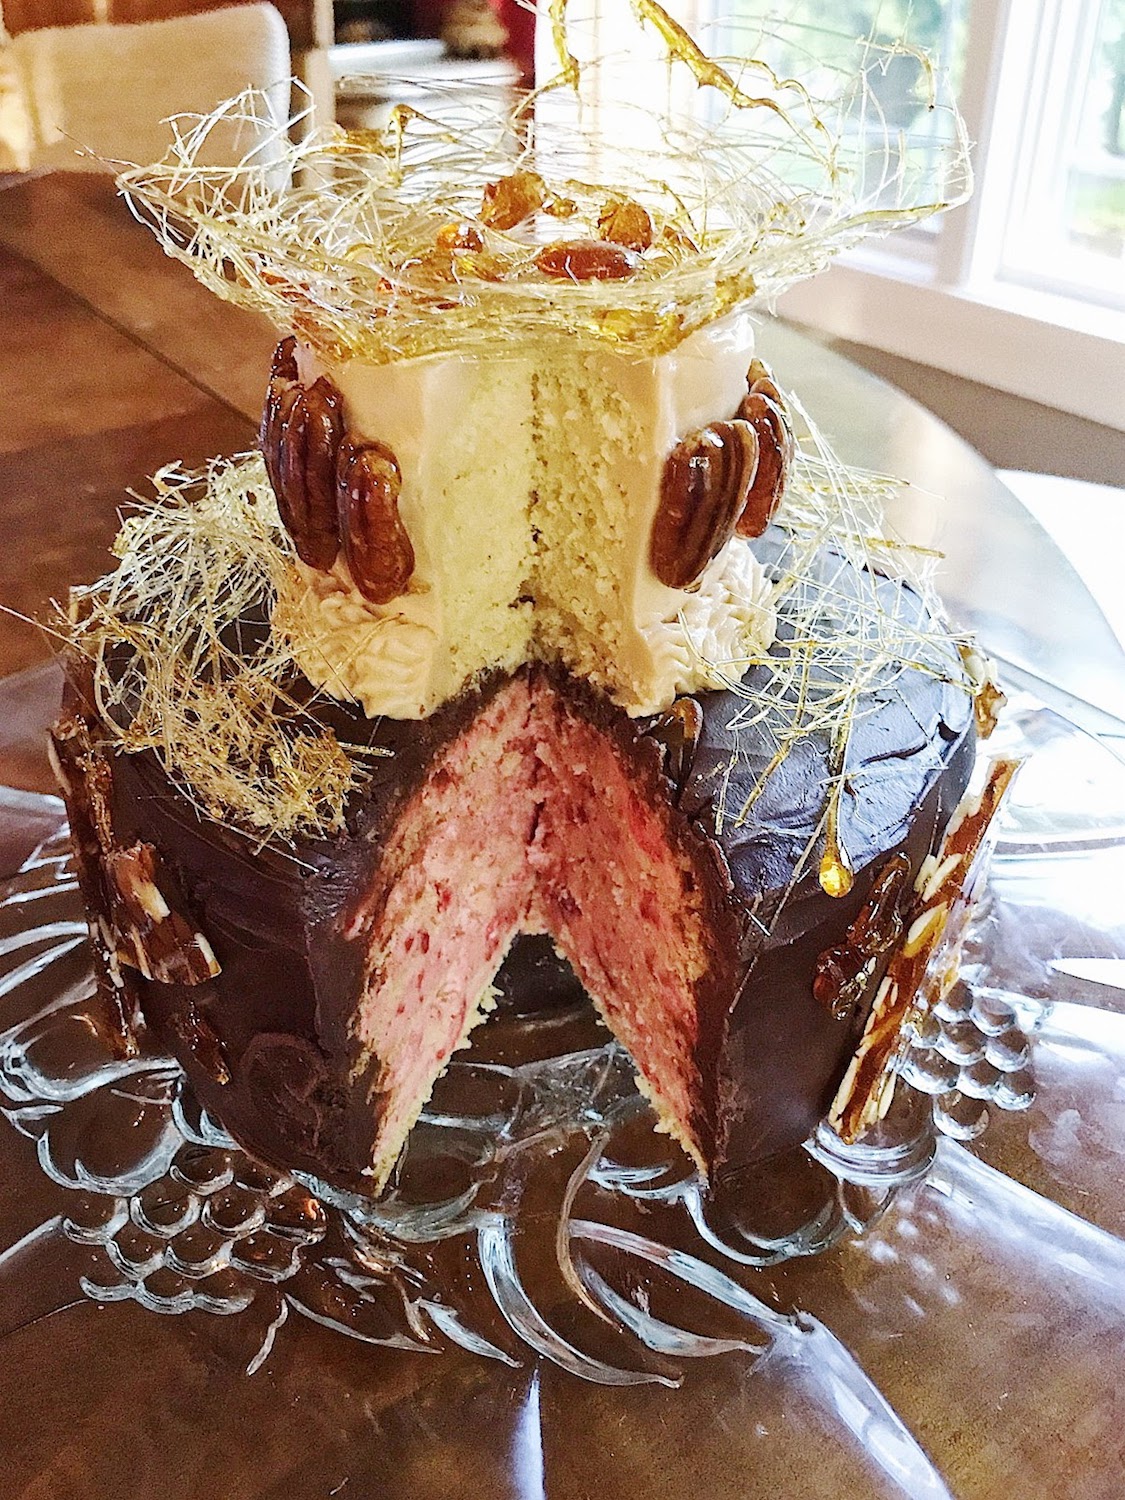
My heartbeat quickened when I saw self-rising flour as a primary ingredient. I’m not sure what it is, but I have never had much luck with self-rising flour or any recipe that calls for it. Often self-rising flour is a component gently folded into light airy egg laden sponge cakes. Nine times out of ten I either over mix the batter and it doesn’t rise or I under mix and have nasty little pockets of flour. This time the stars aligned and everything went according to the plan! I patiently took my time incorporating the flour which resulted in the intended light airy batter. The cake itself is sweet and heavenly, but the real flavor show stopper...an assortment of rich strawberry, caramel, and chocolate buttercream encased in rich silky chocolate ganache. Eye candy…. spun caramel golden threads, shards of caramel almond brittle, and caramel dipped pecans.
Initially, I wanted something a bit tarter as a juxtaposition to the sweetness of the caramel. My original flavor profile of choice was raspberry. After careful consideration, I had concerns about incorporating a juicy fruit into a buttercream. The multi-layered effect of the dobos is visually appealing but there is a structural weight issue to account for ...a tilted towering bake is not the look I hoped to achieve. This rationale leads me to freeze dried fruit. Unfortunately, I was unable to find freeze dried raspberries and opted for freeze dried strawberries…. a superior substitute! The buttercream legitimately tasted like strawberry ice cream if it were a buttercream!
The final personal hurdle of this cake was the caramel. There are few things in this world that I love more than salted caramel. One problem though…. I have the worst luck with caramel! I always burn myself and the caramel turns out crystalized or burnt.
It’s an affliction in this life to not be able to make that which one loves to eat!
This time however, like the self-rising flour, the stars aligned and everything went beautifully! I did manage to burn myself right at the very end with the caramelized pecans, but it wasn’t anything too traumatic. On this bake, I did allow myself to live on the edge and added a splash of bourbon in the caramel for a little bit of fun…. I would recommend it. It doesn’t blow you away but it does make you feel cozy.
Overall this was a bake of personal challenges, and I have to say I’m darn proud of myself and how it turned out. It was decadent and delicious. My “Ottoson Empire” dobos torte was carefully transported to share with co-workers (aka the culinary “test team). By the end of the day...it was fait accompli…. not a crumb nor a dollop of buttercream remained. I don’t think I’ve ever made something that looked so much like a showstopper. Hopefully Mary Berry would be favorably impressed. I’m very pleased with the outcome and would like to challenge everyone else to push themselves outside their comfort zone.
Happy Baking!
Towering Torte
Ingredients
Cake Sponge:
- 8 large eggs (room temperature)
- 350g sugar
- 300g self-rising flour
Caramel Buttercream:
- 800g sugar
- 400ml heavy whipping cream
- 450g softened butter
- powder sugar as needed
*A splash of bourbon optional should you feel adventuresome.
Strawberry Buttercream:
- 1- 34g/1.2 oz. bag of freeze dried strawberries
- 226g softened butter
- 448g powdered sugar
- 1tsp vanilla extract
- 1 tsp milk
- 1/8 tsp of salt
- powder sugar as needed
Chocolate Buttercream:
- 226g softened butter
- 448g powdered sugar
- 64g cocoa powder
- ½ tsp salt
- 2 tsp vanilla extract
- 4 tbsp. milk or heavy cream
Chocolate Ganache:
- 907g semi-sweet chocolate
- 350mL heavy cream
Caramel Work:
- 400g sugar
- 100g almonds
- 12 pecans
Method:
Chocolate Ganache
In a heavy bottomed pan heat heavy cream until it is at the point of boiling. Keep a close eye on it as you don’t want to scald the cream. Pour the warm cream over the chocolate. It is easier if the chocolate is in a wide shallow bowl so it will melt more easily. Once completely combined and there are no lumps, place in a bowl and allow it to cool and set a bit.
Caramel Buttercream
In a large heavy bottomed pan combine sugar and 100mL of water. On a low heat stir constantly and dissolve the sugar in the water. Once dissolved increase the heat and allow the mixture to turn a light golden-brown color (at this point you do not want to stir anymore). Once the mixture has reached the ideal color, the darker the color the stronger caramel flavor, remove from the heat and add the 400 mL of heavy cream. Be careful, as the mixture can often spit since you are adding a cool temperature liquid into something very hot. Combine entirely and leave to cool and set.
Once the caramel is cold and set you can start to beat the butter with a paddle attachment and slowly add the caramel. I found my buttercream needed a little extra help in reaching the best texture for frosting by the addition of powdered sugar ¼ cup at a time. Fill a piping bag with buttercream and set aside until ready to use.
Strawberry Buttercream
Beat your softened butter with a paddle attachment, then on a low speed add powdered sugar. Once it starts to combine, add vanilla extract, milk, and salt. Once the buttercream comes together add ¾ of the bag of freeze dried strawberries and allow them to break up a bit. Take remaining freeze-dried strawberries and crush them into a powder, then add that powder to the buttercream. This ground up version of the strawberries allows you to intensify the flavor without ruining the texture of the buttercream. Fill a piping bag with buttercream and set aside until ready to use.
Chocolate Buttercream
Beat your softened butter with a paddle attachment, then on a low speed add powdered sugar and cocoa powder. Once it starts to combine add the vanilla extract, milk, and salt. Fill a piping bag with buttercream and set aside until ready to use.
Cake Sponge
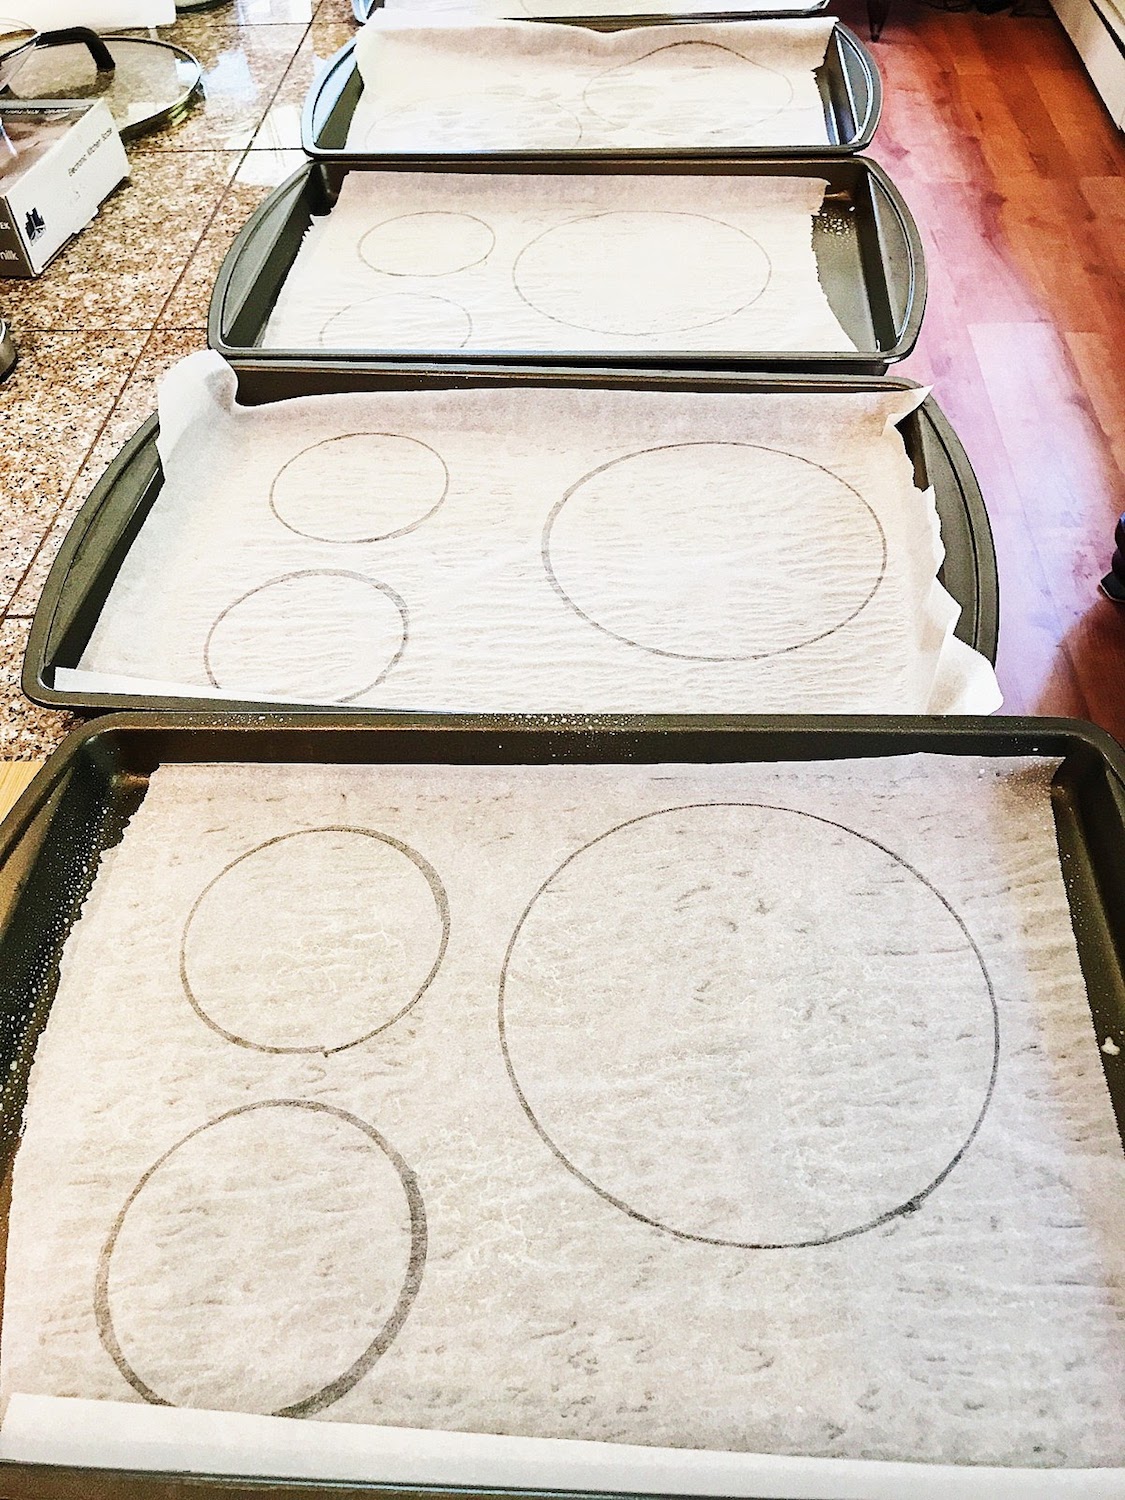
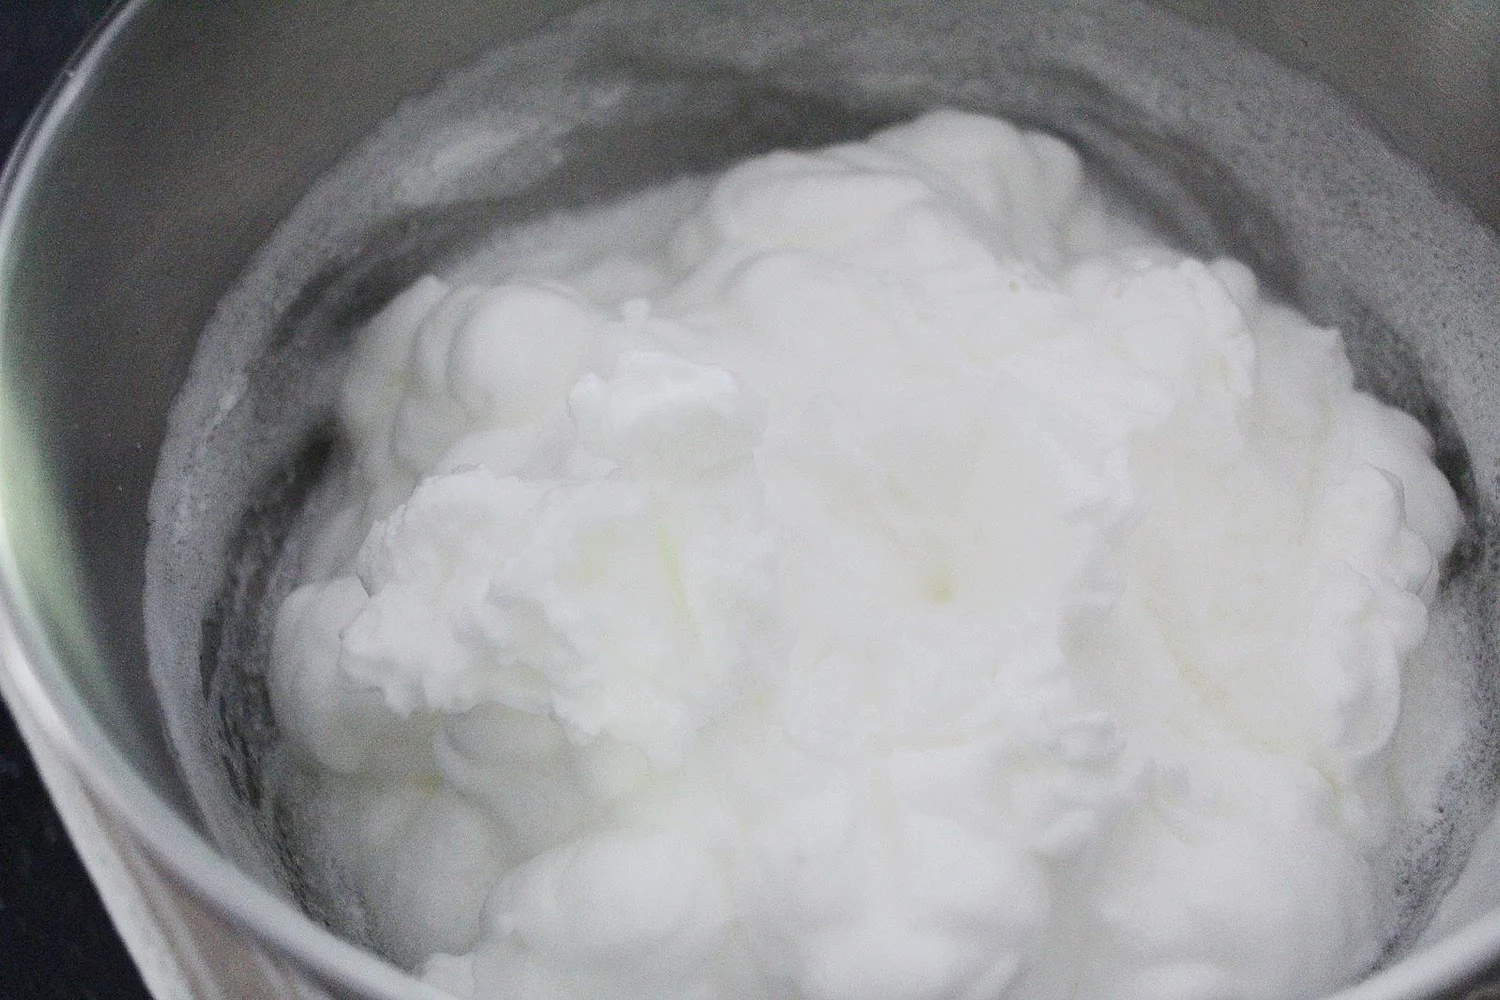
Preheat oven to 395 F and line 4 baking sheets with parchment paper. On each parchment paper trace one 8” circle and one 4” circle. You can start off with this and continue to reuse parchment paper or create more circles until you have used all the mixture or have reached your desired number of layers. Sift self-rising flour into a bowl. In a separate bowl, combine the eggs and sugar. Beat until it turns into a pale and fluffy mixture. Once eggs and sugar are combined, sift the self-rising flour in, ½ cup at a time. Be careful combining the flour into the egg mixture, this will prevent losing all the air you just created by beating the egg. Gently move a rubber spatula around the outside of the bowl and then move it thru the middle of the mixture. When the flour is fully combined the mixture will resemble a loose pancake mixture. Using a ladle, spoon mixture into your traced circles and smooth out with a pallet knife. You want the mixture to reach the edges you have traced out so the layers will be easy to trim. Place the baking sheets in the oven and watch carefully as then can overcook quickly, for my gas oven about 9 minutes was all that was needed. Repeat the process until you’ve reached the desired number of layers.
Assembly
Allow the layers to cool, this is pretty quick given the layers are so thin. Take individual 8” layers and lay them on parchment and place an 8” springform base on top and use that as a template to trim any excess off around the edges. Take one layer and place it on a cake stand, using your piping bag with strawberry buttercream (be sure not to use a tip, the strawberry bits will definitely get stuck) pipe buttercream on top of the layer and smooth with a pallet knife. Use the buttercream layers to help straighten any sloping edges. Once everything looks level, place another layer on top and repeat until you’ve reached your ideal height. You want to make sure that the final top layer does not have buttercream on top of it, otherwise it will compromise the smaller layer and be difficult to cover with the ganache.
Once the bottom tier is assembled you will want to crumb coat it. This is where the chocolate buttercream comes into play. Crumb coating prevents any loose cake bits disrupting the overall look of your frosting. Cover the entire outside of your bottom tier multi layered 8” inch tier in chocolate buttercream. You can now cover the outside with chocolate ganache and place in the fridge to set.
While the 8” base of the torte sets in the fridge, begin assembling the smaller second tier of the torte. You’ll repeat the same frosting concept as the bottom tier only now using the caramel buttercream. This tier does not have a separate frosting as a crumb coat, I just frosted the outside of the cake with buttercream. But if you wanted a more universal look you could also coat it with the ganache topping.
Decoration
On a baking sheet scatter your flaked almonds and using toothpicks, skewer pecans. In a heavy bottom pan combine 400g of sugar and 8 tbsp of water, and on a low heat dissolve the sugar. Once the sugar has dissolved stop stirring and allow it to caramelize, again the darker the color the more flavorful but it can burn very quickly. Once you’ve reached the ideal color, pour 2/3 of your mixture over the almonds and allow to set. The remaining caramel can be used to dip the pecans. Insert a toothpick into the pecan and run through the caramel. Once you have dipped them you can turn them over and insert the pick into an orange or grapefruit which will serve as a sturdy stand and allow them to cool and harden. Allow the caramel to cool completely before handling it to decorate otherwise it will melt the buttercream. To achieve the spun caramel effect, take a metal pick and dip it in the caramel, then quickly move it around an upside-down bowl. This will take some practice to get the temperature of the caramel right so it will start to stick. Keep making circular motions around the bowl until you’ve achieved the look you want.
I hope you all are as impressed and inspired as I am over Cameron's torte! For every relatively failed bake I've been having with my mom throughout this challenge, Cameron has made up for it with her incredible prowess and creativity in these showstopper bakes. Don't forget to follow Cameron on Instagram for more mouth-watering bake photos!
We're going to do the last three bakes a little differently. On the show, these bakes were done all together as part of the finale show. Because of some travel and general life circumstances, we're going to have these bakes presented together on Wednesday, July 19th... so, you'll really have to hang tight for our little Great Blogger Bake Along Finale!
Wednesday, July 19th
Victoria Sandwiches, Tartes au citron, and Scones

Bake #9 | Schichttorte
In case you're not up to speed, this is the ninth bake in The Great Blogger Bake Along series. Read about it here.
Finally! One I've actually done before! This is a German cake, and a few years ago, Tom requested it for his birthday after seeing a YouTube video of someone making one. My parents happened to be visiting, so my mom and I took this on together. I actually liked that recipe better than this one, but let me explain further in a moment.
The Challenge
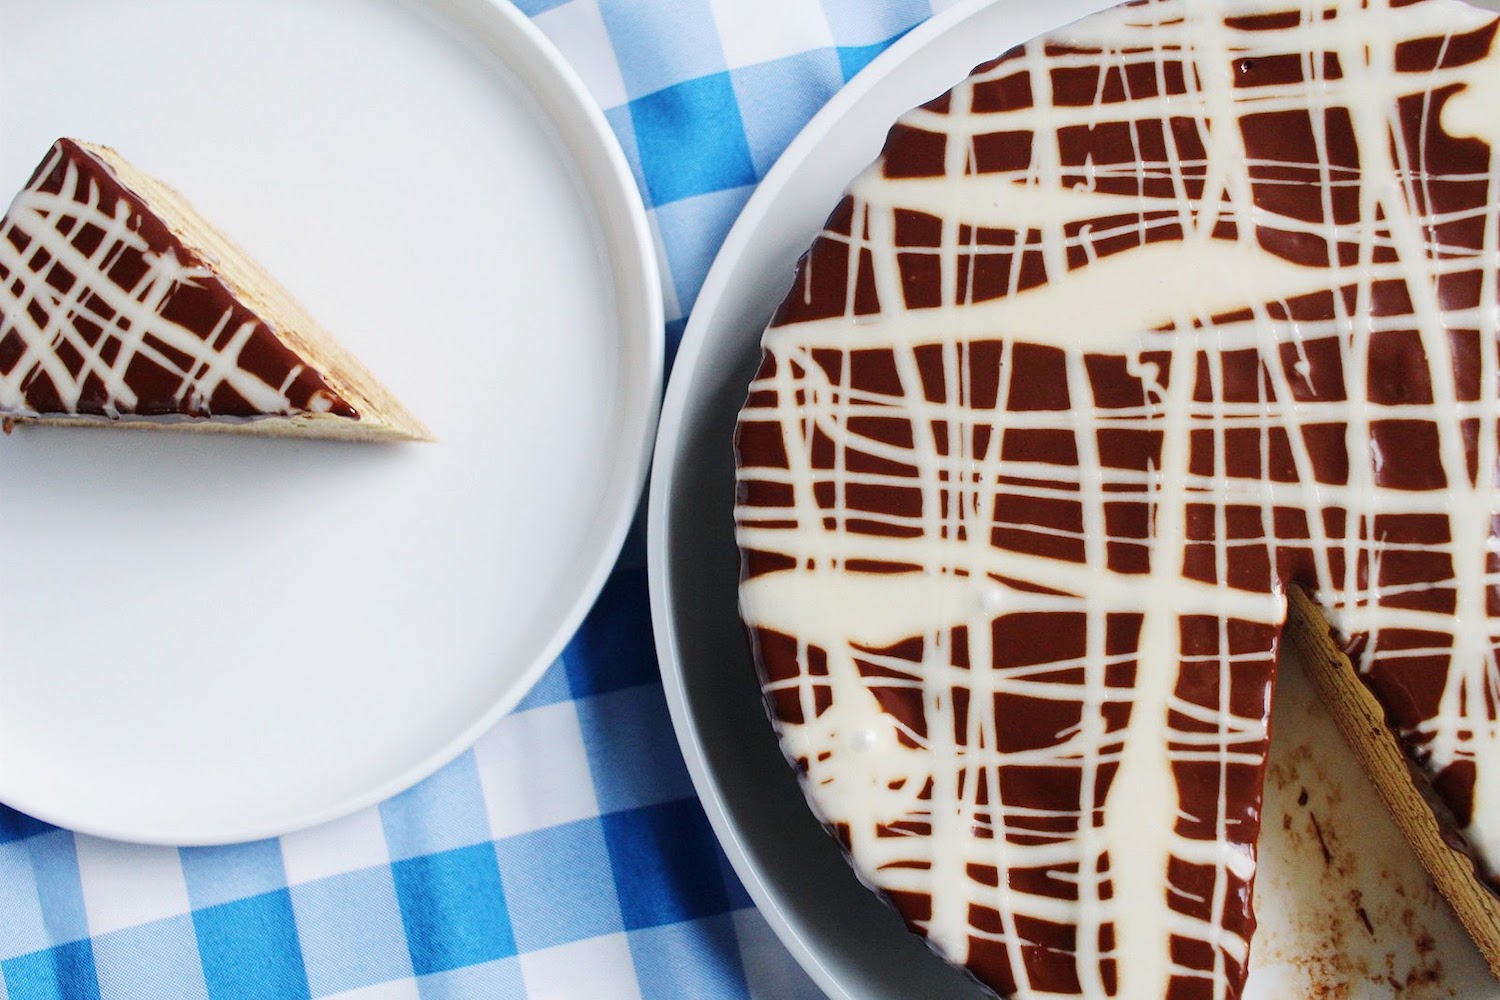
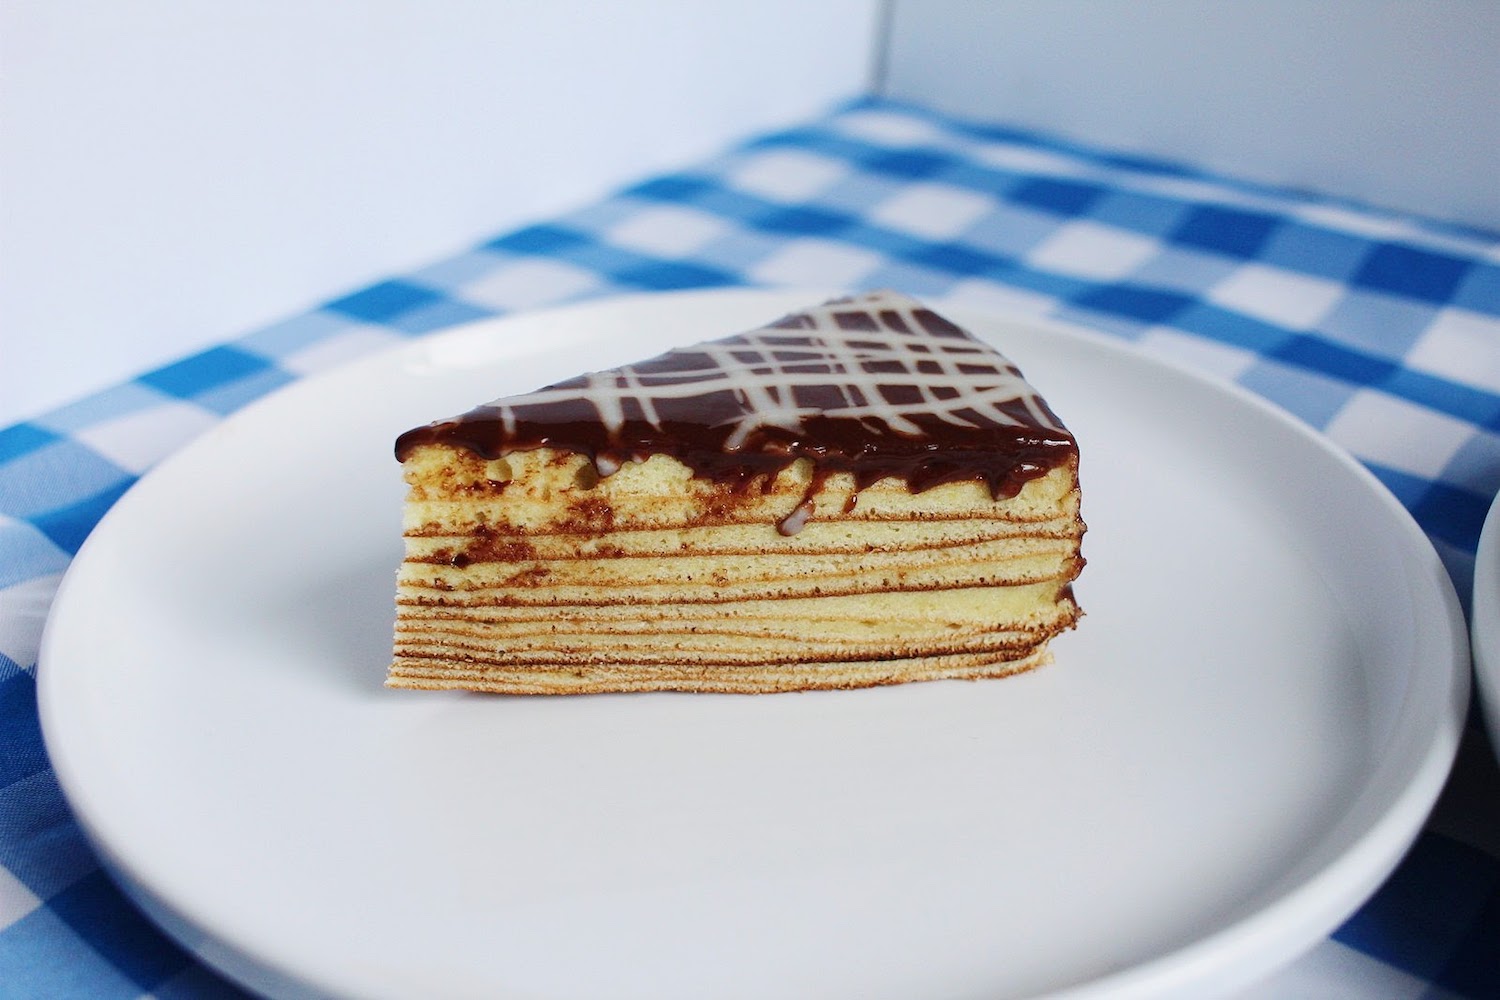
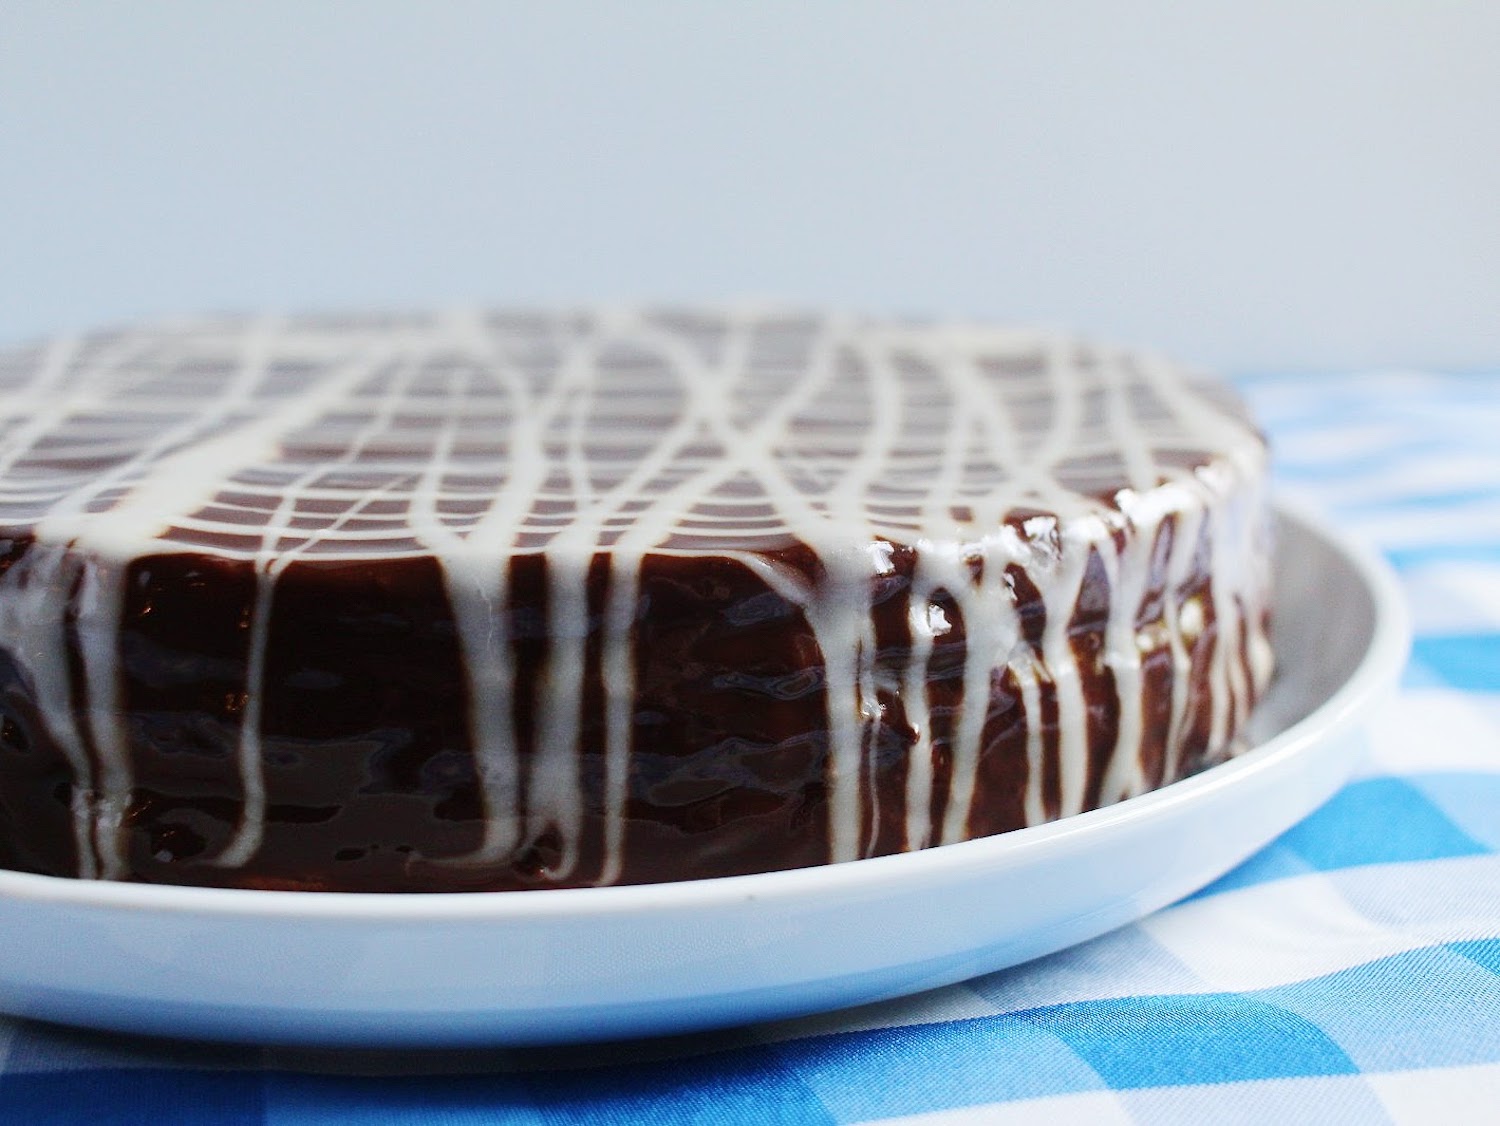
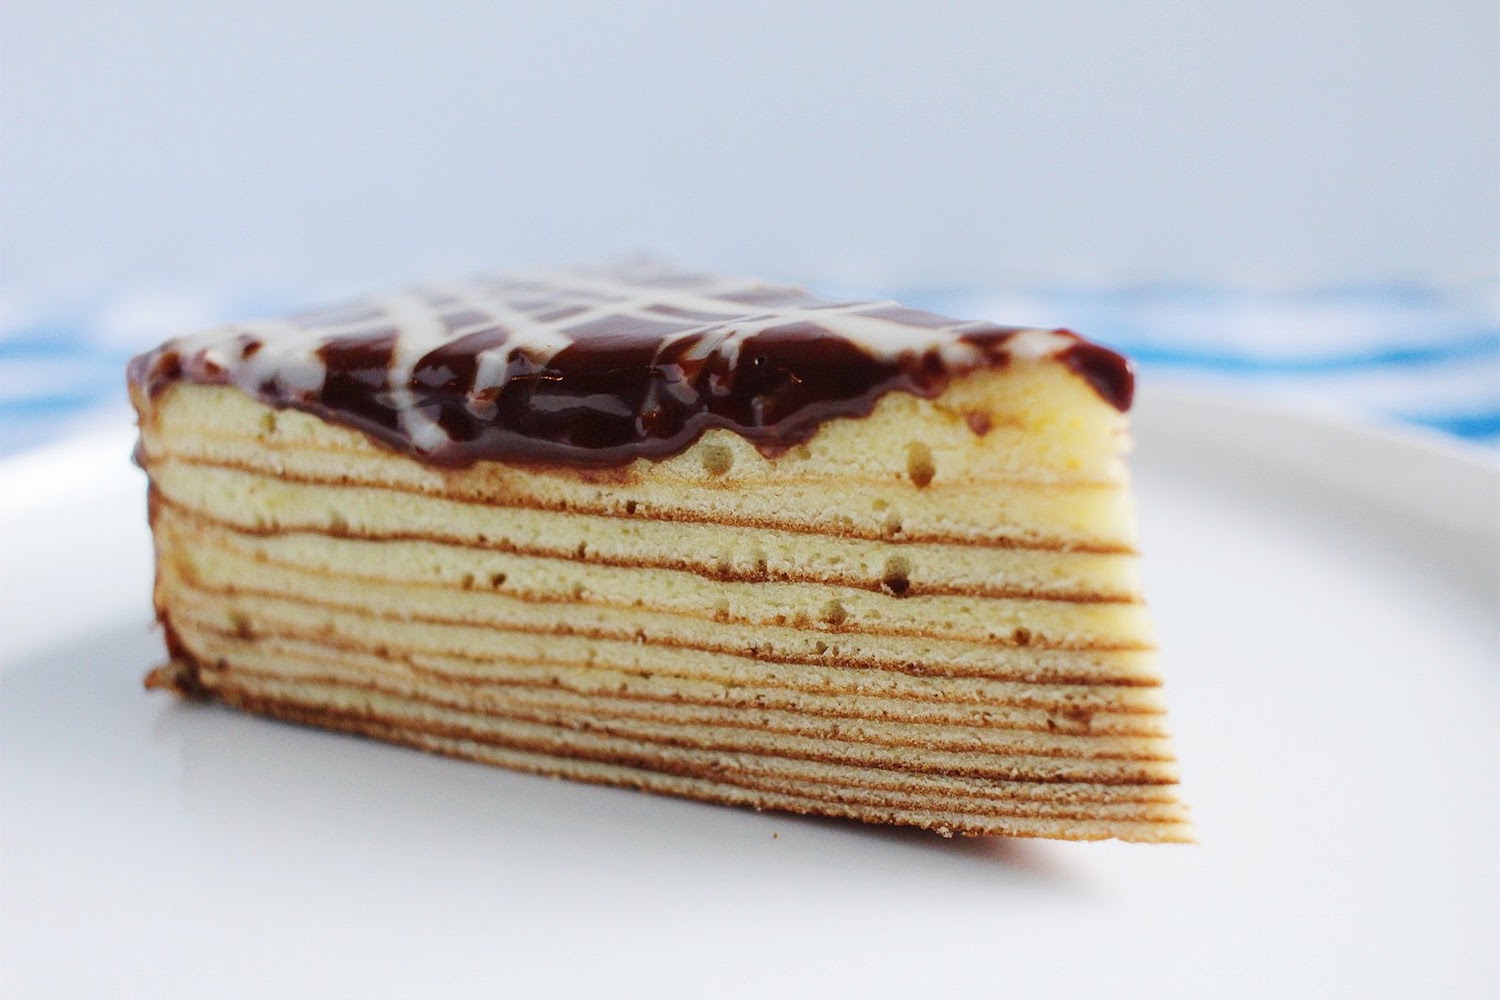
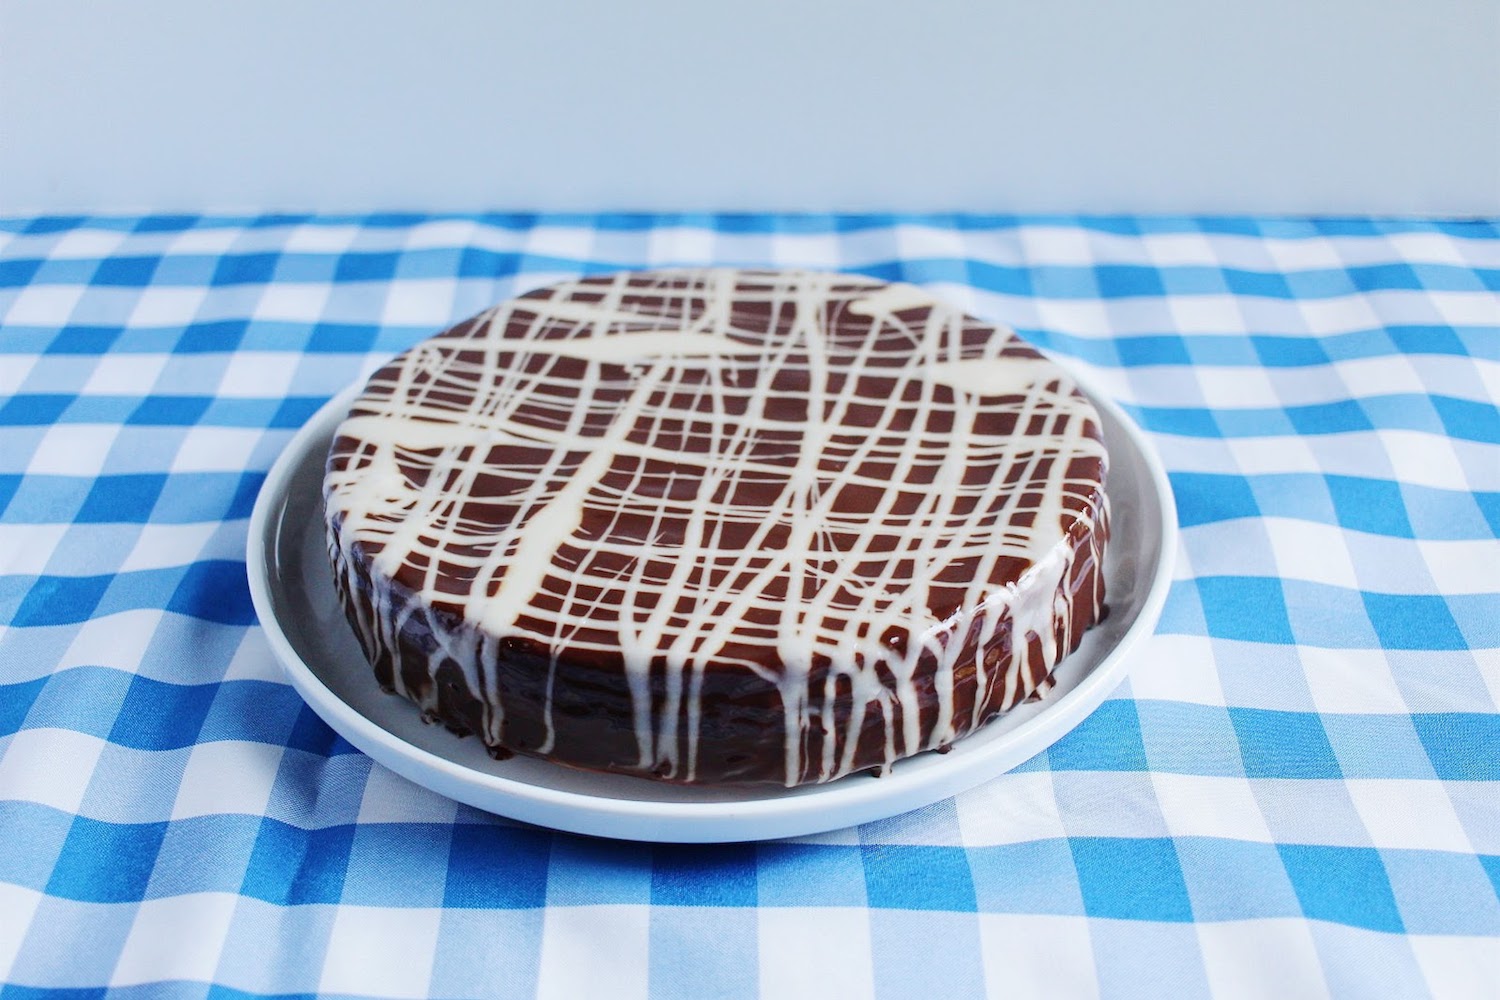
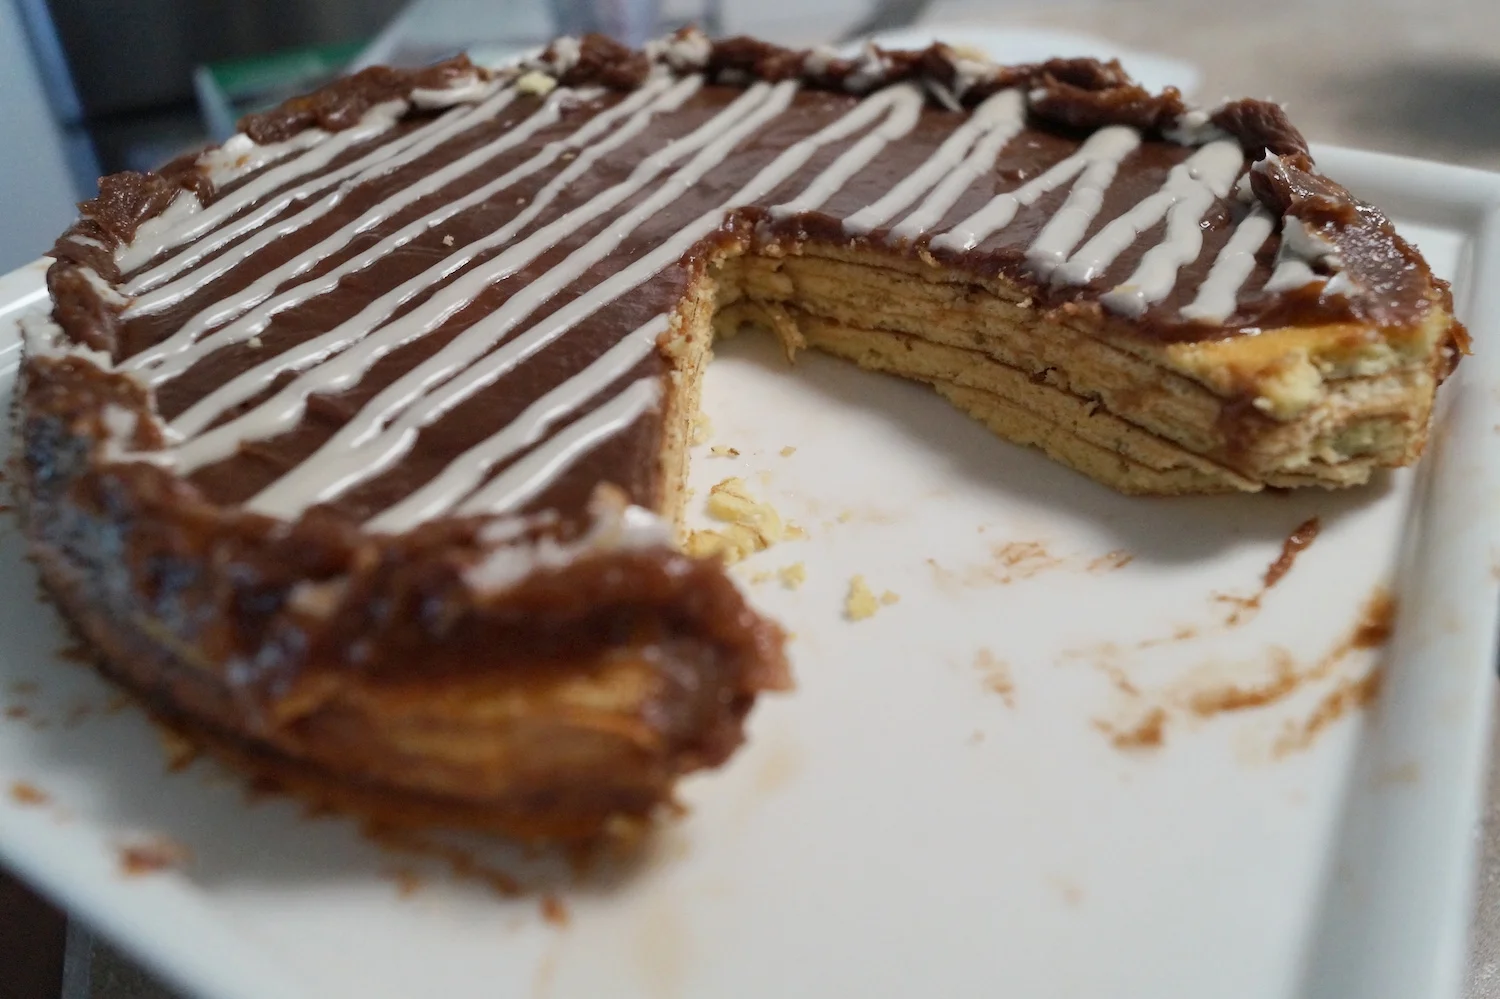
This schichttorte recipe. A twenty layer sponge cake with a chocolate/rum frosting and sugar and rum white frosting. I've also seen this called baumkuchen or "tree cake."
The Outcome
This type of cake turns out so pretty. I've now made a cake using this method three times, and it makes me want to experiment using other batters. It's a very eggy sponge, which is personally not my cup of tea, but the taste was okay. The only problem that both my mom and I came across, is that the layers get hardened, and essentially over-baked. It ended up being rather dry and both my mom and I cut off the bottom of our cakes and ate the top layers with frosting. Oh, the frostings were delicious! I'd be happy to put both of those frostings on just about ANYTHING.
Would either of us bake this again?
Overall, we were a little underwhelmed with this recipe, but the technique is actually quite fun and easy. I'll gladly make this cake again using a different batter, but the same frostings. If you're an amateur baker, looking for a 'fancy' way to make a cake, don't be afraid to give this a try!
Here's the glamour shots...
(take note of the four-legged one who can't resist getting a little too close while I take photos on the floor)


Here's my mom's report
This week's challenge was going to be pretty easy because Joy and I made this a few years ago. Actually, that one turned out nicer than this one. For some reason the "sponge" in most of these challenges turns out heavy and dry. I certainly appreciate a cake with some density and texture, but this cake was so thick and heavy it was hard to swallow. Slicing it into practically paper thin slices helped.


Making the rings (layers) was a whole new way of baking a cake. Under the broiler. It had to be watched carefully and I was pleased with how my layers turned out. The outcome in appearance was lovely, but taste... not so impressed.
My review:
Once I cut the bulk of the cake away and put the bottom half where it belonged we did enjoy eating the rest. The chocolate glaze was delicious. Perhaps a bowl of the chocolate with the cake cut into chunks for dipping is the answer. If I did that, I would have made another variation of this cake called "Baunkuchenspitzen." (Tree cake Pieces) I would make this again using a different recipe.

This really is a fun type of cake to make and with the right recipe, is a not-too-sweet little dessert. I'd recommend trying this one (it's the one I had made previously) or even this one where the same guy uses a box cake mix.
Wednesday, June 14th
Another special Showstopper Bake by our guest Star Baker, Cameron!
See her last showstopper here! I cannot WAIT to see what she's been baking for us! Also, you guys should know she doesn't send me her post or even tell me much about her bake until a day or two before it goes live, which makes it extra exciting for me :) So I'm always just waiting on the edge of my seat!
Also, because of summer schedule conflicts, my mom and I have decided to do our final finale bake (which is actually THREE bakes) on July 19th, so stay tuned!
That finale will include Victoria Sandwiches, Tartes au citron and Scones

May | 2017
I'm pretty sure that the month of May is crazy every single year of life. School's out, graduations, spring trips, parties, etc... and this one was packed full for us!
I'm so thankful we were able to see a lot of my family at the confirmation of our oldest niece, and then later on in the trip see more family in friends in Wisconsin. We could have done without the emergency car repair in some random suburb of Chicago and the bill + a night in a hotel that went with it, but such is life! We also started a gym membership at the beginning of the month and have faithfully been going twice a week, and soon will add a third day. I have been loving it and am even finding myself doing random sets of body weight exercises at home.
The baking challenge is coming to a close in the next month, but it's been so much fun to share and get done every week - especially since my mom is doing it with me! We've always loved to bake together, so even though we're miles apart, we get to feel close while we bake over Facetime :)
Also in relation to food, I'm so excited to be an ambassador for this amazing Dining Out ATL Passbook! We are saving so much money on dates (almost all the deals are BOGO) and having a blast while we're at it!
Well, enough rambling on. Here's the photo tour of our month!


Minimalism: Where Do I Start?
When people learn about our aspirations towards minimalism, the first thing they almost always ask is, "Okay. Where do I start? What should I throw out first?"
Though their heart is in the right place, the real heart of minimalism isn't actually about getting rid of things... or even things at all! Yes, it's about owning less, but that looks different to each of us. The answer their question of where to start, is more of a defining nature.
Where do you feel there is excess in your life?
Can you even recognize it?
Do you feel like you're always, always cleaning?
Are you forever picking things up in the house?
Is your work draining and causing you to have very little steam left for your family at the end of the day?
Do you feel burdened by financial issues or debt?
Are you barely getting by and feeling as though there's never enough money?
Are you constantly at various functions for your kids, work, community?
Do you fill your plate too full (literally and figuratively)?
Do you feel like you're constantly playing catch-up with your basic life to-dos?
Are you just spread too thin and can never seem to spend time on the things you truly enjoy?
The excess in your life could be tangible or not. It could be the excess of your mind's constant to-do list. It could be the excess from your job stresses. The looming bill you're having trouble paying. The many times a week you eat out because you don't have time to cook or grocery shop. On and on...
I talk to friends who just don't seem like they even have time to take a breath. They're tired. They're stressed. They're weary.
And don't get me wrong, sometimes that's just part of a season. "Busy" can be a short term thing. In fact, I'd say that right now, we're in one of those seasons. We have work, engagements we're committed to, trips to plan and go on, an endless to-do list, and appointments to make. Unfortunately none of these things can "give" and we have to just muddle through, but I know there will be slower seasons to come. However, I can tell you most assuredly, that having less home to deal with, and less stuff to clean or organize or use, makes even the busiest of seasons far less weary.
So to answer your question... where should you start?
Start practicing minimalism by...
1. Deciding where your excess lies.
Excess can look so different from one person to the next. Start by looking at the activities you do or things you own.
Working full-time? Raising kids? Kids in activities? Volunteering? Going to every social gathering you're invited to? Leading everything and anything you're asked to head-up? Taking on projects or tasks you can't really dedicate to? Working too much? Keeping a large house in order? Hosting all the time? The sight of your cluttered garage or closet is giving you anxiety? Don't think, just answer - what is pushing you over the edge?
It's essentially up to you, but just figuring out what it is that causes you to feel overdrawn will be the first freeing step of many. It doesn't have to be something big. It could be as small as feeling stressed every time you open your overstuffed pantry.
When we moved to Georgia, I was feeling disheartened by the workforce I had been in previously and I didn't want more of the same. So, I chose a riskier route, and because of my choice to work from home instead of pursuing a career in the corporate world, I've had the freedom to travel, create my own hours, host often, not have to drive in the insane traffic (saving me boatloads of time!), and spend lots of time with my husband. It wasn't the easier route by any means, but it removed the excess that burdened me, and instead gave me the opportunity to explore entrepreneurship.
2. Figure out how to pare down.
Think about these things, and I mean really think about them. Which of these things could you pare down in some way? Could you go to part-time work if the financials allowed it? Could some of the activities your kids are involved in be pared down to one activity per kid? Would downsizing your home or investing in a cleaning service take that off your plate? Could you ask others to host the next time there's a get-together? Could you take a weekend to re-organize and purge your kitchen - even just a few drawers or cabinets?
Break those seemingly big tasks into smaller ones. Get creative with solutions that work for you, but get out of your comfort zone.
If you can't seem to let things go, have a friend or relative help you put things in keep, donate, and toss piles. If you can't quit your job or go part-time, what can you let go of to create more time for yourself or your family? Can you hire a sitter every other week for a couple of hours so you can get dinner with your spouse? Can you split up the housework more evenly with your family so you can spend more time being together? Can you say no to the next volunteer opportunity until work slows down? Can you start ordering your groceries online and simply pick them up to save you the time? (This is a free service at a lot of places these days).
Now, this is just the start, friends. It doesn't have to be earth shattering, and you don't have to make it difficult or overthink it. Simply look over your current state, define what is important to you, figure out what's keeping you from those things, and remove or pare down those excesses over time. I'll get into other steps and tips to help you live simply and minimally in future posts, but for now, I hope you've got an idea of how to begin.
And if there is anything specifically regarding minimalism that you're curious about, drop me a comment, message me on Facebook, or contact me - I'd love to hear your questions!

Bake #8 | Povitica
In case you're not up to speed, this is the eighth bake in The Great Blogger Bake Along series. Read about it here.
This one wasn't too scary... at least until I had to roll the dough out to FORTY inches. Yeesh. This was the first one that I had Tom lend a hand with. Let me explain in a moment.
The Challenge
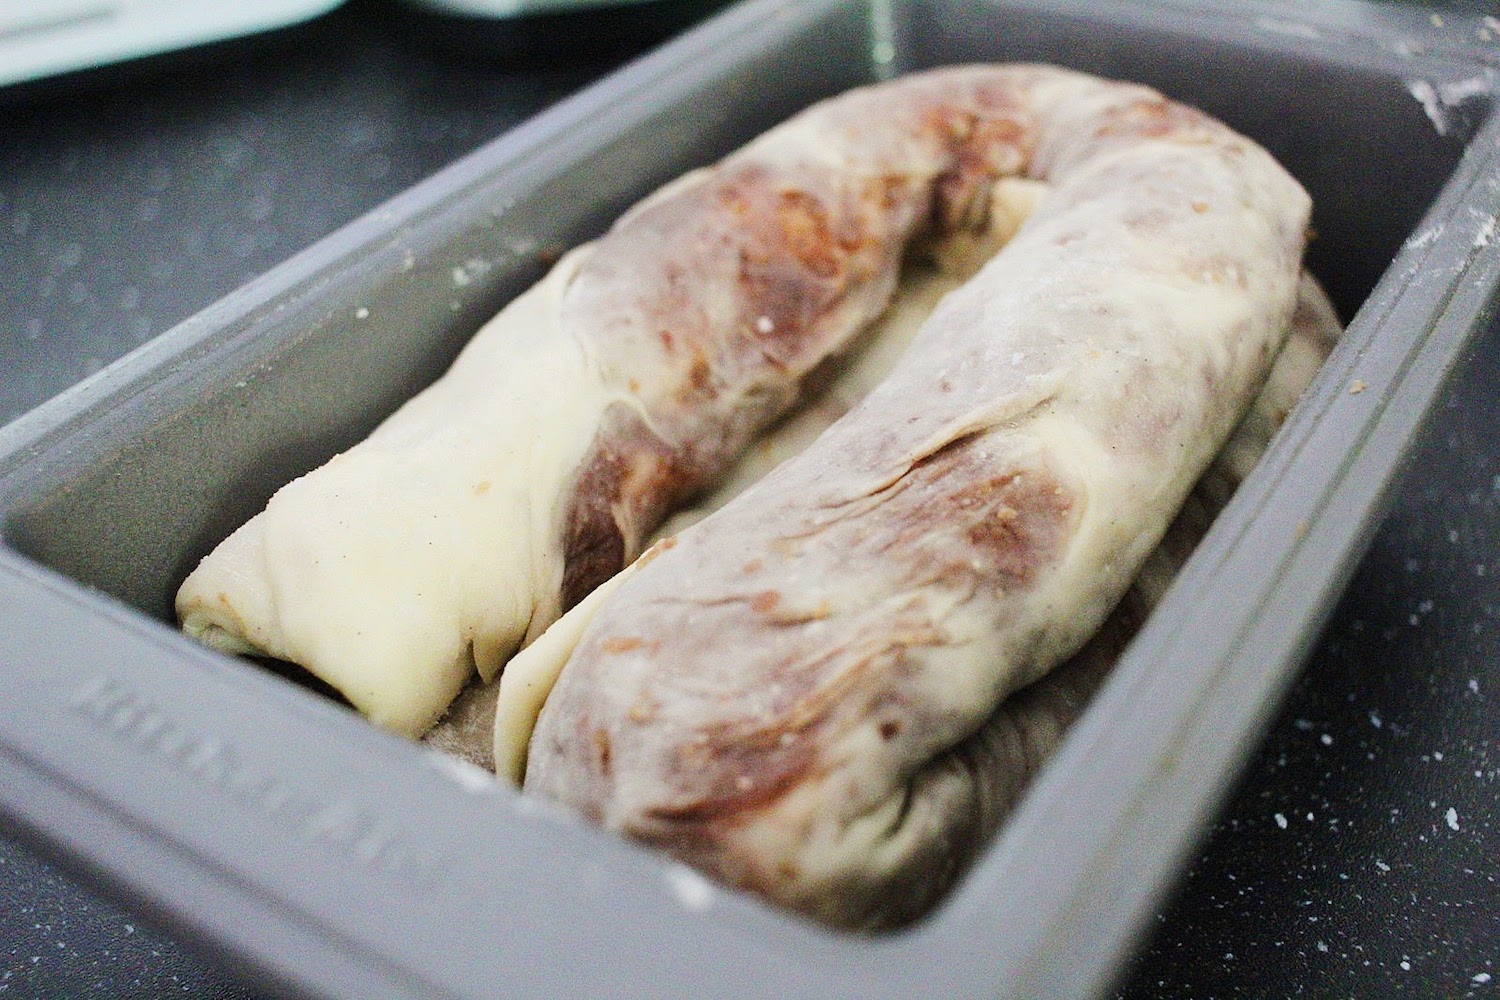
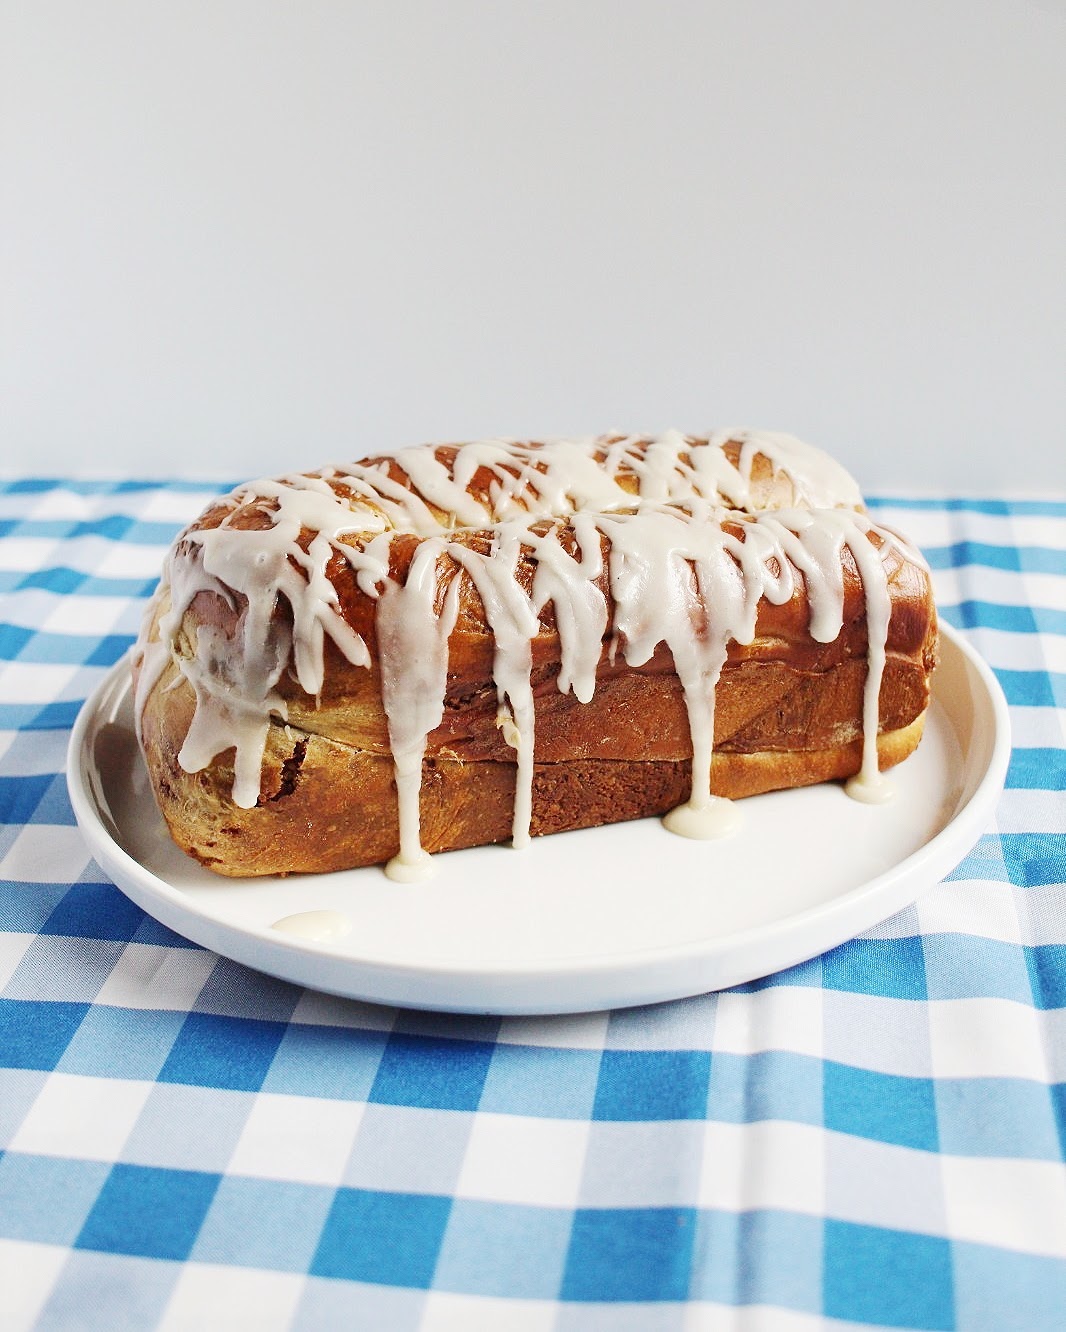
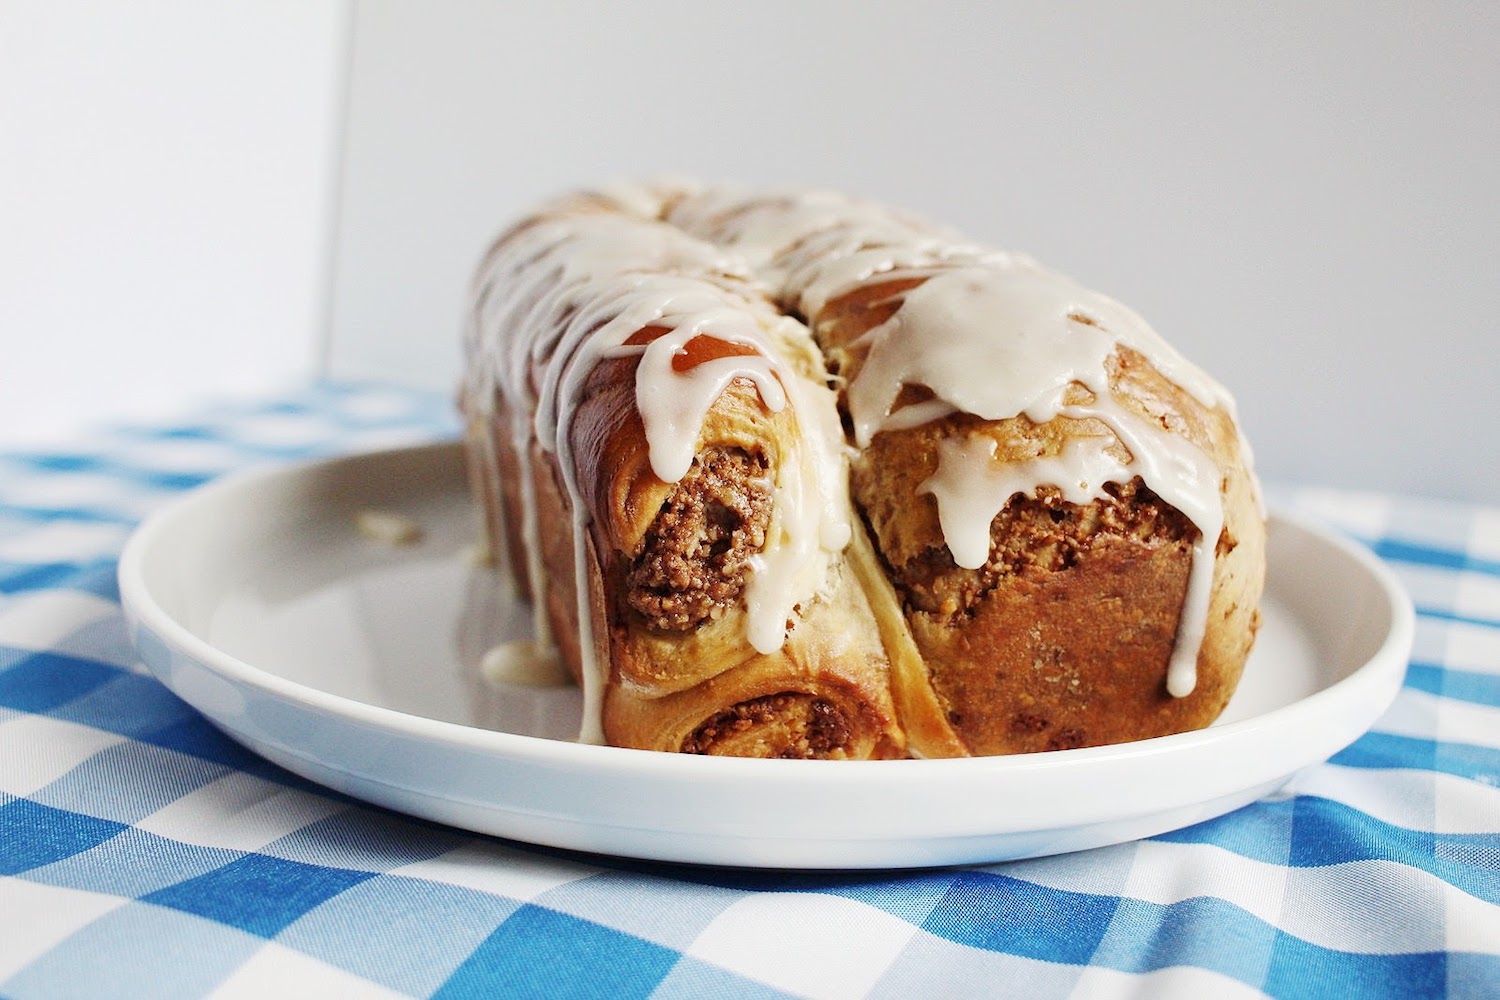
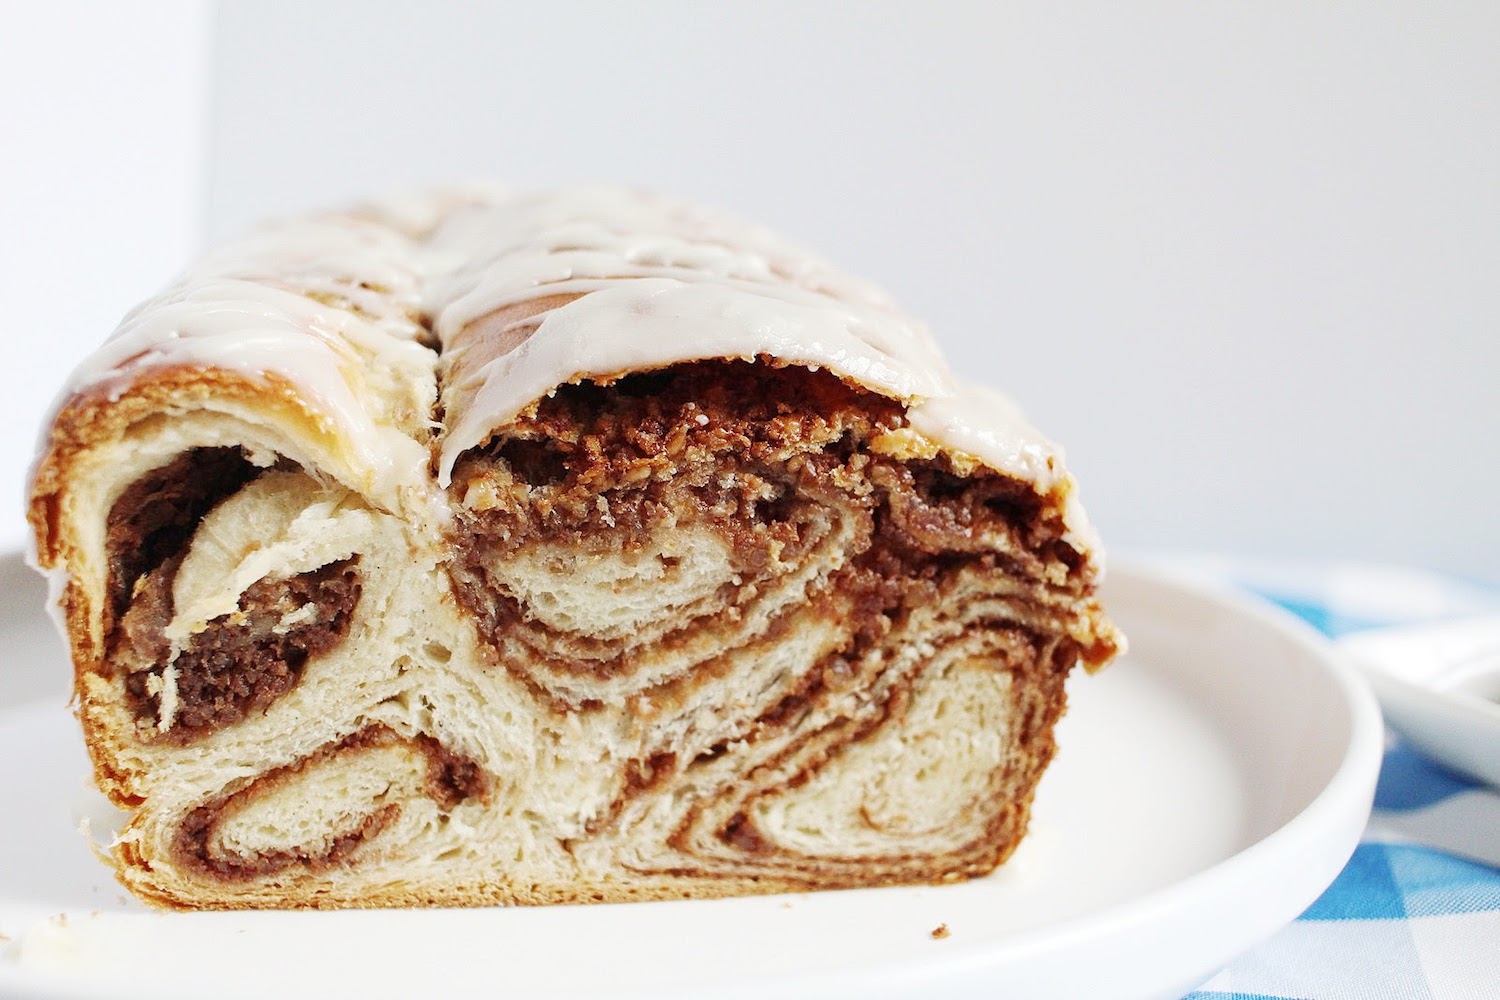
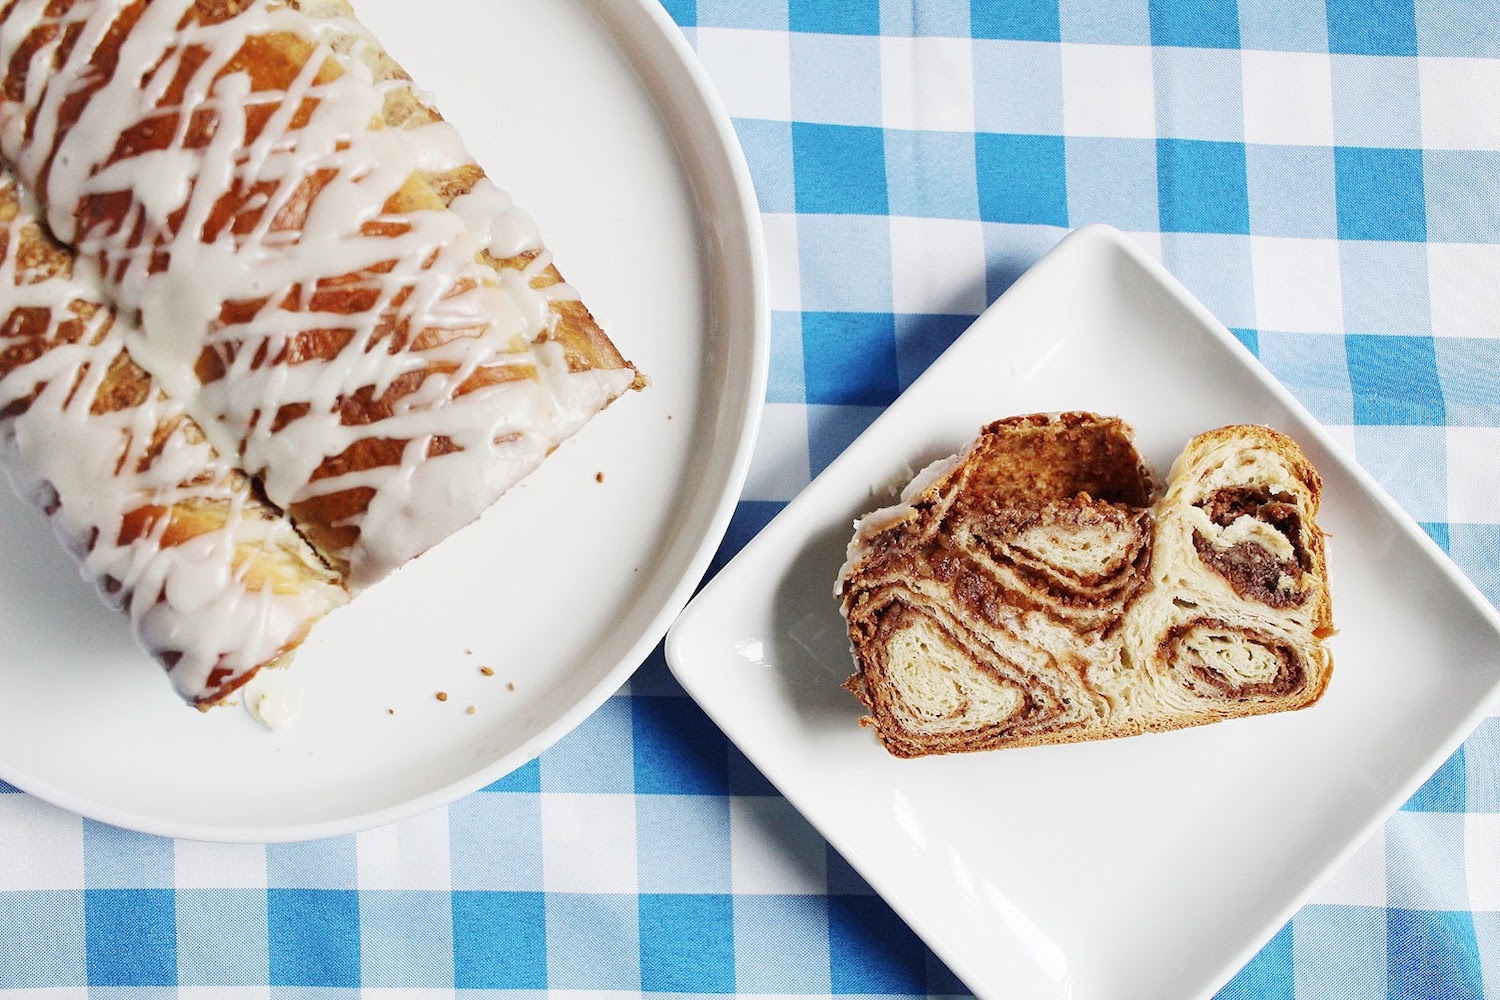
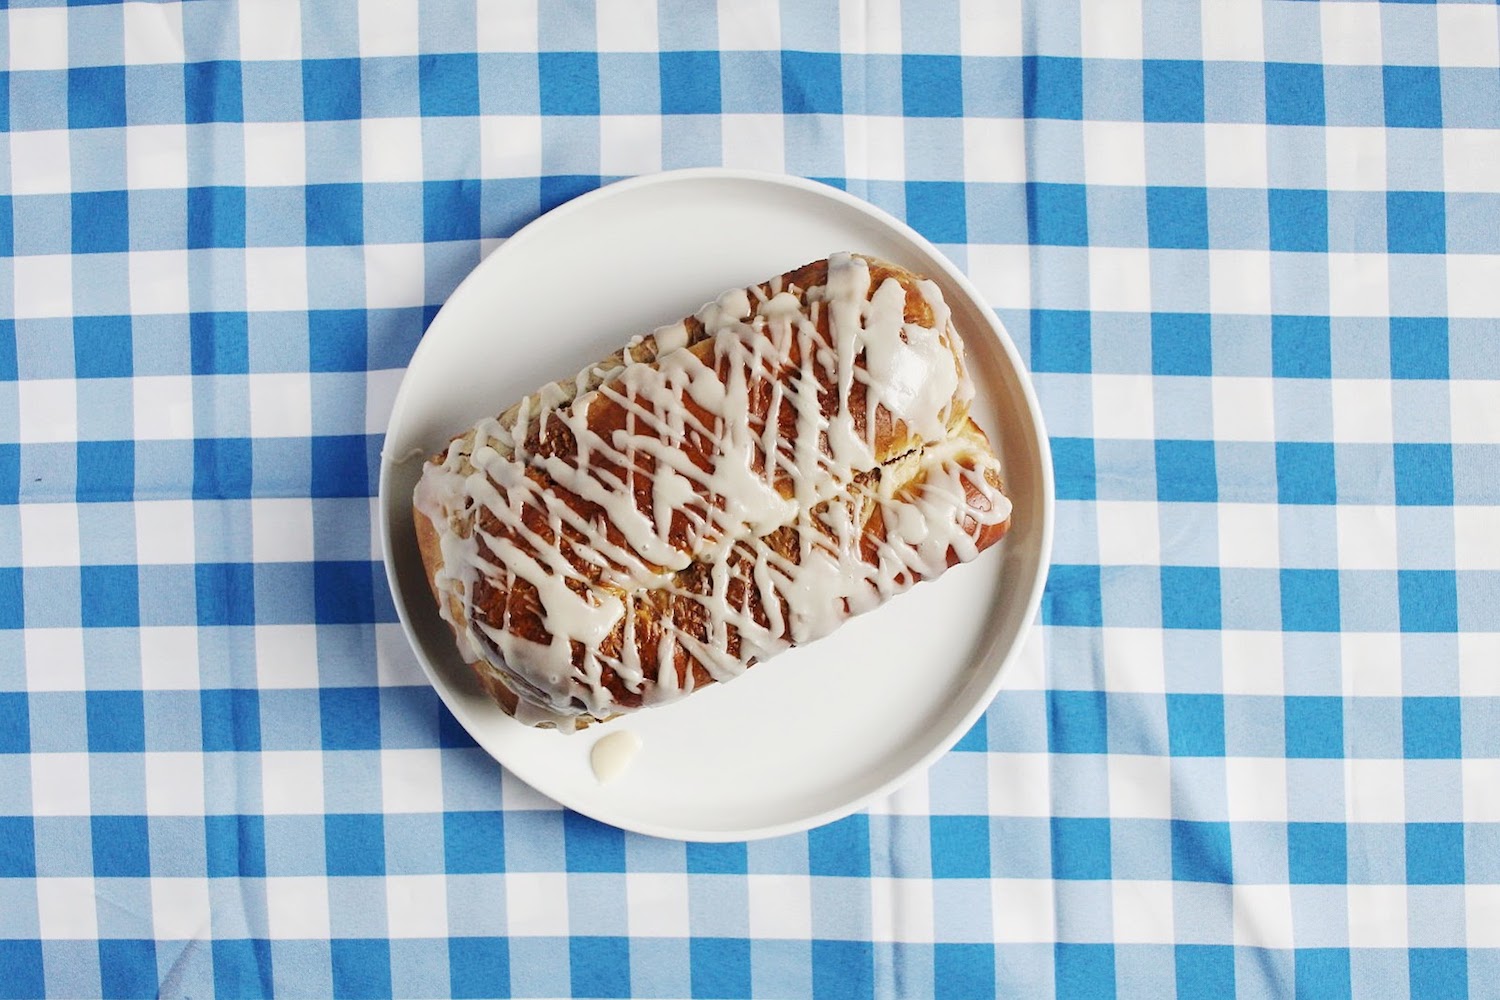
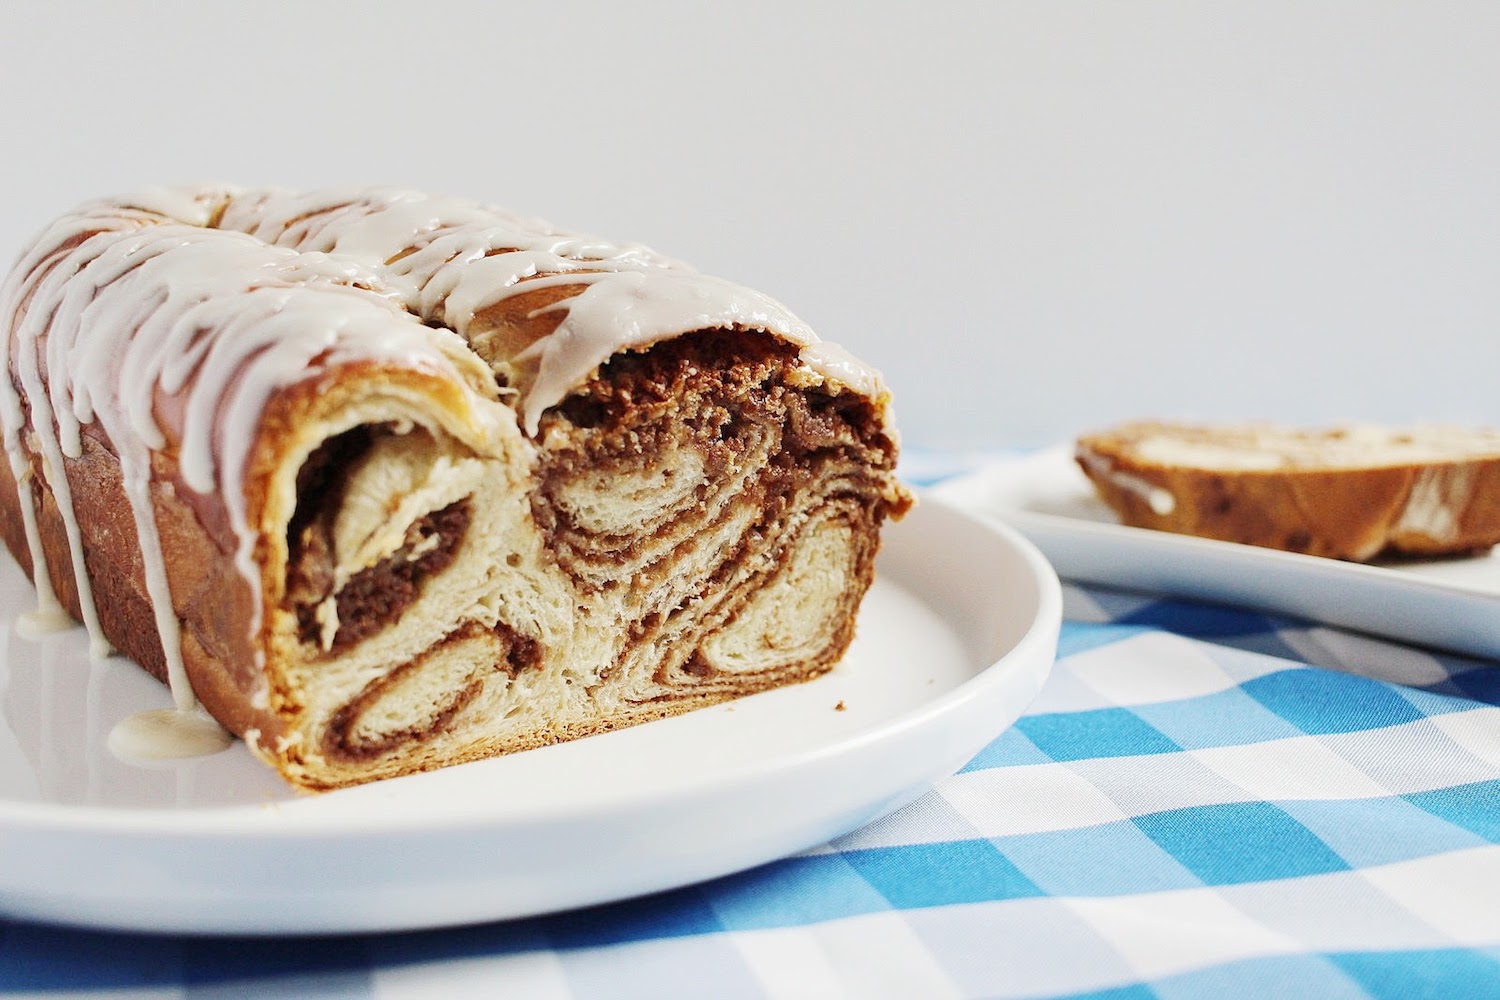
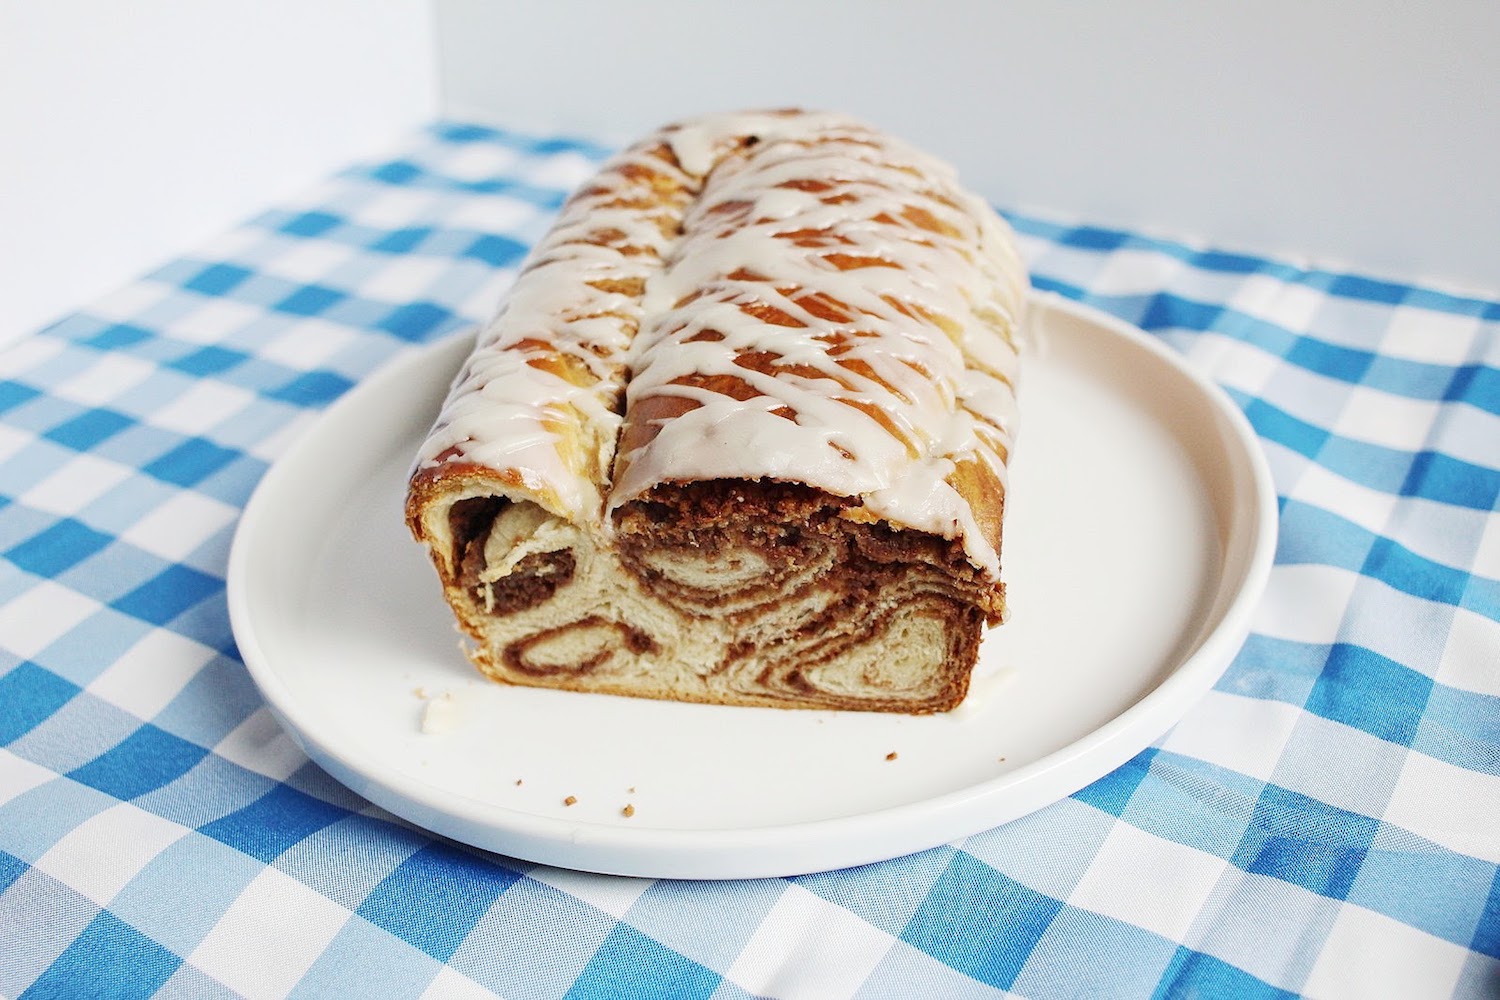
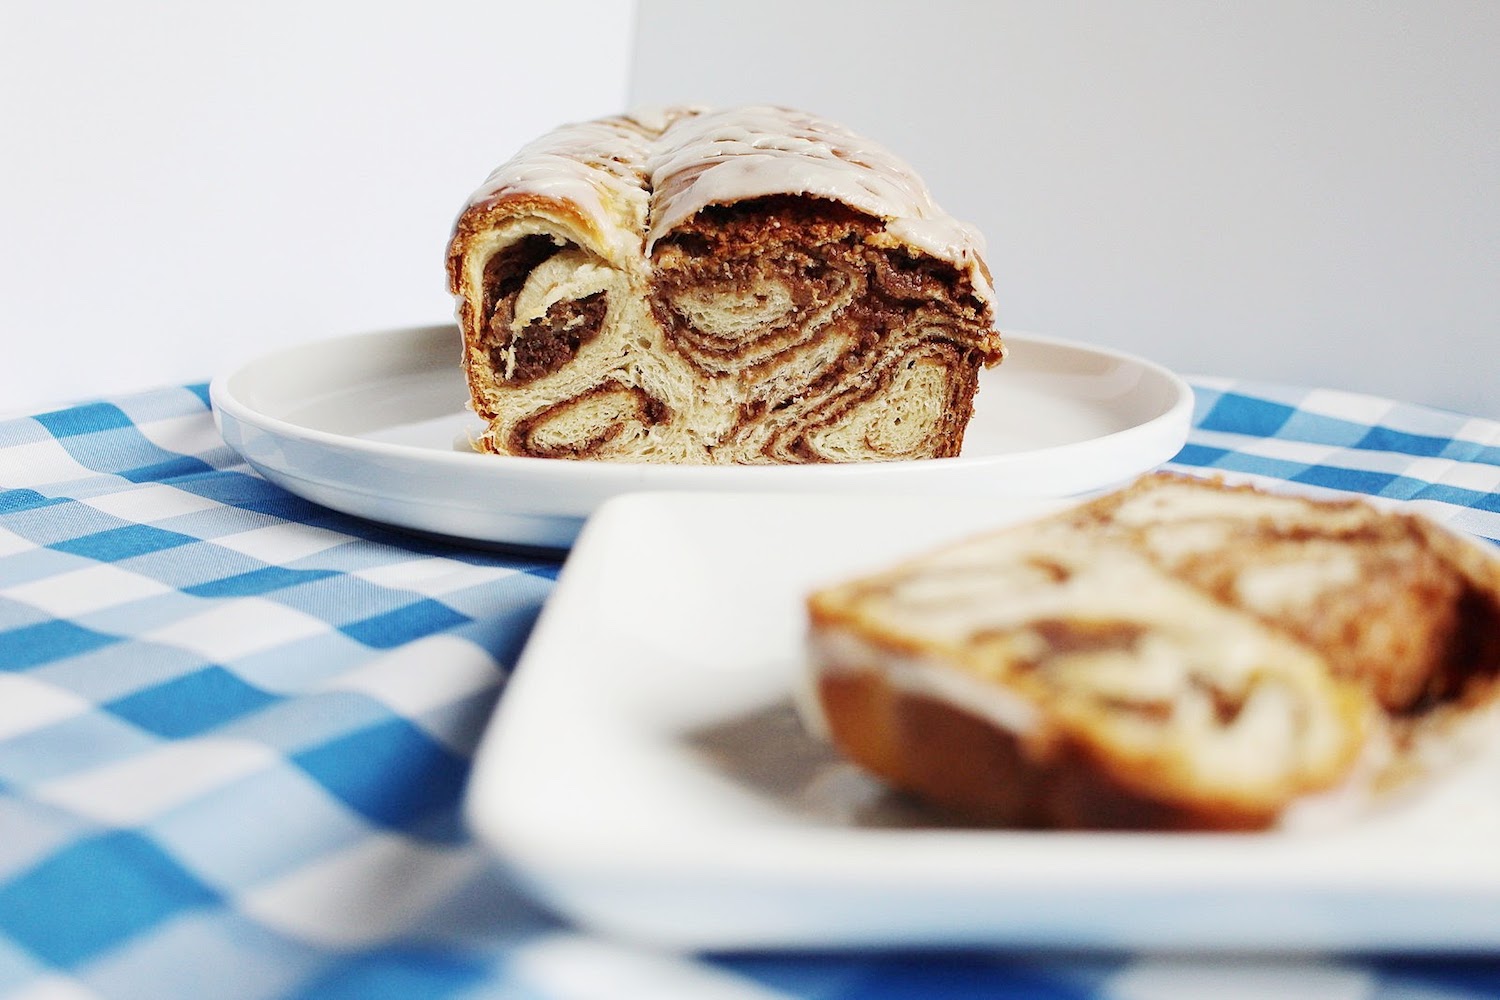
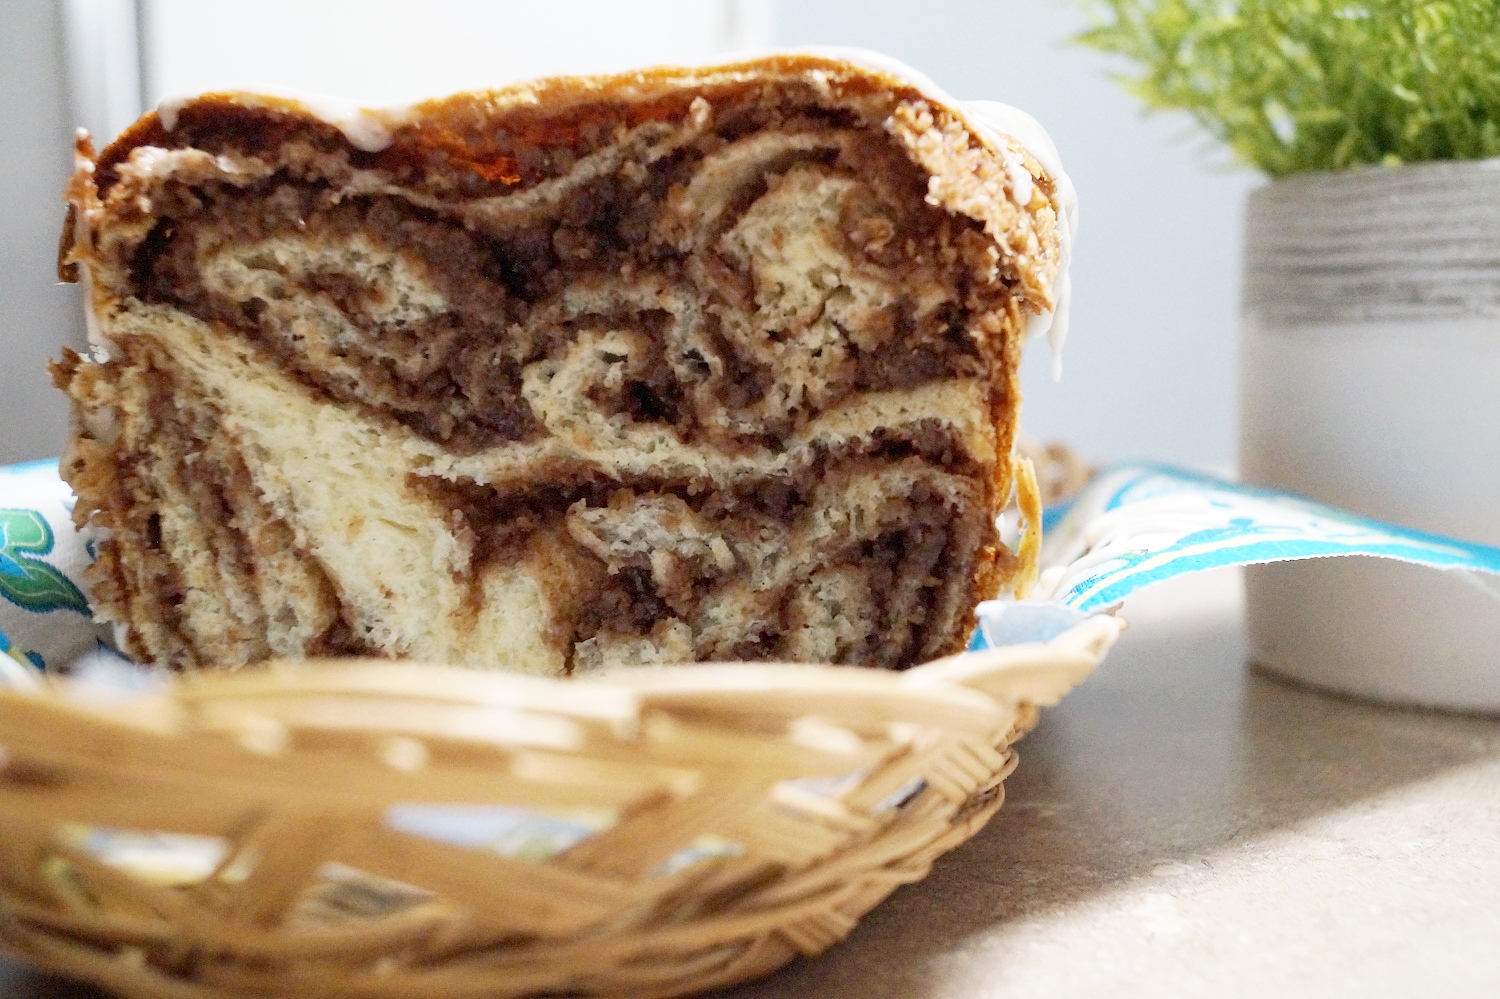
Povitica loaf with four rolls of layered bread and walnut/chocolate filling.
The Outcome
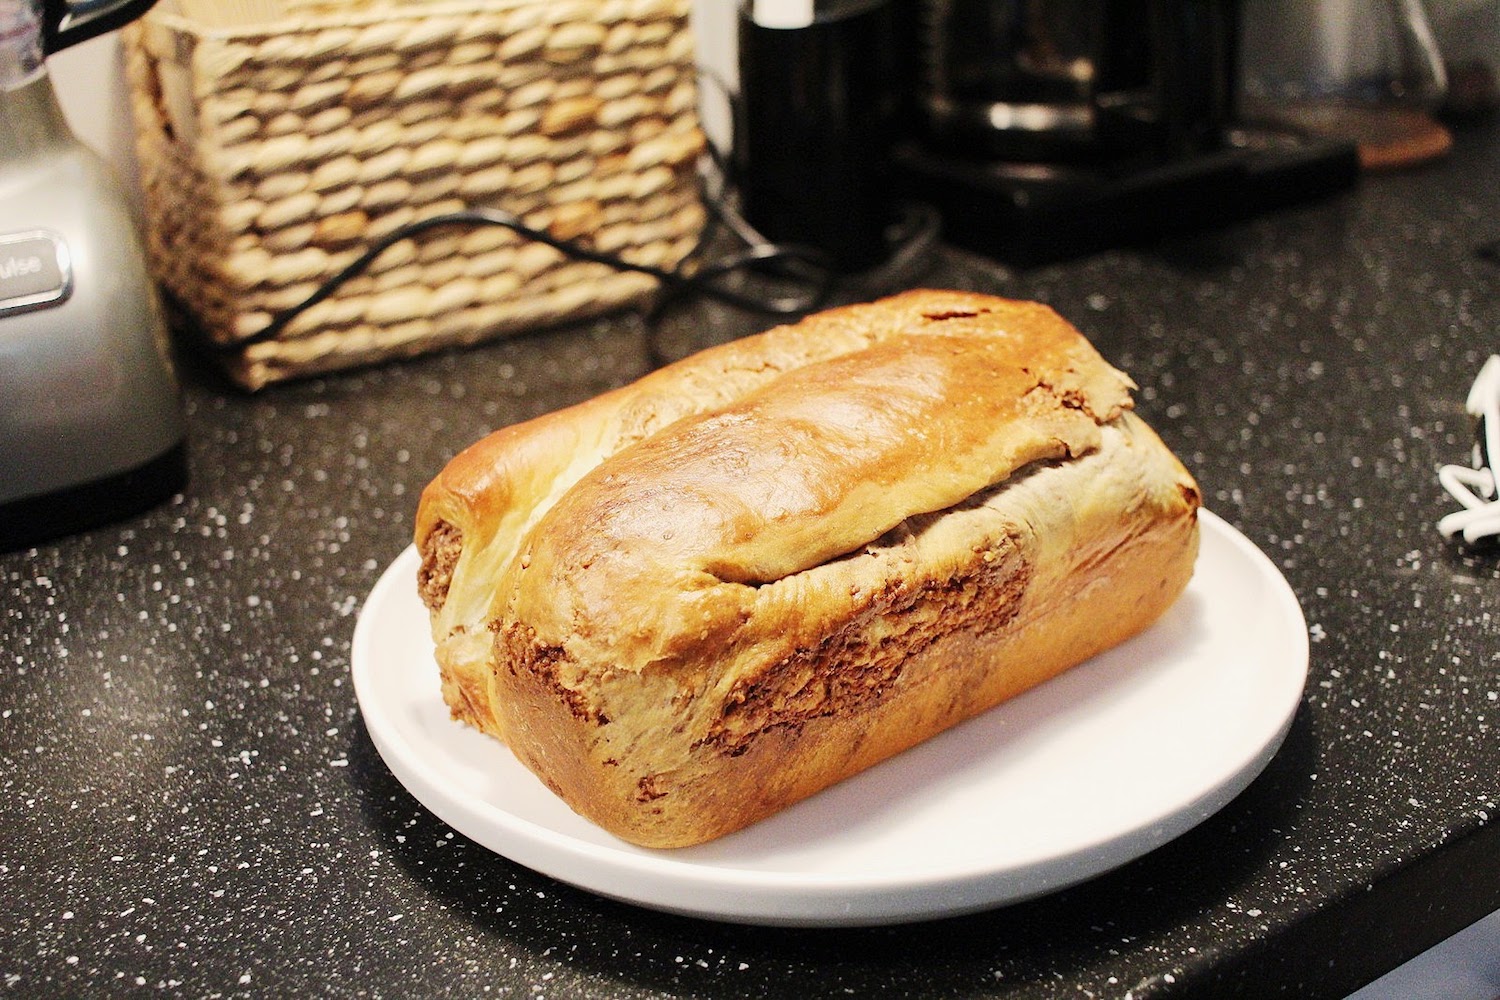
Bread is not my strong suit. For whatever reason, I have a terrible time getting anything to rise properly. I had the same issue with this. The dough comes together easily, but once I set it in a bowl to rise, it never got the bubbly height I had expected. My mom never has a problem with rising, so hers definitely beat me out on that mark. This also required you to roll and stretch your dough out to 40x20" - and this is where I had Tom come over and help me gently stretch it. I barely made it to the parameters, but it ended up being fine. Then we spread the filling over the stretched, super thin dough and laughed as it got all torn to shreds. I should have softened the filling a bit more, but I was worried it would cause the dough to under-bake if it was too wet. Finally I rolled it up and set it in the tin for another lousy rise - haha - but overall, my bake ended up being just fine in terms of size and texture. Tom and I didn't think the flavor of the bread with the walnut/chocolate filling was all that good, but my parents really enjoyed it. I'd have liked the bread alone without any filling to be honest! All in all, it was a pretty simple bake besides the 40x20 size (but read below and hear how my mom used an actual bed sheet!)
Would either of us bake this again?
My mom probably would, but I think I'd pass.
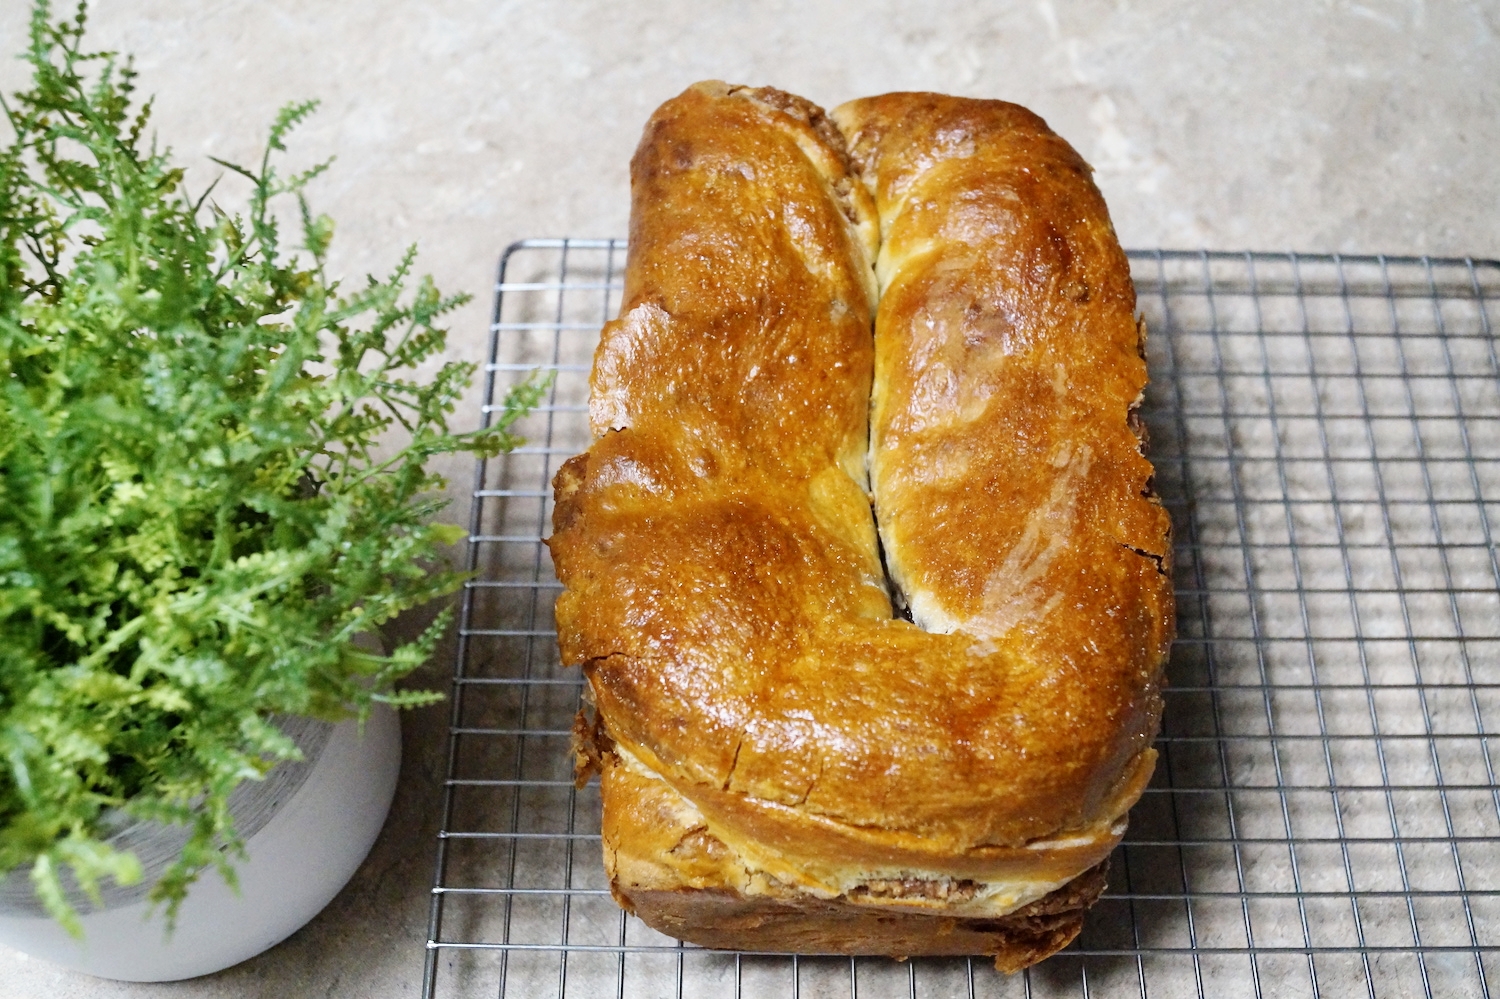
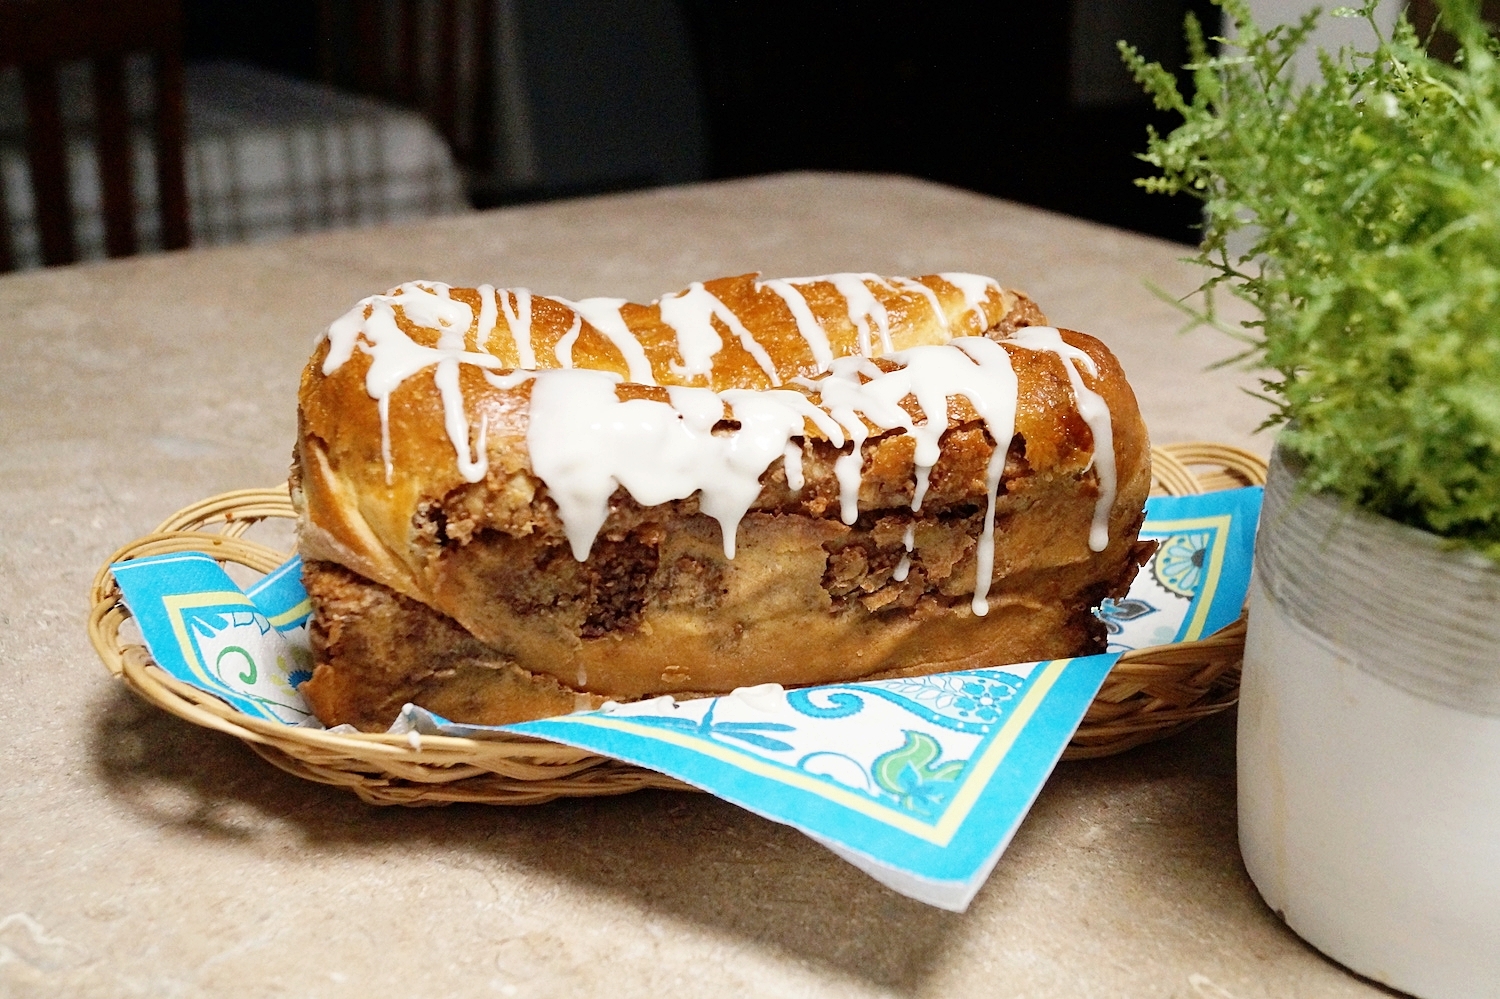
Here's the glamour shots...
Here's my mom's report
Another bread. Happy me! So far the breads in these challenges have been done with dough hooks, which is a very nice method. Hand kneading can be tricky. Using the mixer takes the guesswork out of the process and the result is a beautiful dough.
The directions were simple and easy to follow. The filling was also easy. Shaping the loaf was a bit challenging. By the time you were finished, the stretched out dough was to be paper thin 40" by 20". The directions recommended having a bed sheet laid out to do this. Knowing it would be so thin I did use a sheet which I floured generously. I managed to get the job done without too much trouble and was happy for the cloth underneath resulting in dough that did not stick to the counter.
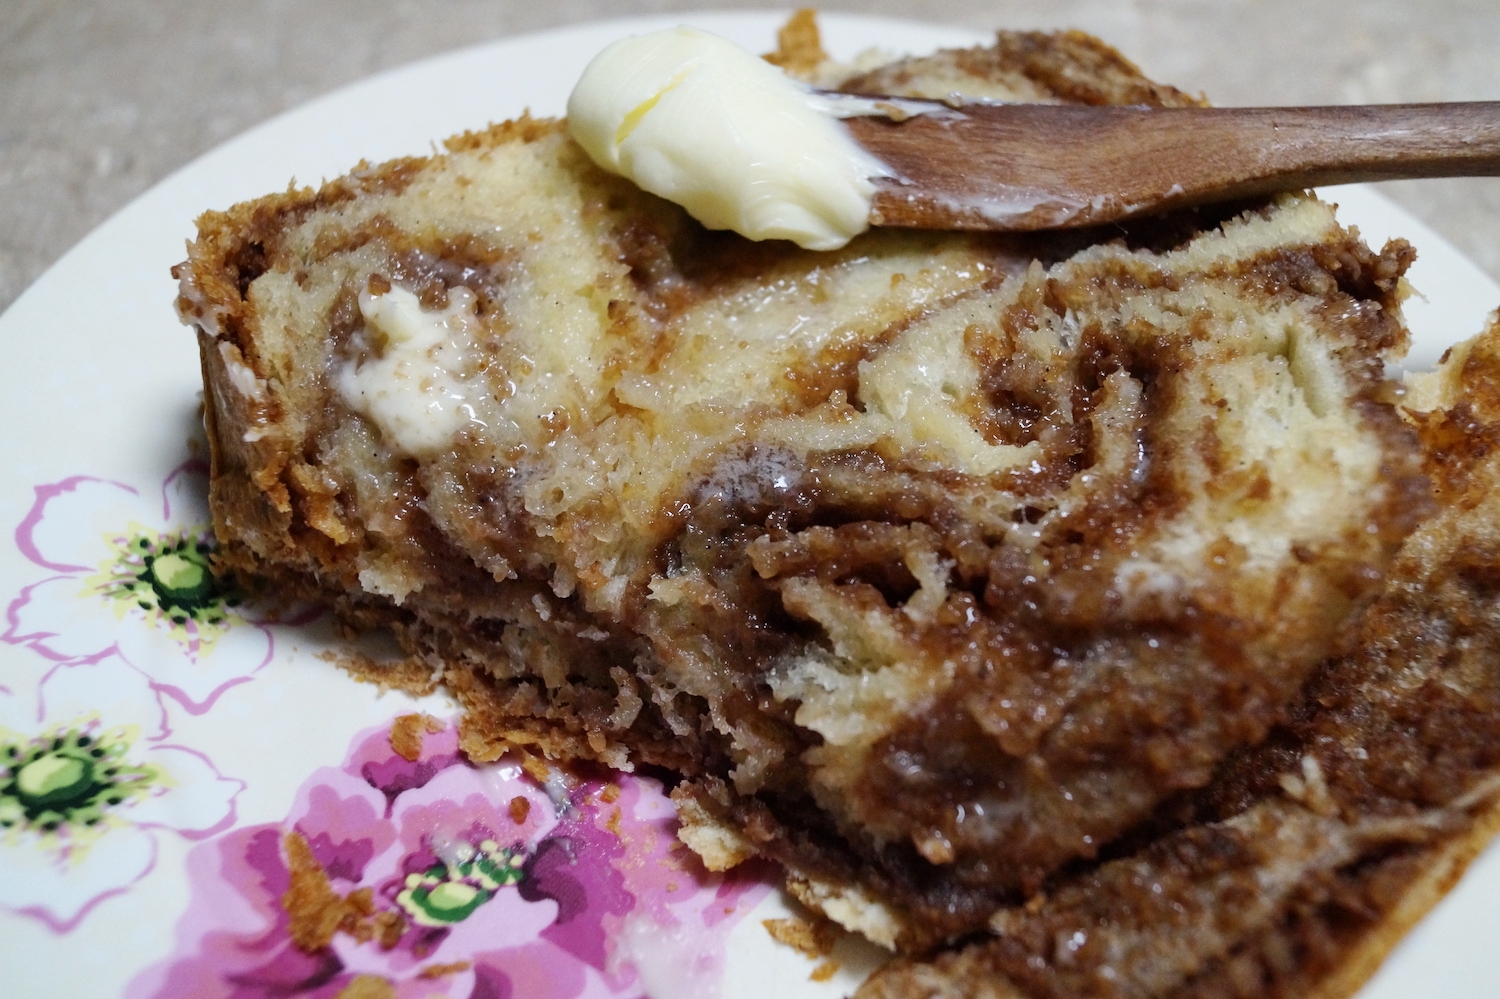
I took 15 minutes off of the baking time. I wouldn't call it a pretty loaf, but we did like the taste. Bread and chocolate, a nice combination for someone who likes both. It was a tad dry, but the remedy for that came from my mom - a little bit-o-butter makes everything better! I would recommend this bread. Pretty yummy and not to difficult.
This was fun to make on a holiday at home with my husband :) And even better, I face-timed my mom and kept her company while she got hers rolled out to 40" and we laughed because we both made the same comment during that process, "Who even thinks to make something this way?! What in the world?!" Don't forget to use the hashtag #JoyLynnBakeAlong and join along on this super fun challenge. Coming up next...
Wednesday, June 7th
Bake #9: Schichttorte
(I'm looking forward to this next one! It's a 20 layer cake that my mom and I actually made together one night for Tom's birthday! Though, this version is a little different, but still fun nonetheless - stay tuned!!)